Herringbone Knit Stitch
Last Updated on May 1, 2022
** Some of the links in this post may include affiliate links. Making a purchase through one of these links pays me a small referral fee at no added cost to you. These small fees add up and help me keep the blog running. View our disclosure and privacy policy for more information.
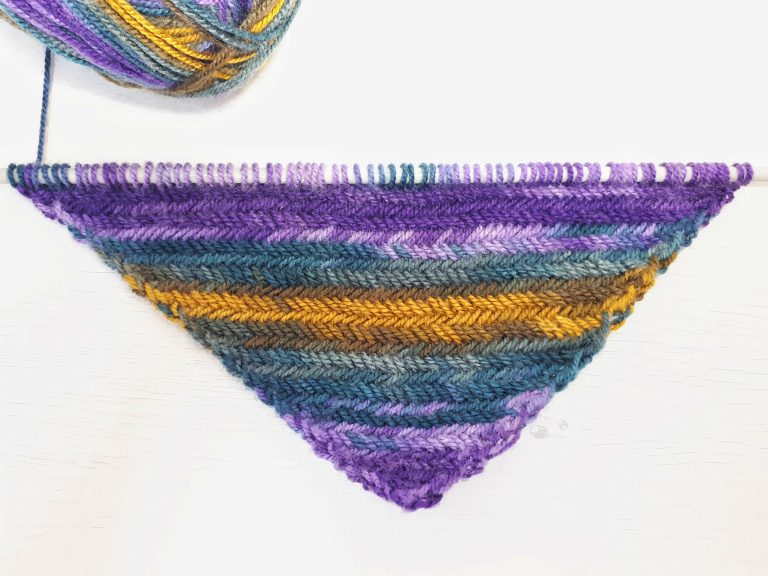
The herringbone stitch is a beautiful and elegant stitch that creates a woven looking fabric. It is not used as much, which is a shame as it is so much easier than it looks!
In my opinion, you can get the most out of this stitch when using a multi-color yarn, the effect obtained by the alternating colors is stunning. I used the Alize Extra Folklorik Batik yarn (sport yarn) because I really love its color combination.
Tip: You should use a bigger needle size than is suggested for your yarn, this will make your work fluffy and nice and will emphasize the “bones” pattern.
Abbreviations (US)
k – knit
tbl – through the back loop
k2tog – knit 2 sts together
p2tog – purl 2 sts together
RS – right side
WR – wrong side
Pattern
Cast on any number of stitches.
1) Working on RS: * k2tog through the back loop and slip only the first stitch off the left needle (leave the second stitch on the needle); Repeat from * until only 1 stitch remains on the left needle, slip last stitch knitwise through back loop.
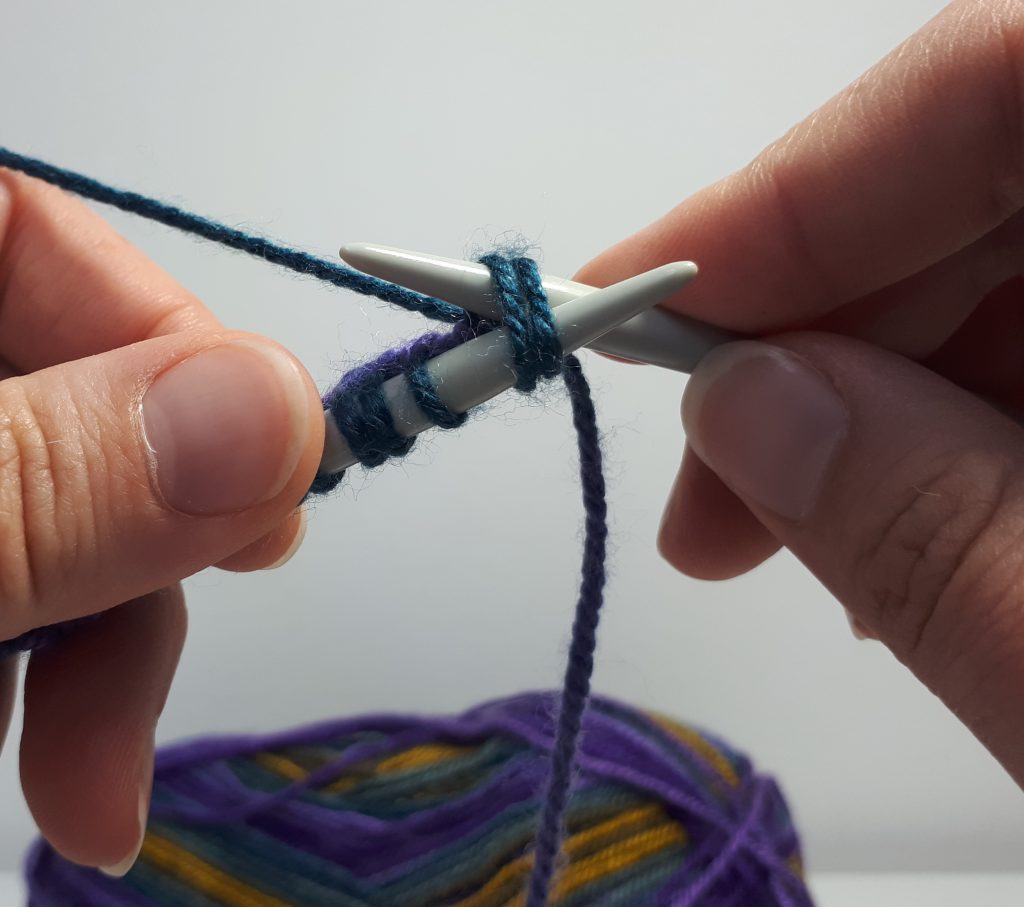
k2tog tbl 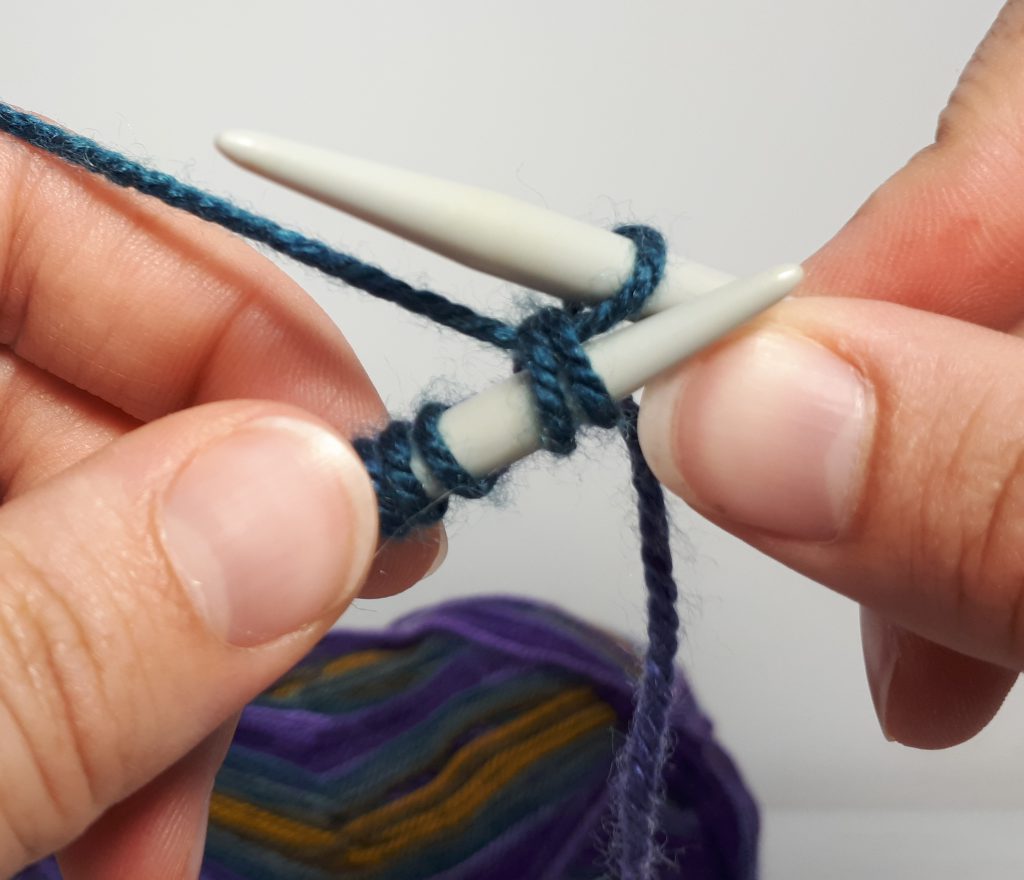
k2tog tbl 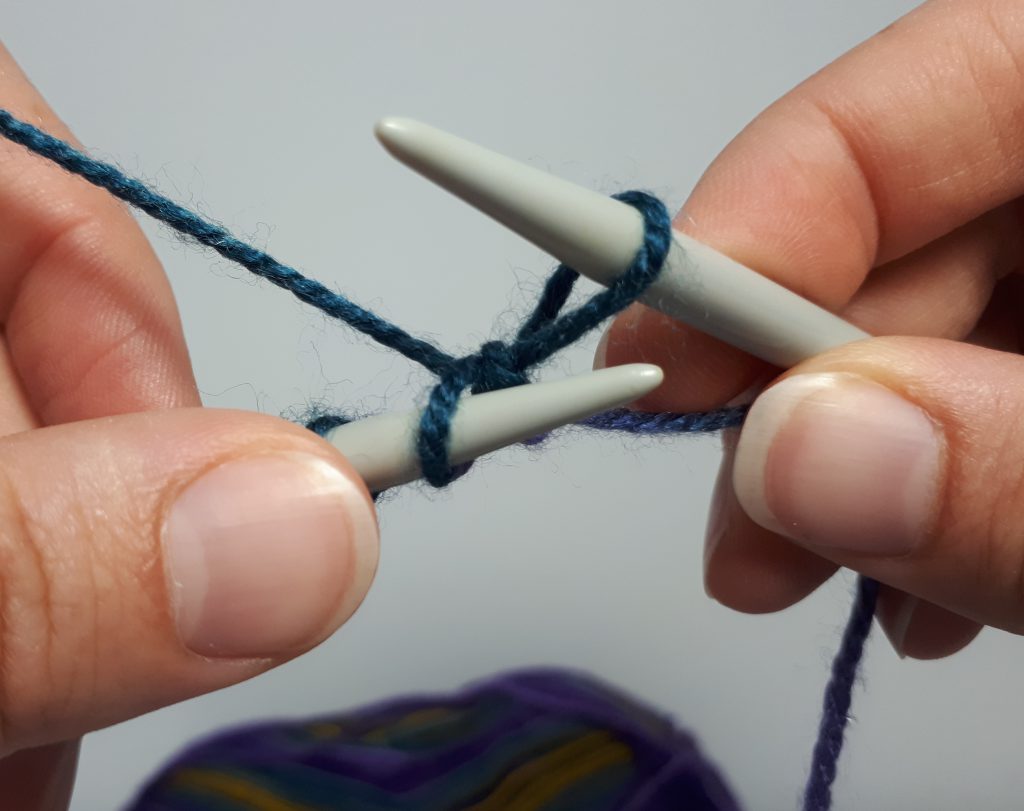
slip only 1st st off the left needle 
when only 1 st left on the needle,
slip st knitwise
2) Working on WR: * p2tog and slip only the first stitch off the left needle (leave the second stitch on the needle); Repeat from * until only 1 stitch remains on the left needle, slip stitch purl-wise.
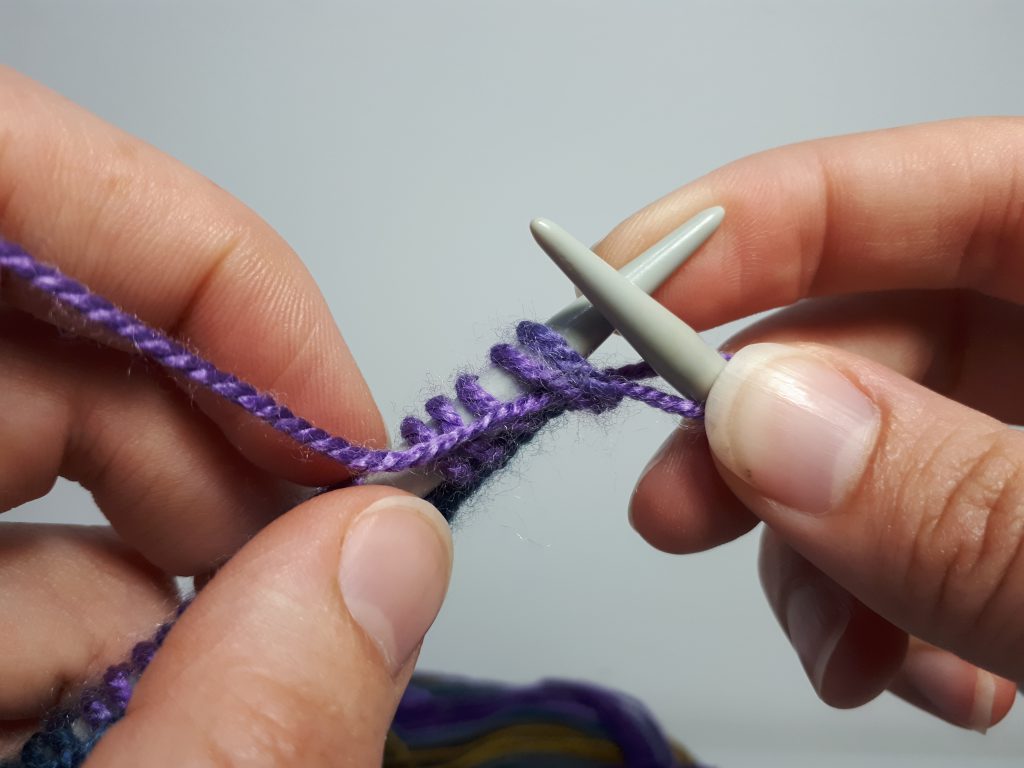
p2tog 
slip only 1st st off the left needle 
when only 1 st left on the needle,
slip st purlwise
Repeat rows 1-2, when you’re done just cast off.
Did you try this out? let me know how it went leave a comment below and tag a photo of your project @madebygootie on Instagram!
Want to learn how to knit the Herringbone stitch from corner to corner?
Check out my C2C Herringbone knit pattern.



I had never heard of this stitch before.
But I tried it and I love it.
Thank you for sharing with the rest of us.