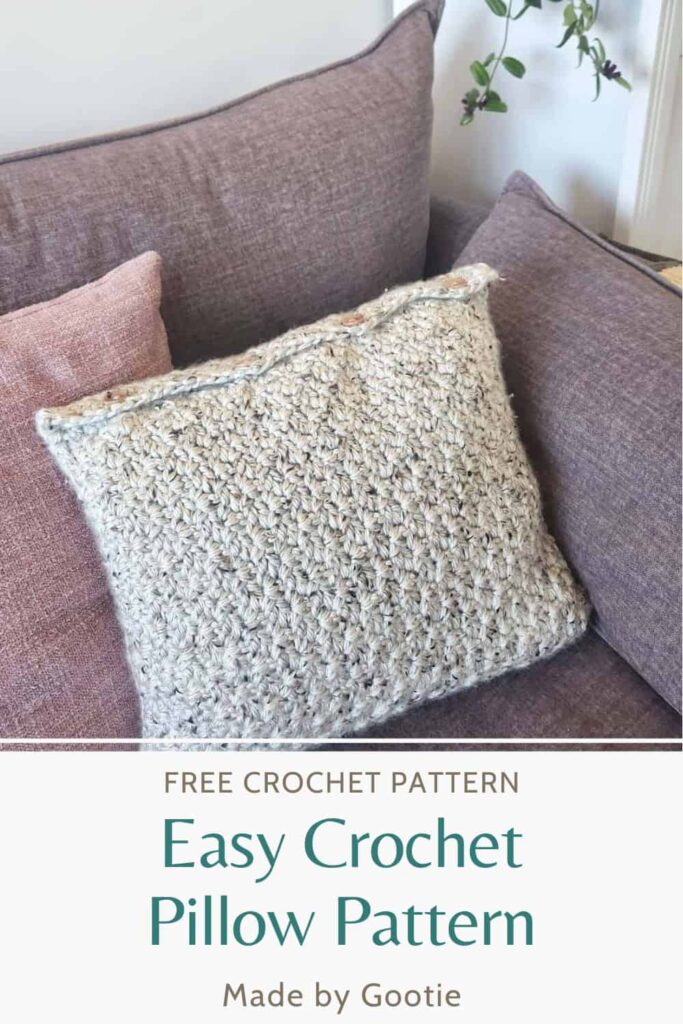
C2C Wattle Crochet Pillow Case Pattern
Last Updated on February 27, 2025
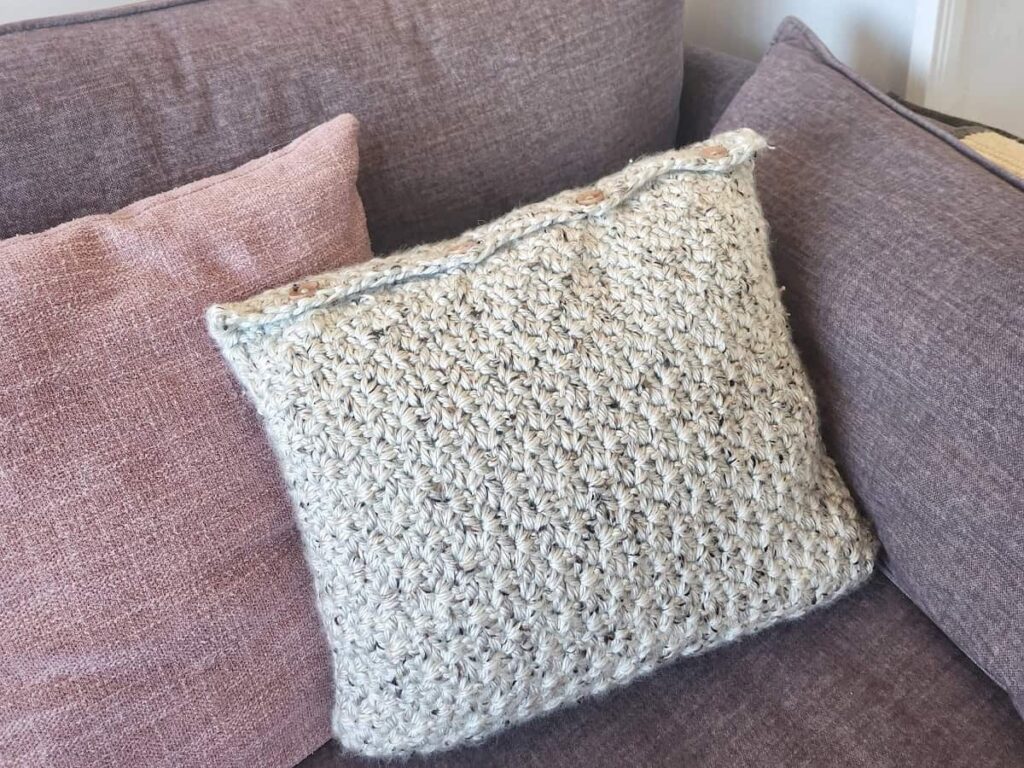
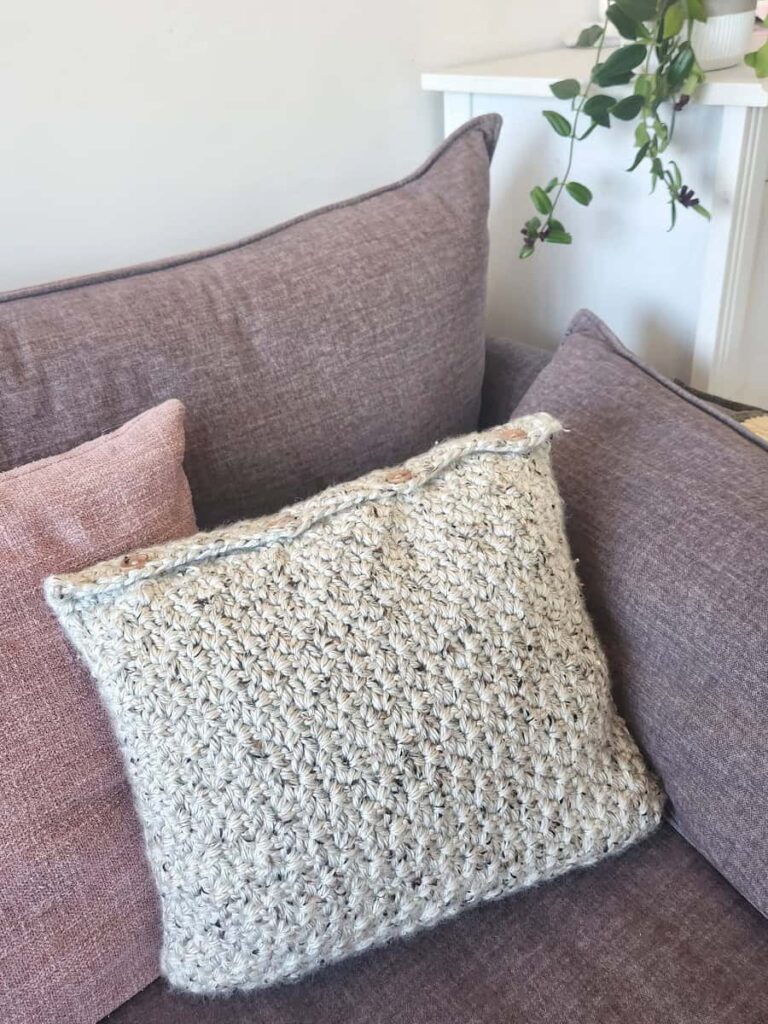
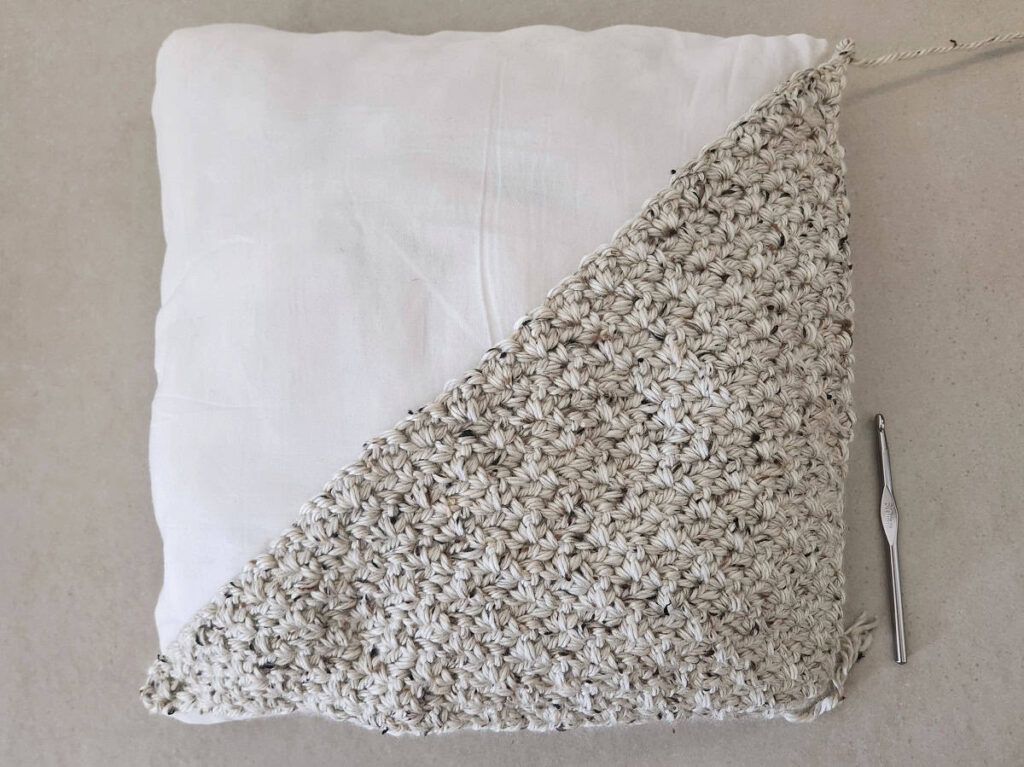
In this quick crochet tutorial, you will learn how to crochet a pillow cover using the corner-to-corner technique. The C2C Wattle Crochet Pillow Case Pattern is made with a Super Bulky (#6) yarn and so the pattern works super fast.
This pillow crochet pattern includes easy-to-follow written instructions, a photo tutorial, and a video tutorial for the stitch pattern.
** Some of the links in this post may include affiliate links. Making a purchase through one of these links pays me a small referral fee at no added cost to you. These small fees add up and help me keep the blog running. View our disclosure and privacy policy for more information.
When I designed this pattern, I wanted to create an easy crochet cushion cover pattern that can be adjusted easily to any size you want.
The pillow cover is made with the Wattle stitch, worked from corner to corner. This way you can keep increasing to adjust the pillow to the size you’d like, or use a different yarn weight.
Another thing that is important for me, is to have the option to take out the pillowcase to wash it, so I made it as a crochet removable pillow case pattern.
Want to save this post for later? Go ahead and PIN it!

The Yarn I Used for my C2C Crochet Pillow
For my pillow, I used Lion Brand – Hometown yarn in Aspen Tweed shade. It’s a soft acrylic Super Bulky (#6) weight yarn that comes in beautiful colors.
Although I used a Super Bulky yarn, since this crochet pillow case pattern is crocheted from corner to corner, you can use a different yarn weight and just keep increasing until reaching the desired size.

C2C Wattle Stitch Pattern Video Tutorial
Click the image below to go to the video tutorial for this C2C stitch pattern.

Materials
– Crochet hook 8 mm (I love the Tulip Etimo and Clover hooks).
– Super Bulky (#6) weight yarn (I used Lion Brand – Hometown)
Total amount of yarn needed: 640gr/331m/362yds
– 4 – 0.8” (2 cm) buttons (I used these)
– 18×18” (46×46 cm) pillow
– Tapestry needle
– 2 stitch markers (optional)
Finished Size –18×18” (46×46 cm)
Gauge (in pattern): Working Rows 1-5 will result in a triangle with 4’’ (10cm) sides.
** Gauge is not crucial for this pattern.
Abbreviations (US)
ch – chain
PM – place marker
sc – single crochet
sp – space
st – stitch
dc – double crochet
* – Repeats are shown via asterisks. Repeat begins at * and ends at ;
[…] – crochet the instructions within brackets into the same indicated stitch/space.
Notes
- The pattern is made using the C2C Wattle Stitch.
- The pattern can be adjusted to any size you want.
- You can use a different yarn weight than suggested with a suitable crochet hook, please note that the yarn amount might change.
C2C Wattle Crochet Cushion Cover Pattern
Increase
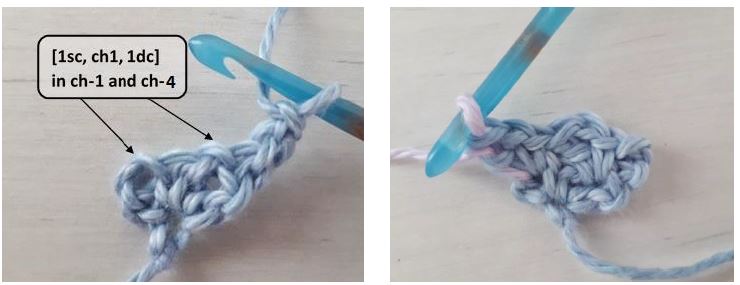
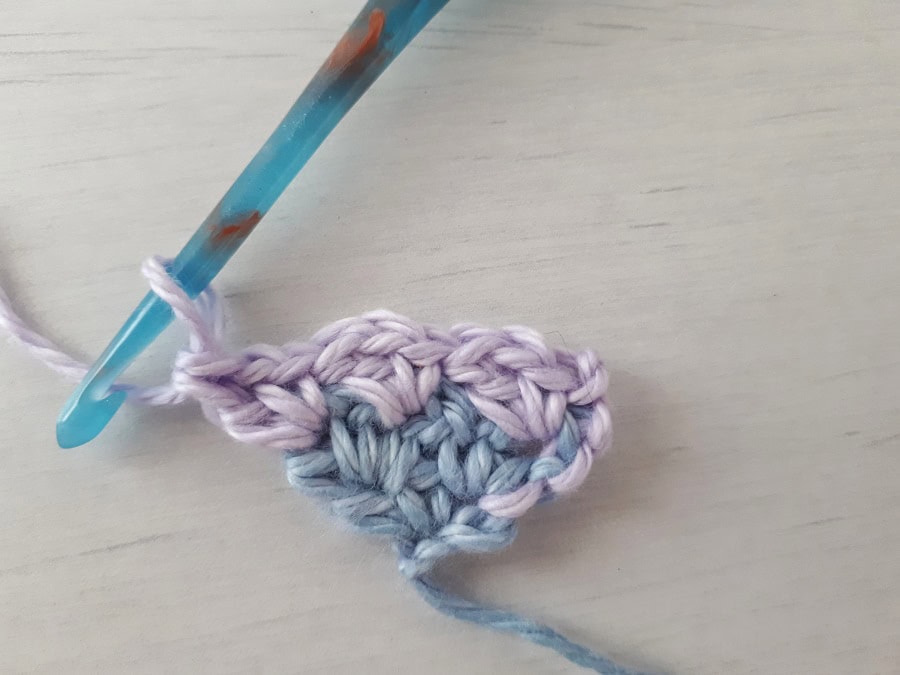
Ch 4
Row 1: [1 sc, ch 1, 1 dc] in 4th ch from hook, turn.
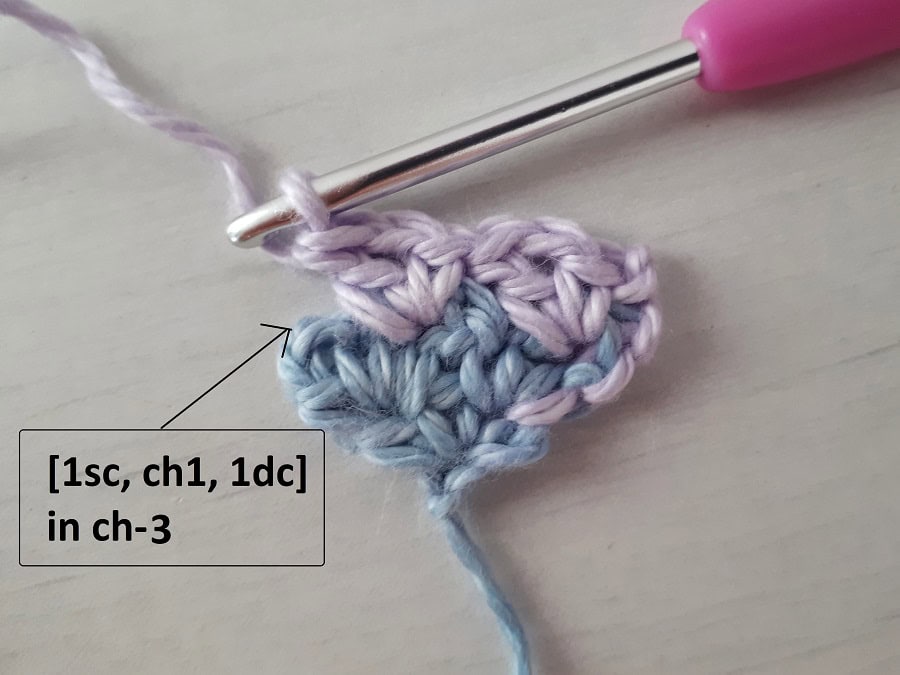
Row 2: Ch 3-PM, skip 1st dc, [1 sc, ch 1, 1 dc] in next ch-1 sp, skip next sc, [1 sc, ch 1, 1 dc] in ch-3 sp, turn.
Row 3: Ch 3-PM, skip 1st dc, [1 sc, ch 1, 1 dc] in next ch-1 sp, skip next sc and dc,
[1 sc, ch 1, 1 dc] in next ch-1 sp, [1 sc, ch 1, 1 dc] in ch-3 sp, turn.
Row 4: Ch 3-PM, * skip next dc, [1 sc, ch 1, 1 dc] in next ch-1 sp, skip next sc; Repeat from * to ch-3 sp [1 sc, ch 1, 1 dc] in ch-3 sp, turn.
Repeat row 4 until the size of your triangle measures 18” (46 cm). Then continue to decrease on one size.
Decreasing on One Side
Row 5: Ch 2-PM, * skip next dc, [1 sc, ch 1, 1 dc] in next ch-1 sp, skip next sc; Repeat from * to ch-3 sp, [1 sc, ch 1, 1 dc] in ch-3 sp, turn.
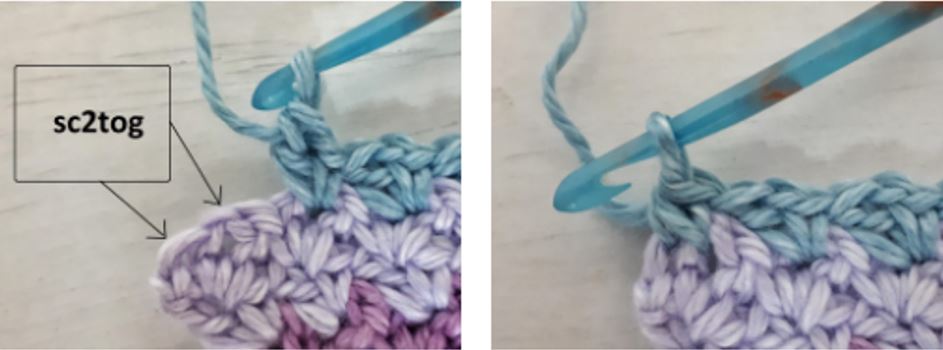
Row 6: Ch 3-PM, * skip next dc, [1 sc, ch 1, 1 dc] in next ch-1 sp, skip next sc; Repeat from * until last ch-1 sp (do not work into last ch-1 sp). Sc2tog in next ch-1 sp & ch-2 sp, turn.
Row 7: Ch 2-PM, skip next sc and dc, [1 sc, ch 1, 1 dc] in next ch-1 sp.
* Skip next sc & dc, [1 sc, ch 1, 1 dc] in ch-1 sp; Repeat from * to ch-3 sp, [1 sc, ch 1, 1 dc] in ch-3 sp, turn.
Repeat rows 6-7 until reaching the long side of your work measures 37” (94 cm), then continue to row 8.
** I wanted the part that folds over and being closed with buttons to be only 1” (2.5 cm). If you want, you can work your cover to be longer for a bigger fold-over part.
Decreasing on Both Sides
Row 8: Ch 2-PM, skip 1st sc & dc, [1 sc, ch 1, 1 dc] in next ch-1 sp.
* Skip next sc & dc, [1 sc, ch 1, 1 dc] in ch-1 sp; Repeat from * until last ch-1 sp (don’t work into last ch-1 sp). Sc2tog in next ch-1 sp and ch-2 sp, turn.
Row 9: Ch 2-PM, skip 1st sc2tog & dc, [1 sc, ch 1, 1 dc] in next ch-1 sp.
* Skip next sc & dc, [1 sc, ch 1, 1 dc] in ch-1 sp; Repeat from * until last ch-1 sp (don’t work into last ch-1 sp). Sc2tog in next ch-1 sp and ch-2 sp, turn.
Continue working row 9 until you have only 2 – [1sc, ch1, 1dc] in your row (total of 9 sts).
Row 10: ch2 (place marker), skip next sc and dc, [1sc, ch1, 1dc] in next ch1, sc2tog in next ch-1 gap and ch-2 (ch-2 of prev. row), turn.
Row 11: ch1, skip next sc and dc, 1sc in next ch1. Fasten off and don’t cut the yarn and continue seaming the pillow.
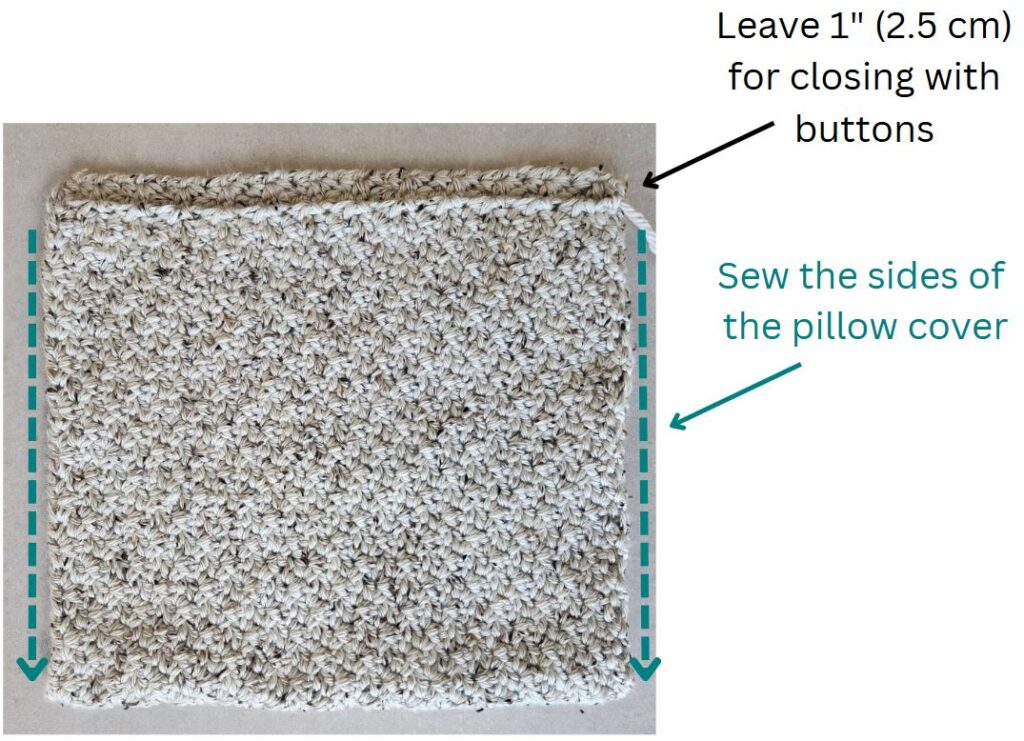
Seaming the Pillow
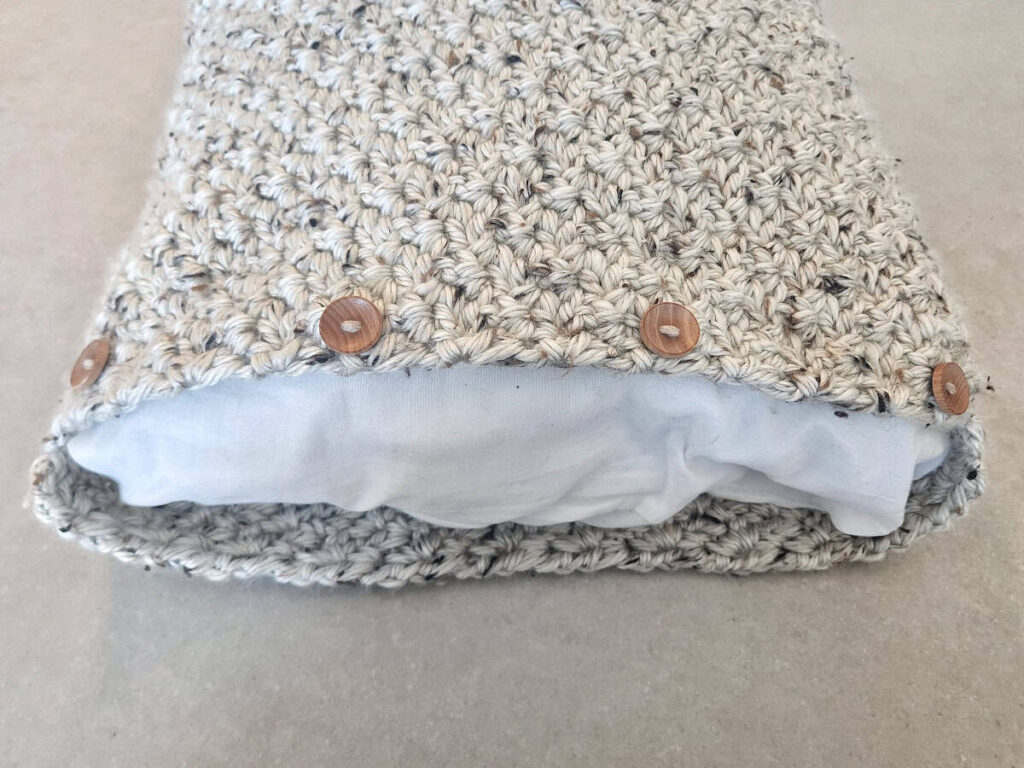
Fold the rectangle in half, leaving 1 in (2.5 cm) overlap to fold over the front side for the buttons.
With a tapestry needle and yarn, sew up the sides with a whip stitch (or your preferred joining method).
Sew the buttons in equal intervals approx. 0.5” (1.25 cm) from the top of the front side (if you made the closing flap longer, sew the buttons accordingly.
The buttons are inserted into the spaces between the stitches.
Looking for More Crochet Pillow Patterns?
Did you try this out? Share your project!
– Let me know how it went and leave a comment below.
– Tag me on Instagram @madebygootie
– Join and share in our FB Community
Want to save this post for later? Go ahead and PIN it!