Floral Crochet Triangle Bunting Pattern (Free)
Last Updated on December 22, 2024
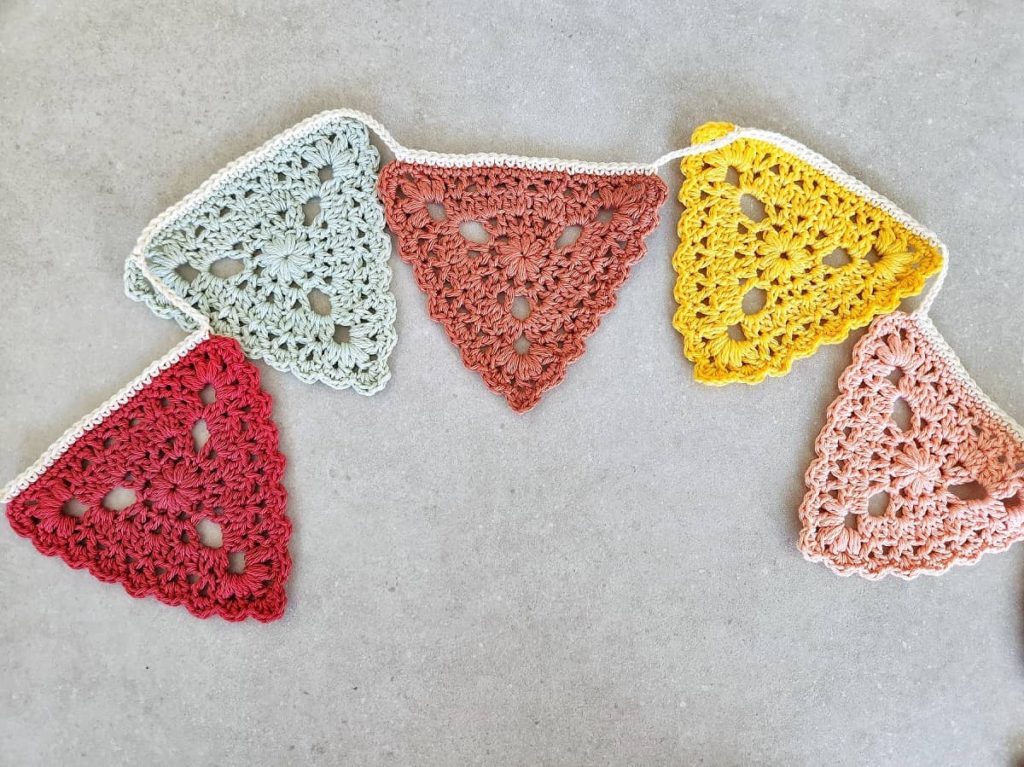
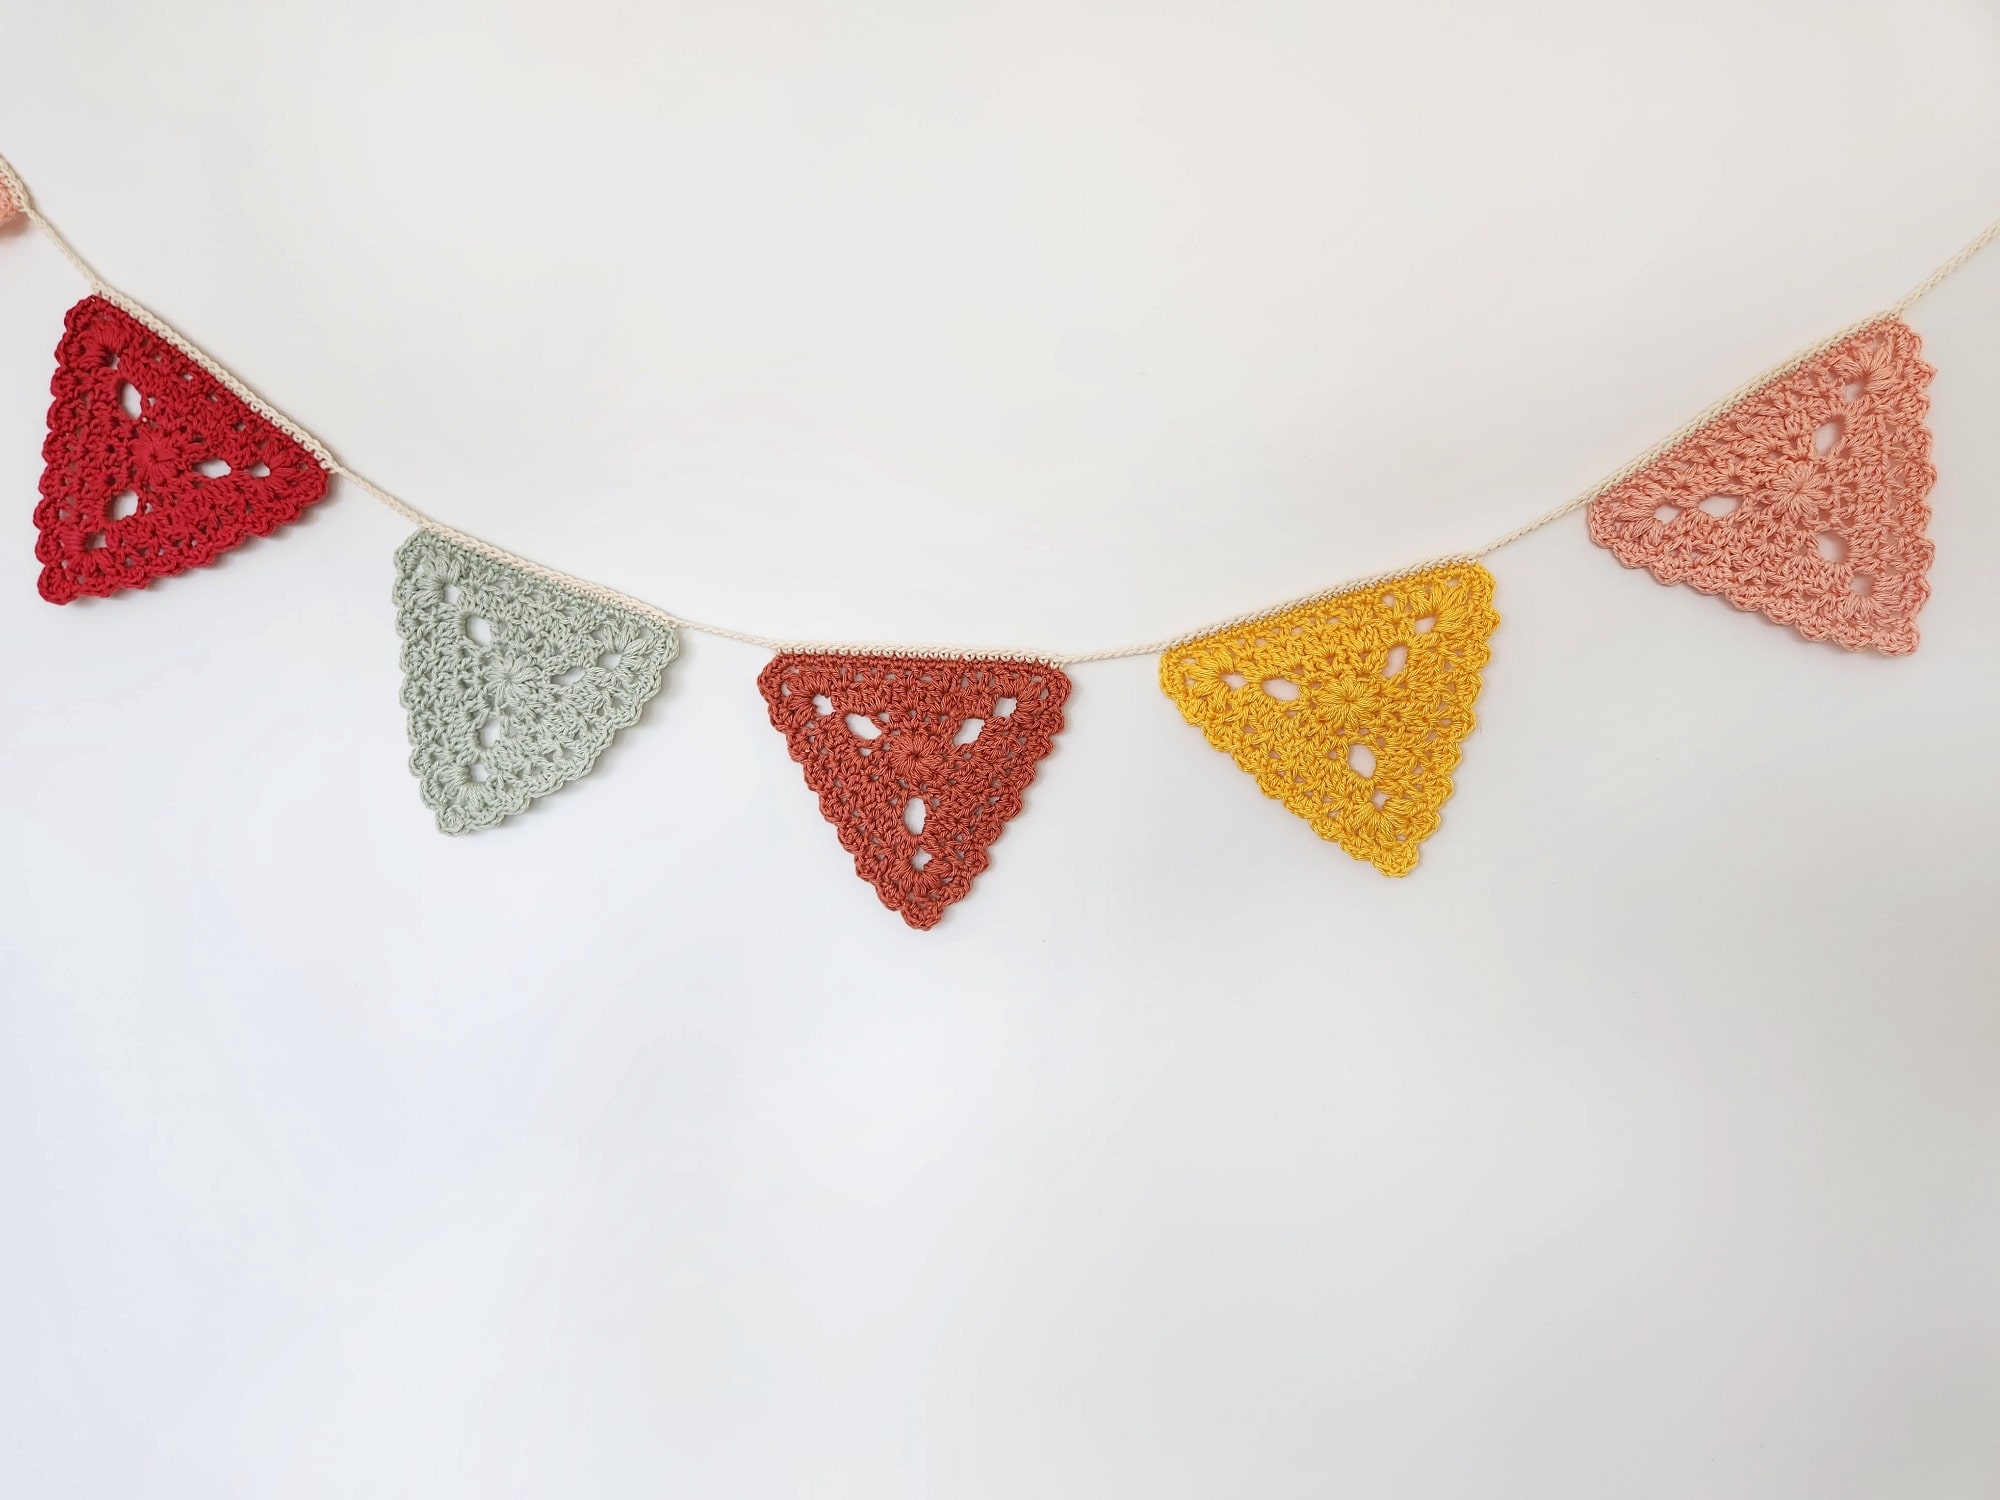
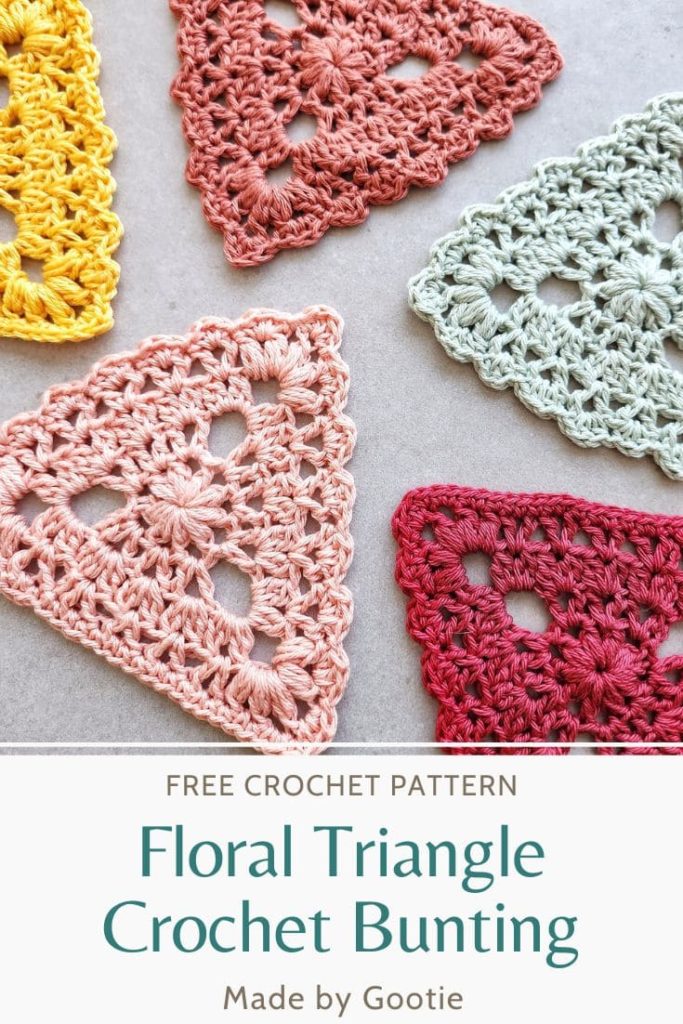
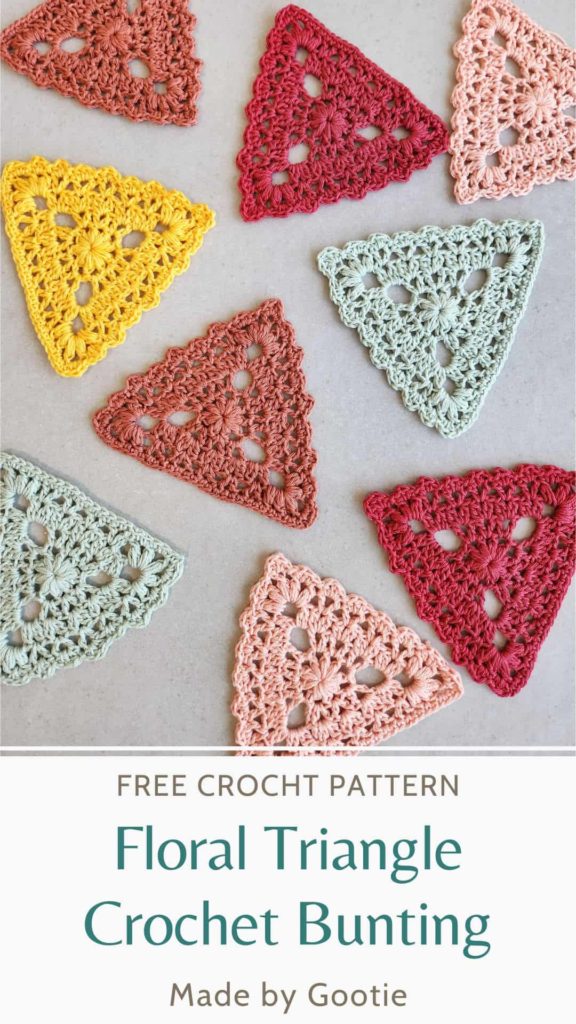
The Floral Crochet Triangle Bunting pattern is a fun and quick crochet project. You can make as many triangles as you’d like to create a beautiful crochet garland.
This crochet garland pattern is fun and festive and will be perfect as a party decoration.
The pattern includes detailed written instructions and a video tutorial.
** Some of the links in this post may include affiliate links. Making a purchase through one of these links pays me a small referral fee at no added cost to you. View our disclosure and privacy policy for more information.
The sun thing about this bunting pattern, is that you can work as many triangles as you’d like, in one color, or use different colors like me, and then assemble all of them.
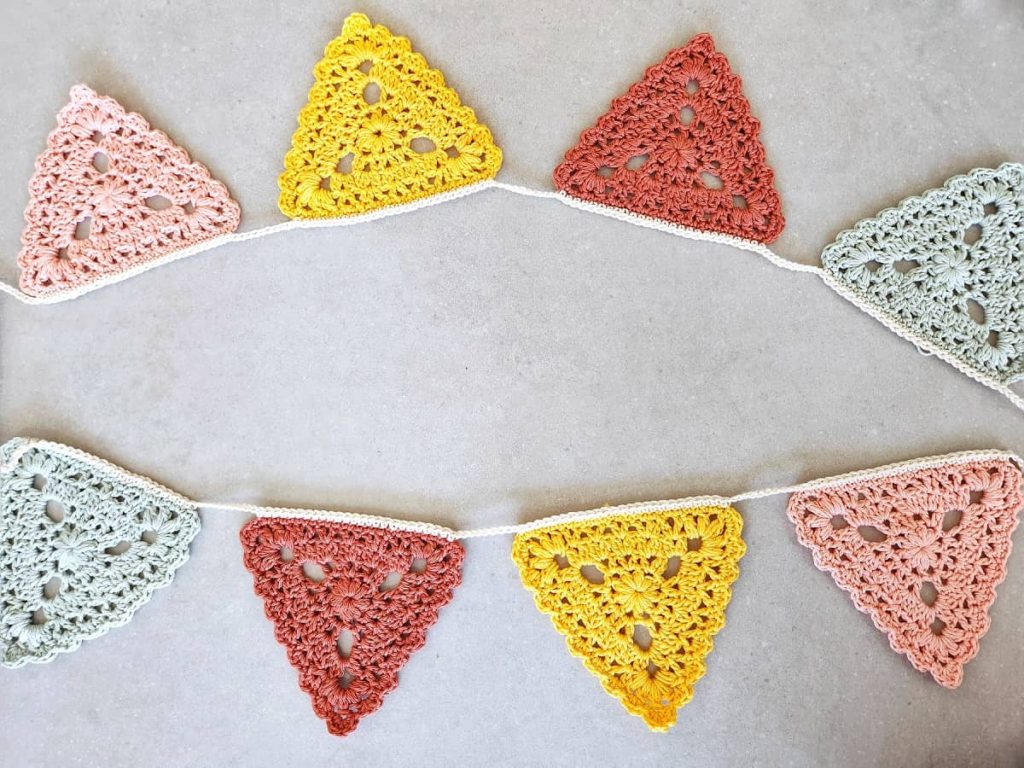
You can either use a string to connect all the little crochet flags or, as this pattern suggests, create a long chain and work single crochet stitches over the top of each flag.
Want to save this post for later? Go ahead and PIN it!
The Perfect Scrap Yarn Crochet Project
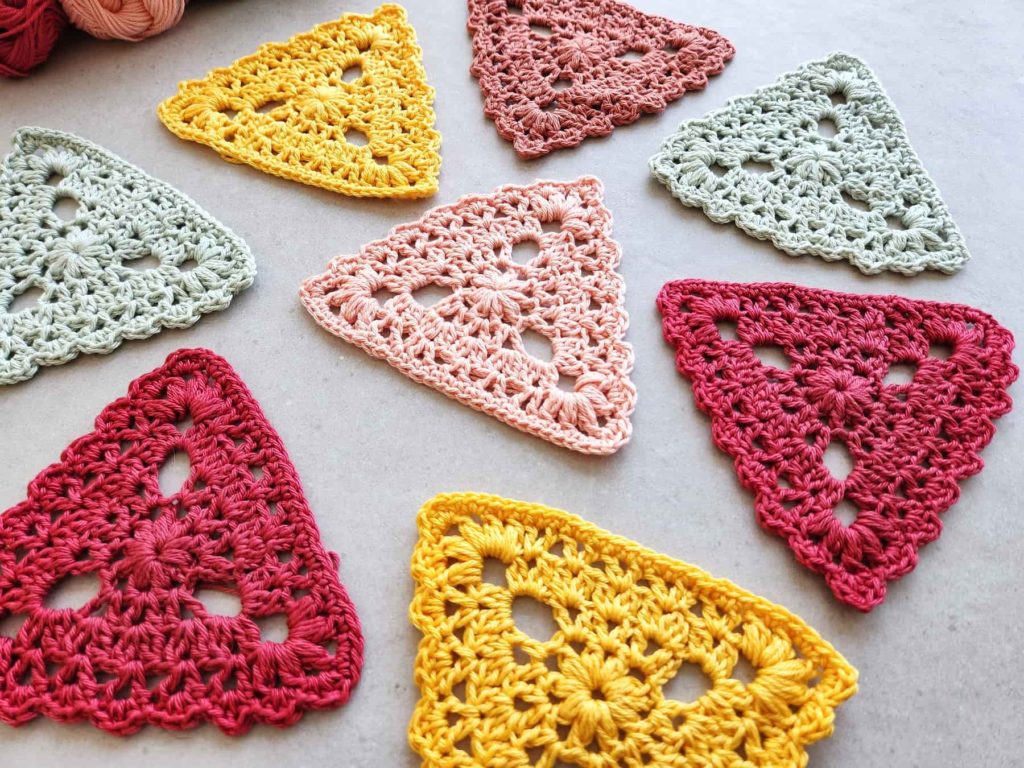
These cute crochet triangles are perfect as a stash-buster project. I used Sport (#2) weight yarn I had in my stash and made this crochet bunting for my daughter’s room.
You can also use DK (#3) weight yarn if that’s what you have in your stash, and just use a 4 mm / G crochet hook, keeping in mind you will result in a slightly bigger triangle.
This pattern was part of the Stash Busting Blog Hop which is co-hosted by Raffaella from Raffamusa Designs and me.
The Yarn I Used For My Crochet Bunting
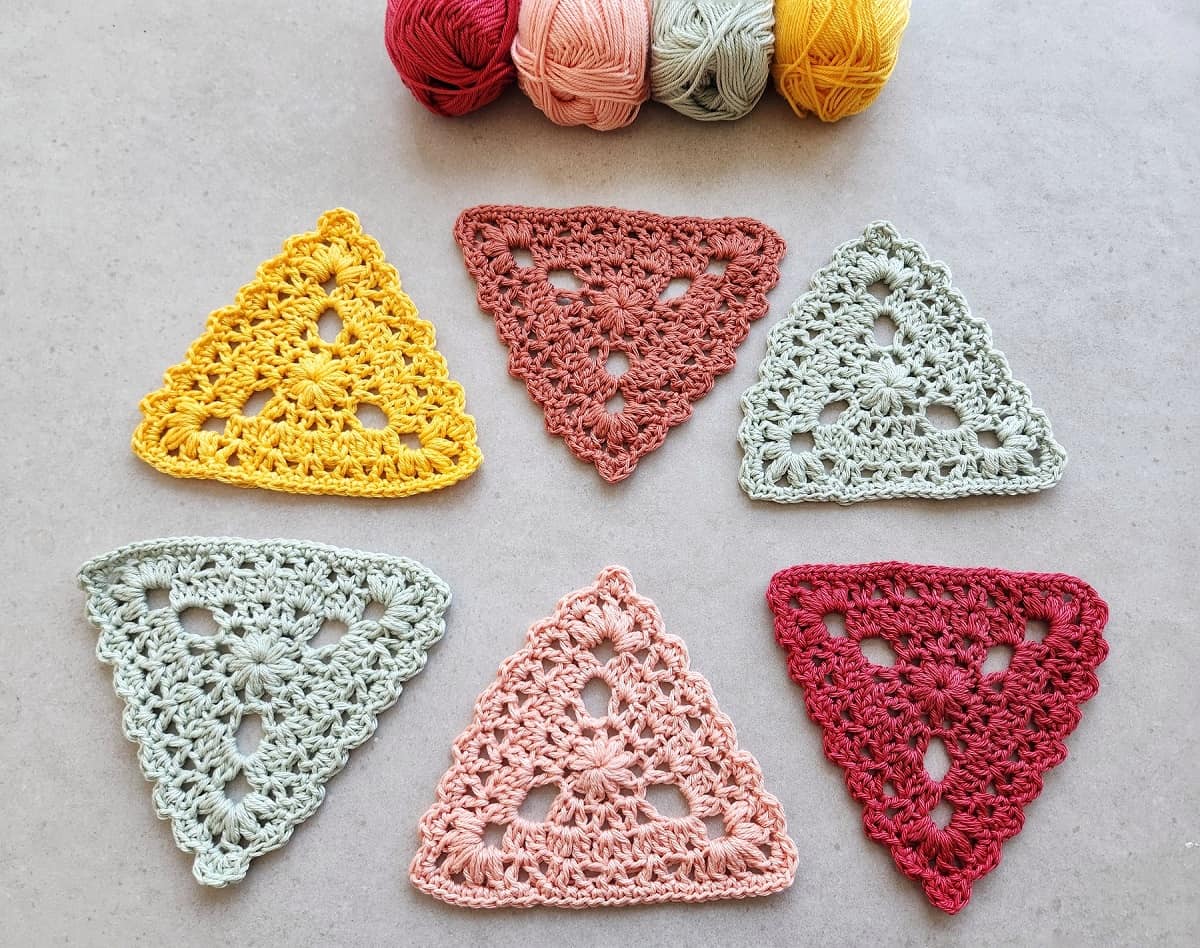
For this Floral Crochet Triangle Bunting pattern, I used a local brand 100% cotton in Sport (#2) weight yarn, because it shows the texture perfectly.
But this stash-buster crochet pattern will look lovely with any type of fiber you have in your stash.
Weight-wise, I recommend using Sport (#2) or DK (#3) weight yarns and no thicker, so the texture will look best.
Crochet Bunting PDF Pattern
You can find the ad-free PDF pattern with the full photo-tutorial at one of my shops below:
Crochet Bunting Video Tutorial
Free Crochet Bunting Pattern
* Want to save this post for later? Go ahead and PIN it!
* Add this pattern to your Ravelry queue HERE!
Skill Level – Intermediate
Materials
– 3.5 mm / E crochet hook (I like this hook).
– Sport (#2) weight yarn (Knit Picks – Shine Sport is a good option)
Total amount of yarn needed:
For 1 triangle: 10 grams/25m/27yds
For the string: 10 grams/25m/27yds
Gauge (in pattern) – Working Rounds 1-6 will result in a triangle with an approx. 4” (10 cm) side.
Finished Size – Triangle: 5.5×5.5’’ (14×14 cm) triangle
Abbreviations (US)
ch – chain
dc – double crochet
dc-cl – dc cluster stitch: yo, insert hook into indicated st, yo and pull up a loop, yo and pull yarn through 2 loops. yo, insert hook into same st, yo and pull up a loop, yo and pull yarn through 2 loops. Yo and pull yarn through 3 loops.
* This dc-cl is basically dc2tog where the 2 dc are worked into the same st.
hdc – half double crochet
Puff – (yo, insert hook into indicated st, yo and pull up a loop) x 3 times working into same st, yo and pull through 6 loops, yo and pull the yarn through 2 remaining loops.
sc – single crochet
ss – slip stitch
st – stitch
V-dc – [1dc, ch1, 1dc] in the same stitch.
V-dc-cl – [1dc-cl, ch1, 1dc-cl] in the same stitch.
V-puff – [1puff, ch1, 1puff] in the same stitch.
yo – yarn over
How to crochet the Puff stitch
(yo, insert hook into indicated st, yo and pull up a loop) x 3 times working into same st. With 7 loops on the hook, yo and pull through 6 loops, yo and pull the yarn through 2 remaining loops.

How to crochet the Double Crochet Cluster Stitch (dc-cl)
yo, insert hook into indicated st, yo and pull up a loop, yo and pull yarn through 2 loops. yo, insert hook into same st, yo and pull up a loop, yo and pull yarn through 2 loops. Yo and pull yarn through 3 loops.
* This dc-cl is basically dc2tog where the 2 dc are worked into the same st.

Notes
- The pattern can also be made with DK (#3) weight yarn, just note that the gauge will be different.
- Ch1/ch2 at the beginning of the round don’t count as a stitch.
- All V stitches are made only into spaces.
- (…) – crochet the instructions within brackets as many times as directed
- […] – crochet the instructions within brackets into the same indicated stitch.
Floral Crochet Triangle Bunting Pattern
Triangle (make as many as you’d like)
Make a magic ring.
Round 1:
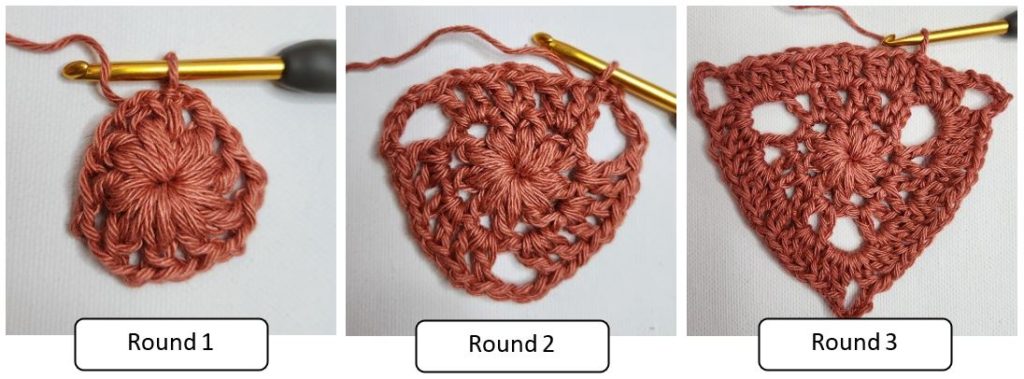
ch2 (doesn’t count as a st), working into the ring: (1puff, ch2, V-puff, ch2) x3 times, ss to top of 1st puff. (3 puff, 3 V-puff, 6 ch-2 sp)
Round 2: ss into next ch-2 sp, ch2 (doesn’t count as a st), V-dc in same ch-2 sp, skip next puff, V-dc in next ch-1 sp, skip next puff, V-dc in next ch-2 sp, ch5, skip next puff.
* V-dc in next ch-2 sp, skip next puff, V-dc in next ch-1 sp, skip next puff, V-dc in next ch-2 sp, ch5, skip next puff; repeat from * 1 more time, ss to dc of 1st V-dc. (9 V-dc, 3 ch-5-sp)
Round 3: ss into next ch-1 sp, ch2 (doesn’t count as a st), V-dc-cl in same ch-1 sp,
(skip next 2 dc, V-dc-cl in next ch-1 sp) x2 times, skip next dc, [V-dc-cl, ch5, V-dc-cl] in next ch-5 sp, skip next dc.
* V-dc-cl in next ch-1 sp, (skip next 2 dc, V-dc-cl in next ch-1 sp) x2 times, skip next dc,
[V-dc-cl, ch5, V-dc-cl] in next ch-5 sp, skip next dc; repeat from * 1 more time, ss to 1st dc-cl of 1st V-dc-cl. (15 V-dc-cl, 3 ch-5-sp)
Do you prefer a full photo-tutorial? Get the premium, ad-free, printable PDF version on Ravelry or Etsy!
Round 4: ss into next ch-1 sp, ch2 (doesn’t count as a st), V-dc in same ch-1 sp, (skip next 2 dc-cl, V-dc in next ch-1 sp) x3 times, skip next dc-cl, [V-puff, ch2, 1puff, ch2, V-puff] in next ch-5 sp, skip next dc-cl.
* V-dc in next ch-1 sp, (skip next 2 dc-cl, V-dc in next ch-1 sp) x4 times, skip next dc-cl,
[V-puff, ch2, 1puff, ch2, V-puff] in ch-5 sp, skip next dc-cl; repeat from * 1 more time.
V-dc in next ch-1 sp, ss to 1st dc of 1st V-dc. (15 V-dc, 3 puff, 6 V-puff, 6 ch-2-sp)
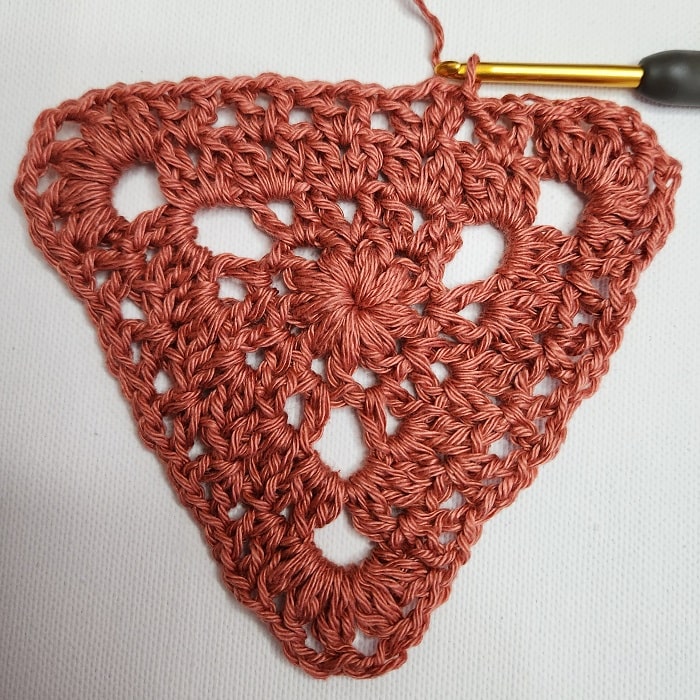
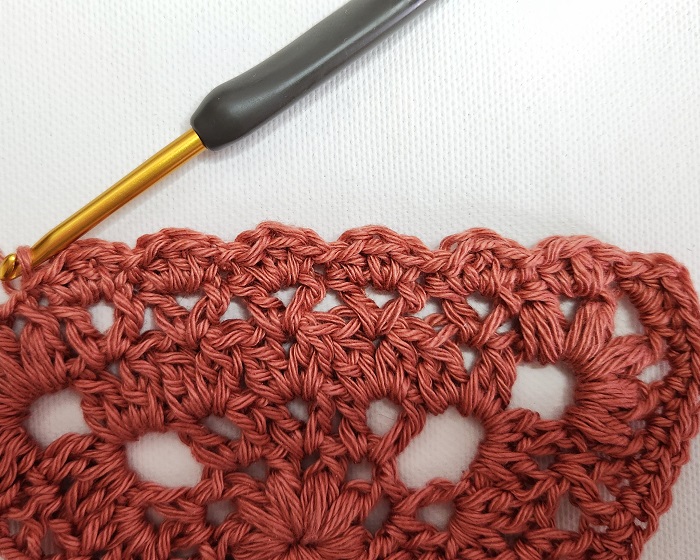
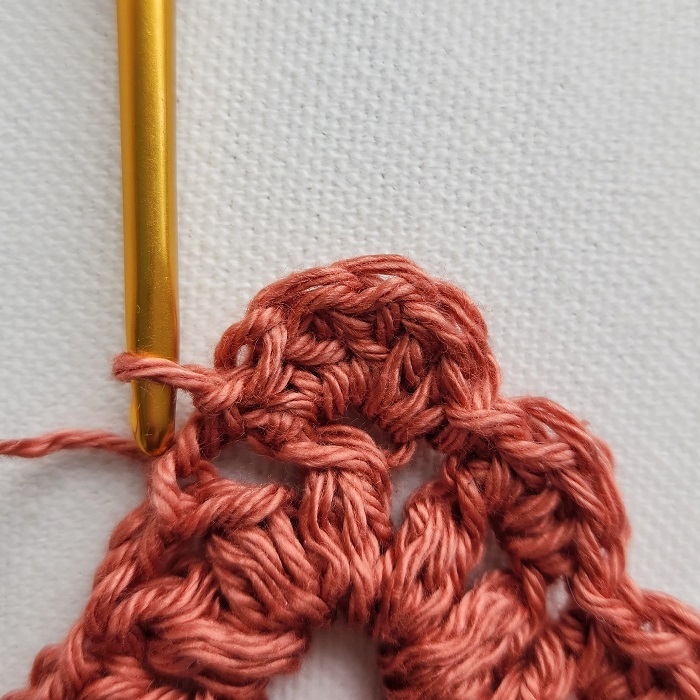
Round 5: ch1 (doesn’t count as a st), 1sc in same 1st dc, 1sc in next 14 sts (each dc, ch-1 sp & puff) until ch-2 sp, 2sc in next ch-2 sp, 1sc in next puff, [1hdc, 1dc, 1hdc] in next ch-2 sp, 1ss in next puff, [1hdc, 1dc, 1hdc] in next ch-1 sp (see pic 2), skip next puff, 1ss in next dc.
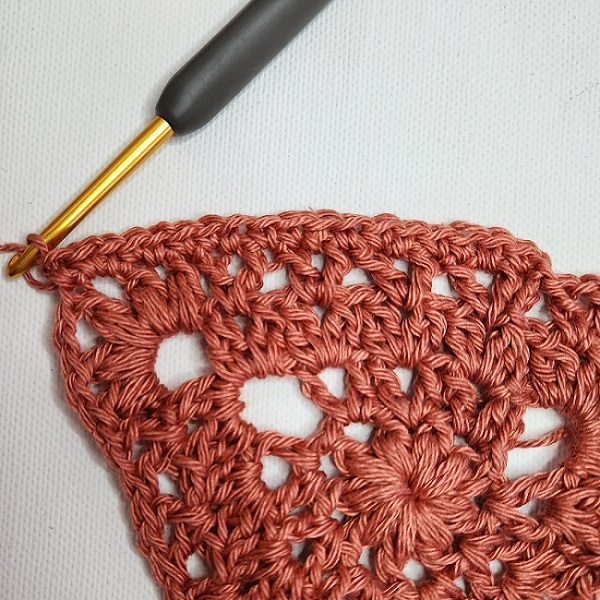
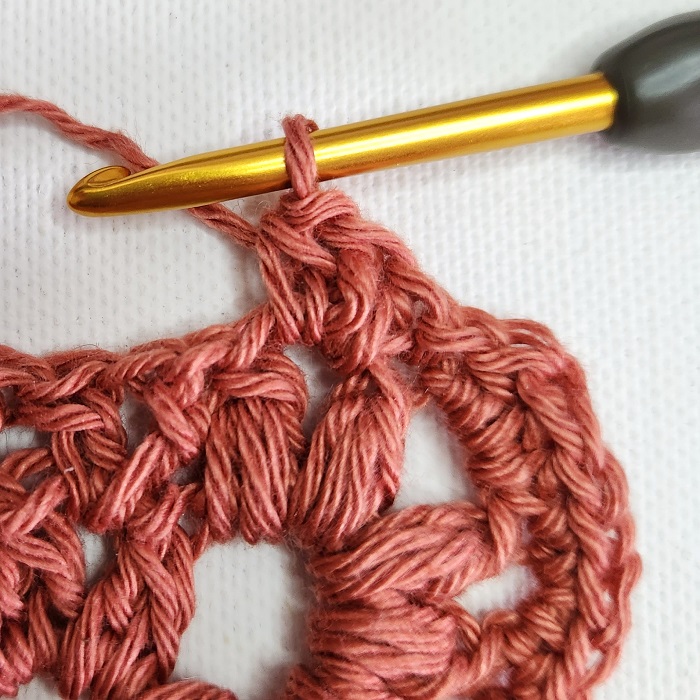
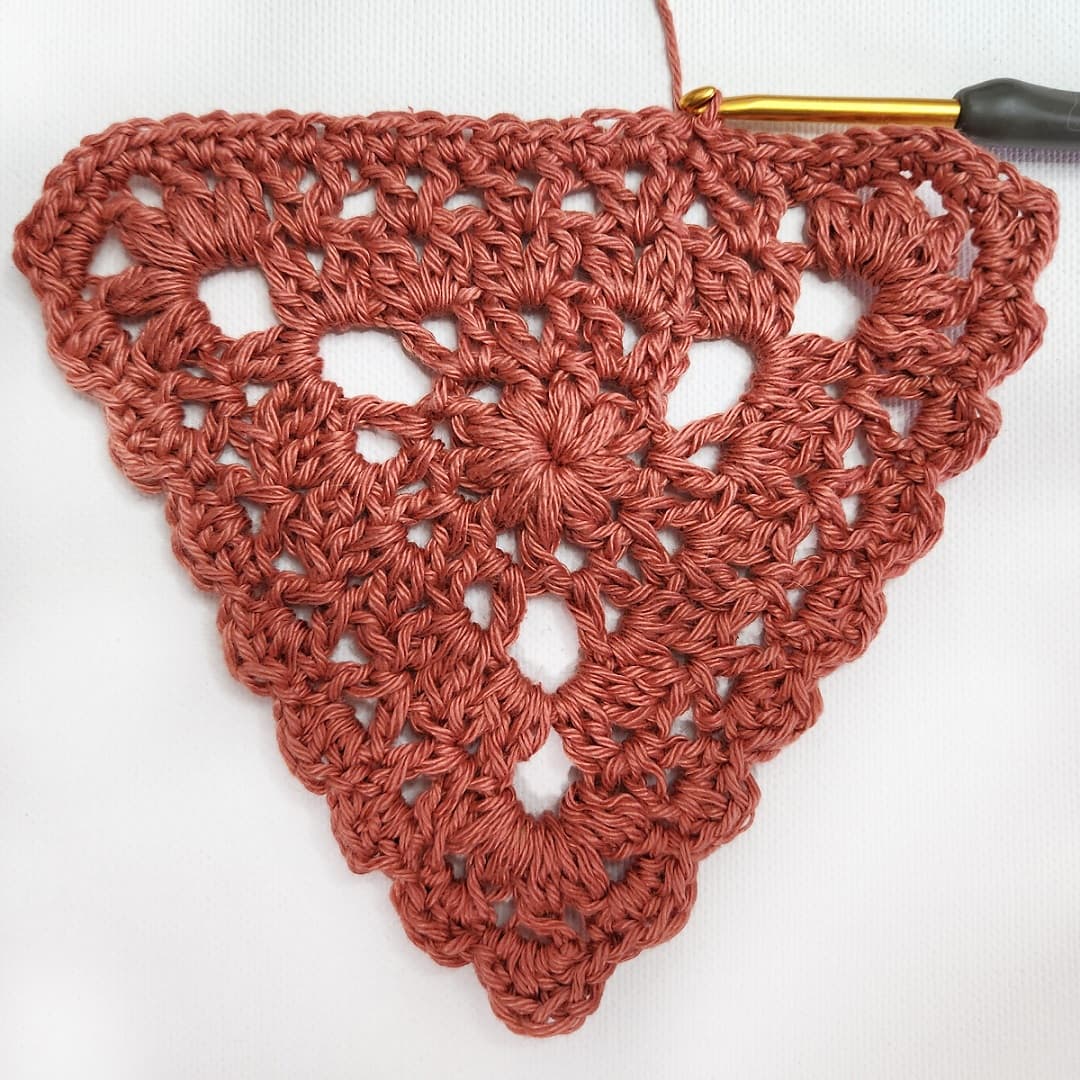
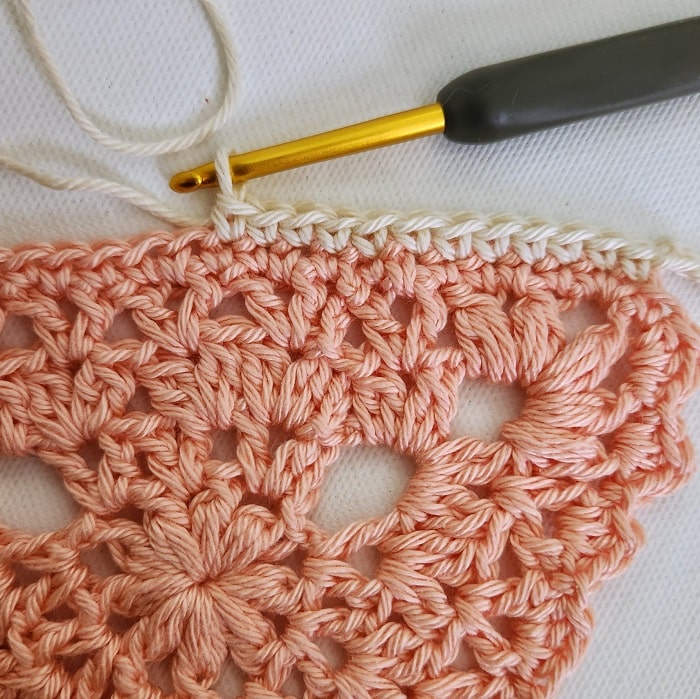
([1hdc, 1dc, 1hdc] in next ch-1 sp, skip next st, 1ss in next st) x5 times (see pic 3), [1hdc, 1dc, 1hdc] in next ch-1 sp, skip next puff, 1ss in next ch-2 sp, [1hdc, 3dc, 1hdc] in next puff, 1ss in next ch-2 sp (see pic 4), skip next puff, [1hdc, 1dc, 1hdc] in next ch-1 sp, skip next puff, 1ss in next dc.
([1hdc, 1dc, 1hdc] in next ch-1 sp, skip next st, 1ss in next st) x5 times, [1hdc, 1dc, 1hdc] in next ch-1 sp, 1ss in next puff, [1hdc, 1dc, 1hdc] in next ch-2 sp, 1sc in next puff.
2sc in next ch-2 sp, 1sc in next 6 sts (each dc, ch-1 & puff) until the end of the round, ss to 1st sc. (27 sc, 16 ss, 34 hdc, 19 dc)
Fasten off, soak and block.
Assembly
With any color you want, chain 15 and ss to the 1st ch to create a loop, ch 30.
Hold the triangle with the right side facing you and the sc side at the top, work 1sc in the 2nd sc (the 1st one in the ch-2 sp) and in next 24 sc across, don’t work into the last sc, ch10 (or make any gap you prefer).
Repeat this step with all your triangles, don’t chain 10 after the last triangle, then chain 45, and ss into the 15 ch from the hook to create a loop.
Fasten off.
Did you try this out? Share your project!
– Let me know how it went and leave a comment below.
– Tag me on Instagram @madebygootie
– Join and share in our FB Community
Want to save this post for later? Go ahead and PIN it!


I’m trying to find your free triangle bunting pattern. It says scroll down for free written instructions but it keeps taking me into a sign up page that involves other online platforms that I don’t want to use to get the “free” instructions you stated numerous times on this site
Hi Kim,
Due to changes to privacy on browsers, it works best for me to share my free patterns through the Grow platform, which is free to sign up and use.
I get that not everyone wants to sign up and set up an account, and I can understand that, but in order to keep providing free content, this is what works best for me at this time.
You also have an option to watch the free video tutorial which is linked to this post before the pattern.
Great pattern! I love how these have turned out. Thanks so much!
Thank you for sharing, Britt! I’m glad you enjoyed the pattern 🙂
Such a beautiful design! Thank you!
My pleasure, Sharon, I’m glad you like it!