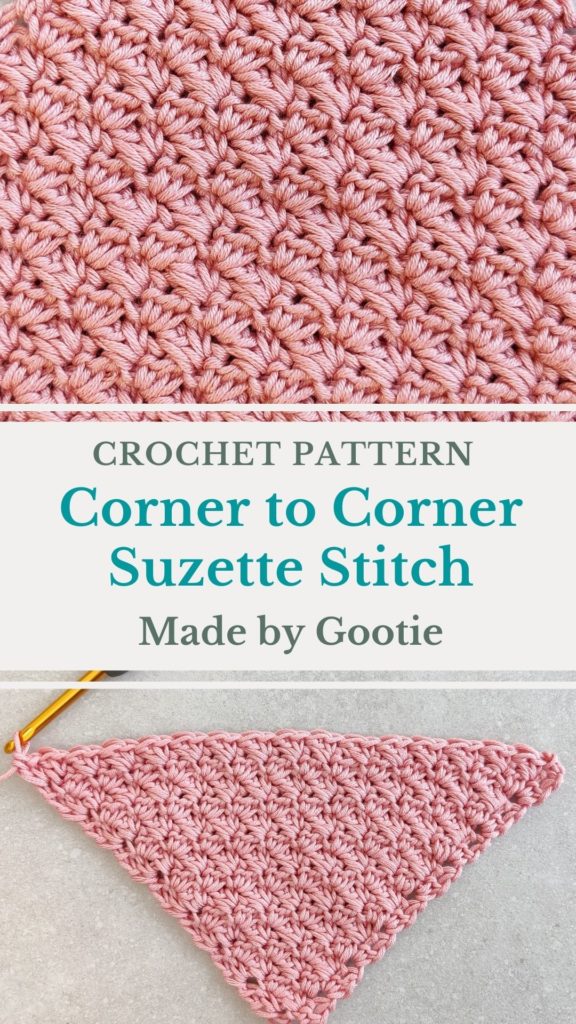
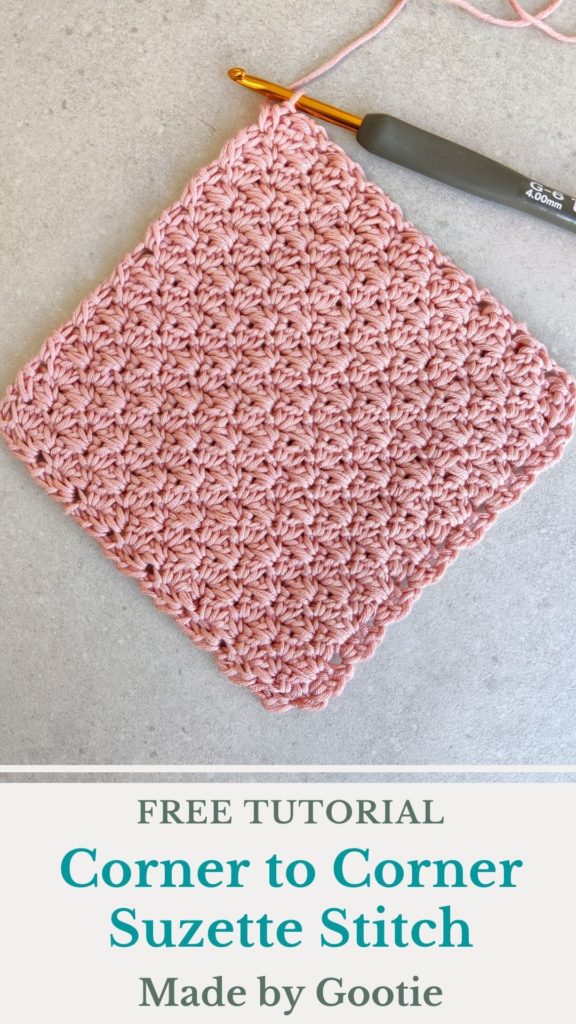
Corner to Corner Crochet Suzette Stitch – Free Pattern
Last Updated on June 25, 2024
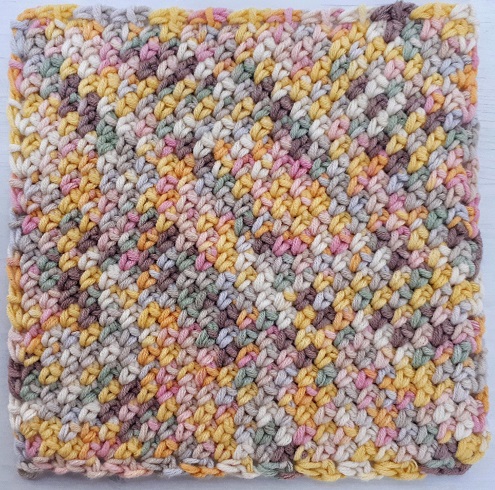
If you have been following me lately, you’d know that I love the Suzette stitch. I love the unique texture of this stitch, and the soft and dense fabric it creates, that’s why I also used it for this Hanging Basket.
So I decided to combine my love for this beautiful crochet stitch with my love for the corner to corner (C2C) method. And that’s how I came up with the Corner to corner crochet Suzette stitch pattern!
Scroll down for the written instructions and video tutorial!
** Some of the links in this post may include affiliate links. Making a purchase through one of these links pays me a small referral fee at no added cost to you. These small fees add up and help me keep the blog running. View our disclosure and privacy policy for more information.
Want to save this post for later? Go ahead and PIN it!
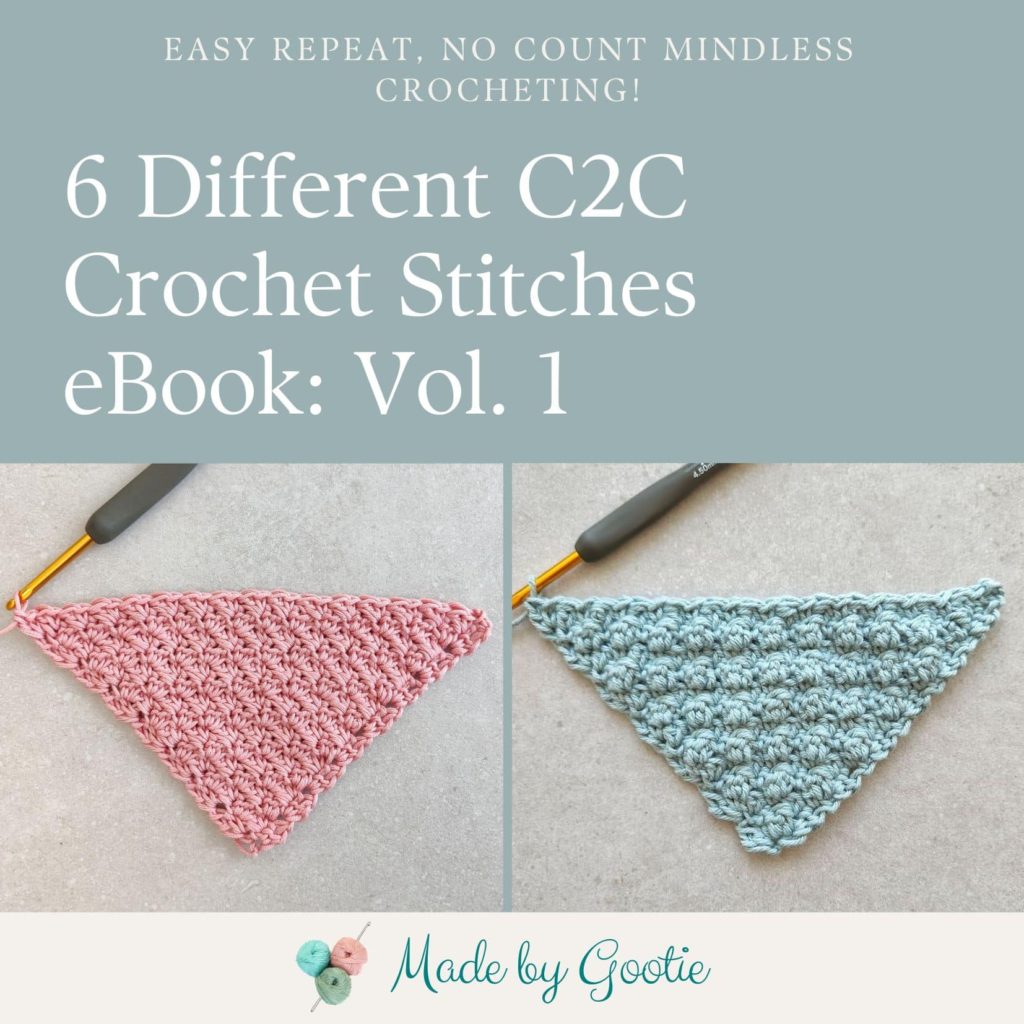
I know that when you first hear the term ‘corner to corner’ or C2C, you initially think of the ‘traditional’ C2C stitch. But actually, there are more corner to corner variations using different stitches, such as the Wattle and Cluster stitches.
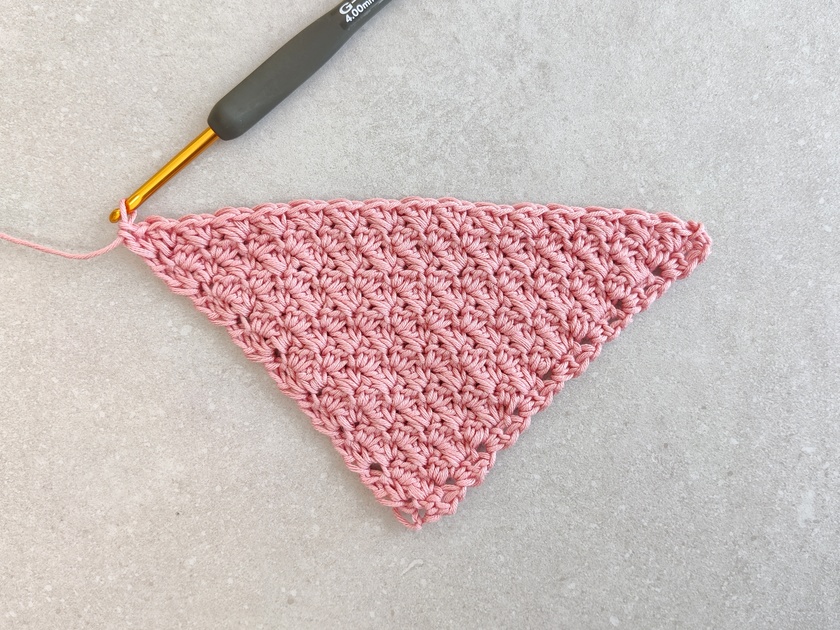
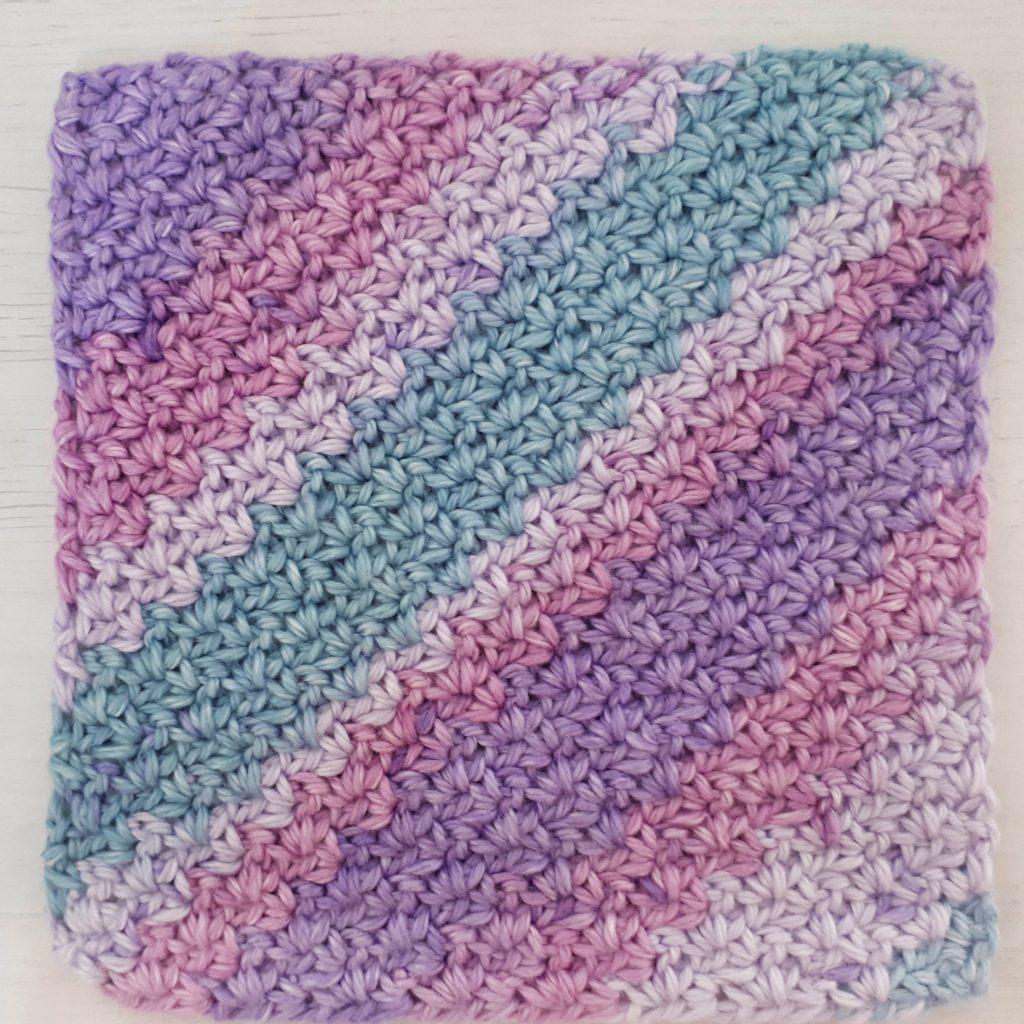
The C2C Suzette stitch is worked in a diagonal with the same method, you start from one corner, increasing both sides of the triangle, and when you reach the desired length you start decreasing on both sides, until reaching the other corner.
Want to learn more about the Corner to Corner method? Check out the Guide to How to Crochet Corner to Corner!
The corner to corner crochet Suzette stitch forms a square, but can also be worked to form a rectangle. The Rectangle version is available in the premium pdf pattern on Ravelry and Etsy.
What Projects Can You Make with the C2C Suzette Stitch?
Because of the dense, yet soft texture of the Suzette stitch, it’s a perfect stitch for so many projects. And the best part about the C2C technique, is that you don’t need to count stitches and make this long starting chain!
- Blankets – no need to count your stitches, start increasing and decide the size as you go!
- Hot Pads
- Washcloths & dishcloths – great project for leftover yarn!
- Plant hanger! I used this stitch in my Suzette Double Hanging Basket
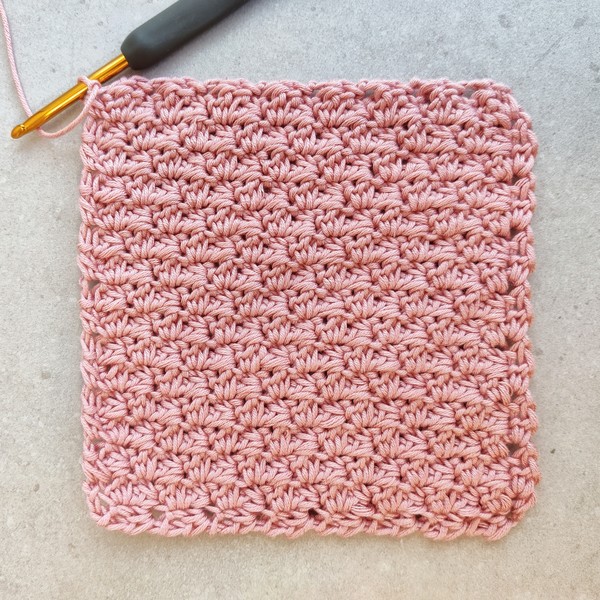
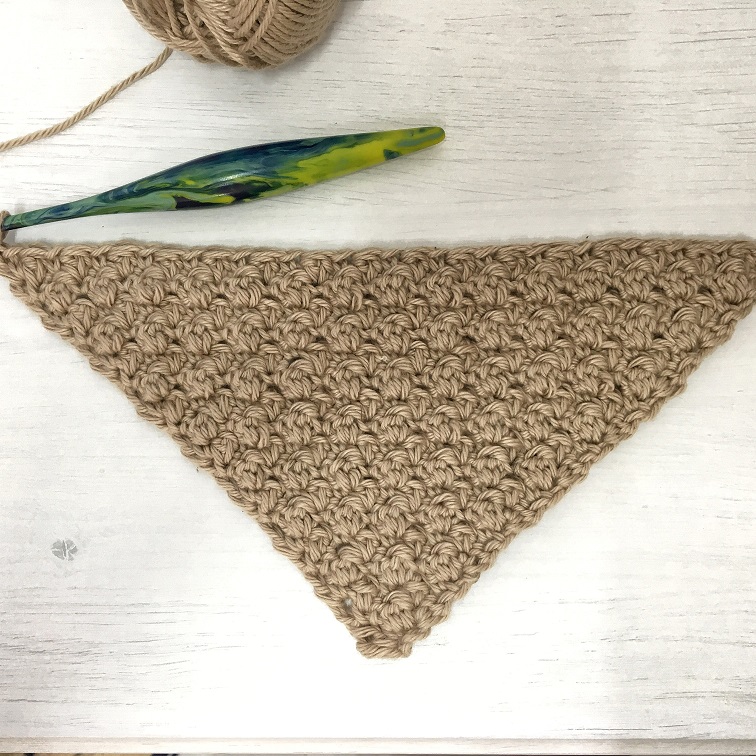
As a tutorial for this stitch we will make a washcloth, scroll down for the instructions!
C2C Suzette Stitch Video Tutorial
How to Corner to Corner Crochet Suzette Stitch
Skill level – easy
Materials
– Crochet hook 4 mm / G (I love the Etimo and Clover Hooks).
– DK (#3) weight yarn – 100% cotton.
Amount of yarn needed: 20gr/45m/50yds
– If you would like to turn this design into a blanket, these are great yarn options for this:
Mary Maxim – Artist Pallete
Mary Maxim – Sugar Baby Stripes
Lion Brand – Mandala
– Stitch marker (optional)
Abbreviations (US)
ch – chain
sc – single crochet
sc2tog -single crochet 2 together
dc – double crochet
PM – place marker
Finished Size – 6.5×6.5” (16.5×16.5 cm)
Gauge (in Suzette stitch):
9 st and 18 rows = 4 in/10 cm with 4.0 mm / G hook
** Gauge is not crucial for this pattern
Notes
- The Suzette stitch is [1sc, 1dc] worked back and forth, while crocheting into the single crochet and skipping the double crochet. You can find the regular Suzette stitch tutorial HERE.
- To make it easier to find the ch3 / ch2 spaces at the end of the row, place a stitch marker when you ch3/ch2 at the beginning of each row.
- The pattern can be worked as a square or as a rectangle (the rectangle is available in the premium pdf pattern)
Want to learn how to crochet the Corner to Corner Suzette stitch also as a rectangle? Get the premium, ad free, printable PDF version onRavelry or Etsy!
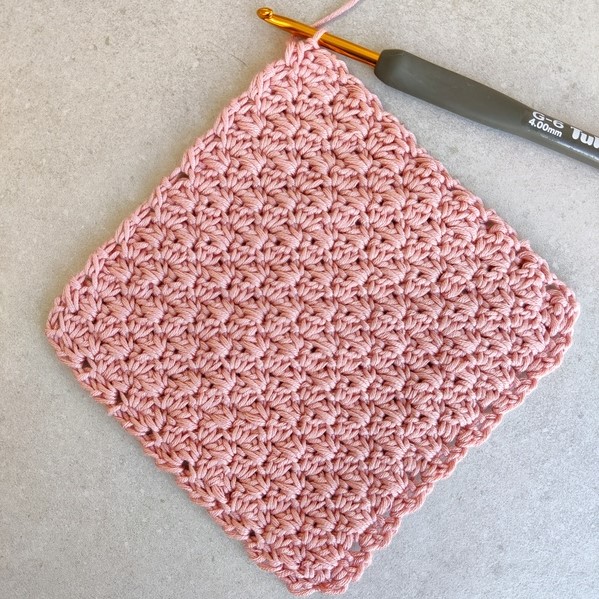
Corner to Corner Suzette Stitch Washcloth Crochet Pattern
C2C Increase
Ch4
ROW 1: [1sc, 1dc] in 4th ch from hook, turn.
ROW 2: ch3-PM, skip 1st dc, [1sc, 1dc] in next sc, [1sc, 1dc] in ch-3, turn.
ROW 3: ch3-PM, skip 1st dc, [1sc, 1dc] in next sc.
Skip next dc, [1sc, 1dc] in next sc, [1sc, 1dc] in ch-3, turn.
ROW 4: ch3-PM, skip 1st dc, [1sc, 1dc] in next sc.
* skip next dc, [1sc, 1dc] in next sc; repeat from * to ch-3, [1sc, 1dc] in ch-3, turn.
Repeat row 4 until the side of the triangle measures 6.5in (16.5cm), or until your desired length.
Do you prefer photo tutorials? Get the premium, ad-free, full photo-tutorial, printable PDF version onRavelry or Etsy!
C2C Decrease
When you reach the desired length, start decreasing:
** Place the stitch marker at the beginning of each ch2 so you can easily find it for the decrease stitch.
ROW 5: ch2-PM, skip next dc & sc, [1sc, 1dc] in next sc.
* skip next dc, [1sc, 1dc] in next sc; repeat from * to last sc, sc2tog in last sc & ch-3, turn.
ROW 6: ch2-PM, skip next sc2tog & dc, [1sc, 1dc] in next sc.
* skip next dc, [1sc, 1dc] in next sc; repeat from * to last sc, sc2tog in last sc & ch-2, turn.
Continue working row 6 until you have only one [1sc, 1dc] stitch + sc2tog in your row (total of 3 sts + ch-2), then work row 7.
ROW 7: ch1, skip next sc2tog & dc, sc2tog in last sc & ch-2.
Fasten off.
DESIGNERS – IF USING THIS C2C STITCH IN A CROCHET DESIGN, I WOULD LOVE IT IF YOU GIVE A REFERENCE TO THIS ORIGINAL POST SOMEWHERE IN YOUR DESIGN.
Looking for More Different C2C Crochet Patterns? Check out the other free stitch tutorials on the blog:
Did you try this out? Share your project!
– Let me know how it went and leave a comment below.
– Tag me on Instagram @madebygootie
– Join and share in our FB Community
Want to save this post for later? Go ahead and PIN it!
Can you make the C2C a rectangle, instead of a square?
Yes, you have that option in the PDF version 🙂
I’m waiting for he code in my email so I can buy the patterns, I’m using the Suzette stitch for a blanket and I’m almost to the point where I can start making it a rectangle, I just need to know how
I will make sure to resend you it to you 🙂
Hi, I’m making the C2C Suzette stitch square and I’m decreasing but my corners in the decrease are rounded. Is that normal? I have frogged back my work so many times!
Hi Amy,
I’m sorry you are having trouble with the decrease part.
The corners have a bit of a round shape, but not too much, as you can see in the photos.
Are you using stitch markers to help find the ch-2 space?
Also, another way to make sure you are decreasing correctly is to count your ‘Suzette’ stitches [1sc, 1dc]. Every decrease row has one less Suzette stitch to it.
I hope it helps!
Thank you. I think I was one stitch off on the decrease. I tried again and now it’s correct! Thank you.
I’m so glad it worked out for you!
I’m in the process of making c2c hdc v stitch I’ve pulled out the decrease 4 times now PLEASE HELP!!!!! I don’t know what I’m doing wrong. I usually just pull it apart, but I’m going to try this
Hi Donna,
I’m really sorry you’re having a hard time with decreasing the C2C V stitch.
I can’t really help without seeing a photo (you are welcome to email me a close up of your decrease part and I’ll do my best to find the problem).
Are you using stitch markers to help find the ch-2 space?
Also, another way to make sure you are decreasing correctly is to count your V stitches [1hdc, ch1, 1hdc]. Every decrease row has 2 less V stitches to it.
I hope it helps!
Do you ever add a border?
Hi Sara,
I think the stitch creates a smooth edging, so I don’t add a border when I’m working this stitch.
But this is a personal preference of course, and you can add any border you like 🙂
I’m a huge fan of the Suzette stitch and I’ve made dozens of the straight back and forth versions. I recently tried this C2C version and I love it just as much! Best pattern directions anywhere! Thank you!
I’m so happy you love my C2C version of the Suzette stitch, Debbi!
Im making a 40×40 blanket with this pattern. it is such a huge help (and a lot of rows). I saw that you prefer not to use a border but, if you did, what border(s) would you suggest? I was thinking 2 sc rows around then the crab stitch because I saw that on Reddit but I’m not sure if i like it.
It looks like there’s a small error – at the end of the row you say to chain 3 and turn, then the beginning of the next row, you write to chain 3 and place a marker. Shouldn’t there be just one chain 3 (or 2), either at the end of the row or the beginning of the next row?
I also couldn’t find a link to the video.
Thank you for the tutorial, instructions, and photos! It was a great help in learning how to do this.
Hi Nancy,
I’m so glad you found the tutorial and photos helpful!
At the end of each row it says to work into the ch-3 sp or the ch-2 sp.