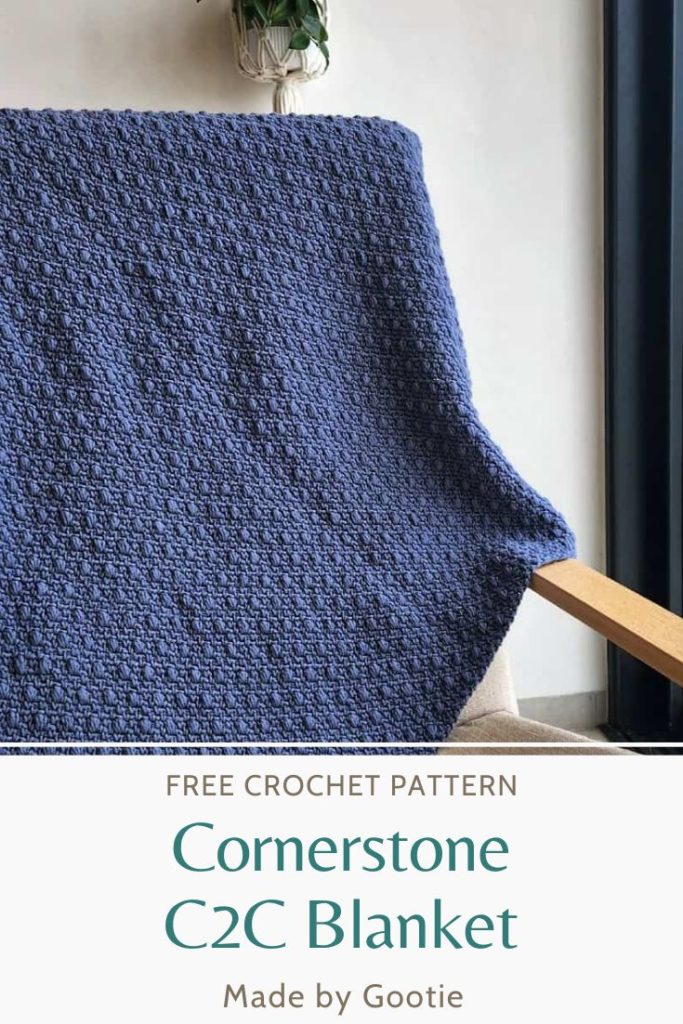
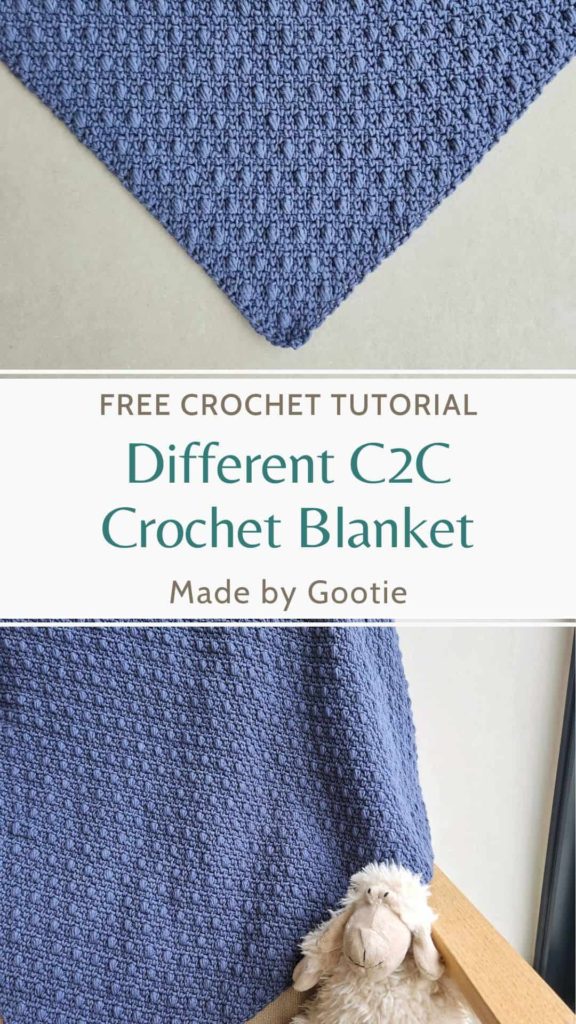
Unique C2C Moss Stitch Crochet Blanket
Last Updated on June 3, 2024
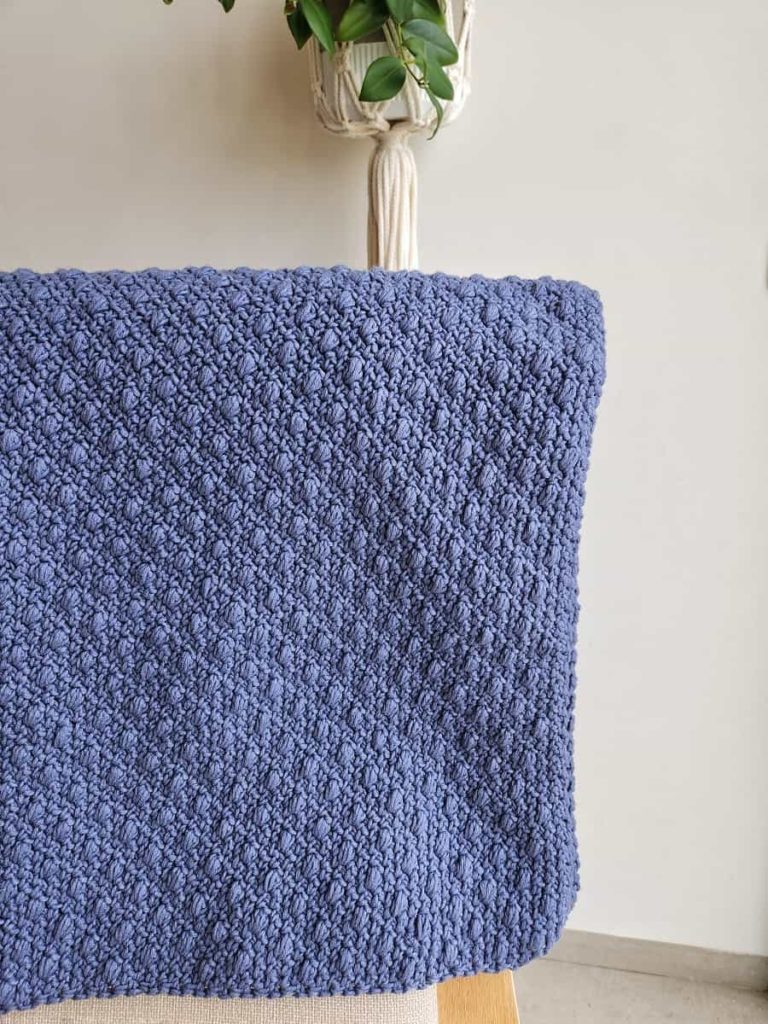
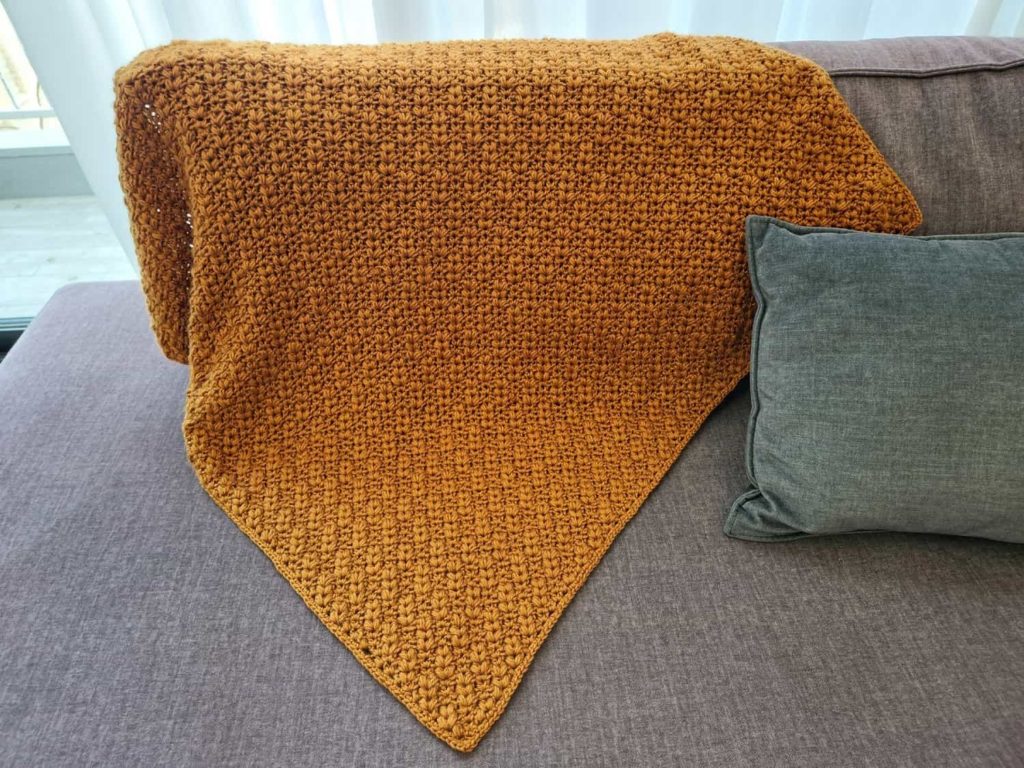
This C2C Moss stitch crochet blanket pattern incorporates the Spiked Bean stitch and creates a beautiful textured blanket. If you love the corner-to-corner Moss stitch, but are looking for something a little different, this Cornerstone C2C blanket is for you!
This blanket pattern is great for both experienced and new crocheters.
Some of the links in this post may include affiliate links. Making a purchase through one of these links pays me a small referral fee at no added cost to you. These small fees add up and help me keep the blog running. View our disclosure and privacy policy for more information.
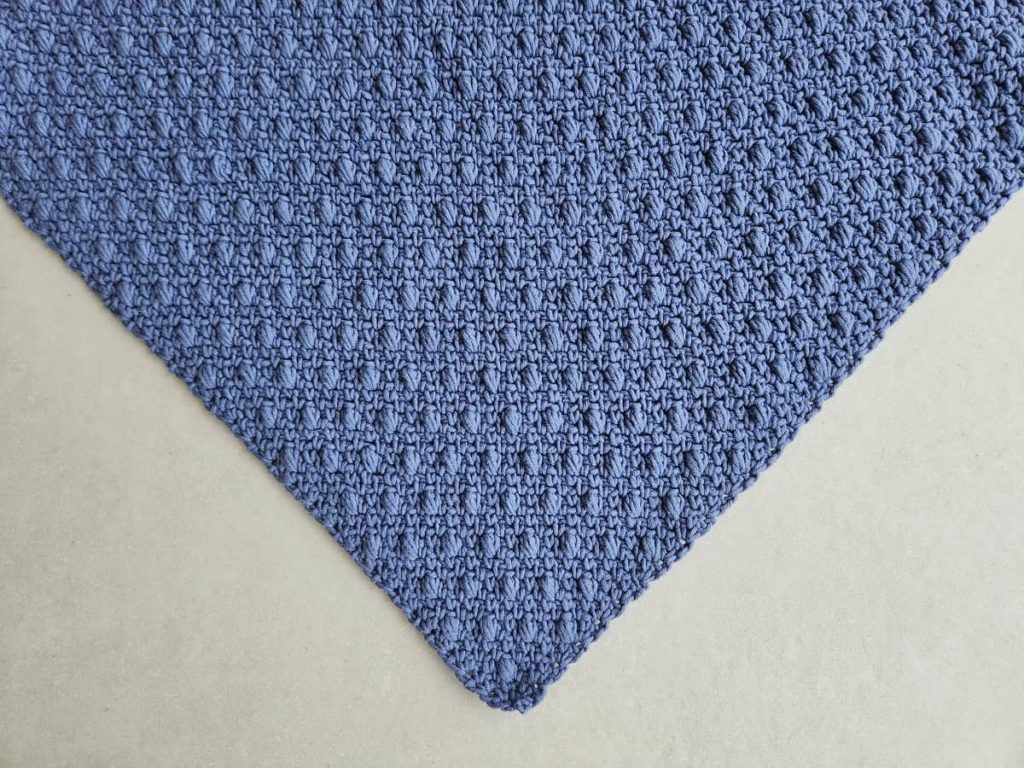
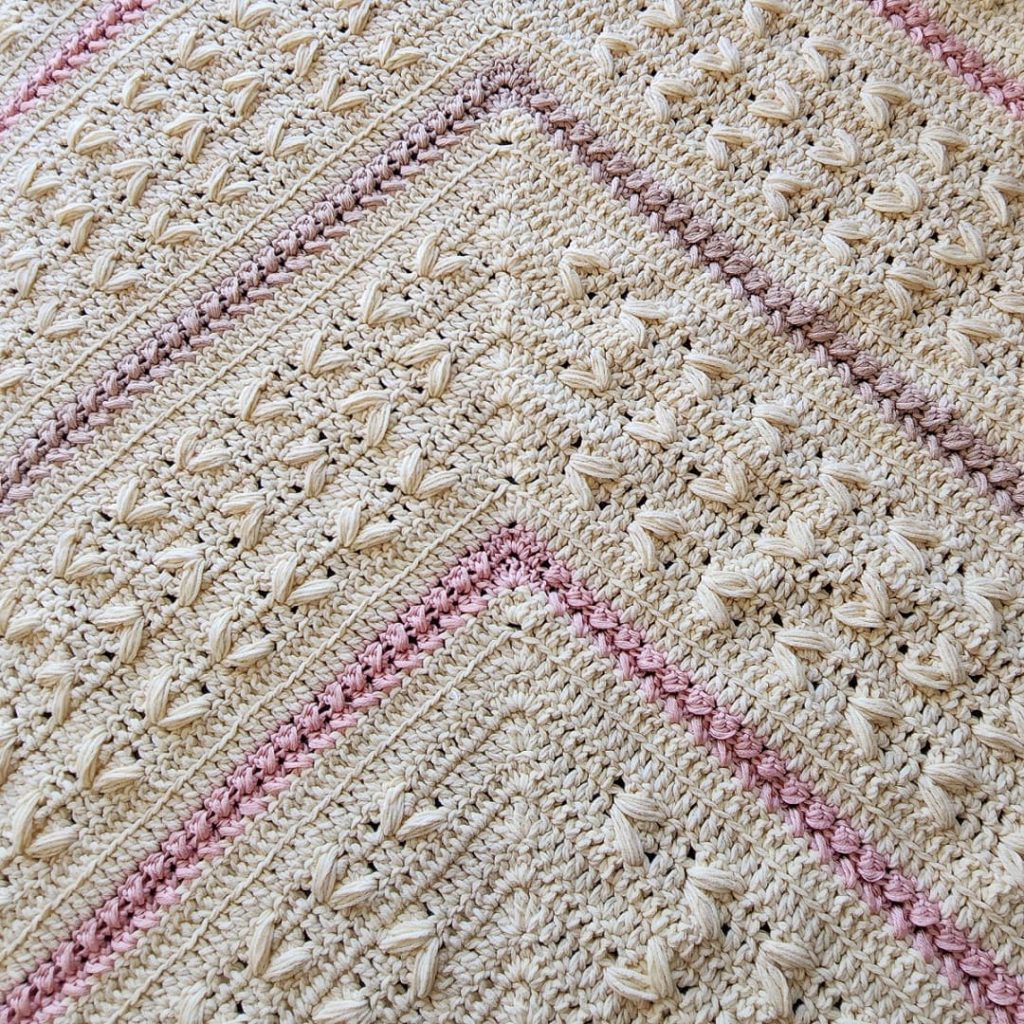
This unique C2C Moss stitch crochet blanket uses the Spiked Bean stitch which is worked 2 rows below. The combination of these 2 stitches creates a different C2C stitch.
I love the Bean stitch more than the Puff stitch, since it creates a rounder stitch.
The Bean stitch rows are separated with 3 rows of Moss stitch, while each time, the Bean are shifted so they will be alternating.
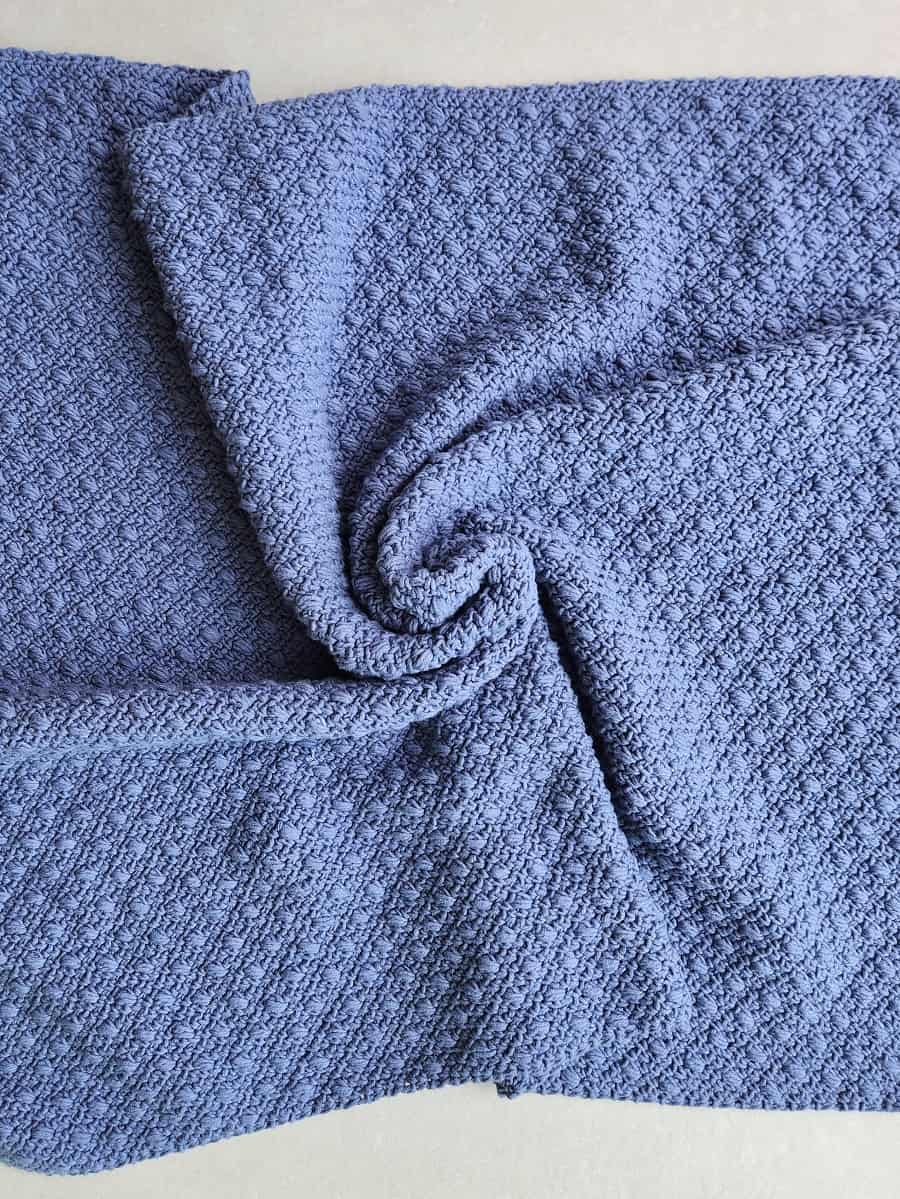
Since this moss stitch blanket is made using the C2C method, it can be worked to any size you want, just keep increasing until you reach the desired length!
Want to save this post for later? Go ahead and PIN it!
What yarn to use for this Corner to Corner moss blanket?
The beautiful thing about working a crochet blanket from corner to corner is that you don’t have to work a swatch to calculate the width of the starting chains.
This gives you the freedom to use different weights and types of yarn for the same pattern. I used YarnArt – Jeans Plus which Worsted (#4) weight yarn consists of 55% cotton and 45% acrylic, but you can also use a DK or Bulky yarn for this blanket pattern, with a suitable hook.

C2C Moss Stitch Crochet Blanket Pattern PDF
You can find the ad-free PDF pattern with the full photo-tutorial at one of my shops below:

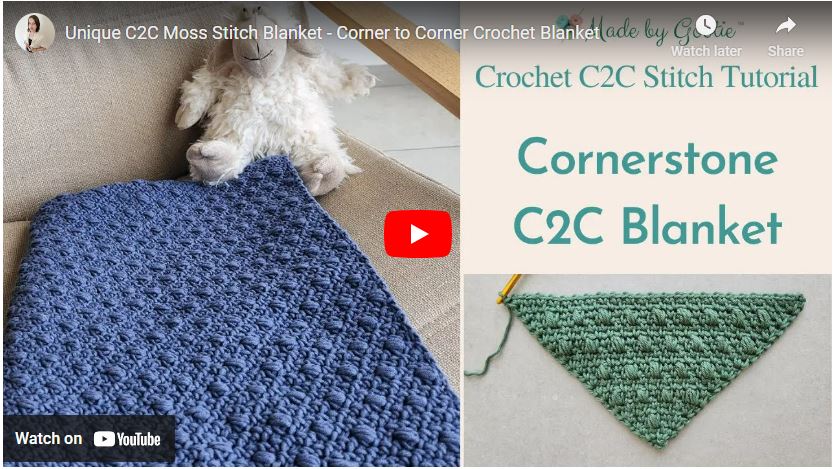
C2C Moss Stitch and Beans Video Tutorial
Cornerstone C2C Crochet Blanket Pattern
* Want to save this post for later? Go ahead and PIN it!
* Add this pattern to your Ravelry queue HERE!
Skill level – Intermediate
Materials
– Crochet hook 5.0 mm / G (I like this hook)
– Worsted (#4) weight yarn (I used YarnArt – Jeans Plus)
Total amount of yarn needed: 1,000gr/1,600m/1,750yds
– 2 Stitch markers (optional)
Gauge – Working Rows 1-13 with 5.0mm / H hook will result in a triangle with 4’’ (10 cm) sides.
Gauge is not crucial for this pattern.
Finished Size – 30×30’’ (76x76cm)
Abbreviations (US)
Bean – Insert your hook into indicated st, yo and pull up a loop. (Yo and insert hook into same st, yo and pull up a loop) x 2 times. Yo and pull yarn through all 6 loops on hook.
ch – chain
PM – place marker
sc – single crochet
sp – space
st – stitch
yo – yarn over
* – Repeats are shown via asterisks. Repeat begins at * and ends at ;
(…) – crochet the instructions within brackets as many times as directed.
[…] – crochet the instructions within brackets into the same indicated stitch/space.
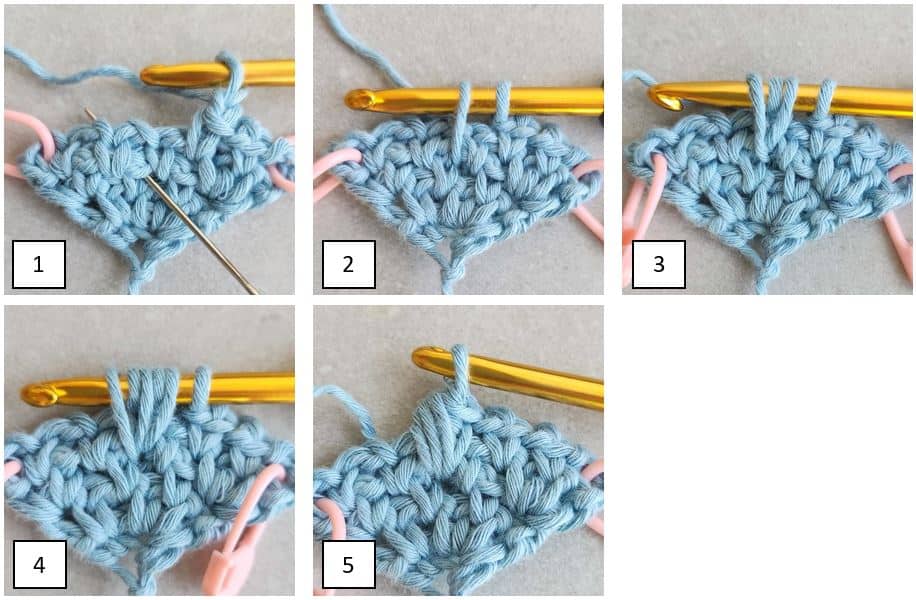
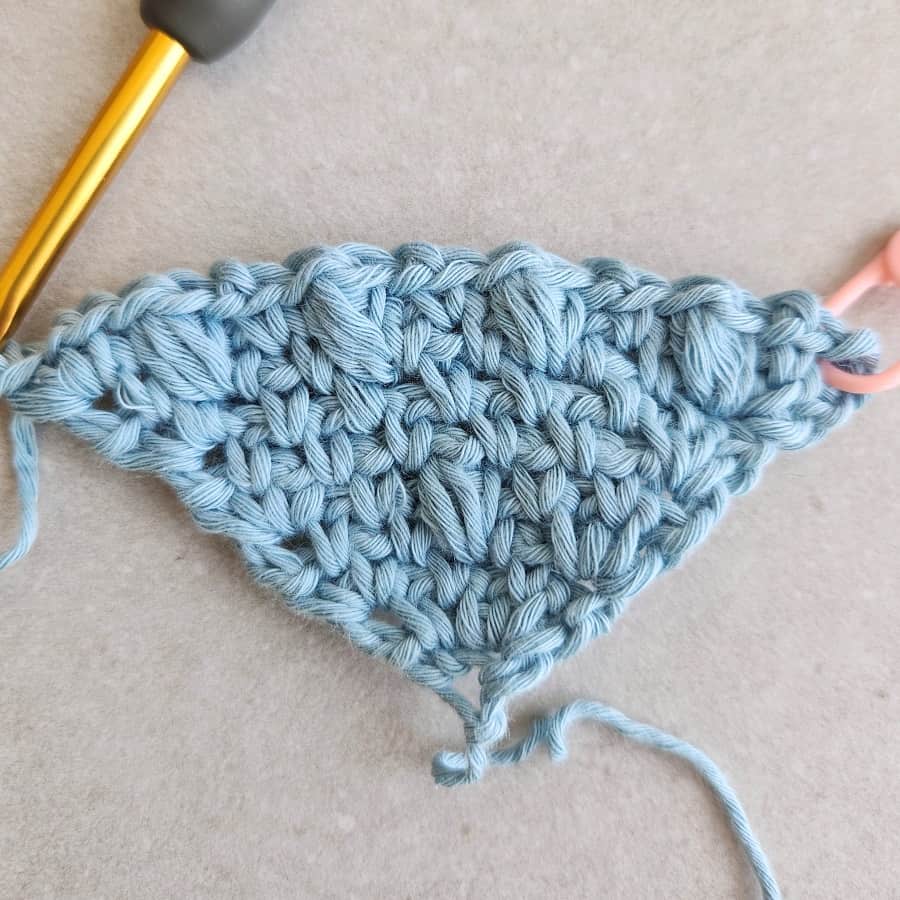
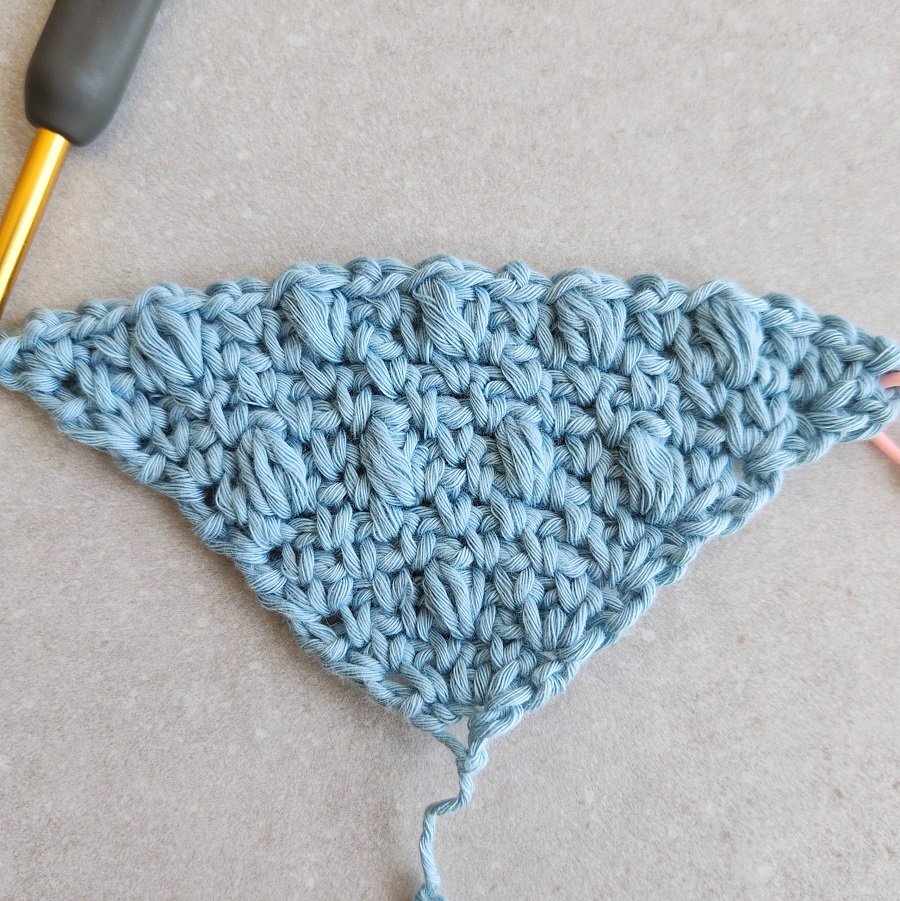
How to crochet the Bean stitch in sc 2 rows below (Spiked Bean)
Insert your hook into the unworked single crochet 2 rows below – under the ch-1 sp (pic 1), yo and pull up a loop – bring your hook to the height of the row (pic 2). (Yo and insert hook into same st, yo and pull up a loop) x 2 times (pics 3&4). Yo and pull yarn through all 6 loops on hook (pic 5).
Notes
- To make it easier to find the ch3 / ch2 spaces at the end of the row, place a stitch marker when you ch3/ch2 at the beginning of each row.
- Every 3 rows, the Beans are shifted.
- The stitch count is shown only at the beginning of the increase section to help you get the hang of the pattern.
- The border is optional, I chose not to add a border, because the pattern forms straight edges and I liked the way it looked.
Want to crochet the blanket as a rectangle?
Get the premium, ad-free, full photo-tutorial, printable PDF version on Ravelry or Etsy!
Unique C2C Moss Stitch Crochet Blanket Pattern
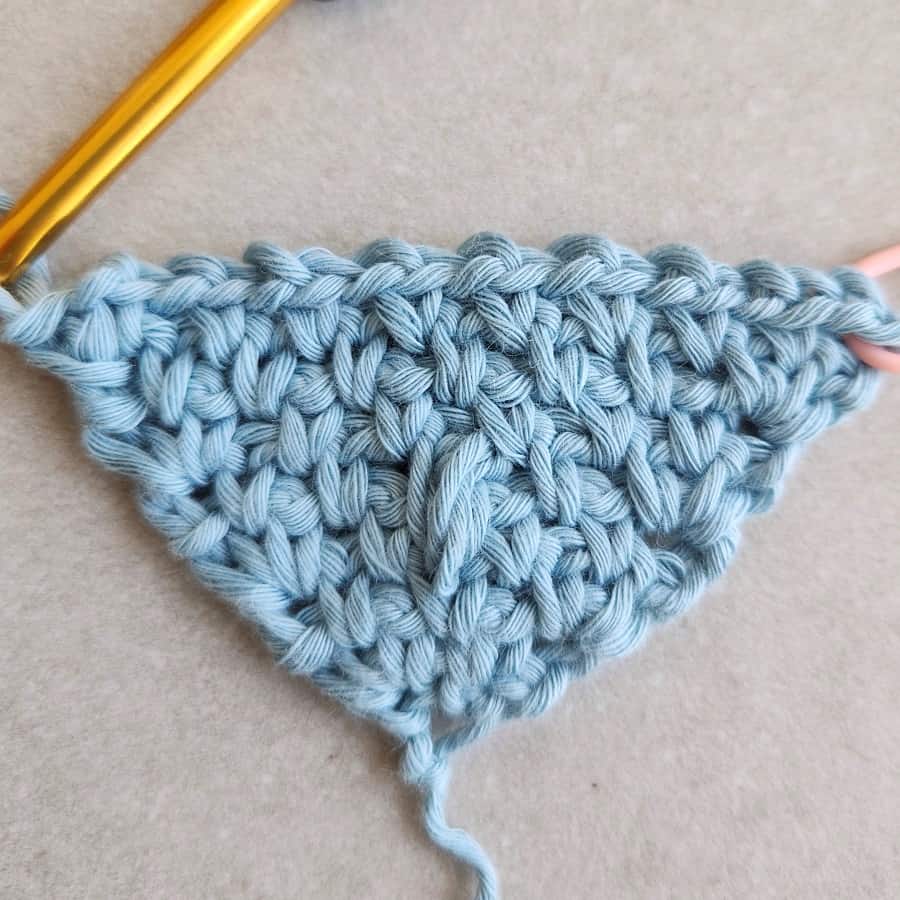
C2C Increase
Ch4,
Row 1 (RS): 1 sc in 4th chain from hook, turn. (1 sc, 1 ch-3 sp)
Row 2 (WS): Ch3-PM, 1 sc in sc, ch 1, [1 sc, ch 1, 1 sc] in ch-3 sp, turn. (3 sc, 2 ch-1 sp, 1 ch-3 sp)
Row 3 (RS): Ch3-PM, skip 1st sc.
* 1 sc in next ch-1 sp, ch 1, skip next st; Repeat from * to ch-3 sp, [1 sc, ch 1, 1 sc] in ch-3 sp, turn. (4 sc, 3 ch-1 sp, 1 ch-3 sp)
Row 4 (WS): Repeat row 3. (5 sc, 4 ch-1 sp, 1 ch-3 sp)
Row 5 (RS): Ch3-PM, skip 1st sc, (1 sc in next ch-1 sp, ch 1, skip next sc) x twice, 1 Bean st in sc 2 rows below, ch 1, skip next sc, 1 sc in next ch-1 sp, ch 1, skip next sc, [1 sc, ch 1, 1 sc] in ch-3 sp, turn. (1 bean, 5 sc, 5 ch-1 sp, 1 ch-3 sp)
Rows 6-8: Repeat row 3 – total of 3 repetitions. (finishing row 8 with 9 sc, 8 ch-1 sp, 1 ch-3 sp)
Row 9 (RS): Ch3-PM, skip 1st sc.
* 1 sc in next ch-1 sp, ch 1, skip next sc, 1 Bean st in sc 2 rows below, ch 1, skip next sc; Repeat from * to ch-3 sp, [1 sc, ch 1, 1 sc] in ch-3 sp, turn. (4 bean, 6 sc, 9 ch-1 sp, 1 ch-3 sp)
Rows 10-12: Repeat row 3 – total of 3 repetitions. (finishing row 12 with 13 sc, 12 ch-1 sp, 1 ch-3 sp)
Row 13 (RS): Ch3-PM, skip 1st sc, (1 sc in next ch-1 sp, ch 1, skip next sc) x twice.
* 1 Bean st in sc 2 rows below, ch 1, skip next sc, 1 sc in next ch-1 sp, ch 1, skip next sc; Repeat from * to ch-3 sp, [1 sc, ch 1, 1 sc] in ch-3 sp, turn. (5 bean, 9 sc, 13 ch-1 sp, 1 ch-3 sp)
Repeat rows 6-13 until you reach 30” (76cm) or your desired length, finishing with row 13.
C2C Decrease
Row 14 (WS): Ch2-PM, skip 1st sc, 1 sc in next ch-1 sp, don’t ch 1, skip next sc, 1 sc in next
ch-1 sp.
* Ch 1, skip next st, 1 sc in next ch-1 sp; Repeat from * to last sc before ch-3 sp, don’t ch 1, skip next sc, 1 sc in ch-3 sp, turn.
Row 15 (RS): Ch2-PM, skip 1st & 2nd sc, 1 sc in next ch-1 sp.
* Ch 1, skip next sc, 1 sc in next ch-1 sp; repeat from * until only 2 sc are left in the row before ch-2 sp, don’t ch1, skip next 2 sc, 1 sc in ch-2 sp, turn.
Row 16 (WS): Ch2-PM, skip 1st & 2nd sc, 1 sc in next ch-1 sp.
* Ch 1, skip next st, 1 sc in next ch-1 sp; Repeat from * to last sc before ch-2 sp, don’t ch 1, skip next sc, 1 sc in ch-2 sp, turn.
Row 17 (RS): Ch2-PM, skip 1st & 2nd sc, 1 sc in next ch-1 sp.
* Ch 1, skip next sc, 1 Bean st in sc 2 rows below, ch 1, skip next sc, 1 sc in next ch-1 sp; Repeat from * to last sc before ch-2 sp, don’t ch 1, skip next sc, 1 sc in ch-2 sp, turn.
Rows 18-20: Repeat row 16 – total of 3 repetitions.
Row 21 (RS): Ch2-PM, skip 1st & 2nd sc, 1 sc in next ch-1 sp, ch 1, skip next sc, 1 sc in next ch-1 sp.
* Ch 1, skip next sc, 1 Bean st in sc 2 rows below, ch 1, skip next sc, 1 sc in next ch-1 sp; Repeat from * until only 2 sc are left in the row before ch-2 sp, ch 1, skip next sc, 1 sc in next ch-1 sp, don’t ch 1, 1 sc in ch-2 sp, turn.
Rows 22-24: Repeat row 16 – total of 3 repetitions.
Repeat rows 17-24 until you have only 3 sc in your row.
Row 25 (RS): Ch 2, skip 1st & 2nd sc, 1 sc in next ch-1 sp, don’t ch 1, skip next sc, 1 sc in next
ch-2 sp.
Row 26 (WS): Ch 1, skip 1st & 2nd sts, 1 sc in next ch-2 sp.
Border (optional)
With the RS facing you, turn the square/rectangle in 90 degrees. Ch1, work 1sc in each side of each sc & ch-2 sp, (you will be working 1sc in each row’s side), continue working until corner, work corner: [1sc, ch1, 1sc] into the corner.
Continue working in the same way on each side of the square/rectangle.
On the last side of the square/rectangle, when you reach the corner work corner: [1sc, ch1, 1sc] into the beginning ch-1, ss to 1st sc.
Fasten off and weave in the ends.
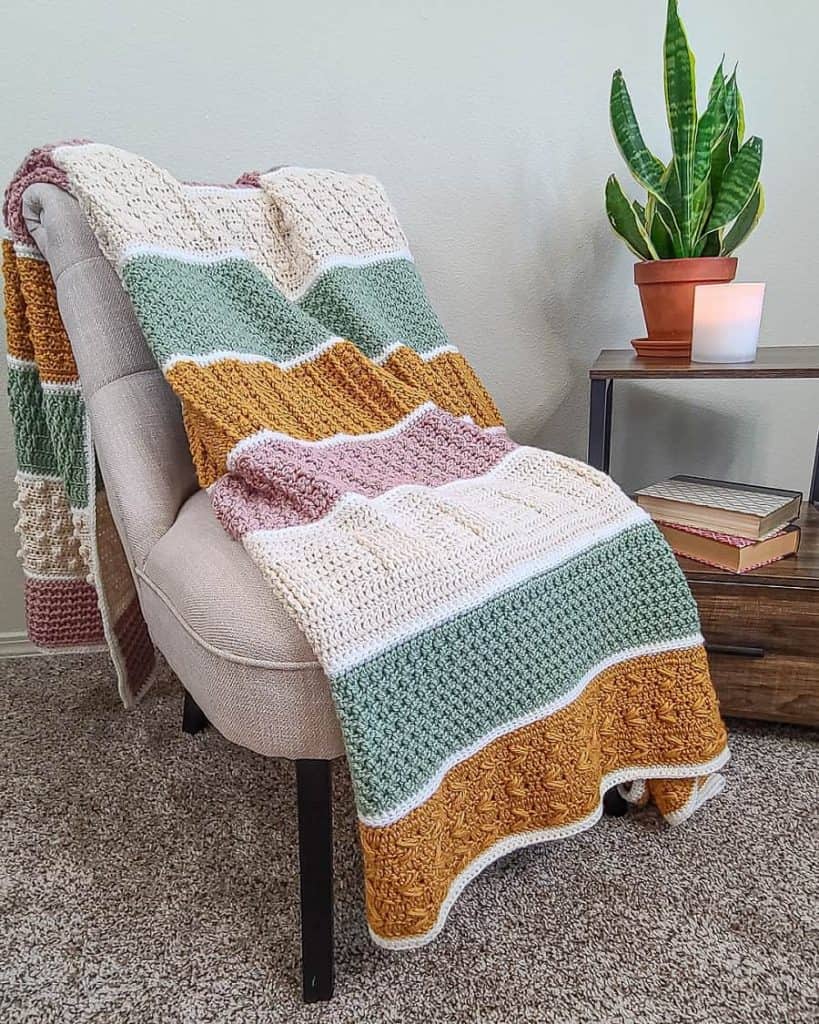
More Free Crochet Blanket Patterns
Did you try this out? Share your project!
– Let me know how it went and leave a comment below.
– Tag me on Instagram @madebygootie
– Join and share in our FB Community
Want to save this post for later? Go ahead and PIN it!
All of the Ravelry, Etsy, and Pinterest links are for the “Spider Stitch Headband”.
Thank you so much for letting me know! All fixed now 🙂
Is there a video for this stitch? I’m more of a visual learner. Thank you!
Hi Dee Dee,
Yes! The video tutorial is linked in the post, right before the pattern. You can also find it here: https://youtu.be/7eS9UIlJ2S8