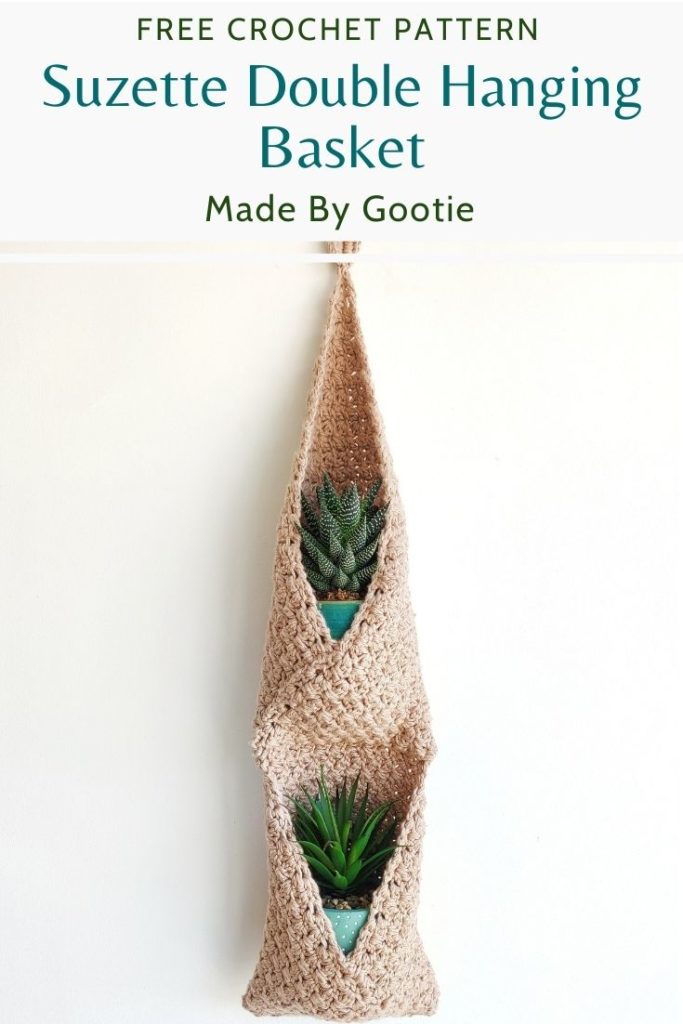
The Suzette Double Hanging Basket Pattern
Last Updated on September 29, 2025
The idea of a crochet plant hanger came to me since I wasn’t able to grow any plants around the house with my cats eating them and digging in them. This idea hit me after I designed the Suzette Hanging Basket (if you are looking for a super easy plant holder pattern, this is also a great option!).
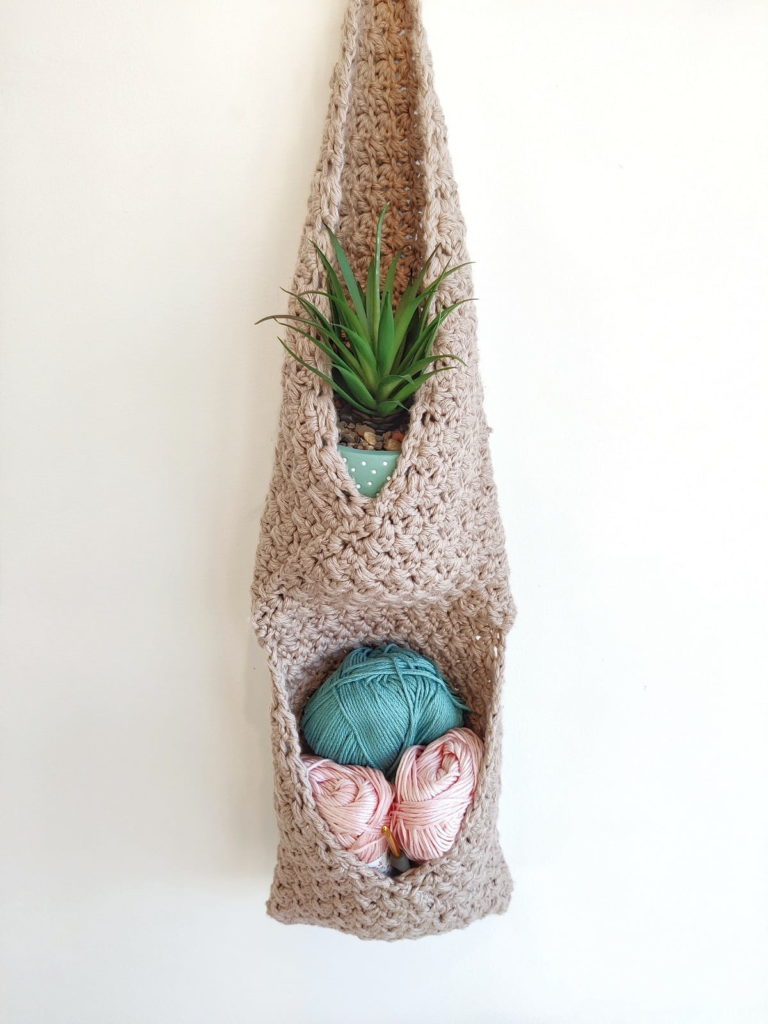
Because this crochet plant hanger pattern is made as a basket plant holder, it can also be used as a crochet hanging basket. You can use it to keep your yarn, or WIP, it will also be very nice as a storage for your bathroom supply.
I think this plant hanger will be a beautiful gift for housewarming and also a great item to sell at a craft market.

Some of the links in this post may include affiliate links. Making a purchase through one of these links pays me a small referral fee at no added cost to you. These small fees add up and help me keep the blog running For more details, view our disclosure and privacy policy.
How to Crochet a Plant Holder?
There are a few different ways to crochet a plant hanger. Some of the plant hangers are made to be hanging from the ceiling, and usually will be constructed from strings similar to a macrame string plant hanger. Another option to make a plant holder is by making a crochet wall plant holder, which will be kind of a basket shape, so the plant is placed inside the basket.
Want to save this post for later? Go ahead and PIN it!
The Yarn I Used For My Crocheted Plant Hanger
This pattern is crocheted with 2 worsted weight yarn strands held together. The best yarn for this kind of project would be cotton. It is a strong fiber and will keep the shape of the basket. You can also use one strand of Chunky yarn instead of 2 Worsted strands held together.
For this basket, I used Knit Picks – Comfy Worsted yarn. This is a Worsted (#4) weight yarn, it is 75% Pima Cotton, 25% Acrylic, it’s strong enough for home decor projects, yet still nice and soft.
More optional yarn for this project would be:
Lily Sugar n’ Cream
Premier Home Cotton Blend
Knit Picks – Dishie
About the Suzette Double Hanging Basket Design and Construction
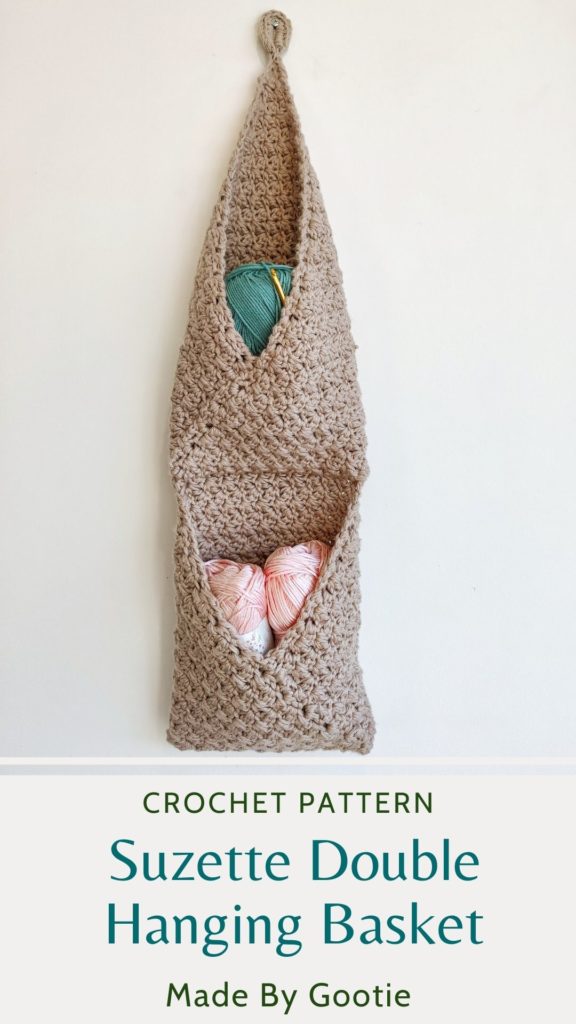
This crochet plant hanger is made from two pocket shaped baskets.
Before working the basket’s body, we are making the loop, and then starting to make the basket.
The basket is made using the C2C Suzette stitch to create 2 connected triangles. The triangles’ corners are then folded and sewn to create the pockets.
Want to learn more about the Corner to Corner method? Check out the Guide to How to Crochet Corner to Corner!
The Suzette stitch creates a dense and beautiful textured thick fabric, which is strong enough to hold the plants and any other items you put inside the baskets.
You can find the ad-free PDF pattern with the full photo-tutorial at one of my shops below:


How to Crochet a Plant Hanger Free Pattern
Materials
– 6.0 / J mm Crochet hook (I love the Etimo and Clover hooks).
– For this pattern I used Knit Picks – Comfy Worsted yarn – Worsted (#4) weight yarn.
* can be substituted with 1 strand of Chunky weight yarn.
More sutiable yarn for this design:
Lily Sugar n’ Cream
Premier Home Cotton Blend
Knit PIcks – Dishie
– Total amount of yarn needed: 300gr / 600m / 656ysd
* The pattern is worked with 2 strands held together!
** The pattern can be worked with 1 strand, using 300gr of chunky yarn
– 1 Stitch marker
– Tapestry needle
Skill level – easy
Gauge (in Suzette stitch) – 12 sts and 10 rows = 4 in/10 cm with 6.0mm / J hook.
Want to take the instructions on the road with you?
Get the ad-free, printable premium PDF version! Get it onRavelryor Etsy!
Abbreviations (US)
ch – chain
st – stitch
ss – slip stitch
sc – single crochet
dc – double crochet
PM – Place marker
Finished size (without the loop) – 21.5×7.5in (55x19cm)
Notes
- The Suzette stitch is [1sc, 1dc] worked back and forth, while crocheting into the single crochet and skipping the double crochet, you can find a photo-tutorial HERE.
- You can find a video tutorial for the C2C Suzette stitch HERE.
- To make it easier to find the ch3 space at the end of the row, place a stitch marker when you ch3 at the beginning of each row.
- The loop is made at the beginning of the pattern.
- The basket is constructed of 2 connected triangles. The triangles’ corners are folded and sewn to create the pockets.
C2C Suzette Stitch Video Tutorial
Use the increase section of this tutorial, to crochet the first triangle.
Suzette Double Hanging Basket Crochet Instructions
Making the Loop
ch9, ss into the 1st ch to create a loop.
ch2-PM, work 16sc around the ch-9 loop, ss to beginning ch-2.
Making the Basket Body
** Use the increase section in this video tutorial of the C2C Suzette stitch, to create the first triangle.
Row 1: ch3-PM, [1sc, 1dc] in same ch-2, turn.
Row 2: ch3-PM, skip 1st dc, [1sc, 1dc] in next sc, [1sc, 1dc] in ch-3, turn.
Prefer a detailed step-by-step photo tutorial?
Get the premium, ad free, printable PDF version onRavelryor Etsy!
Row 3: ch3-PM, skip 1st dc, [1sc, 1dc] in next sc.
Skip next dc, [1sc, 1dc] in next sc, [1sc, 1dc] in ch-3, turn.
Row 4: ch3-PM, skip 1st dc, [1sc, 1dc] in next sc.
* skip next dc, [1sc, 1dc] in next sc; repeat from * to ch-3, [1sc, 1dc] in ch-3, turn.
Repeat row 4 until you have 66 sts + ch-3 (33 Suzette stitches) and continue working row 5.
This is the first triangle and upper pocket of the basket, after the second triangle (lower pocket) is done, you will be folding both corners to form a ‘pocket’.
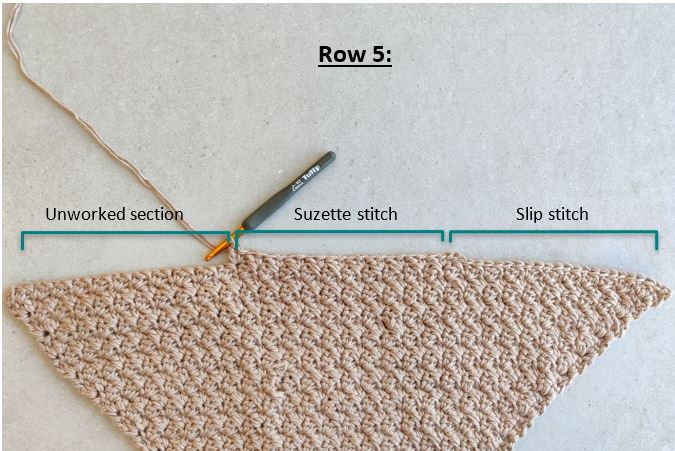
The triangle is now divided into 3 parts, each part has 22 sts (11 Suzette st [1sc, 1dc]).
Row 5: ch1, ss in next 22 sts.
ch3, * skip next dc, [1sc, 1dc] in next sc; repeat from * 10 more times (total of 11 Suzette sts), turn.
* You leave the 3rd section (22 sts) unworked.
Repeat row 4 until you have 66 sts + ch-3 (33 Suzette stitches).
Fasten off.
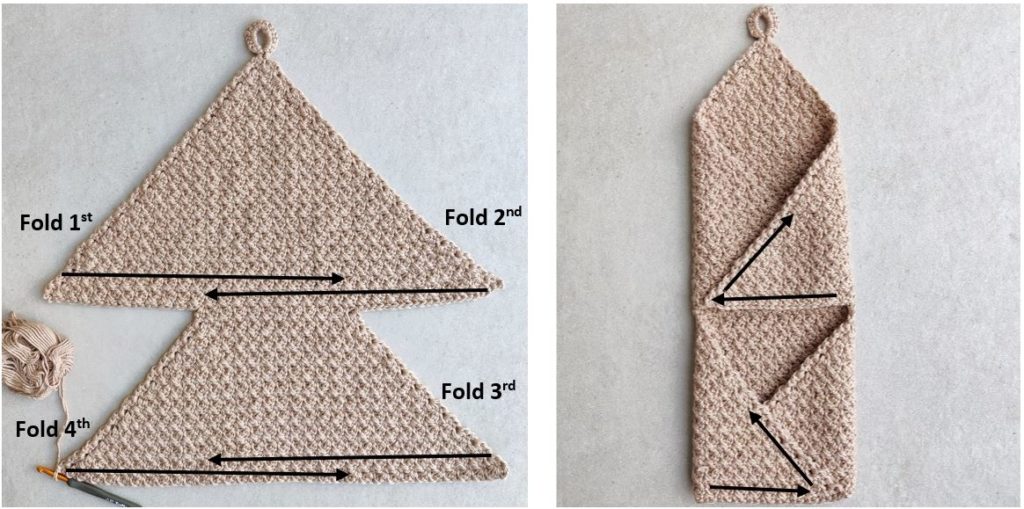
Sewing the Basket Body
Fold both corners of each triangle to the center as shown in the photos.
Using a tapestry needle, whip stitch as directed in the photo to sew up the pockets.
Looking for more crochet inspiration? Check out these other free patterns on the blog:
Did you try this out? Share your project!
– Let me know how it went and leave a comment below
– Tag me @madebygootie
– Join and share in our FB Community
Want to save this post for later? Go ahead and PIN it!
Brilliant idea! I’m hoping these will work for orchids as my best friend has just started her collection – I think they’ll be ideal.
Thanks for the pattern and clear directions.
Thank you, Carol!
I’m intrigued to see this with orchids! Please share the end result!
300gr of chunky yarn is a big underestimation, I bought 500gr of chunky yarn and I can barely finish one triangle instead of two. Just saying for future readers, I am still happy with my single plant hanger!
Hi Mati,
Thank you for sharing your experience, and I’m sorry the amount of yarn specified wasn’t enough in your case. And I’m glad you are happy with the plant hanger that came out 🙂
The pattern was tested by several people using both chunky and Worsted weight yarns, and that’s how the amount of estimated yarn was decided.
I will add the yardage as well for the note about the chunky yarn, to help find a better chunky yarn for the project.
I could not find the free download.
Please help.
Thank you
Hi Donna, the free download was available only for 24 hours.
Hello Agat:
For the single Suzette plant hanger, you stated I could use a Chunky yarn-one strand held.
What Chunky yarns do you recommend? I saw on Knit picks they sell Comfy Aran/Heavy Worsted yarn. Not sure if that is chunky enough.
Thank you,
Lisa
Hi Lisa,
I haven’t worked with many Chunky yarns, so I don’t have a good recommendation for you.
I looked at the Comfy Aran yarn and it doesn’t seem to be thick enough to crochet as one stranded for this project. I would go with the Comfy Worsted and crochet with 2 strands, if that’s goof for you 🙂