Cornerstone Pillow Case Crochet Pattern
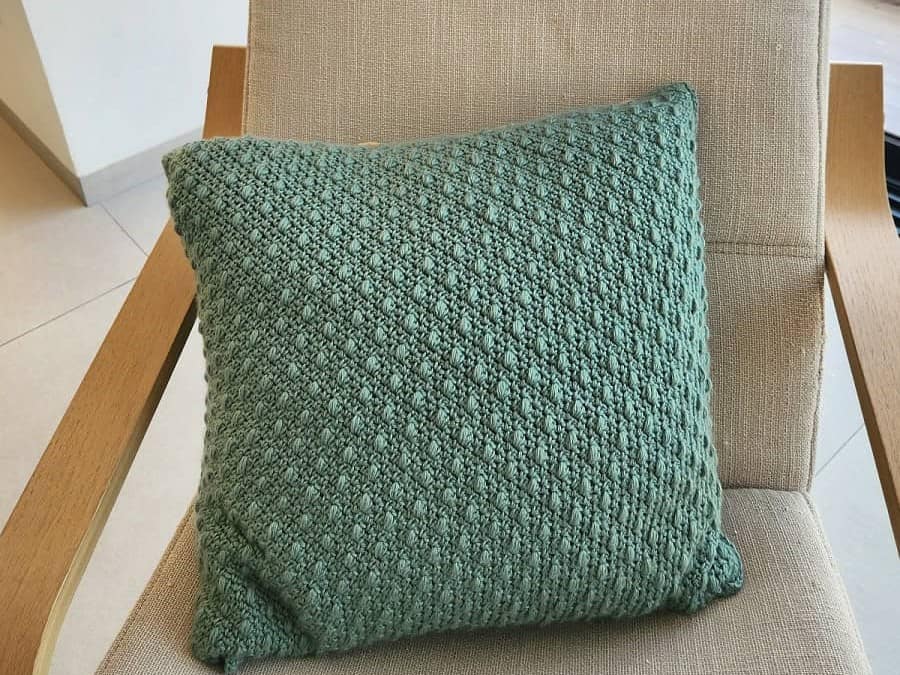
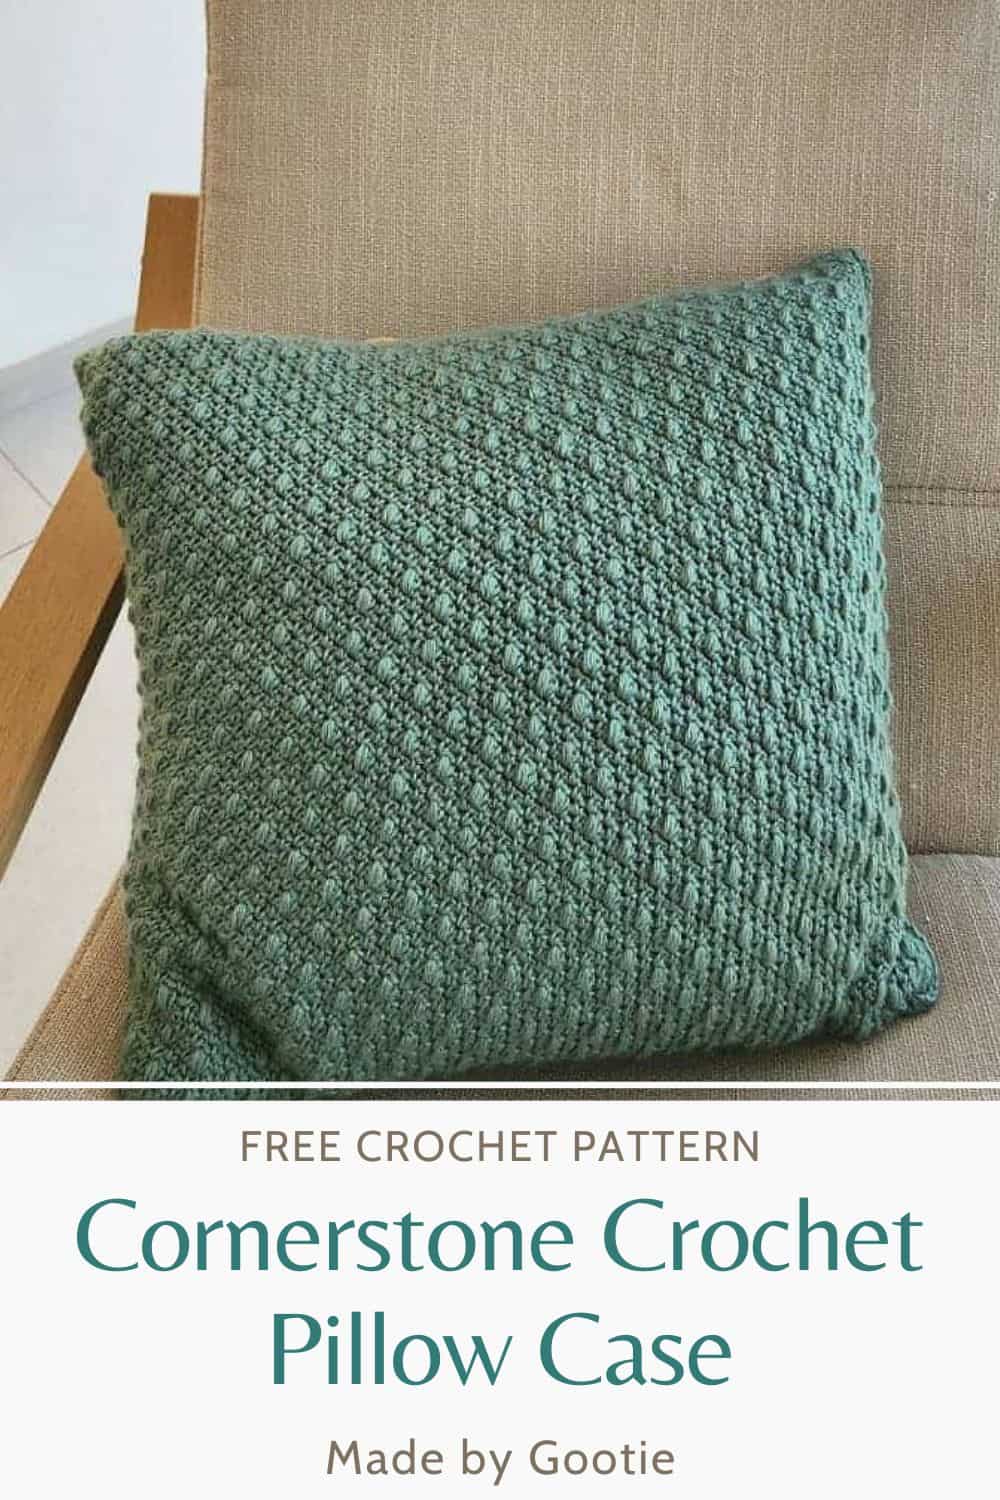
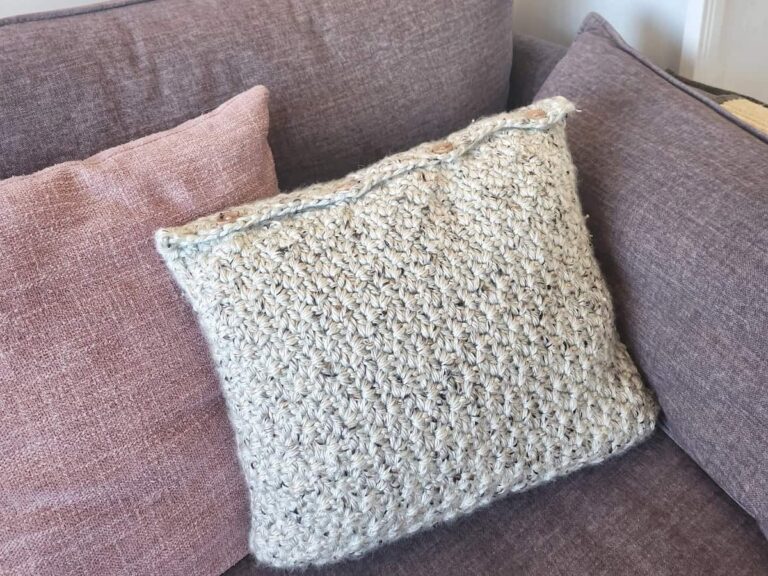
The Cornerstone pillow case crochet pattern is a beautiful textured crochet pillow.
This pretty crochet pillow will add coziness to your living room. It’s a functional pattern, it can be made in different sizes by repeating the pattern and you can easily remove the pillow cover if needed.
The cornerstone crochet cushion cover tutorial has step-by-step instructions and an easy-to-follow photo tutorial and video tutorial.
** Some of the links in this post may include affiliate links. Making a purchase through one of these links pays me a small referral fee at no added cost to you. These small fees add up and help me keep the blog running. View our disclosure and privacy policy for more information.
I wanted to make this crochet pillow cover as functional as I could and create a beautiful textured crochet pillow that will be a lovely addition to your home decor.
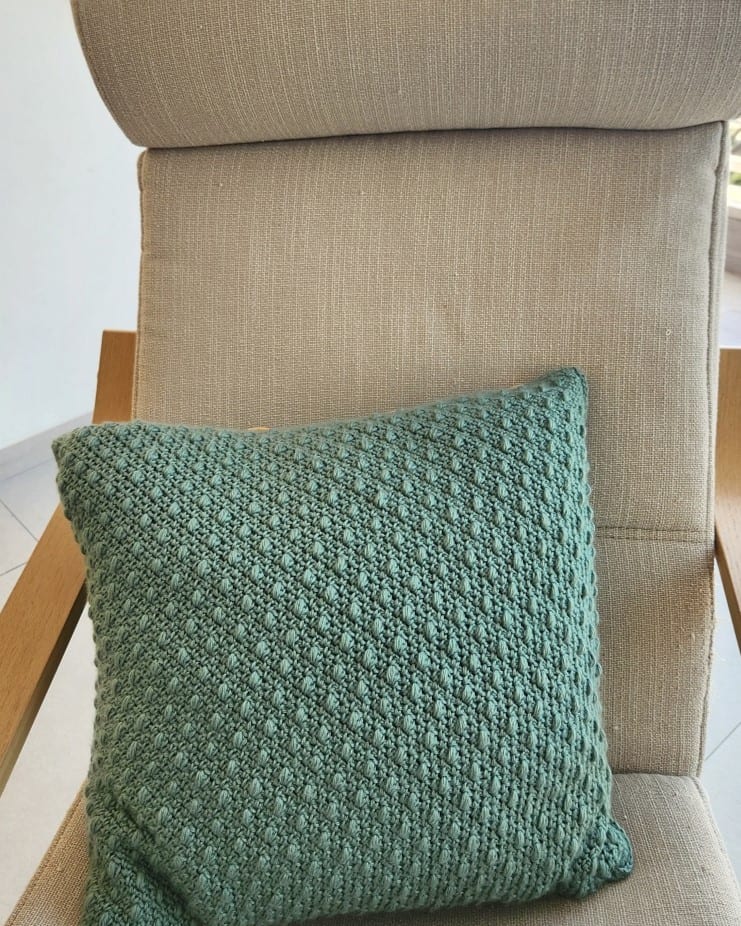
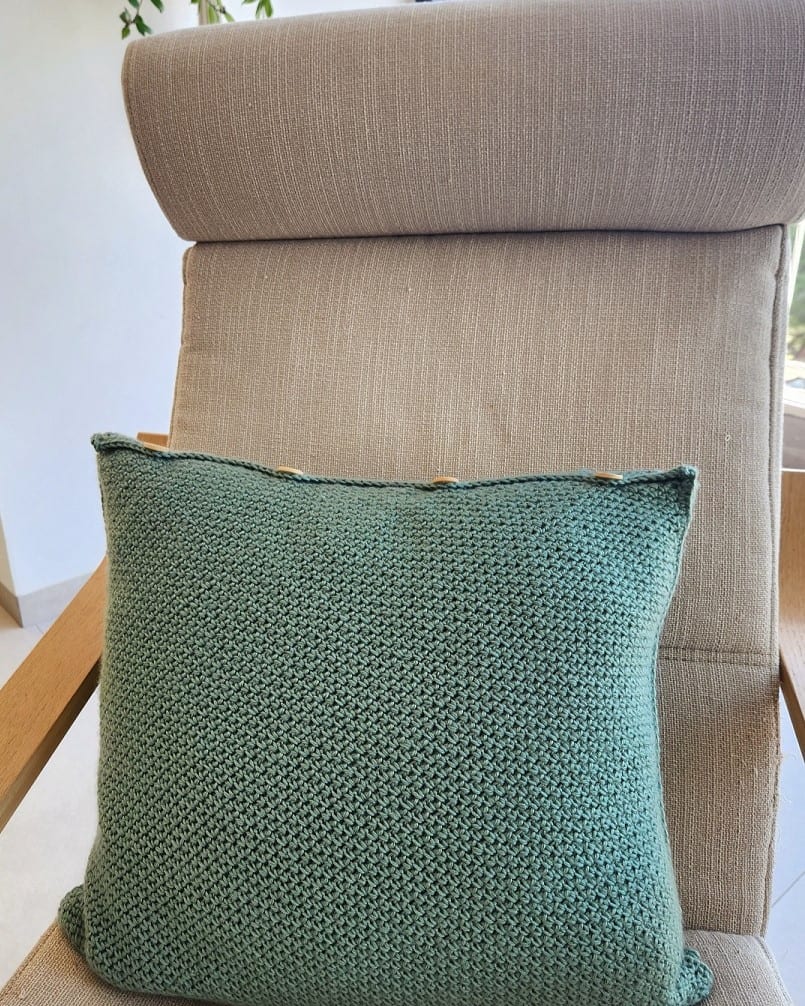
The crochet pillowcase is constructed of 2 panels that are joined together. The front panel is made using my C2C Cornerstone pattern, and the back panel is made using the Moss stitch which is also worked from corner to corner.
We then add buttonhole rows to the front panel, so we can remove the pillow from the pillow cover if needed!
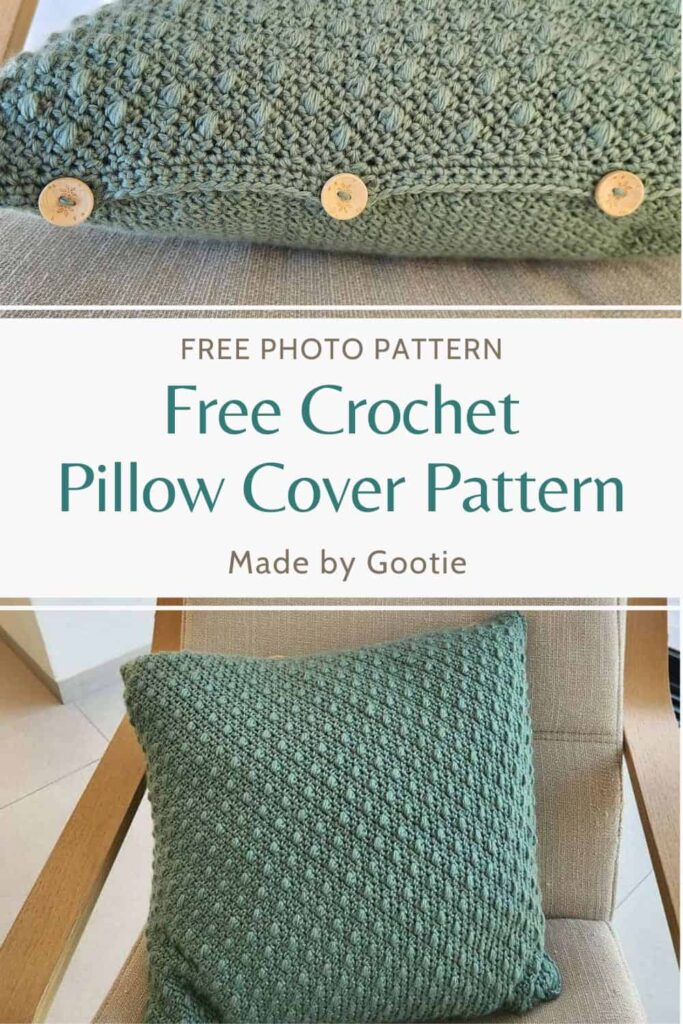
Want to save this post for later? Go ahead and PIN it!
The Yarn I Used for My Cornerstone Crochet Pillow
For my crochet pillow case, I used Mighty Stitch yarn, which is a premium super soft acrylic Worsted (#4) weight yarn. This yarn comes in many beautiful colors and shows the texture of the pillow gorgeously!
You can see the front panel with the cute Beans in the Cornerstone pattern on the left photo, and the back panel with the elegant Moss stitch on the right side.
When you are making this crochet cushion cover pattern, you can use any Worsted (#4) weight yarn you have on hand. I used what I had in my stash, but a cotton yarn would also be perfect for this kind of project.
How to Crochet a Removable Pillow Cover
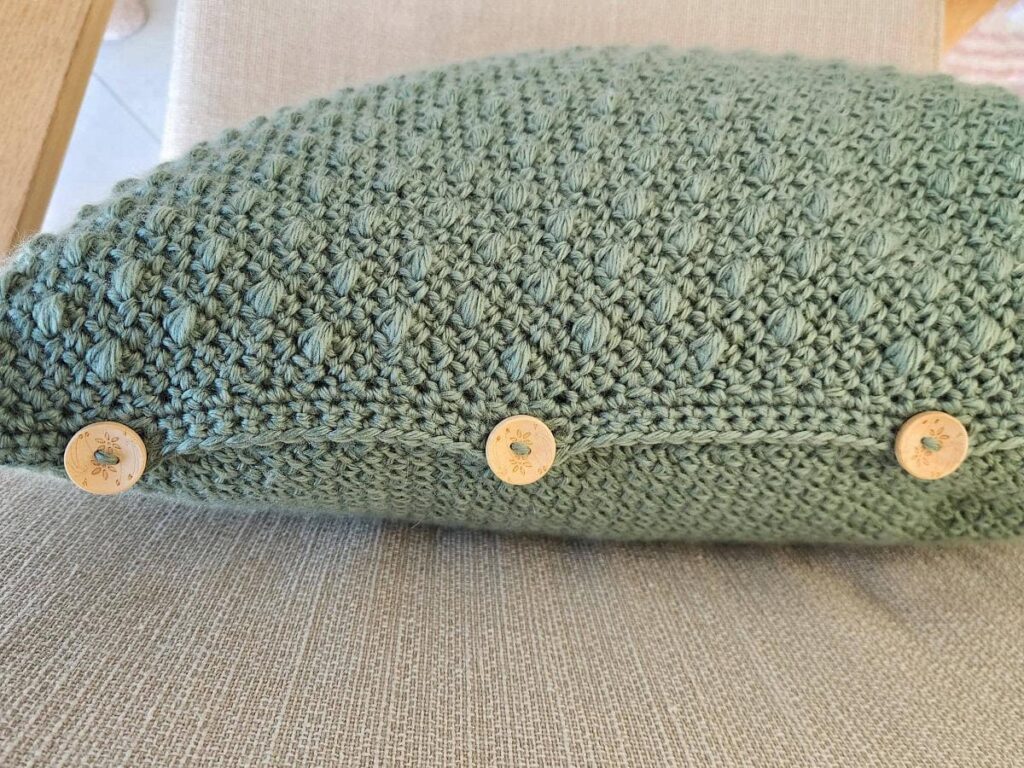
To make our crochet pillow cover removable, when we finish crocheting the front panel, we add a few rows to make buttonholes on one side of the panel. The holes in the pattern are suitable for 0.8″ (2 cm) size buttons.
Then we join the 2 panels together, we will sew the buttons at the top of the back panel. I used these stunning floral buttons for my pillow.
I bought them on my trip to Japan a few years ago, and found some very similar buttons on Etsy, if you want to use the same buttons!
Materials
– Crochet hook 4.5 mm (I love the Etimo Hooks).
– Worsted (#4) weight yarn – I used Knit Picks – Mighty Stitch
Total amount of yarn needed:
390gr/742m/811yds
Front panel – 220
Back panel – 170
– 4 – 0.8” (2 cm) buttons
– 18×18” (46×46 cm) pillow
– Tapestry needle
– 2 stitch markers (optional)
Finished Size – 18×18″ (46×46 cm)
Gauge (in Front Panel pattern) –Working Rows 1-14 with a 4.5 mm hook will result in a triangle with 4’’ (10 cm) sides.
Abbreviations (US)
Bean – Insert your hook into indicated st, yo and pull up a loop. (Yo and insert hook into same st, yo and pull up a loop) x 2 times. Yo and pull yarn through all 6 loops on hook.
ch – chain
PM – place marker
rev. sc – work a single crochet into the st to the right of your hook, with the RS facing you.
sc – single crochet
sp – space
st – stitch
yo – yarn over
* – Repeats are shown via asterisks. Repeat begins at * and ends at ;
(…) – crochet the instructions within brackets as many times as directed.
[…] – crochet the instructions within brackets into the same indicated.
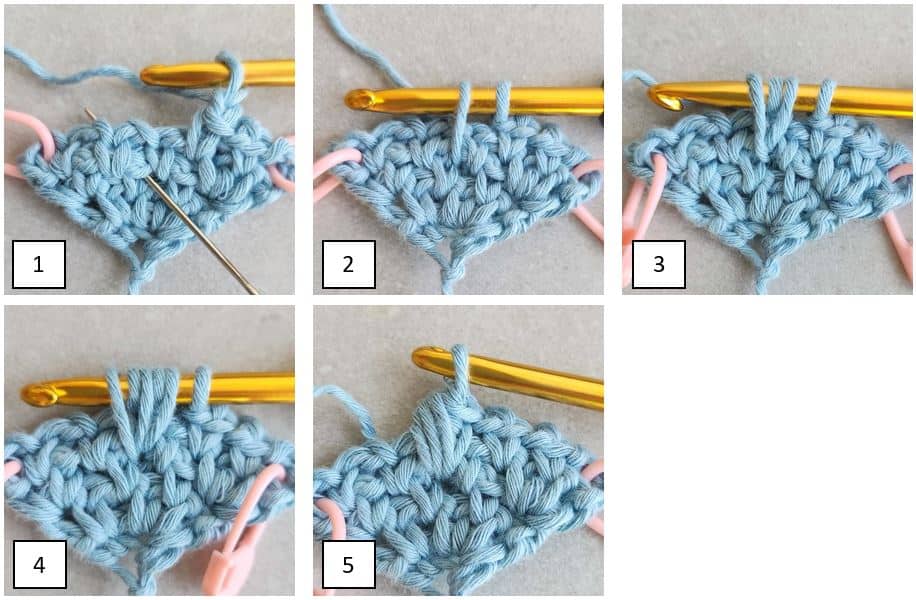
How to crochet the Bean stitch in sc 2 rows below (Spiked Bean)
Insert your hook into the unworked single crochet 2 rows below – under the ch-1 sp (pic 1), yo and pull up a loop – bring your hook to the height of the row (pic 2). (Yo and insert hook into same st, yo and pull up a loop) x 2 times (pics 3&4). Yo and pull yarn through all 6 loops on hook (pic 5).
Notes
- To make it easier to find the ch3 / ch2 spaces at the end of the row, place a stitch marker when you ch3/ch2 at the beginning of each row.
- In the front panel – every 3 rows, the Beans are shifted.
- You can adjust the size of the pillow cover by following the pattern repetitions. Make sure to check your gauge before.
Cornerstone Crochet Pillow Cover Instructions
Front Panel – C2C Cornerstone – You can find a video tutorial for this C2C stitch HERE.
C2C Increase
Ch 4,
Row 1 (RS): 1 sc in 4th chain from hook, turn. (1 sc, 1 ch-3 sp)
Row 2 (WS): Ch3-PM, 1 sc in sc, ch 1, [1 sc, ch 1, 1 sc] in ch-3 sp, turn. (3 sc, 2 ch-1 sp, 1 ch-3 sp)
Row 3 (RS): Ch3-PM, skip 1st sc.
* 1 sc in next ch-1 sp, ch 1, skip next st; Repeat from * to ch-3 sp, [1 sc, ch 1, 1 sc] in ch-3 sp, turn. (4 sc, 3 ch-1 sp, 1 ch-3 sp)
Row 4 (WS): Repeat row 3. (5 sc, 4 ch-1 sp, 1 ch-3 sp)
Row 5 (RS): Ch3-PM, skip 1st sc, (1 sc in next ch-1 sp, ch 1, skip next sc) x twice, 1 Bean st in sc 2 rows below, ch 1, skip next sc, 1 sc in next ch-1 sp, ch 1, skip next sc, [1 sc, ch 1, 1 sc] in ch-3 sp, turn. (1 bean, 5 sc, 5 ch-1 sp, 1 ch-3 sp)
Rows 6-8: Repeat row 3 – total of 3 repetitions. (finishing row 8 with 9 sc, 8 ch-1 sp, 1 ch-3 sp)
Row 9 (RS): Ch3-PM, skip 1st sc.
* 1 sc in next ch-1 sp, ch 1, skip next sc, 1 Bean st in sc 2 rows below, ch 1, skip next sc; Repeat from * to ch-3 sp, [1 sc, ch 1, 1 sc] in ch-3 sp, turn. (4 bean, 6 sc, 9 ch-1 sp, 1 ch-3 sp)

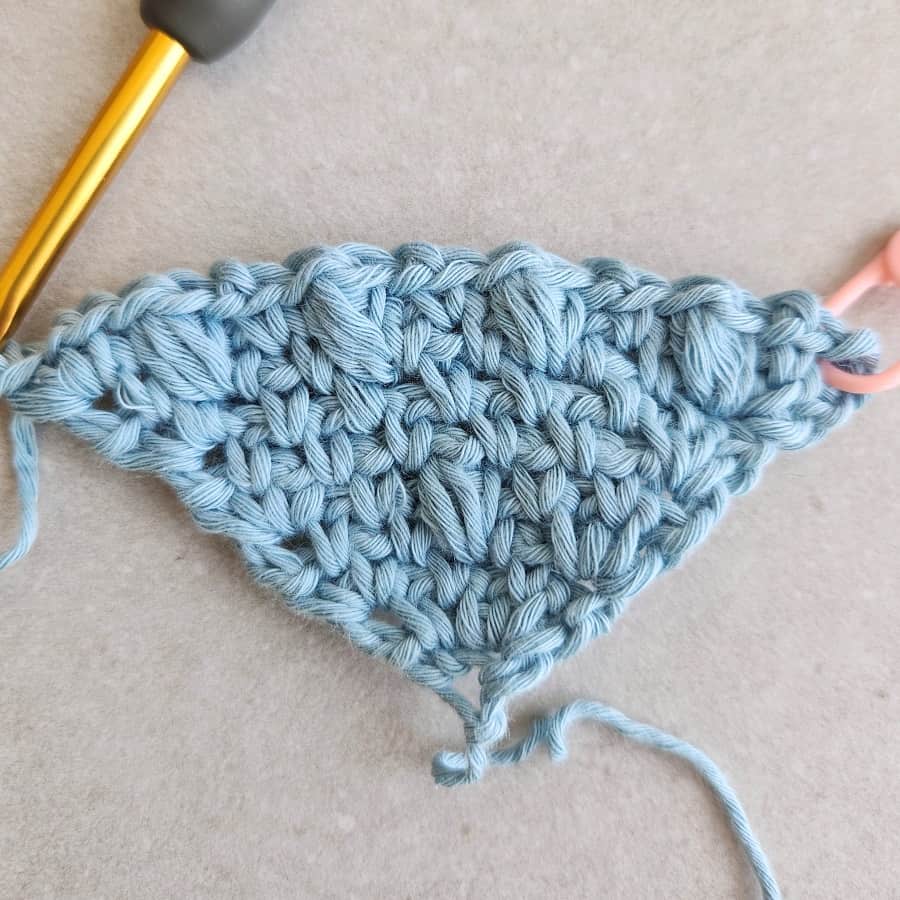
Rows 10-12: Repeat row 3 – total of 3 repetitions. (finishing row 12 with 13 sc, 12 ch-1 sp, 1 ch-3 sp)
Row 13 (RS): Ch3-PM, skip 1st sc, (1 sc in next ch-1 sp, ch 1, skip next sc) x twice.
* 1 Bean st in sc 2 rows below, ch 1, skip next sc, 1 sc in next ch-1 sp, ch 1, skip next sc; Repeat from * to ch-3 sp, [1 sc, ch 1, 1 sc] in ch-3 sp, turn. (5 bean, 9 sc, 13 ch-1 sp, 1 ch-3 sp)
Rows 14-69: Repeat rows 6-13 (total of 7 repetitions – finishing row 69 with 33 bean, 37 sc, 69 ch-1 sp, 1 ch-3 sp).
** At this point the side of your triangle should measure approx. 18” (46 cm).
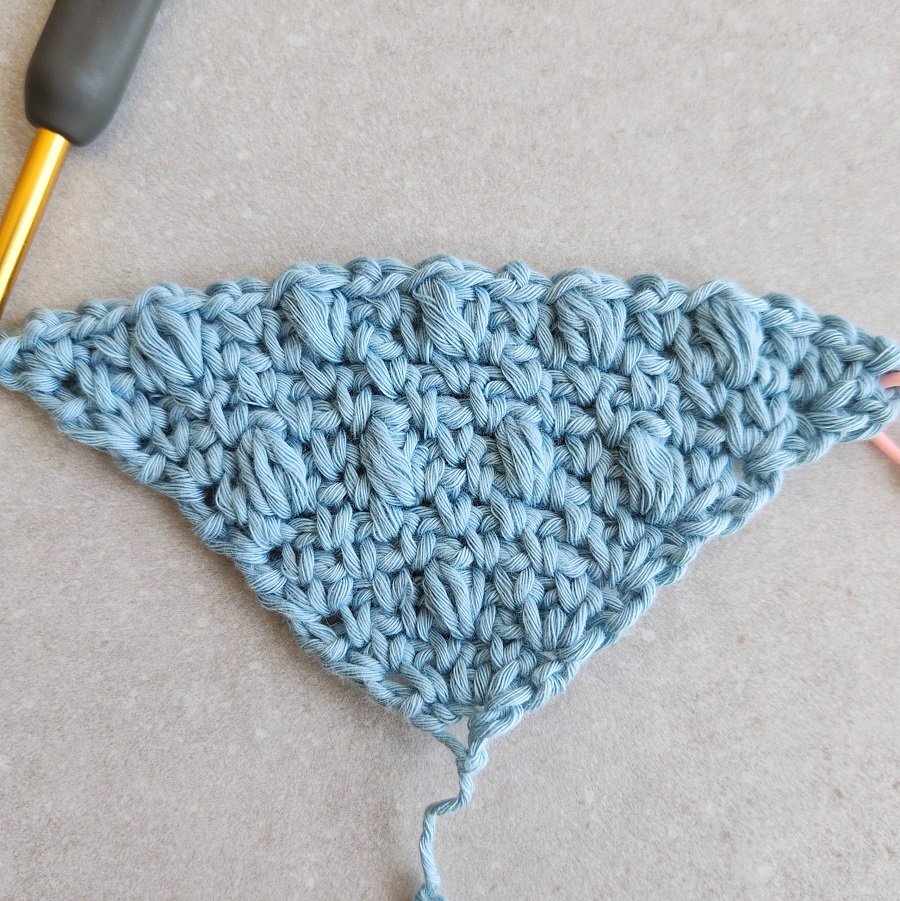
Decrease
Row 70 (WS): Ch2-PM, skip 1st sc, 1 sc in next ch-1 sp, don’t ch 1, skip next sc, 1 sc in next
ch-1 sp.
* Ch 1, skip next st, 1 sc in next ch-1 sp; Repeat from * to last sc before ch-3 sp, don’t ch 1, skip next sc, 1 sc in ch-3 sp, turn. (69 sc, 69 ch-1 sp, 1 ch-2 sp)
Row 71 (RS): Ch2-PM, skip 1st & 2nd sc, 1 sc in next ch-1 sp.
* Ch 1, skip next sc, 1 sc in next ch-1 sp; repeat from * until only 2 sc are left in the row before ch-2 sp, don’t ch1, skip next 2 sc, 1 sc in ch-2 sp, turn. (68 sc, 66 ch-1 sp, 1 ch-2 sp)
Row 72 (WS): Ch2-PM, skip 1st & 2nd sc, 1 sc in next ch-1 sp.
* Ch 1, skip next st, 1 sc in next ch-1 sp; Repeat from * to last sc before ch-2 sp, don’t ch 1, skip next sc, 1 sc in ch-2 sp, turn. (67 sc, 65 ch-1 sp, 1 ch-2 sp)
Row 73 (RS): Ch2-PM, skip 1st & 2nd sc, 1 sc in next ch-1 sp.
* Ch 1, skip next sc, 1 Bean st in sc 2 rows below, ch 1, skip next sc, 1 sc in next ch-1 sp; Repeat from * to last sc before ch-2 sp, don’t ch 1, skip next sc, 1 sc in ch-2 sp, turn.
(32 bean, 34 sc, 64 ch-1 sp, 1 ch-2 sp)
Rows 74-76: Repeat row 72 – total of 3 repetitions. (finishing row 76 with 63 sc, 61 ch-1 sp, 1 ch-2 sp)
Row 77 (RS): Ch2-PM, skip 1st & 2nd sc, 1 sc in next ch-1 sp, ch 1, skip next sc, 1 sc in next
ch-1 sp.
* Ch 1, skip next sc, 1 Bean st in sc 2 rows below, ch 1, skip next sc, 1 sc in next ch-1 sp; Repeat from * until only 2 sc are left in the row before ch-2 sp, ch 1, skip next sc, 1 sc in next ch-1 sp, don’t ch 1, 1 sc in ch-2 sp, turn. (29 bean, 33 sc, 60 ch-1 sp, 1 ch-2 sp)
Rows 78-80: Repeat row 72 – total of 3 repetitions. (finishing row 80 with 59 sc, 57 ch-1 sp, 1 ch-2 sp)
Repeat rows 73-80 until you have only 3 sc in your row.
Row 81 (RS): Ch 2, skip 1st & 2nd sc, 1 sc in next ch-1 sp, don’t ch 1, skip next sc, 1 sc in next
ch-2 sp. (2 sc, 1 ch-2 sp)
Row 82 (WS): Ch 1, skip 1st & 2nd sts, 1 sc in next ch-2 sp, turn. (1 sc, 1 ch-1 sp)
Making buttonholes
With the RS facing you, turn the square in 90 degrees.
Row 1 (RS): Ch 1, work 1 sc in the side of each sc & ch-2 sp, continue working until corner, turn. (69 sc)
Row 2 (WS): Ch 1, 1 sc in next 8 sc.
* Ch 3, skip next 2 sc, 1 sc in next 15 sc; Repeat from * 2 more times. Ch 3, skip next 2 sc, 1 sc in next 8 sc, turn. (61 sc, 4 ch-3 sp)
Row 3 (RS): Ch 1, 1 sc in next 8 sc.
* 3 sc in next ch-3 sp, 1 sc in next 15 sc; Repeat from * 2 more times. 3 sc in next ch-3 sp,
1 sc in next 8 sc, don’t turn. (61 sc, 4 ch-3 sp)
Ch 2 and turn your work in 90 degrees to crochet on the side of the next 3 rows: 1 sc in the side of rows 1-3.
Don’t fasten you will continue to assemble the 2 panels from here after making the back panel.
Back Panel- C2C Moss Stitch – You can find a video tutorial for this C2C stitch HERE.
C2C Increase
Ch 4
Row 1: 1 sc in 4th chain from hook, turn. (1 sc, 1 ch-3 sp)
Row 2: Ch 3-PM, [1 sc, ch 1, 1 sc] in ch-3 sp, turn. (3 sc, 2 ch-1 sp, 1 ch-3 sp)
Row 3: Ch 3-PM, * skip next sc, 1 sc in next ch-1 sp, ch 1; repeat from * to last sc.
[1 sc, ch 1, 1 sc] in ch-3 sp, turn. (4 sc, 3 ch-1 sp, 1 ch-3 sp)
Rows 4-69: Repeat row 3 (finishing row 69 with 70 sc, 69 ch-1 sp, 1 ch-3 sp).
** At this point the side of your triangle should measure approx. 18” (46 cm).
C2C Decrease
Row 4: Ch2-PM, skip 1st sc, 1 sc in next ch-1 sp, don’t ch 1, skip next sc, 1 sc in next
ch-1 sp.
* Ch 1, skip next st, 1 sc in next ch-1 sp; Repeat from * to last sc before ch-3 sp, don’t ch 1, skip next sc, 1 sc in ch-3 sp, turn.
Row 5: Ch2-PM, skip 1st & 2nd sc, 1 sc in next ch-1 sp.
* Ch 1, skip next sc, 1 sc in next ch-1 sp; repeat from * until only 2 sc are left in the row before ch-2 sp, don’t ch1, skip next 2 sc, 1 sc in ch-2 sp, turn.
Row 6: Ch2-PM, skip 1st & 2nd sc, 1 sc in next ch-1 sp.
* Ch 1, skip next st, 1 sc in next ch-1 sp; Repeat from * to last sc before ch-2 sp, don’t ch 1, skip next sc, 1 sc in ch-2 sp, turn.
Repeat row 6 until you have only 3 sc in your row.
Row 7: Ch 2, skip 1st & 2nd sc, 1 sc in next ch-1 sp, don’t ch 1, skip next sc, 1 sc in next ch-2 sp. (2 sc, 1 ch-2 sp)
Row 8: Ch 1, skip 1st & 2nd sts, 1 sc in next ch-2 sp. (1 sc, 1 ch-1 sp)
Attaching the Panels
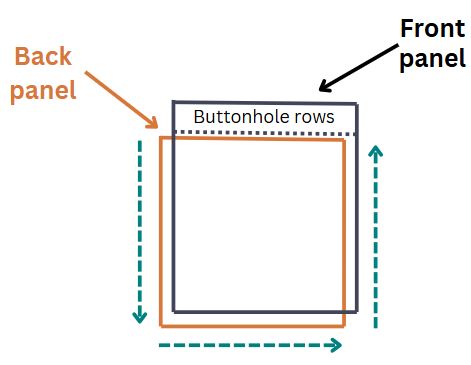
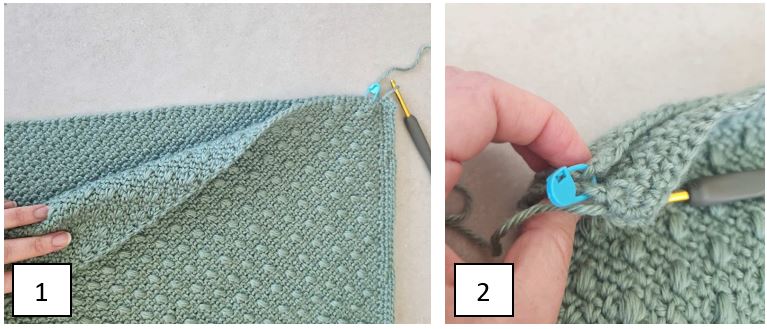
With the yarn you worked in the front panel, place the front and back panels together with the right sides facing out (pic 1), secure the corners with stitch markers (pic 2 – place the panels on top of each other with the buttonhole part at the top not overlapping the back panel).
With the front panel facing you, work into the 2 panels 1 sc in each side of each sc & ch-2 sp, (you will be working 1sc in each row’s side), continue working until corner, work corner:
[1 sc, ch 2, 1 sc] into the corner.
Continue working in the same way in the next 2 sides.
On the third side of the pillow cover, when you reach the 3 buttonholes rows, work 1 sc in each side of the row, ch 1 and slip stitch to the first sc of row 3. Fasten off and weave in the ends.
Continue to sew the buttons.
With the back panel facing you, fold the front panel down over the top of the back panel and with stitch markers mark the row where each button will be placed.
Using a yarn needle and green yarn, sew each button in place.
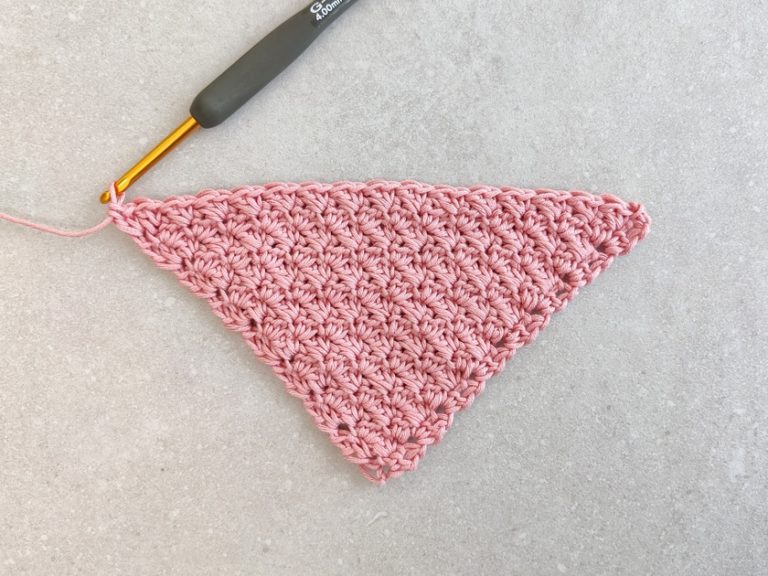
Looking for More Home Decor Crochet Patterns?
Did you try this out? Share your project!
– Let me know how it went and leave a comment below.
– Tag me on Instagram @madebygootie
– Join and share in our FB Community
Want to save this post for later? Go ahead and PIN it!

Chag Sameach Agat.
And a hope for Peace in 2025!
Toronto, Canada
Chag Sameach, Sue 🙂
We all pray for peace in the upcoming year!
Happy Hanukkah !
Thank you, Barbara!
Happy holidays 🙂
Thank you for this beautiful pattern and for the spirit of Christmas
Happy holidays