Iris Granny Square Join As You Go Tutorial
Last Updated on January 3, 2026
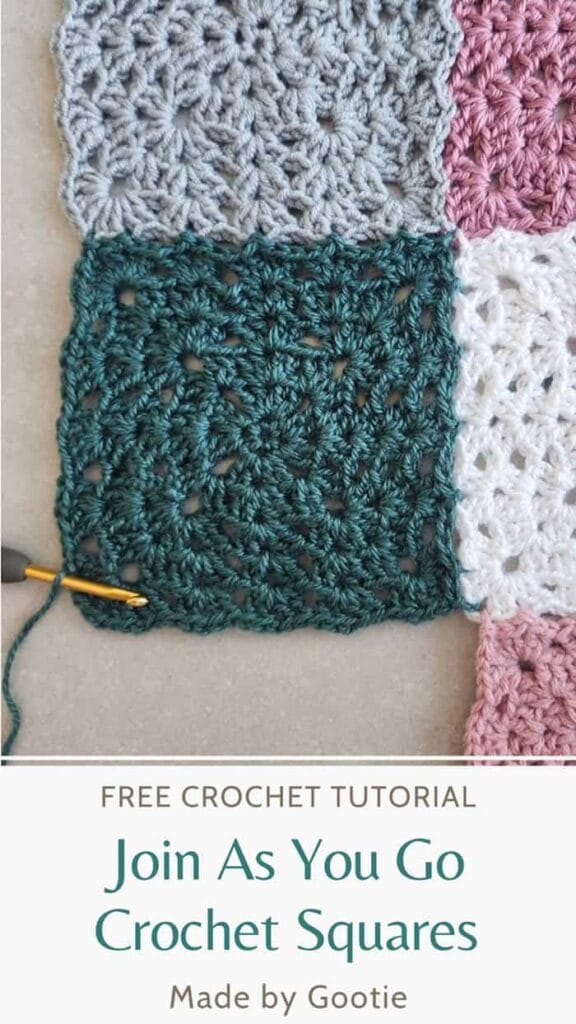
This is one of the best crochet square joining methods, in my opinion! The Granny Square Join As You Go (JAYGO) method is hassle-free, taking the stress out of the joining task at the end of making a granny square blanket.
This is an easy join as you go tutorial for my Iris Granny Square pattern. It can be used to make a big granny square blanket, a quick and easy crochet baby blanket, and much more (see ideas below!).
Scroll down for the free crochet pattern and photo tutorial.

** Some of the links in this post may include affiliate links. Making a purchase through one of these links pays me a small referral fee at no added cost to you. View our disclosure and privacy policy for more information.
I don’t like joining squares together in crochet, it’s one of my least favorite things in crochet. I would do that if it’s really necessary, but I will usually try to avoid it if I can. I used the Iris square pattern to make a big Granny Square blanket (Instead of working the classic Granny Square stitch, we are working the Iris stitch, which is a double V stitch).
And thought to myself that it would be so pretty as a “classic” Granny Square blanket with small crochet squares joined together.
And that’s when it hit me, that I can use the same method for the classic join as you go granny square in my Iris square! Honestly, it’s the joining method I didn’t know I needed. It spares me the joining at the end of the project, I can easily join the next square in the last round.
Want to save this post for later? Go ahead and PIN it!
What Can You Make with this Join-As-You-Go Iris Granny Square Tutorial?
The Iris Granny Square join as you go pattern can be used for so many different projects. The flexibility of joining your squares as you go, giving you the freedom to decide the size and shape of your project while making it.
Here are just a few ideas to use this tutorial for:
- Blankets
- Table runner
- Placemat
- Granny Square bag
- Granny squares scarf
Iris Granny Square Join As You Go
* Want to save this post for later? Go ahead and PIN it!
* Add this pattern to your Ravelry queue HERE!
Skill Level – Easy
Materials I Used for My Tutorial
– 5.0 mm / H crochet hook
– Worsted (#4) weight yarn I had in my stash (although it can be made with any yarn weight and a suitable hook).
– 4 Stitch marker (optional)
Abbreviations (US)
ch – chain
st – stitch
sc – single crochet
sp – space
ss – slip stitch
dc – double crochet
D-V – double V stitch: [2dc, ch1, 2dc] in same stitch
PM – place markers
[…] – crochet the instructions within brackets into the same indicated st.
(…) – crochet the instructions within brackets as many times as directed.
* – Repeats are shown via asterisks. Repeat begins at * and ends at ;

Join As You Go Crochet Method for the Iris Granny Squares
Joining 2 Squares Together
- Make 1 Iris Granny Square as instructed in this post. Work the square as big as you’d like, make sure to finish with round 6.
- Make a second Iris Granny Square, don’t work the last round 6.
Work the last Round 6 as follows (working only 2 sides of the square first):
Round 6: Ss in the next st and into the ch-3 sp (corner), ch 3 (counts as 1dc),
[1 dc, ch 1, 2 dc, ch 1-PM, 1 D-V] in ch-3 sp, (1 D-V in next ch-1 sp) repeat (…) until ch-3 sp (corner).
[1 D-V, ch 1-PM, 1 D-V] in next ch-3 sp (corner), (1 D-V in next ch-1 sp) repeat (…) until
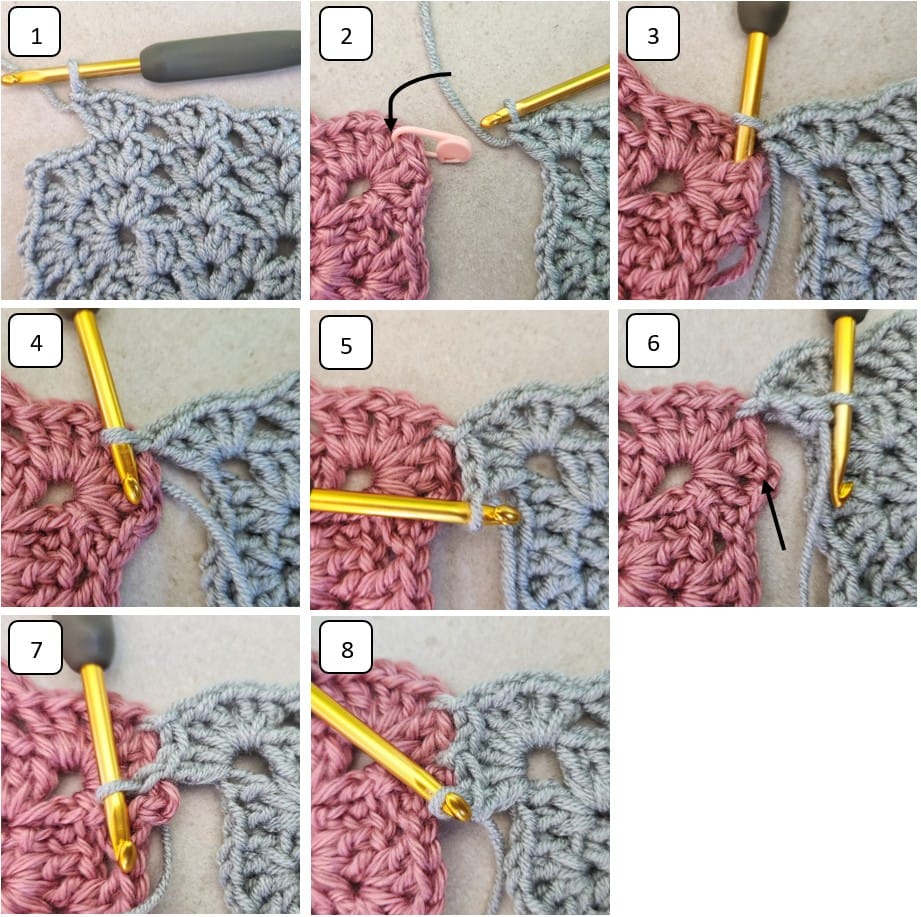
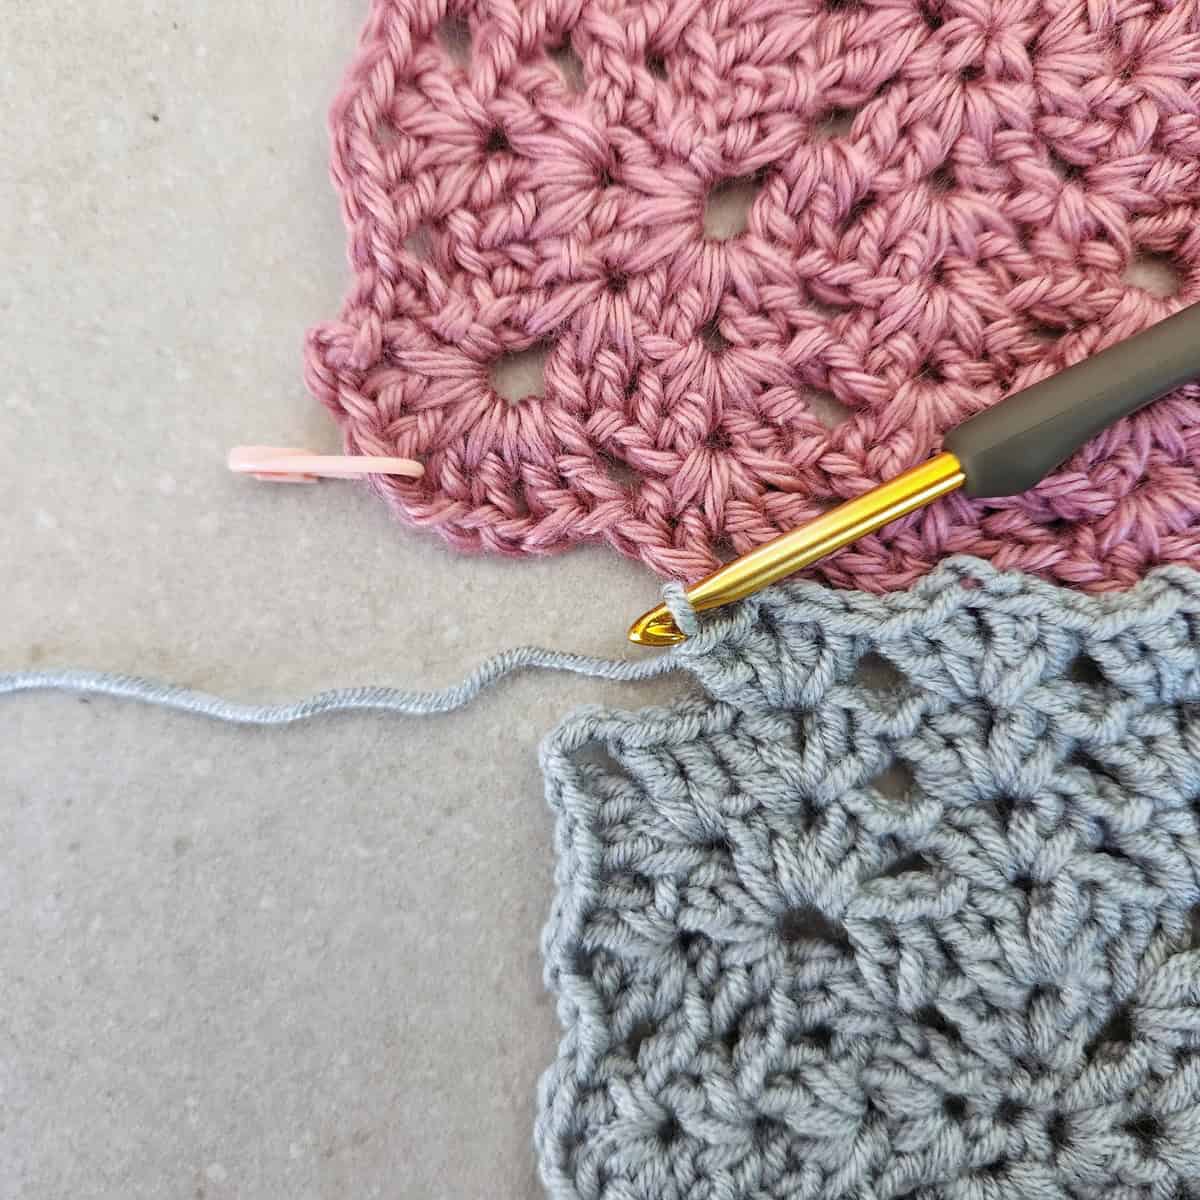
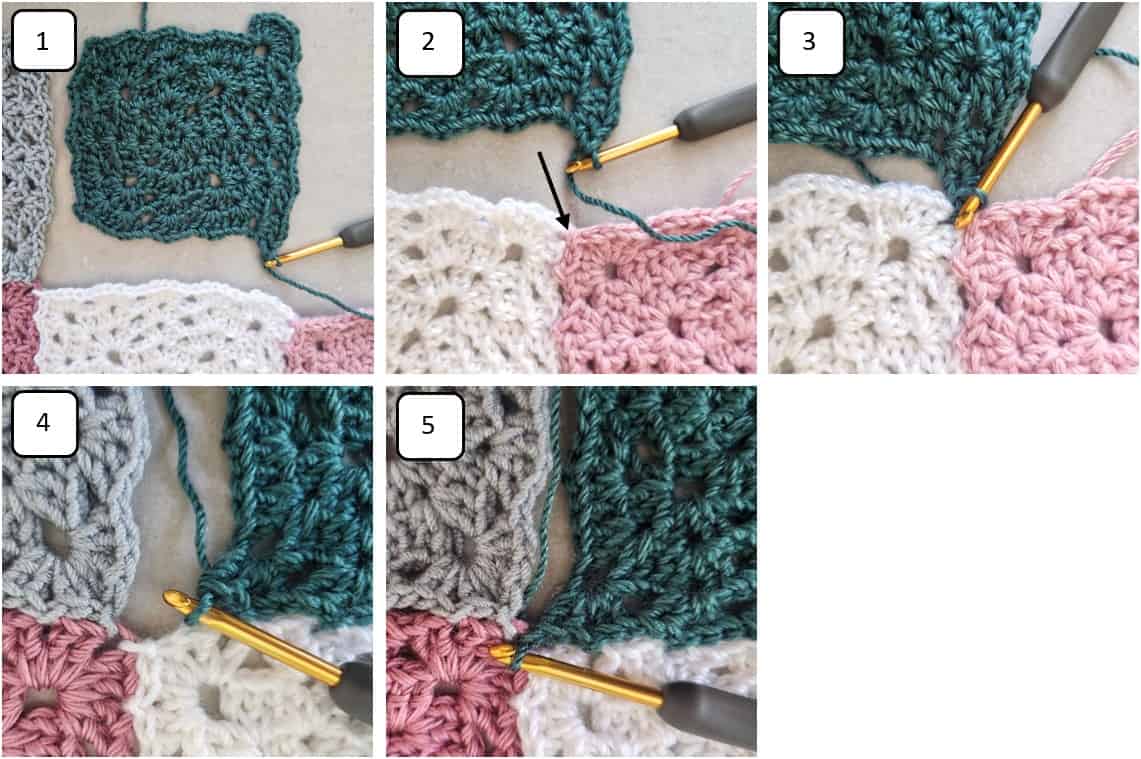
ch-3 sp (corner) (pic 1). - Now that you have worked 2 sides of the square, we will start joining the 2 squares.
On the third side that we are joining, instead of working chain 1, we will slip stitch into the other square’s parallel ch-1 spaces.
In the next ch-3 sp corner: 1 D-V (pic 2), ss into marked ch-1 corner of the first square (pics2-4), 2 dc in same ch-3 sp (pic 5), ss in next parallel ch-1 sp of first square (pics 6-7), 2 dc in same ch-3 sp (pic 8).
4. Continue working the third side of the square: Work 1 D-V into each ch-1 sp – but instead of making ch-1 sp after the first 2 dc of the D-V stitch, work a ss into the parallel ch-1 sp of the second square.
Continue until you reach the ch-3 corner.
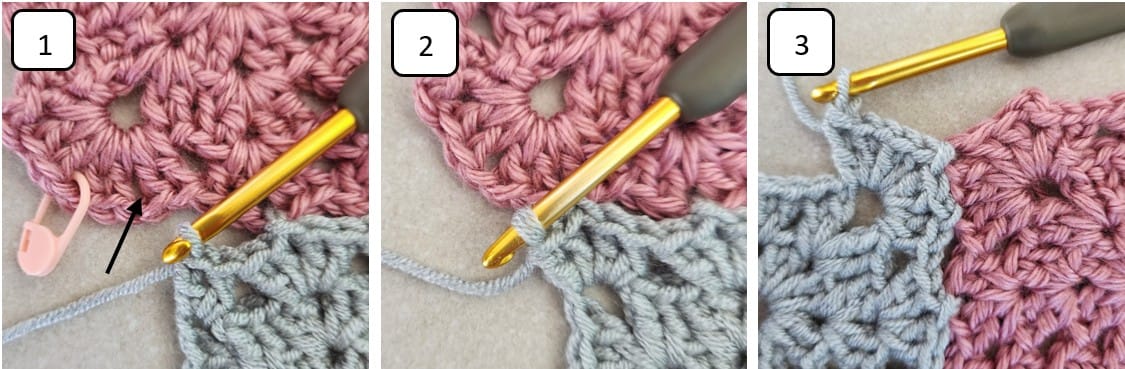
5. Now that we have reached the ch-3 corner, work this corner as follows:
In the next ch-3 sp corner: 2 dc in ch-3 sp (pic 1), ss in next parallel ch-1 sp of first square, 2 dc in same ch-3 sp (pic 2), ss into marked ch-1 corner of the first square, 1 D-V in same ch-3 sp (no ss here – pic 3).
6. Continue to finish the fourth side of the square:
* 1D-V in each ch-1 sp; Repeat from * until ch-3 (corner). Ss to top of ch-3, fasten off.
Joining 1 Square into a Corner
- Crochet the Iris Granny Square you want to join, don’t work the last round 6.
Work the last Round 6 as follows (working only 1 side of the square first):
Round 6: Ss in the next st and into the ch-3 sp (corner), ch 3 (counts as 1dc),
[1 dc, ch 1, 2 dc, ch 1-PM, 1 D-V] in ch-3 sp, (1 D-V in next ch-1 sp) repeat (…) until ch-3 sp (corner).
1 D-V in next ch-3 sp (corner), work only 1 D-V in the corner (pic 1). - Now that you have worked 1 side of the square, we will start joining the squares together.
Continue working the corner: Ss into the parallel ch-1 corner of the first square you are joining (pics 2-3), 2 dc in same ch-3 sp, ss in next parallel ch-1 sp of first square, 2 dc in same ch-3 sp. - Continue working the second side of the square: Work 1 D-V into each ch-1 sp – but instead of making ch-1 sp after the first 2 dc of the D-V stitch, work a ss into the parallel ch-1 sp of the second square.
Continue until you reach the ch-3 corner. - Working the next corner: Work 1 D-V in the ch-3 sp corner (the ss will be in the last ch-1 sp before the joined ch-1 corner – pic 4).
Ss into the joined ch-1 sp corner (pic 5), 1 D-V in the same ch-3 sp corner (the ss will be in the first ch-1 sp of the second square, after the joined ch-1 corner).
5. Continue working the third side of the square: Work 1 D-V into each ch-1 sp – but instead of making ch-1 sp after the first 2 dc of the D-V stitch, work a ss into the parallel ch-1 sp of the second square. Continue until you reach the ch-3 corner.
6. Now that we have reached the ch-3 corner, work this corner as follows:
In the next ch-3 sp corner: 2 dc in ch-3 sp, ss in next parallel ch-1 sp of second square, 2 dc in same ch-3 sp, ss into marked ch-1 corner of the second square, 1 D-V in same ch-3 sp (no ss here).
7. Continue to finish the fourth side of the square:
* 1D-V in each ch-1 sp; Repeat from * until ch-3 (corner). Ss to top of ch-3, fasten off.
Did you try this out? Share your project!
– Let me know how it went and leave a comment below.
– Tag me on Instagram @madebygootie
– Join and share in our FB Community
Want to save this post for later? Go ahead and PIN it!