Lacy Owl Free Crochet Amigurumi Owl Pattern
Last Updated on July 11, 2024
** Some of the links in this post may include affiliate links. Making a purchase through one of these links pays me a small referral fee at no added cost to you. These small fees add up and help me keep the blog running. View our disclosure and privacy policy for more information.
I created this crochet amigurumi owl pattern as a gift for a dear friend who was expecting a baby girl. My friend really loves owls, so I knew I’m going to make her an amigurumi owl.
This pattern is easy and great for beginners. I also added some lace in the wings, I wanted to create some texture and color change, to make the owl more interesting and appealing for the baby.
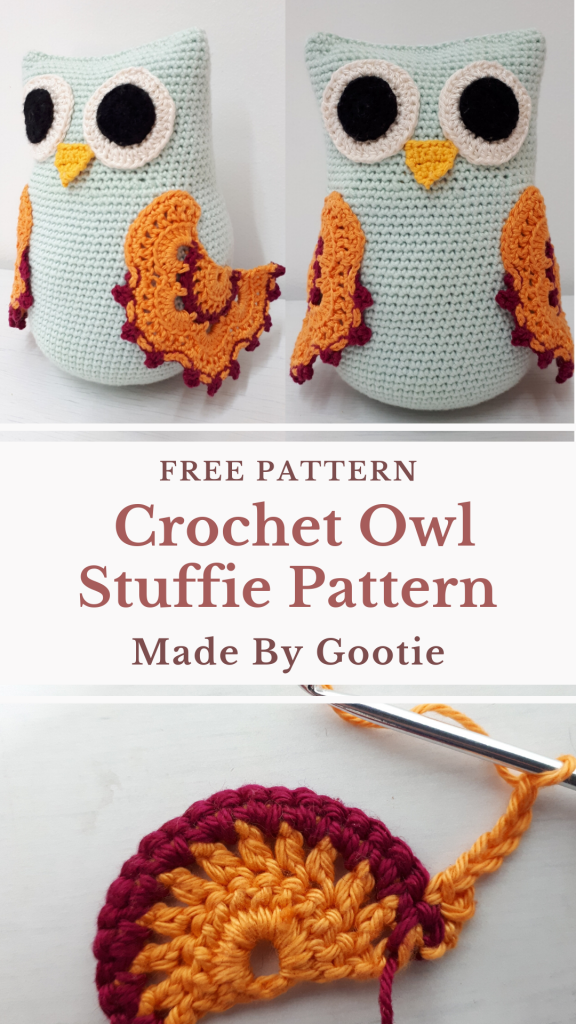
* Pin this pattern for later HERE
Crochet Amigurumi Owl
Materials
– Crochet hook D / 3mm (I love the Furls and Clover Hooks)
– 200 grams [200 – 250 yards (183 – 229 m)] Cotton – Sport yarn – like Schachenmyar Ctatnia 100% Cotton.
** Use any cotton yarn suitable for the hook size.
– FiberFill for stuffing
– Tapestry needle
– Scissors
Level – easy- requires some experience
Finished Size
This cute crochet amigurumi owl is about 6.5” (16 cm) tall
Abbreviations (US)
ss – Slip stitch
ch – Chain
sc – Single crochet
hdc – Half double crochet
dc – Double crochet
inc – 2 sc in same stitch
dec – 2 sc together
FL sc – Front loop only single crochet
FL hdc – Front loop only half double crochet
Edge – [sc, ch3, sc] in same st
RS – Right side
WS – Wrong side
* Get the ad-free, complete photo tutorial, ready-to-print PDF pattern at one of my stores:
Crochet Amigurumi Owl Pattern
Body
1) Make a magic ring
2) 6 sc into ring (6)
3) Inc around (12)
4) 1 sc, inc (18)
5) 1 sc, inc, (2 sc, inc)x5, 1 sc (24)
6) 3 sc, inc (30)
7) 2 sc, inc, (4 sc, inc)x5, 2 sc (36)
8) 5 sc, inc (42)
9) 3 sc, inc (6 sc, inc)x5, 3 sc (48)
10) 7 sc, inc (54)
11) 4 sc, inc (8 sc, inc)x5, 4 sc (60)
12) 9 sc, inc (66)
13) 5 sc, inc (10 sc, inc)x5, 5 sc (72)
13-39) Sc around (72)
40) 5 sc, dec, (10 sc, dec)x5, 5 sc (66)
41) 9 sc, dec (60)
42-59) sc around (60).
Fasten off, leave a long enough tail to sew the edges.
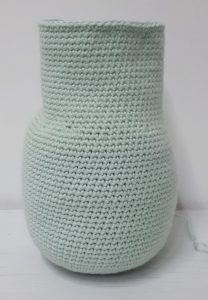
Eyes
With white yarn
1) Make a magic ring
2) Ch2, 11hdc into the ring, ss to top of ch2 (12)
3) Ch2, hdc in same st, 2hdc in each st around, ss to top ch2 (24)
4) Ch2, 2hdc in next st, *hdc, 2hdc; Repeat from * around. Fasten off (36)
With black yarn
1) Make a magic ring
2) Ch2, 11hdc in the ring, ss to top of ch2 (12)
3) Ch2, Hdc in same st, 2hdc in each st around, ss to top ch2. Fasten off (24)
Sew the black pupils to the white eyes, and then sew the eyes to the body.
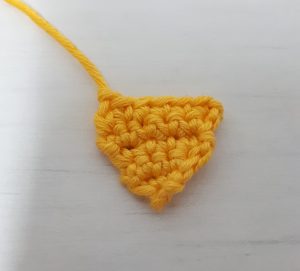
Beak
With yellow yarn
1) Ch2, 2 sts in first chain, turn (2)
2) Ch1, inc in next 2 sts, turn (4)
3) Ch1, sc in each st, turn (4)
4) Ch1, inc in next st, sc in next 2 sts, inc in next st, turn (6)
5) Ch1, sc in each st. Fasten off (6)
Sew beak under the eyes.
Wings – make 2, pay attention to the difference between the right-wing and left-wing on the 9th row.
With orange yarn
1) Ch6, ss to first chain to form a ring.
2) Working on write side- Ch3 (counts as first dc), 11 dc into ring. Turn.
3) Working on wrong side- Ch3 (counts as first hdc and space), (FL hdc in next st, ch1)x10, FL hdc in top of ch3. Turn.
Change to red yarn (optional)
4) Ch1 (counts as first sc), (sc in next space, sc in next hdc)x10, sc in space, sc in 2nd ch of ch3. Turn.
Change back to orange yarn (optional).
5) Ch4, sc in next st, (ch5, skip 2 sts, sc in next st, ch3, skip 2 sts, sc in next st)x3, ch5, skip 2 sts, sc in last st. Turn.
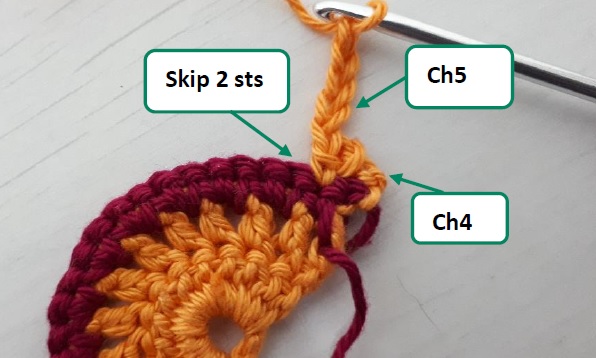
6) Ch3 (counts as first dc), 9 dc into ch5 space, (sc into ch3 space, 10 dc into ch5 space)x3, sc into ch4 space. Turn
7) Ch3 (counts as first hdc and space), (FL hdc in next st, ch1)x8, FL sc in next st, skip 3 sts (see pic), FL sc in next st, (ch1, FL hdc in next st)x6, ch1, FL sc in next st, skip 3 sts, FL sc in next st, (ch1, FL hdc in next st)x6, ch1, FL sc in next st, skip 3 sts, FL sc in next st, (ch1, FL hdc in next st)x7, ch1, FL hdc in top of ch3, Turn.
8) Ch1 (counts as first sc), (sc in ch1 space, sc in next hdc)x7, sc in ch1 space, sc in next 2 sc, (sc in ch1 space, sc in next hdc)x6, sc in ch1 space, sc in next 2 sc, (sc in ch1 space, sc in next hdc)x6, sc in ch1 space, sc in next 2 sc, (sc in ch1 space, sc in next hdc)x7, sc in ch1 space, sc in top of ch3. Turn
Change to red yarn (optional)
9) In the last row you’ll be working on WS-
First wing (right-wing):
Ch1 (counts as first sc), (Edge in next st, ss in next 3 sts)x4, ss in next 3 sts, (Edge in next st, ss in next 3 sts)x3, ss in next 3 sts, (Edge in next st, ss in next 3 sts)x3. You’re finishing this row at the 27 st and not at the end of the row.
Fasten off, weave in the ends.
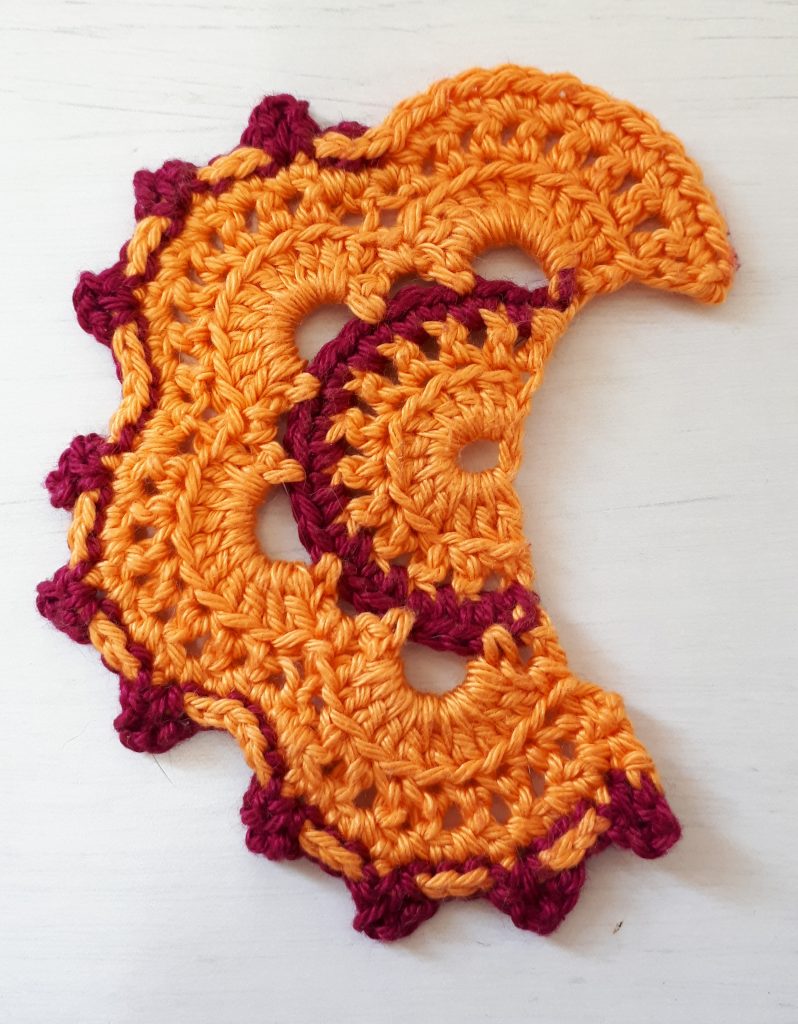
Second wing (left-wing):
Fasten off the yarn of row 8, attach new color in 17th st.
(ss in next 3 sts, edge in next st)x3, ss in next 3 sts, (ss in next 3 sts, Edge in next st)x3, ss in next 3 sts, (ss in next 3 sts, Edge in next st)x4, ss in last st. Fasten off, weave in the ends.
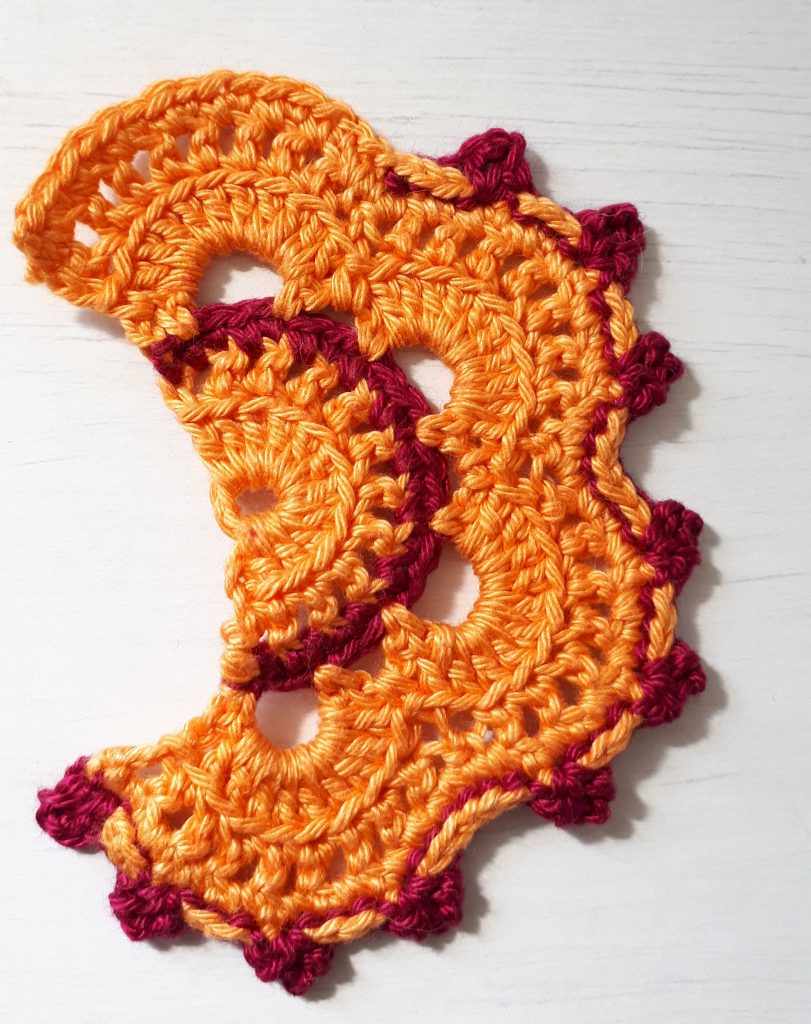
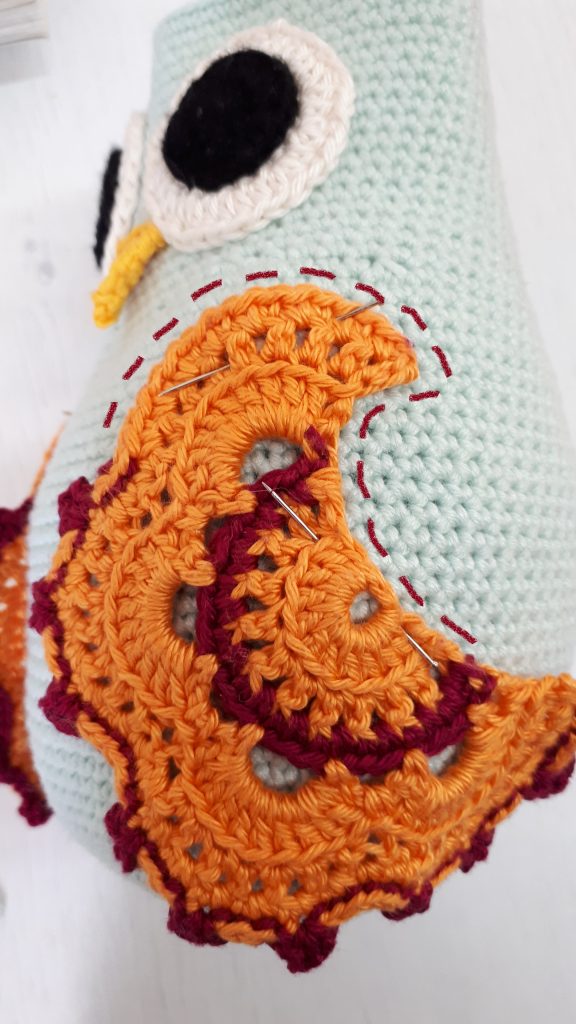
Sew the wings to the body with orange yarn as shown in the picture below.
Finishing up
Stuff the body with fiberfill.
Pick up the yarn from the top of the body, fold the top in half and sc the edges together.
Did you try this out? Let me know how it went! Leave a comment below and tag a photo of your project #madebygootie on Instagram.
Follow me on Facebook, Instagram and Pinterest!

I love this owl so much. His wings in particular I am in love with! Thank you for all of the detailed pictures showing how to create him.
Thanks for the free owl pattern!!