Beginner’s Crochet Doily Pattern: Iris Doily-Placemat
Last Updated on November 24, 2024
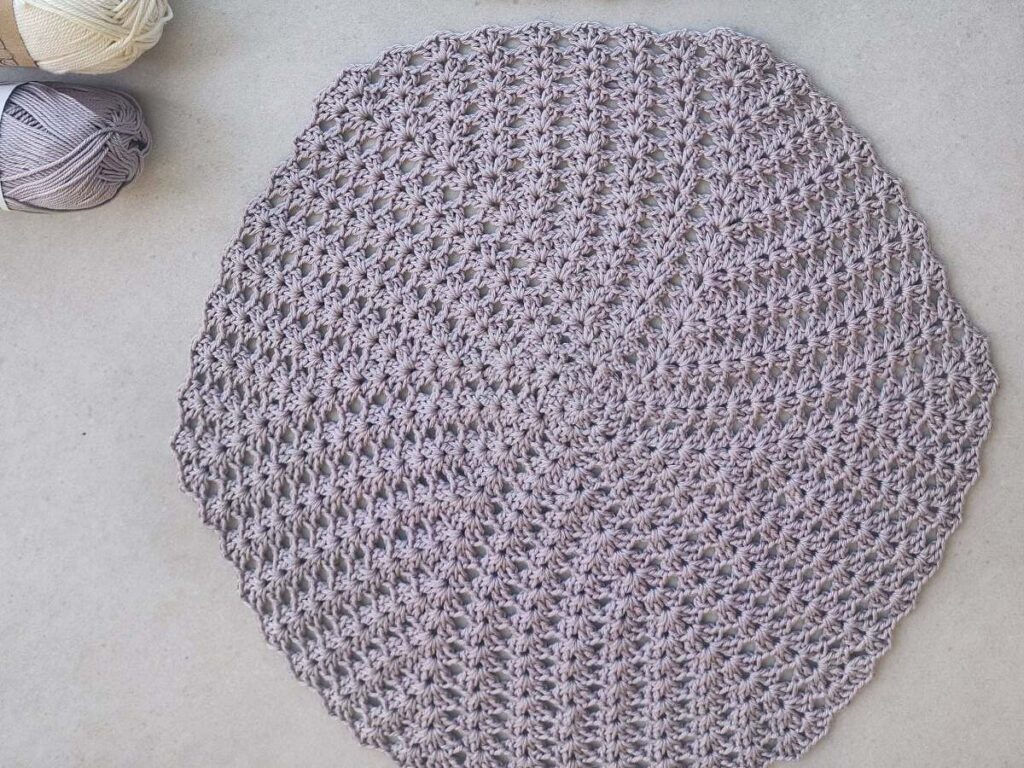
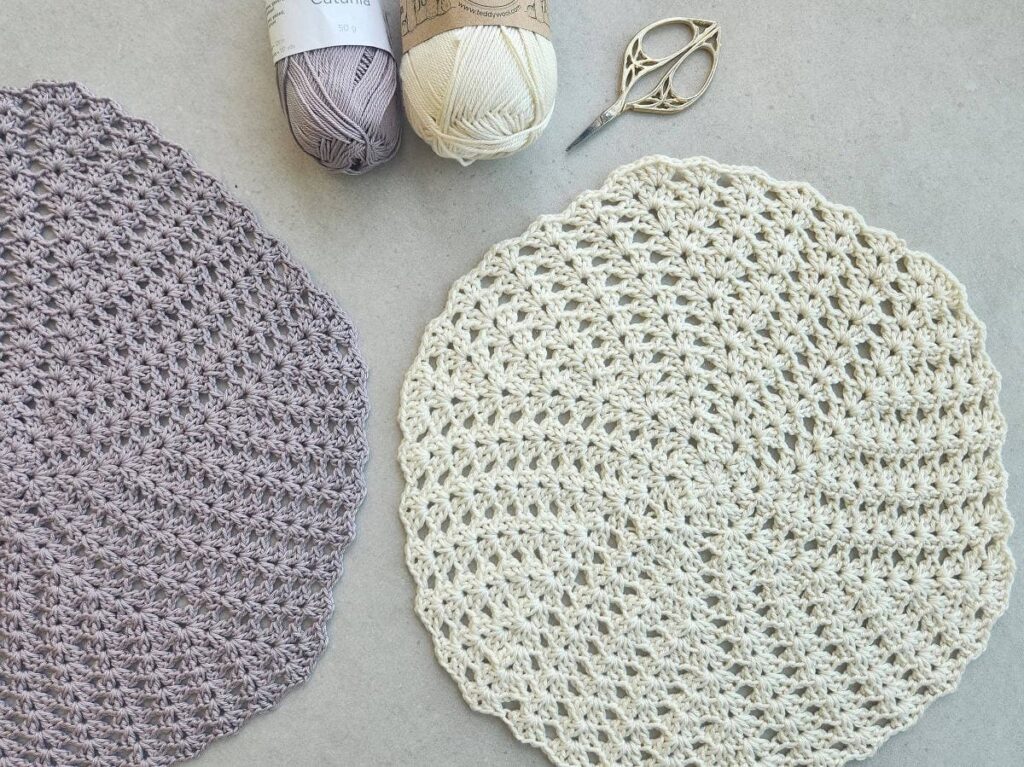
The Iris Doily is a beginner’s crochet doily pattern. It’s super easy, and the main pattern is a two-round repeat, so you can make a small coaster or a big crochet doily to use as a round placemat.
The Iris crochet doily is made using only double crochet and chain stitches, working the Iris stitch in the round.
This crochet doily tutorial has step-by-step instructions and an easy-to-follow photo tutorial.
** Some of the links in this post may include affiliate links. Making a purchase through one of these links pays me a small referral fee at no added cost to you. These small fees add up and help me keep the blog running. View our disclosure and privacy policy for more information.
I love making crochet doilies, there’s something so relaxing and satisfying in seeing it coming along.
After I designed the Diamonds Doily a few years ago, I knew I wanted to create another doily design, but this time, I wanted to design a doily that can be made as big as you’d like.
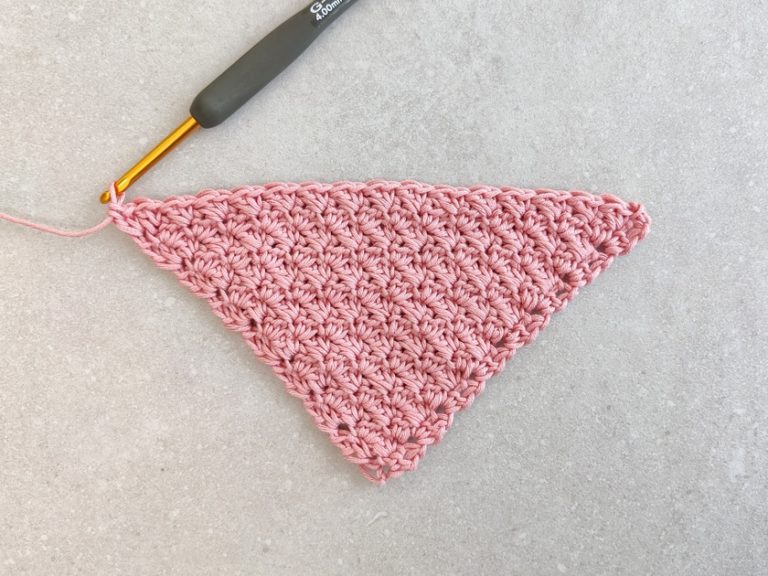
For this doily, as the name implies, I used the crochet Iris Stitch. I love this stitch and how pretty it is in it’s simplicity. I already used the Iris Stitch to create a square from the middle out and a rectangle, so to create a beginner’s crochet doily pattern I decided to design this stitch in the round!
Want to save this post for later? Go ahead and PIN it!
The Yarn I Used for My Crochet Doily
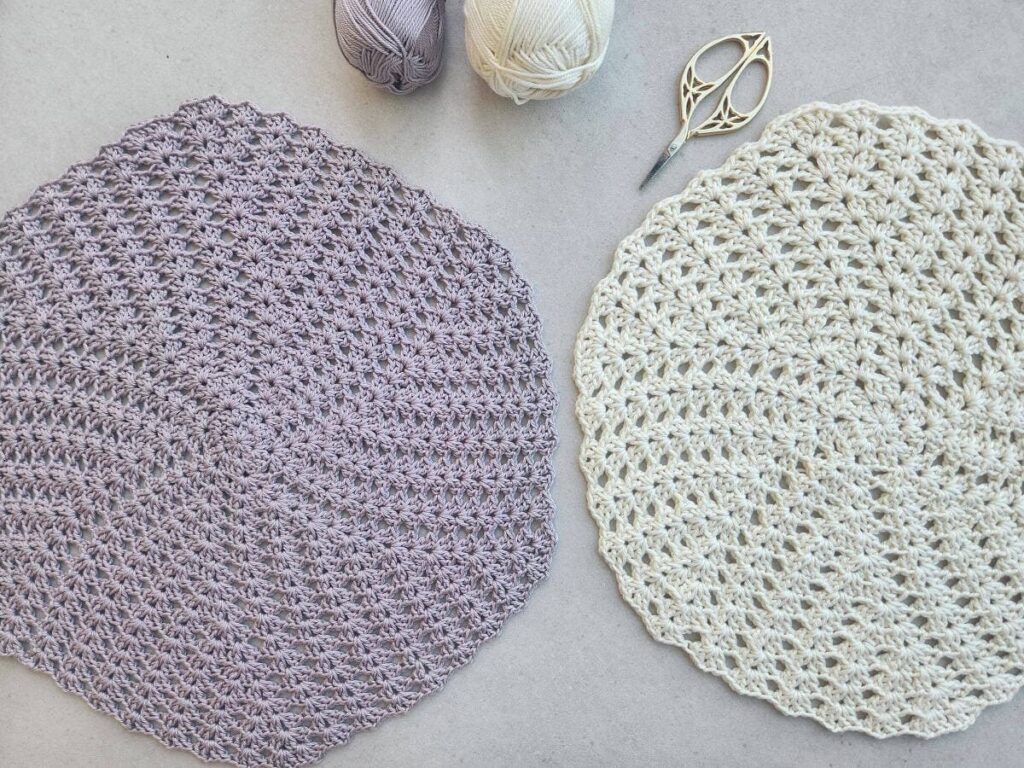
For my doilies, I used 100% mercerized cotton yarn, for the purple doily I used Schachenmayr – Catania Sport (#2) weight yarn, and for the white doily I used Knit Picks – Vividie Worted (#4) weight yarn.
I love using mercerized cotton for these kinds of projects because of the nice shine the yarn has and how well it shoes the stitches in the design.
For your doily, you can use any yarn weight with a suitable crochet hook, and just work the doily as big as you’d like!
Materials
– Crochet hook 3.5 mm / E (I love the Etimo Hooks).
– Sport (#2) weight cotton yarn – I used Schachenmayr – Catania
** You can use any yarn weight you want with a suitable hook size.
Total amount of yarn needed using Sport yarn: 85gr/212m/231yds
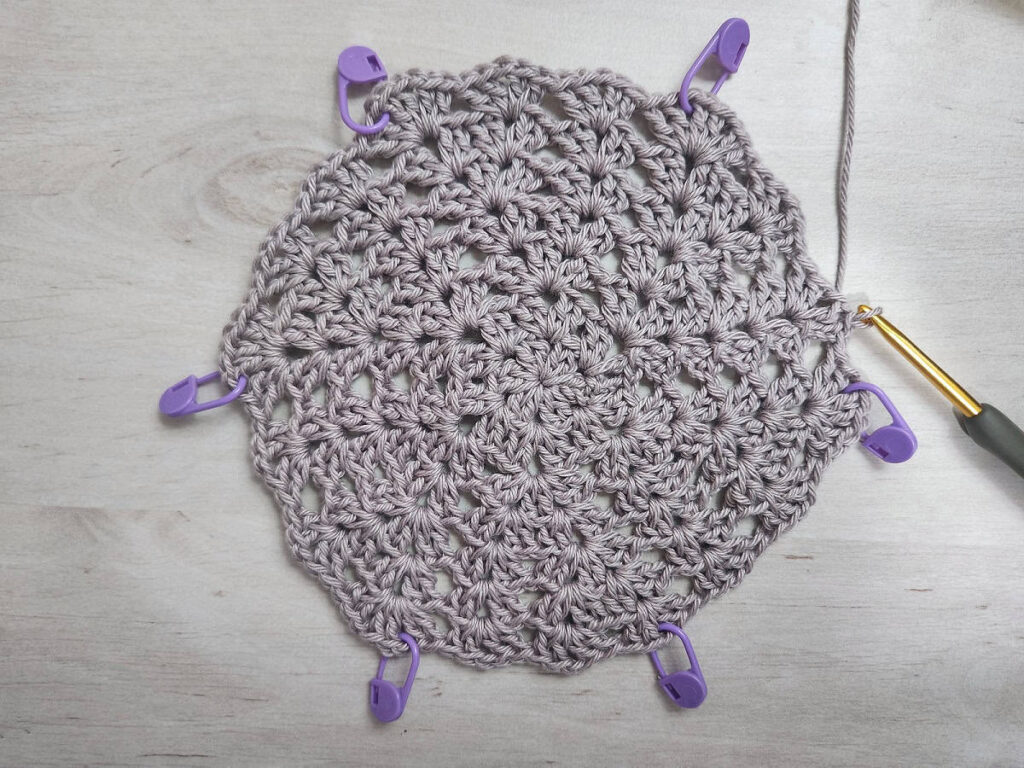
– 6 Stitch markers.
Finished Size – 17 in (43 cm) diameter (can be made any size you want).
Gauge (in pattern) – Working rounds 1-5 with a 3.5 mm / E crochet hook will result in a 4 in (10 cm) diameter circle.
** Gauge is not crucial for this pattern.
Abbreviations (US)
ch – chain
dc – double crochet
sp – space
st – stitch
ss – slip stitch
(…) – crochet the instructions within brackets as many times as directed.
[…] – crochet the instructions within brackets into the same indicated st/sp.
Notes
- The stitch markers are placed to help find the corners. Move them along as you work up the rounds.
- You can use any yarn weight with a suitable hook size.
- The doily can be used as a placemat.
Crochet Doily PDF Pattern
You can find the ad-free PDF pattern with the full photo-tutorial at one of my shops below:
Iris Crochet Doily Written Instructions & Photo-Tutorial
Make a magic ring.
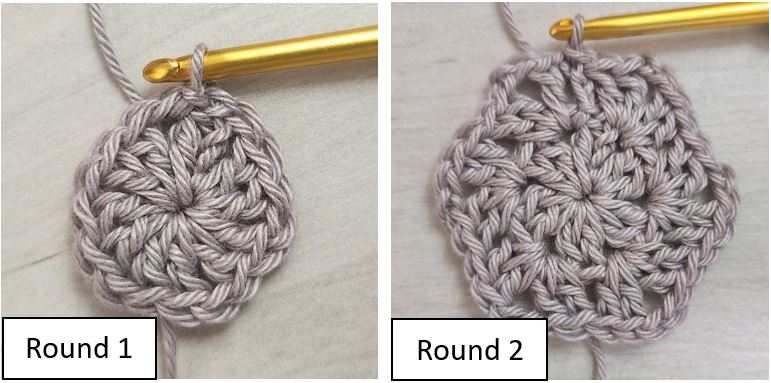
Round 1: Ch 3 (counts as dc here and throughout), work into the ring:
1 dc, ch 1, (2 dc, ch 1)x 5 times. Ss to top of beginning ch-3 and pull the ring tight. (12 dc, 6 ch-1 sp)
Round 2: Ss in the next dc and into the ch-1 sp, ch3 (counts as dc here and throughout),
[1 dc, ch 2, 2 dc] in same ch-1 sp.
* Skip next 2 dc, [2 dc, ch 2, 2 dc] in same ch-1 sp; Repeat from * until last 2 dc, skip last
2 dc. Ss to top of beginning ch-3. (24 dc, 6 ch-2 sp)
Round 3: Ss in the next dc and into the ch-2 sp, Ch3, [1 dc, ch 1, 2 dc, ch 1 – PM, 2 dc] in same ch-2 sp.
* Skip next 4 dc, [2 dc, ch 1, 2 dc, ch 1 – PM, 2 dc] in same ch-2 sp; Repeat from * until last 4 dc, skip last 4 dc. Ss to top of beginning ch-3. (36 dc, 12 ch-1 sp)
Round 4: Ss in the next dc and into the ch-1 sp, ch 3, [1 dc, ch 1, 2 dc] in same ch-1 sp, skip next 2 dc, [2 dc, ch 1 – PM, 2 dc] in same ch-1 sp.
* Skip next 4 dc, [2 dc, ch 1, 2 dc] in same ch-1 sp, skip next 2 dc, [2 dc, ch 1 – PM, 2 dc] in same ch-1 sp; Repeat from * until last 4 dc, skip last 4 dc. Ss to top of beginning ch-3. (48 dc, 12 ch-1 sp)
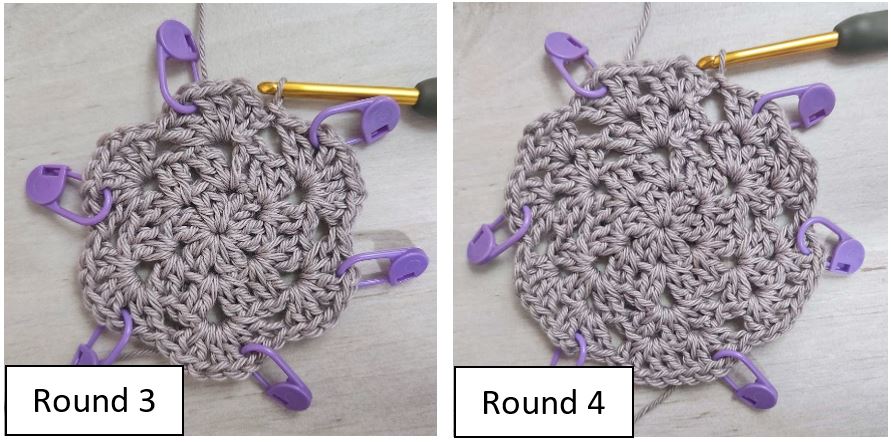
Round 5: Ss in the next dc and into the ch-1 sp, ch 3, [1 dc, ch 1, 2 dc] in same ch-1 sp, skip next 4 dc, [2 dc, ch 1, 2 dc, ch 1 – PM, 2 dc] in same ch-1 sp.
* Skip next 4 dc, [2 dc, ch 1, 2 dc] in same ch-1 sp, skip next 4 dc, [2 dc, ch 1, 2 dc, ch 1 – PM, 2 dc] in same ch-1 sp; Repeat from * until last 4 dc, skip last 4 dc. Ss to top of beginning
ch-3. (60 dc, 18 ch-1 sp)
Round 6: Ss in the next dc and into the ch-1 sp, ch 3, [1 dc, ch 1, 2 dc] in same ch-1 sp.
* (Skip next 4 dc, [2 dc, ch 1, 2 dc] in same ch-1 sp) repeat from (…) until marker, skip next
2 dc, [2 dc, ch 1 – PM, 2 dc] in same ch-1 sp; Repeat from * until last 4 dc, skip last 4 dc. Ss to top of beginning ch-3. (72 dc, 18 ch-1 sp)
Round 7: Ss in the next dc and into the ch-1 sp, ch 3, [1 dc, ch 1, 2 dc] in same ch-1 sp.
* (Skip next 4 dc, [2 dc, ch 1, 2 dc] in same ch-1 sp) repeat from (…) until marker, skip next
4 dc, [2 dc, ch 1, 2 dc, ch 1 – PM, 2 dc] in same ch-1 sp; Repeat from * until last 4 dc, skip last 4 dc. Ss to top of beginning ch-3. (84 dc, 24 ch-1 sp)
Work rounds 6-7 until reaching __ or the desired size, finish with round 6.
Fasten off, weave in the ends and block if needed.
Looking for Easy Crochet Projects?
Did you try this out? Share your project!
– Let me know how it went and leave a comment below.
– Tag me on Instagram @madebygootie
– Join and share in our FB Community
Want to save this post for later? Go ahead and PIN it!




Beautiful, thank you!
I’m glad you like it!