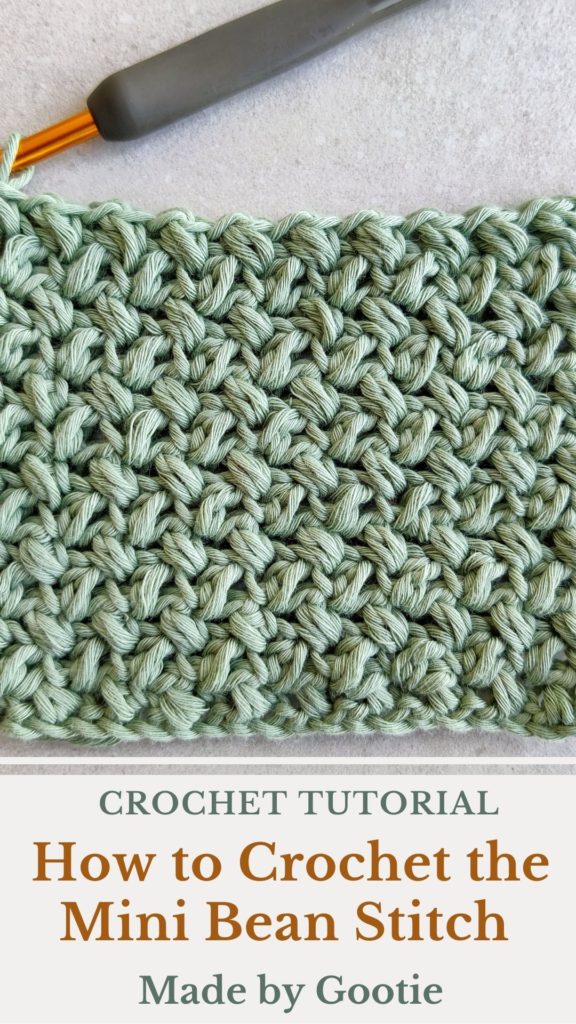
How to Crochet the Mini Bean Stitch
Last Updated on May 10, 2023
Learn how to crochet Mini Bean Stitch with an easy photo-tutorial!
Have you tried to crochet the Mini Bean stitch? If not, I promise you are going to love it!
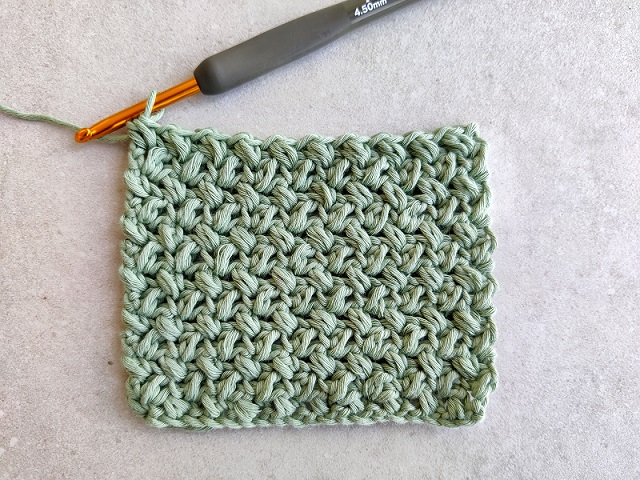
This stitch is also known as the “Elizabeth stitch”. The stitch is full of texture, it looks like a smaller version of the puff stitch but is much more elegant and still forms a really nice and warm fabric! And what is also so nice about the stitch, is that it forms a reversible fabric, because it looks really nice on the wrong side.
The mini bean stitch is very easy to make and repetitive, it just gets you into a nice relaxing rhythm of crocheting.
Some of the links in this post may include affiliate links. Making a purchase through one of these links pays me a small referral fee at no added cost to you. These small fees add up and help me keep the blog running. For more details, view our disclosure and privacy policy.
What is the Mini Bean Stitch?
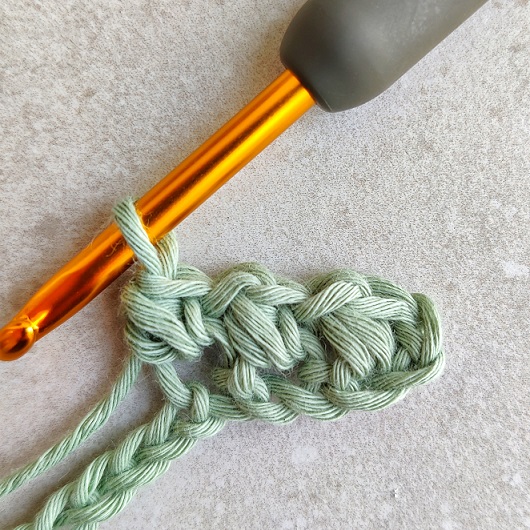
The Mini Bean crochet stitch is a one row repeat stitch. It alternates between one chain and one mini bean which is kind of a small rounded puff stitch.
A lot of stitch tutorials for the Mini Bean are referring to this stitch as a combination of the mini bean puff and the ch1 that comes after it as the top of the mini bean stitch. Therefore, they instruct you to place the mini bean stitch into the “side” of the mini bean, which is actually the top of the mini bean puff stitch.
I find it a little confusing, that’s why my tutorial is a little different where the mini bean is the puff itself, and the ch1 space is a separate stitch. I think it makes much more sense and it’s easier to understand it that way (scroll down for the full stitch tutorial).
Want to save this post for later? Go ahead and PIN it!
What is the difference between the Bean stitch and the Mini Bean Stitch?
The bean stitch is a “bigger stitch” it has an extra yarn over step which makes it puffier than the mini bean. Where in the mini bean you form the little puff with 4 loops on the hooks, with the bean stitch the puff is formed with 6 loops on the hook.
Did you know that you can also work the Mini Bean Stitch from corner to corner? Check out my C2C Mini Bean Stitch tutorial!
What Can You Make with the Crochet Mini Bean Stitch?
The mini bean stitch has so many uses! It will make a beautifully textured blanket, and can also be used to create a trivet, because it forms a thick fabric.
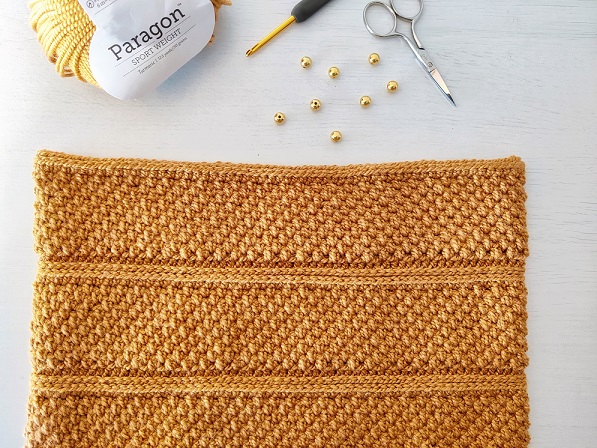
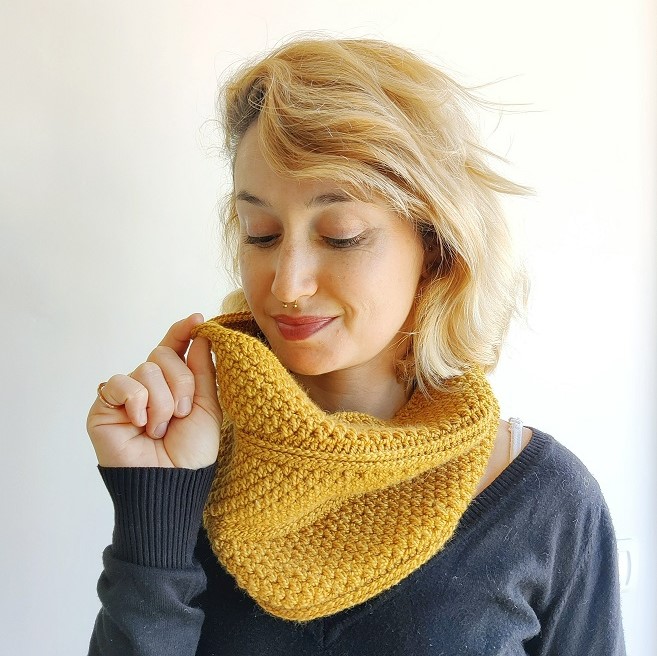
This crochet stitch is also great for scarves, I used a slight variation of the mini bean stitch worked in the round in my Cobblestone Path Cowl. The unique texture of this stitch forms an eye catching and elegant fabric, making a stunning cowl that will keep you warm and suit any outfit!
What Kind of Yarn Should You Use for Mini Bean Stitch?
It really depends on the type of project you are making. For the best stitch definition, if you want the texture to really show, I think cotton yarn is the best option.
In this tutorial, I used Knit Picks – CotLin. But If you make a blanket or a scarf, any other kind of yarn would be suitable.
Looking for More Crochet Stitches? Check out these other stitch tutorials on the blog:
- Crochet Ribbed Stitch
- Catherine’s Wheel Stitch
- Moss Stitch (in 3 different ways)
- Crunch Stitch
- Lace Flower Stitch
How to Crochet the Mini Bean Stitch
Materials I used for this tutorial
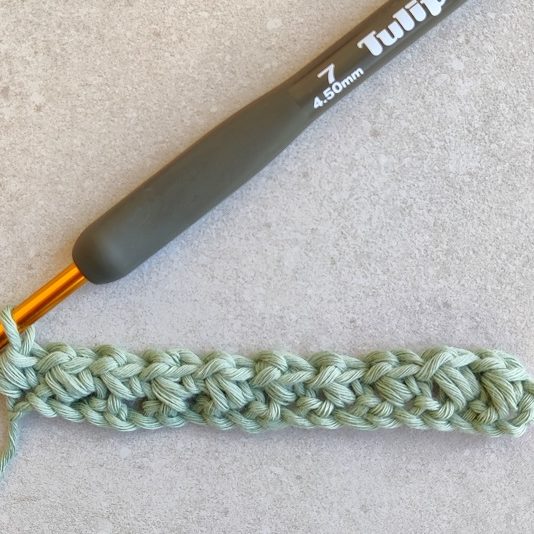
– 4.5 mm Tulip Etimo Crochet hook.
– For this tutorial, I used Knit Picks – CotLin yarn by WeCrochet – DK (#3) weight yarn. You can find this yarn HERE.
Abbreviations (US)
ch – chain
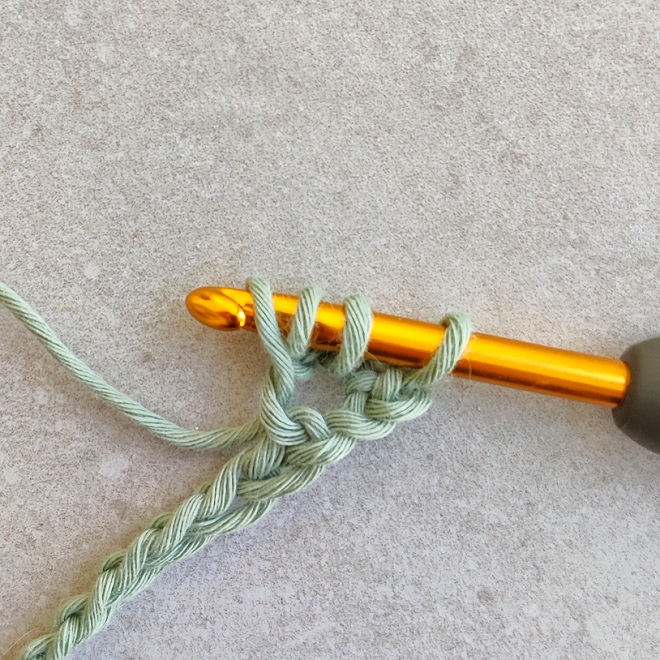
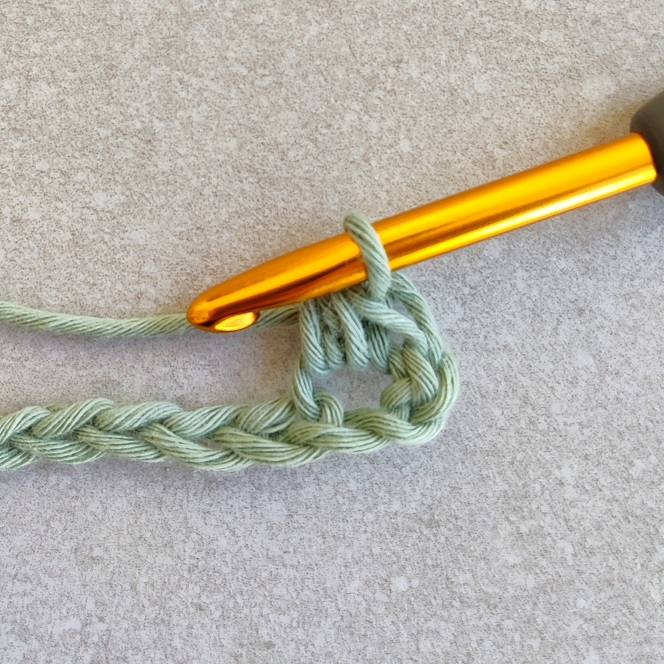
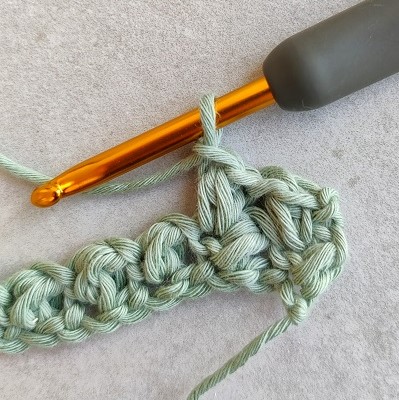
mb – Mini Bean stitch: insert hook into indicated st, yo and pull up a loop. yo and insert hook into same st, yo and pull up a loop. yo and pull through all 4 loops on hook.
Crochet Mini Bean Stitch Instructions
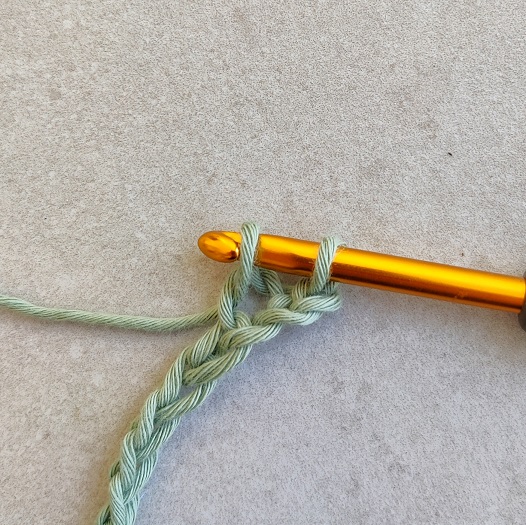
Chain an odd number of chains.
Row 1: mb in 3rd chain from hook, * ch1, skip next ch, mb in next ch; repeat from * across to the end of the row, turn.
Row 2: ch2, mb in the 1st mb stitch, * ch1, skip next ch-1 space, mb in next mb; repeat from * across to the end of the row, turn.

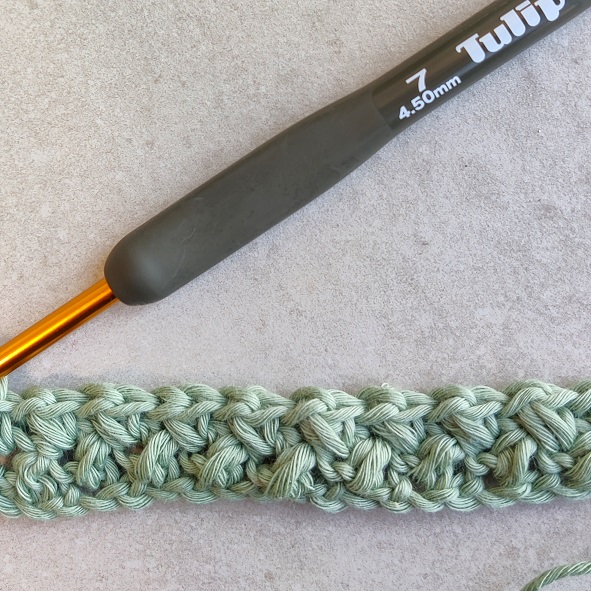
Repeat row 2 until desired length.

Did you try this out? Let me know how it went and leave a comment below or tag me @madebygootie !
* Want to save this post for later? Go ahead and PIN it!
Thanks for the cowl pattern gift as you celebrate Hanukkah and may you be blessed beyond measure!
Thank you and Chag Sameach!
Todah! Chag sameach 🙂
Thank you for this stitch tutorial and your clear explanation. I appreciate that you give advice about uses for the bean stitch. This year I had decided to give my close friends trivets for Christmas and when I saw the picture of this stitch and your advice that this stitch would be appropriate for a trivet I was excited to try it. Thank you for sharing your crocheting expertise and your patterns.
I’m so happy you found it helpful! I would love to see how your trivets turn out!
Thank you!
Gootie, thank you for sharing this beautiful cowl pattern.
Happy Hanukkah!
My pleasure, happy holidays, Dotty!
I wanted to thank you for this beautiful pattern you are sharing (Cobblestone-path-cowl) I can’t wait to try to make it and Happy Hanukkah
You are very welcome! I hope you’ll have a great holiday season!
Free? I was charged $4? I will still get it.
Hi Nola,
The free download is a direct download from my website when you click on the big DOWNLOAD button with the event decorations.