Iris Cocoon Shrug Crochet Pattern
Last Updated on July 11, 2024
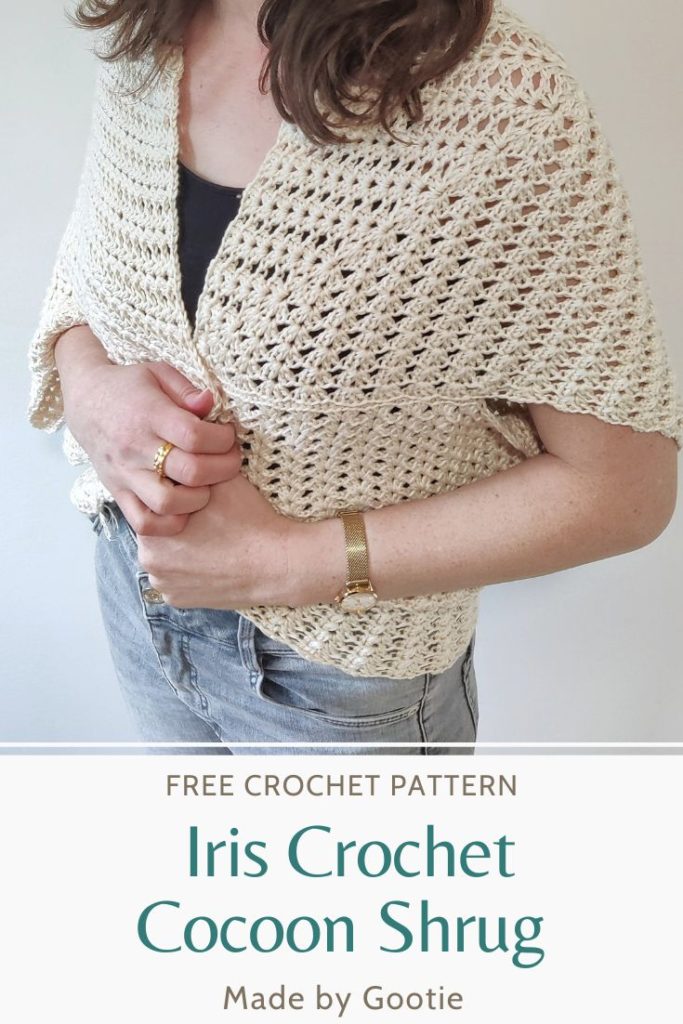
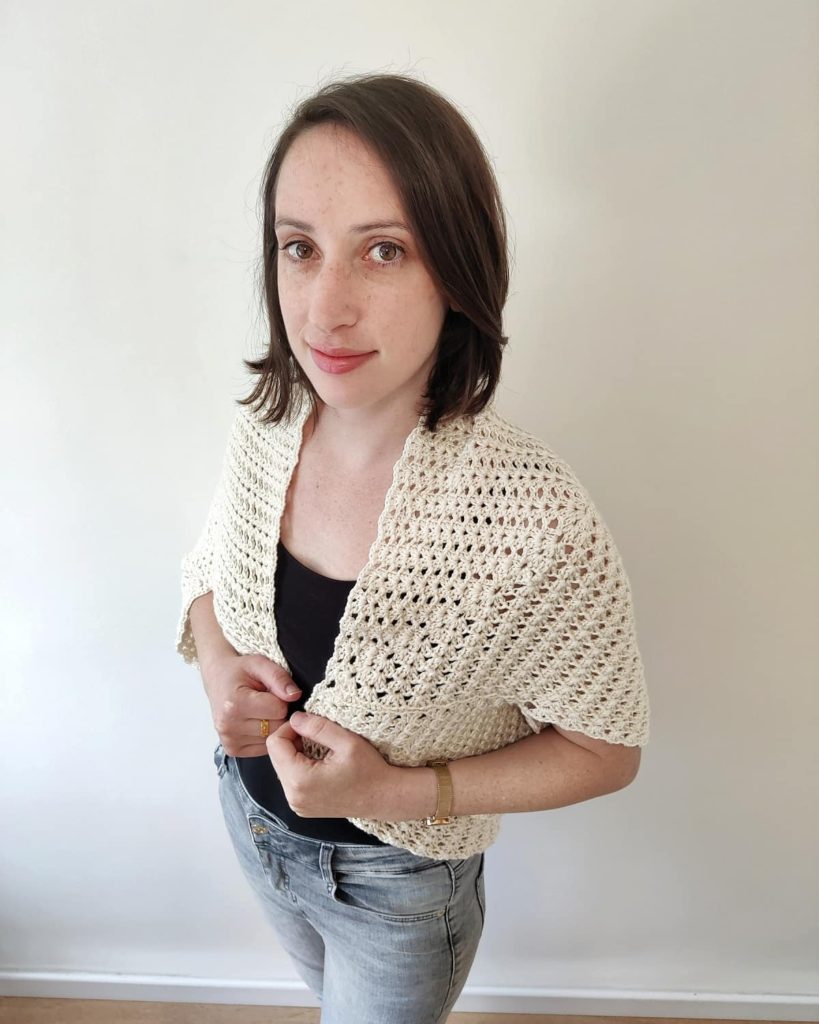
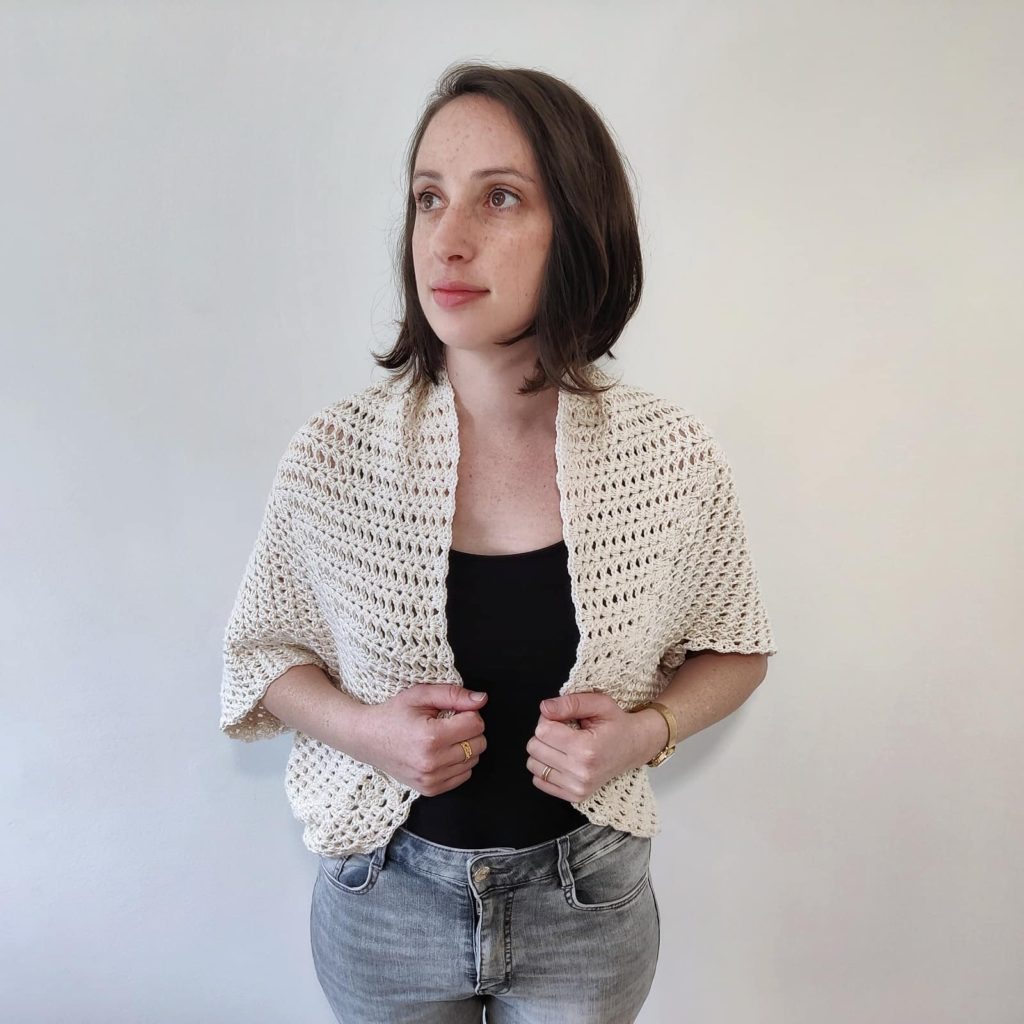
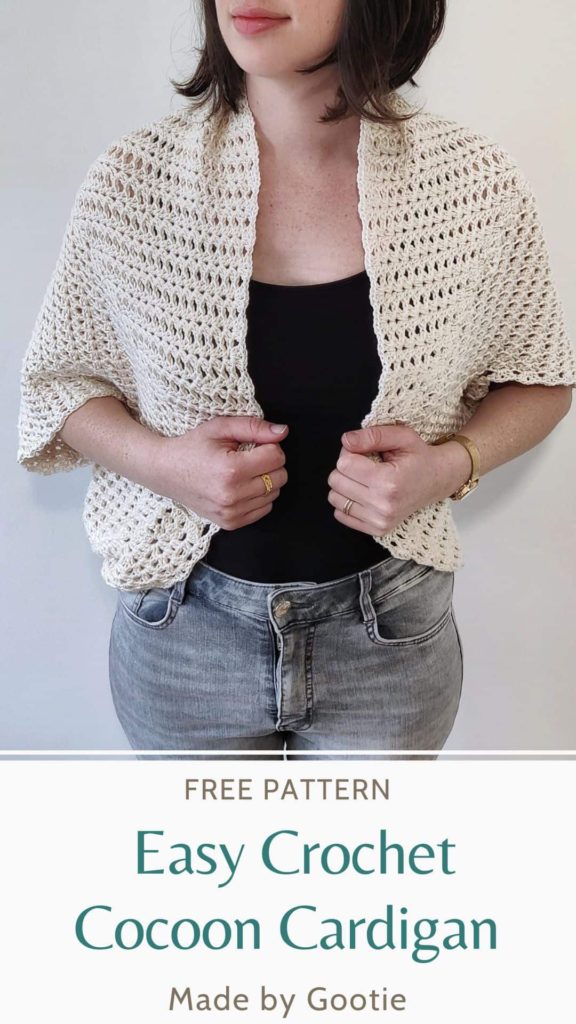
The Iris Cocoon Shrug crochet pattern is a modern granny cocoon shrug made using the Iris stitch, to create a beautiful texture.
This is an easy crochet shrug pattern made in 3 sizes – XS-M, L-2XL, 3XL-5XL. Since this is an oversized cocoon cardigan crochet pattern, it can easily be modified to any size you want.
The pattern was initially designed for I like Crochet Magazine, and I’m happy to finally share it here with you!
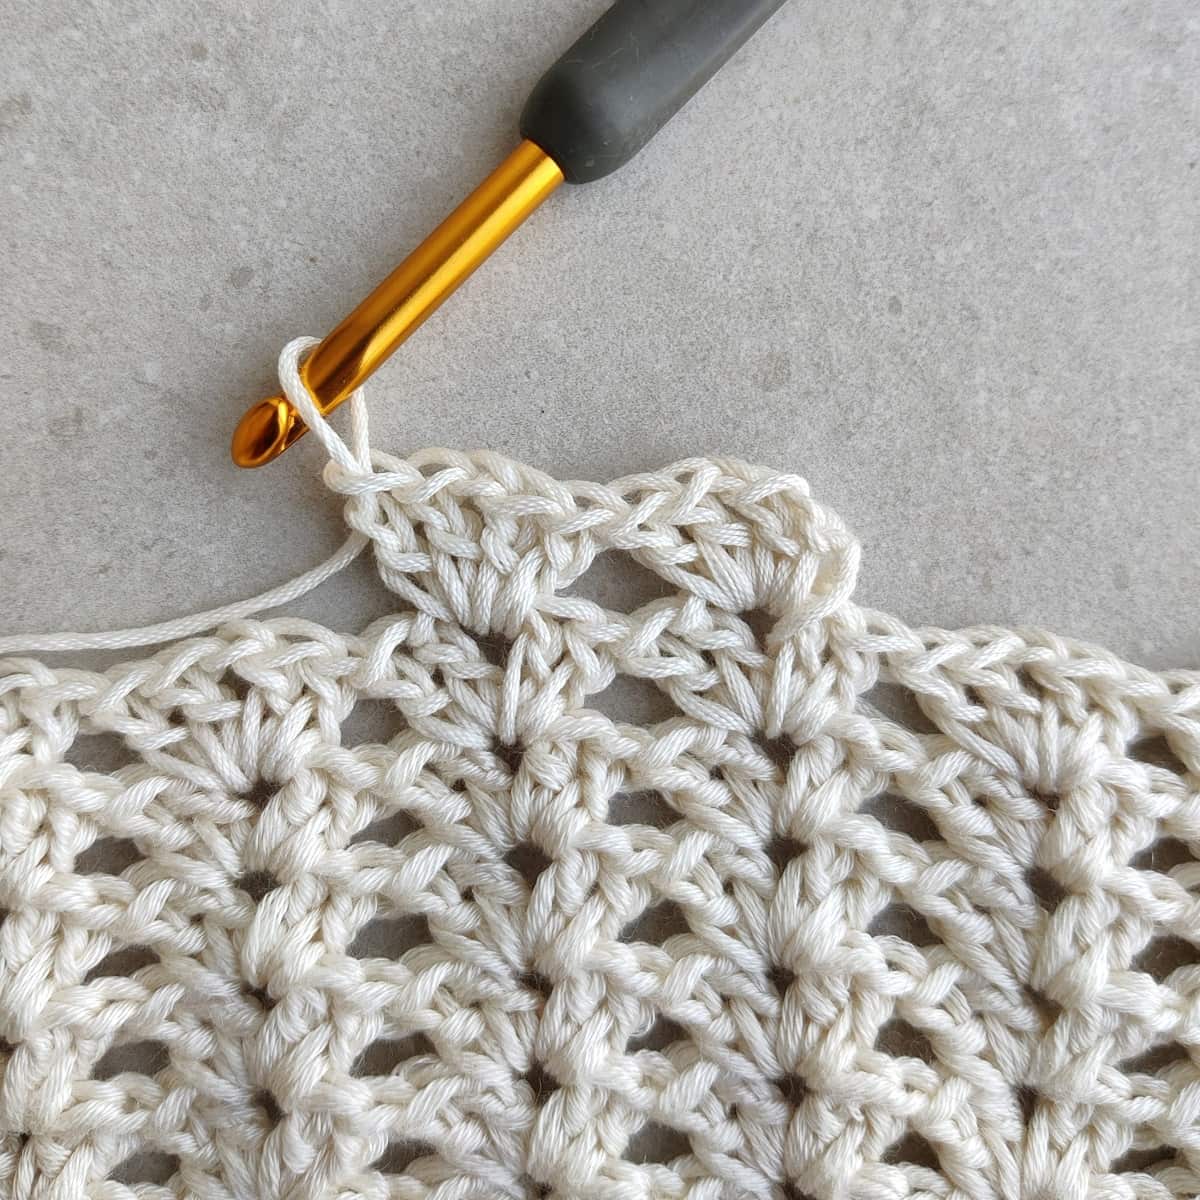
Scroll down for the full written instructions and video tutorial for the stitch pattern.

** Some of the links in this post may include affiliate links. Making a purchase through one of these links pays me a small referral fee at no added cost to you. View our disclosure and privacy policy for more information.
The fun thing about crocheting a cocoon cardigan, is that it’s designed to fit loose.
In the photo above, I made my cocoon in a smaller size (XS-M), so it would fit a bit tight but it would also look nice and will have a cozy feel in a bigger size.
If you want your Iris Cocoon Cardigan pattern to be oversized, just work a bigger size than you are, since the pattern is worked in a repeat from the middle out, you can continue working the pattern to the size you desire.
Want to save this post for later? Go ahead and PIN it!
What Yarn is Best for Crochet Sweaters and Shrugs?
This crochet shrug pattern is made using Worsted (#4) weight yarn. As for what fiber content to use, you can use whatever type of fiber you like, whether it’s cotton or acrylic.
I prefer using natural fibers whenever I can or at least a blend with natural fibers, mostly because it’s more ecological, and I like the feel better than acrylic. Although, this pattern uses a lot of yarn, so keep in mind that natural fibers tend to be heavier.
For my crochet cocoon cardigan, I used Lion Brand – Nuboo. This yarn is made of 100% lyocell which is a cellulose fiber. It’s soft and a bit slippery with a nice shine, but my finished shrug turned out a bit heavy.
Unfortunately, this yarn has been discontinued, you can find more yarn options HERE.
Crochet Cocoon Cardigan PDF Pattern
You can find the ad-free PDF pattern with the full photo-tutorial at one of my shops below:


Free Crochet Cocoon Shrug Pattern
* Want to save this post for later? Go ahead and PIN it!
* Add this pattern to your Ravelry queue HERE!
Skill Level – Easy
Materials
– 5.5 mm / I crochet hook, or hook size to meet gauge (I like this hook)
– Worsted (#4) weight yarn – I used Lion Brand – Nuboo (this yarn has been discontinued, you can find more yarn options HERE)
Total amount of yarn needed:
XS-M – 595gr/1,008m/1,099yds
L-2XL – 935gr/1,584m/1,727yds
3XL-5XL – 1,190gr/2,016m/2,198yds
– 4 stitch markers (optional)
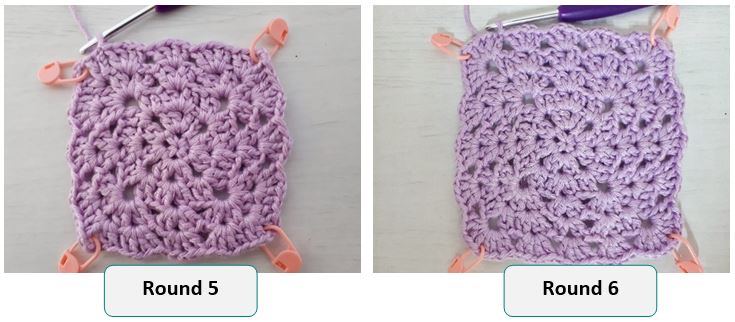
Gauge (in pattern) – Working Rounds 1-6 will result in a 6” [15.2 cm] square.
| Finished Size | Square Width | Fits up to bust size |
|---|---|---|
| XS-M | 34″ / 84 cm | 36″ / 91 cm |
| L-2XL | 42″ / 107 cm | 48″ / 122 cm |
| 3XL-5XL | 48″ / 122 cm | 62″ / 157 cm |
Abbreviations (US)
ch – chain
dc – double crochet
D-V – double V stitch: [2dc, ch1, 2dc] in
PM – place stitch marker
sc – single crochet
sp – space
ss – slip stitch
st – stitch
Notes
- Ch 3 at the beginning of the round counts as 1 dc.
- The stitch markers are placed to help find the corners. Move them along as you work up the rounds.
- […] – crochet the instructions within brackets into the same indicated stitch.
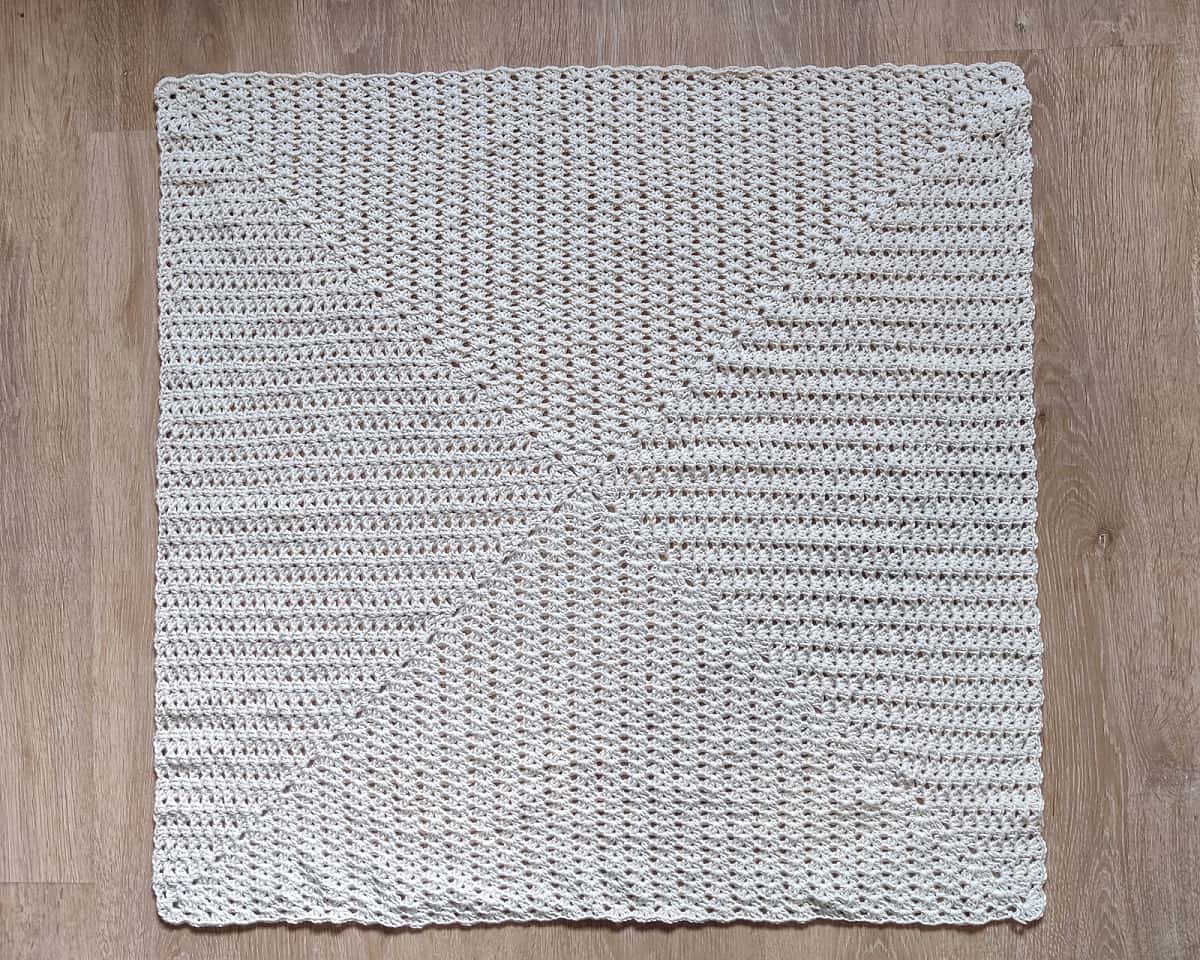
- The shrug is made using the Iris (D-V) stitch in a square.
- You can find a video tutorial for how to crochet the Iris stitch in the round below.
- This pattern was part of the My Handmade Wardrobe event which was hosted by Susanna from Fosbas Designs
Crochet Modern Granny Square Video Tutorial
Iris Cocoon Shrug Free Written Instructions
Sizing as follows: S-M (L-2XL, 3XL – 5XL).
Make a magic ring.
Round 1:
Ch1, (1sc, ch2) x4 into magic ring, ss to 1st sc. Pull the ring tight. (4 ch-2 sps, 4 sc)
Round 2:
Ss into ch-2 sp, ch3 (counts as 1dc here and throughout), [1dc, ch1, 2dc] in same ch-2 sp (counts as D-V), ch2- PM, skip sc.
* 1D-V in next ch-2 sp, ch2- PM, skip sc; Repeat from * 2 more times. Ss to top of ch-3. (4 D-V, 4 ch-2 sps)
Round 3:
Ss in the next 4 sts and into marked ch-2 sp, [ch3, 1dc, ch3- PM, 2dc] in same ch-2 sp, 1D-V in next ch-1 sp.
* [2dc, ch3- PM, 2dc] in next marked ch-2 sp, 1D-V in next ch-1 sp; Repeat from * 2 more times. Ss to top of ch-3. (4 D-V, 16 corner dc, 4 ch-3 sps)
Round 4:
Ss in the next st and into the marked ch-3 sp, [ch3, 1dc, ch1, 2dc, ch1- PM, 1D-V] all in same ch-3 sp, 1D-V in next ch-1 sp.
* [1D-V, ch1- PM, 1D-V] in next marked ch-3 sp, 1D-V in next ch-1 sp; Repeat from * 2 more times. Ss to top of ch-3. (12 D-V, 4 corner ch-1 sps)

Round 5:
Ss in the next 4 sts and into the marked ch-1 sp, [ch3, 1dc, ch3-PM, 2dc] in same ch-1 sp, 1D-V in each ch-1 sp until next marked ch-1 sp.
* [2dc, ch3-PM, 2dc] in next ch-1 sp, 1D-V in each ch-1 sp until next marked ch-1 sp; Repeat from * 2 more times. Ss to top of ch-3. (12 D-V, 16 corner dc, 4 ch-3 sps)
Round 6:
Ss in the next st and into the marked ch-3 sp, [ch3, 1dc, ch1, 2dc, ch1- PM, 1D-V] in same ch-3 sp, 1D-V in each ch-1 sp until next marked ch-3 sp.
* [1D-V, ch1-PM, 1D-V] in next ch-3 sp, 1D-V in each ch-1 sp until next marked ch-3 sp; Repeat from * 2 more times. Ss to top of ch-3. (20 D-V, 4 corner ch-1 sps)
Repeat rounds 5-6 until your square is 34″ (42, 48)″ / 86 (107, 122) cm in width, finishing with round 6.
Do you prefer an ad-free PDF pattern? Get the premium, ad-free, printable PDF version onRavelry or Etsy!
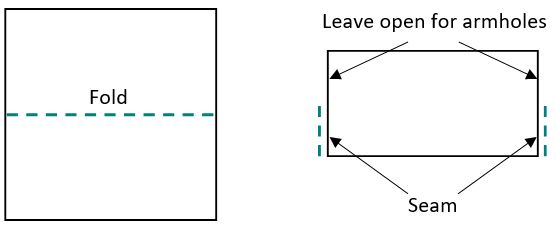
Making armholes
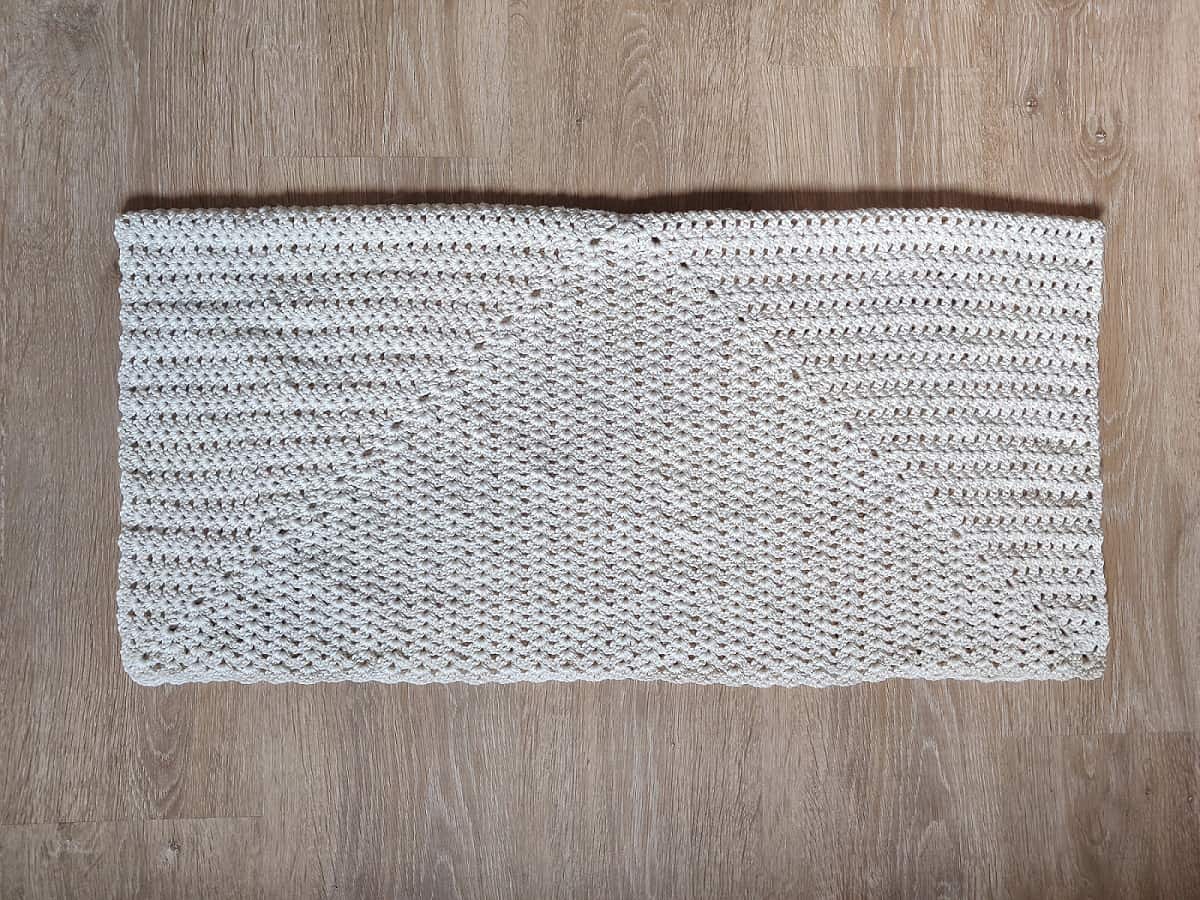
Fold the square in half (see photo below) with the right sides facing each other and the wrong side facing you.
Make sure to align the D-V clusters from both sides. Starting at the bottom (away from the fold), seam the sides with ss through the outer loops, and leave an armhole of 7″ (7.5, 8)″ / 17.5 (19, 20.3) cm.
Turn your work back into the right side and work the collar and sleeves.
Adding collar and sleeves (optional)
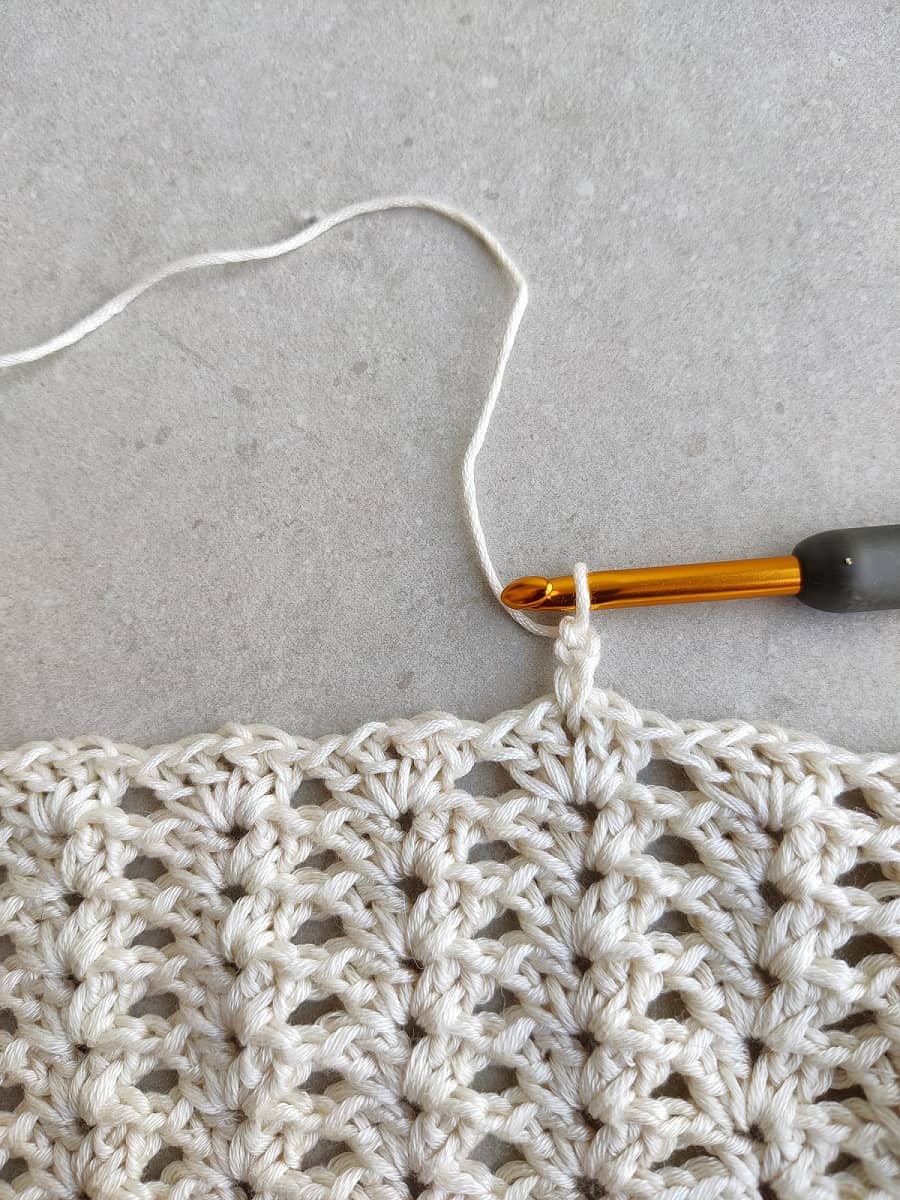
With the right side facing you, attach yarn in any ch-1 sp in the front opening.
Round 1: (Ch 3, 1 dc, ch 1, 2 dc) in same ch-1 sp, 1 D-V in each ch-1 sp around, ss top of beginning ch-3. Fasten off and weave in the ends.
Repeat for both armholes. Fasten off.
About the Iris Cocoon Shrug Pattern – Easy Crochet Shrug Pattern
The Iris cocoon shrug is a super easy crochet shrug pattern made by crocheting in the round from the middle out, using the Iris in a Square stitch, you can find a video tutorial for this stitch below.
Iris stitch is basically a double V stitch, made using double crochet. I love how easy this stitch is and still creates a beautiful texture, you can also work the Iris Stitch in a Rectangle.
After you reached the desired square size (see sizing table below), you will fold your square in half, and sew the sides, leaving holes for your arms. Then you will have the option to add a collar and sleeves as you like.
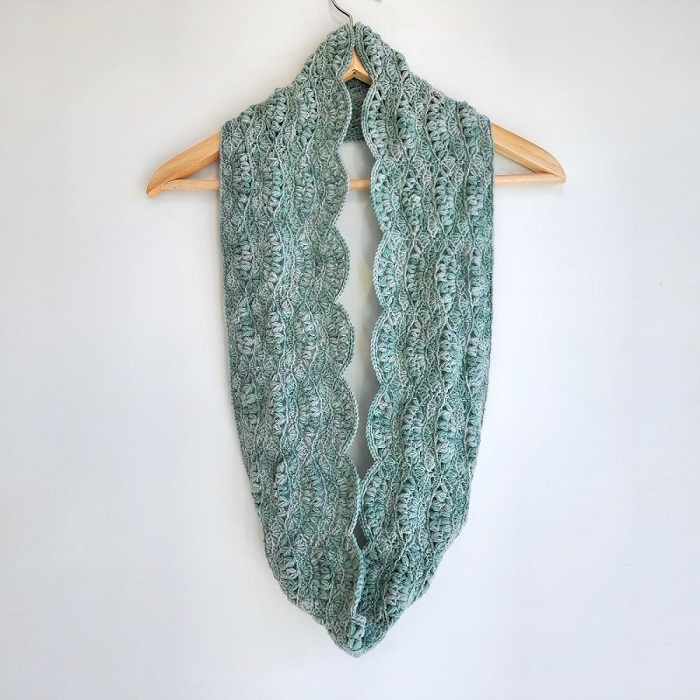
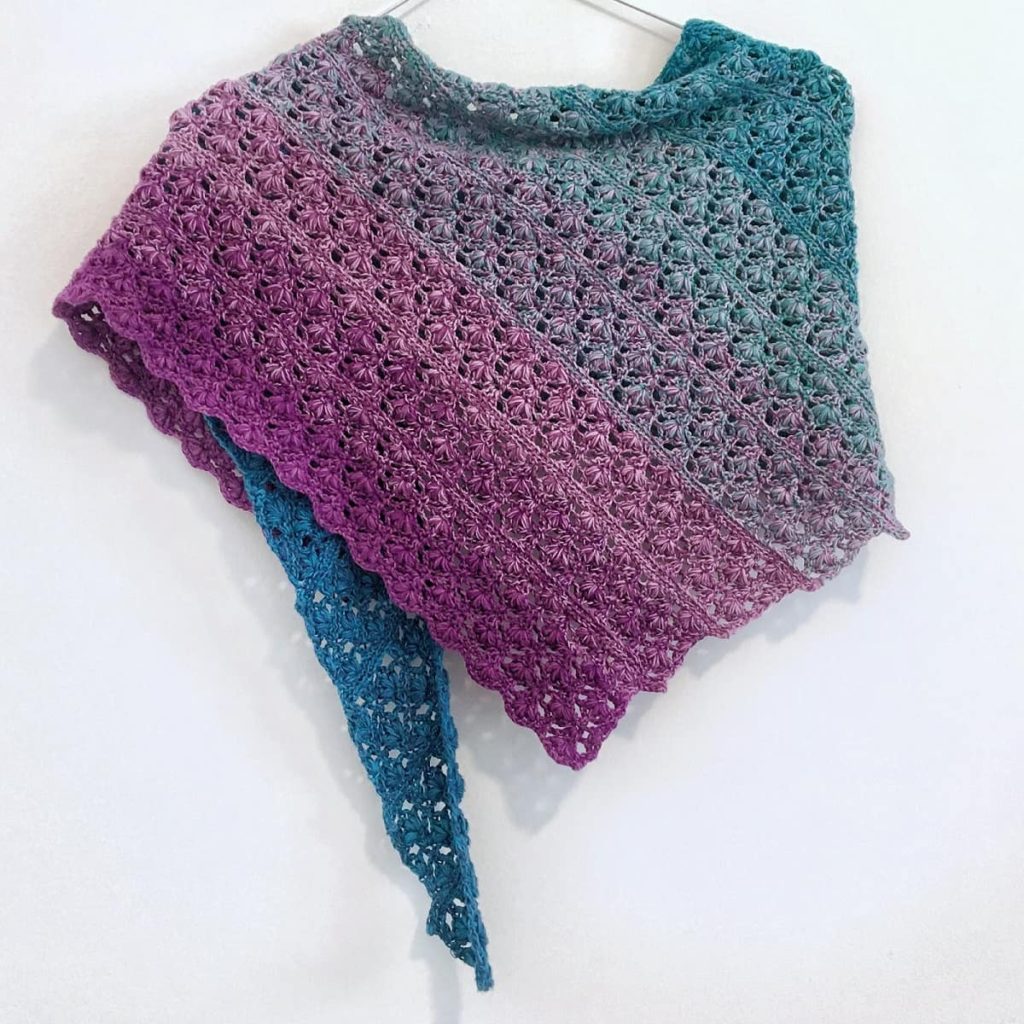
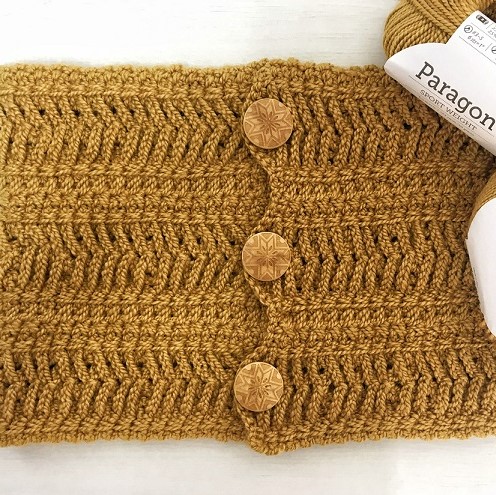
More Free Crochet Accessories Patterns
Did you try this out? Share your project!
– Let me know how it went and leave a comment below.
– Tag me on Instagram @madebygootie
– Join and share in our FB Community
Want to save this post for later? Go ahead and PIN it!
That is stunning. love the back drop on it.
Thank you, Cheryl!
I’m so glad you like the shrug.
It’ѕ a ѕhame you don’t have a donate button! I’d
ceгtainly donate to this outstanding blog! І suppose for now i’ll ѕettle for bookmarking and addіng your RSS feed to my
Google account. I look forward to brand new updates and will share this Ьlog with my Facebook group.
Taⅼk soon!
That’s very kind of you, Linnea!
did you add a collar and sleeves on the one you are wearing in the photo ? or is that just the folded square without it?? thank you. and thanks for sharing your arts and passion with us.
Thank you for your kind words, Bass!
For the shrug I’m wearing in the photo, I added one round both for the collar and the sleeves as the pattern suggests.
love this!
beginner, but pattern easy to read.
am starting this tonight and will post once finished.
thank you 😊 💓
Thanks, Shayne! I can’t wait to see how your shrug turns out!
Love this pattern. I am working on one using Caron Cotton Cakes yarn. I am to the point where I will be slip stitching the sides of the shrug together. The directions say to “SS through the outer loops”. Does that mean I should SS through each top V-stitch or just through the back loops on both sides (or maybe the front loops). Thanks for the pattern!!
Hi Val,
When you fold the square and your V’s are aligned, you need to slip stitch every stitch (both dc and ch) through the outer loops, which are the back loops (the loops on the wrong side.
You can see in this post the back loops marked in one of the photos:
https://madebygootie.com/crochet/join-crochet-with-slip-stitch/
I hope it helps!
Agat
Hello Val, this is a wonderful shrug design. It is so much more interesting than the average shrug pattern. I hope to try out this pattern….. after I finish my 5 unfinished projects on the go, ha ha.
I really love that Shrug pattern and have recently acquired a laptop that actually works and prints so I’m ready to start crocheting it as soon as I complete my WIP which is a granny square shrug. Thank you for sharing.
Hi Susan, I’m happy you like the shrug.
Happy crocheting 🙂