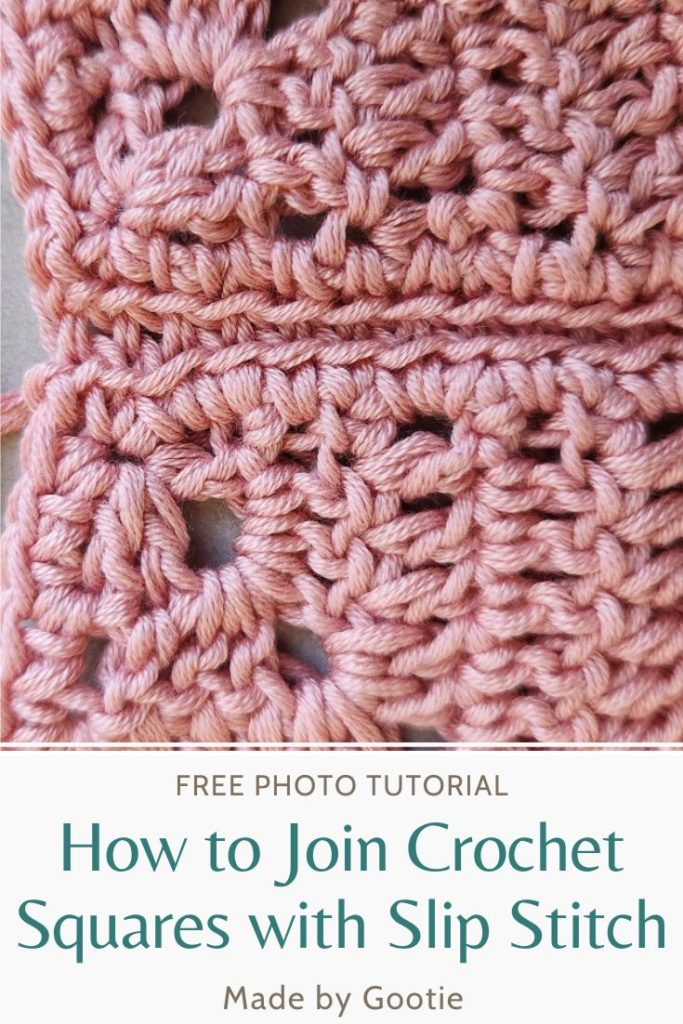
How To Join Crochet With Slip Stitch In Back Loop – In Bloom Ruana CAL Part 4
Last Updated on September 4, 2023
This photo tutorial will show you how to join crochet with slip stitch through the back loop. There are a lot of different ways to join crochet squares, but this is one of my favorites.
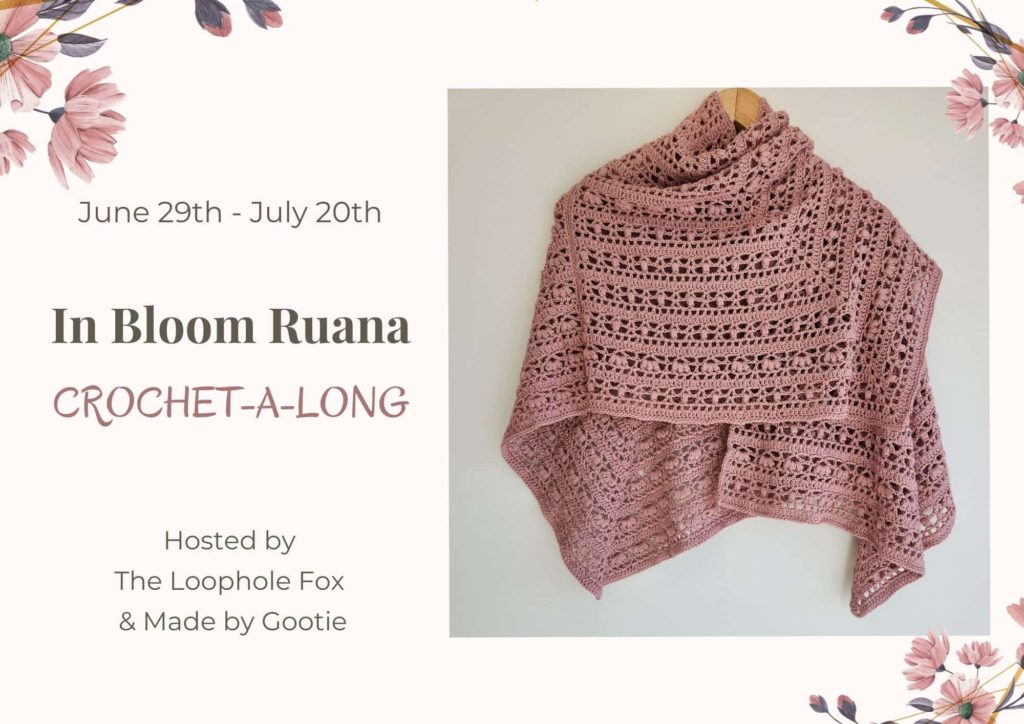
This is also the last part of the In Bloom Ruana Crochet Along, which is hosted by Shannon from The Loophole Fox and myself.
Use this tutorial and instructions to join your 3 squares.
** Some of the links in this post may include affiliate links. Making a purchase through one of these links pays me a small referral fee at no added cost to you. View our disclosure and privacy policy for more information.
What Is The Best Way to Join Crochet Squares?
The best way to join crochet pieces together depends on the crochet project you are making and is also a personal preference.
It depends if you want your crochet squares to be joined tight (for example when making a crochet bag, or a pillow), or whether you want to have this kind of lacy join (can be used when making a blanket).
I used this method of joining squares with a slip stitch through the back loop in my Diamonds Hexagon blanket and Flower Granny Square Blanket.
If you are here because you are making the In Bloom Ruana, you can use this method to join crochet squares with slip stitch through the back loop, or Seaming the Squares Using Invisible Whip Stitch.
But you can also use any of your preferred joining methods! Just scroll down to see the seaming instructions first.
Want to save this post for later? Go ahead and PIN it!
In Bloom Ruana PDF Crochet Pattern
We know not everyone likes to jump from one website to the other, or prefers to have their patterns without the ads.
We have put together a premium PDF version for the In BLoom Ruana which has the full instructions, different squares instructions, and 2 seaming options, with a full photo tutorial for each section.
You will get both the full photo tutorials PDF version and a print-friendly PDF version without the photos.
Throughout the event (from June 27th until July 23rd), the PDF will be available for a discounted price of $5.60, afterward, the price will be increased to $8.
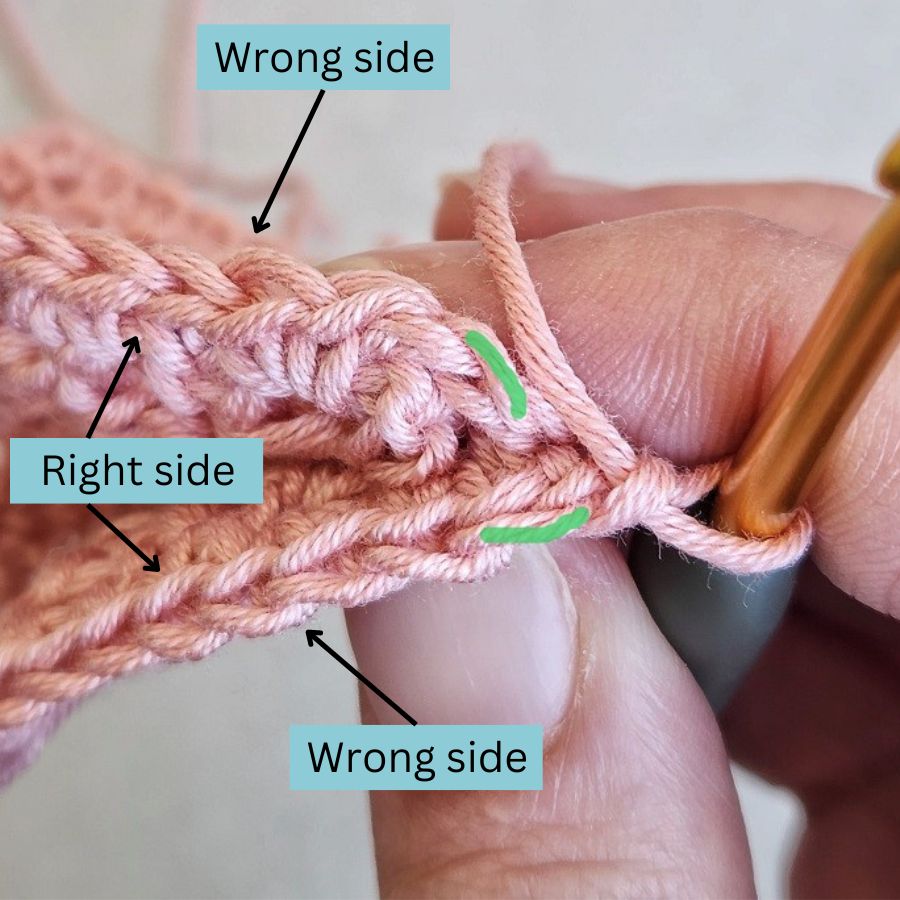
How Do You Find The Back Loop in Crochet?
To make it easier for you to identify the back loop when you are joining your squares, keep in mind that the back loop will always be the loop that is closer to the wrong side of your work, while the front loop will be the one that is closer to the right side of your work.
Here in the image below, you can see the right and wrong sides of the squares, and then the back loop of each square is highlighted with green.
Seaming Instructions For the In Bloom Ruana
To finish the Ruana, we seam the 3 squares together. Shannon used the Invisible Whip Stitch and I used the Slip Stitch Through Back Loop that you will find in this post.
If you have a preferred seaming method that you’d rather use, go for it!
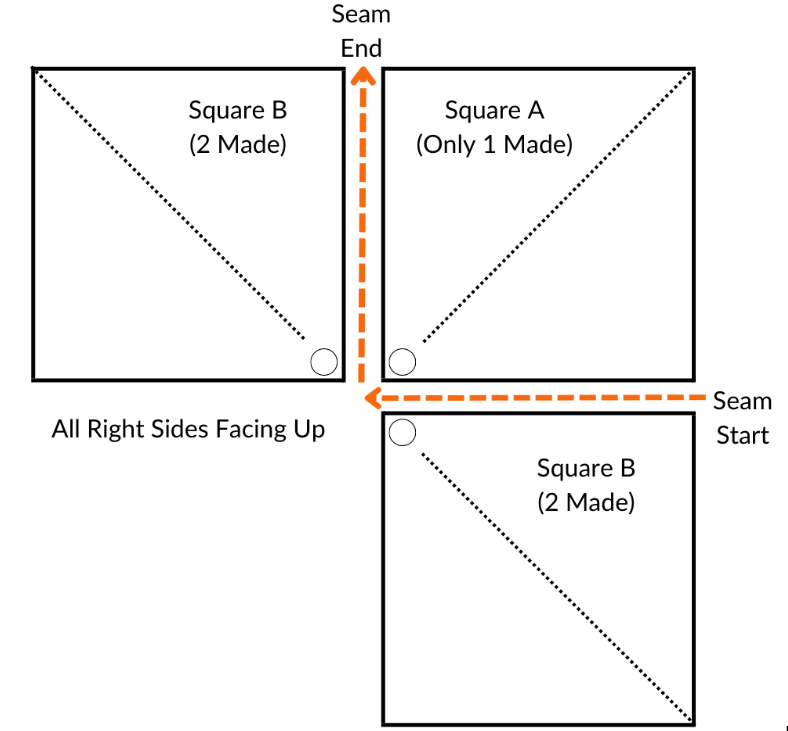
You will have 3 squares made: 1 of one pattern and 2 of the other pattern.
The square you made only 1 of will be the middle square (Square A) and the square you made 2 of will be the outside squares (Square B).
1) Lay out your three squares with their right sides facing up and Row 1 of the squares all facing toward the center.
2) Square A should be your corner square. Circles in the corners of the squares in the graphic to the right indicate the Magic Circle that started each square/Row 1.
3) Seam the 3 squares together as shown in the graphic. Follow the direction of the orange dotted arrows to seam.
4) Do not cut yarn during seaming. Continue to seam the next square.
How to Join Crochet With Slip Stitch Through Back Loop
- Step 1 – Align the first 2 squares that will be joined together. Then place one square on top of the other when the Right Sides are facing together, and the Wrong Sides are facing out.
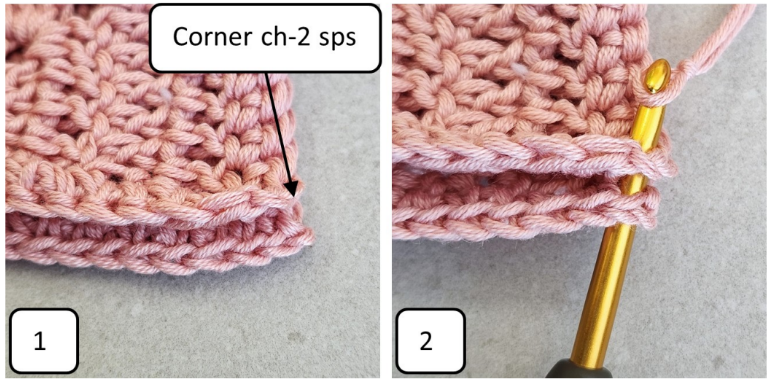
– The corner ch-2 sp’s created in the Magic Circle while creating the borders should be together and the corner ch-2 sp’s created on the edge of Row 48 should be together.
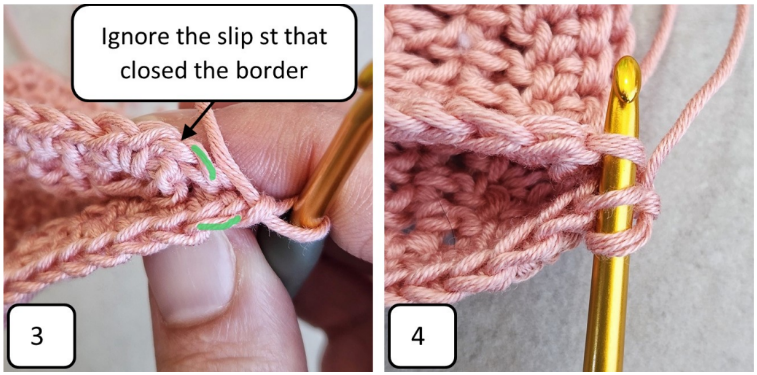
– Begin in the corner ch-2 spc on the edge of Row 48. - Step 2 – Attach the yarn into the ch-2 sp of both squares and secure the yarn (Pics 1 & 2).
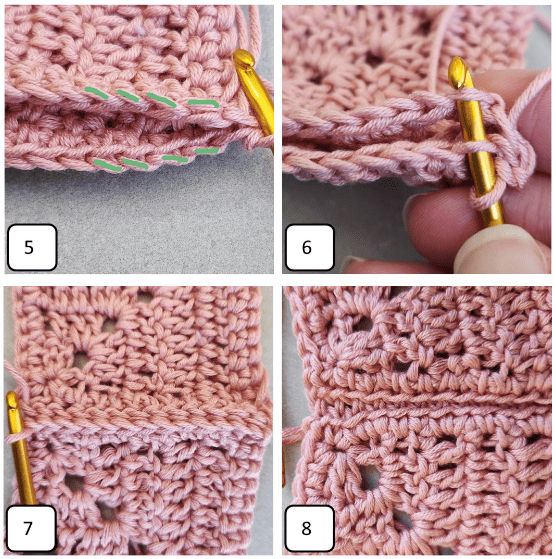
- Step 3 – Work a slip st through the back loops into the second ch of the corner ch-2 sp (the one before the slip st that closed the border):
Insert your hook into the Back Loop of the next 2 sts (Pics 3 & 4 – Back Loops are highlighted in green in Pic 3). Your hook will insert into the Back Loop Only of the stitch on the bottom square from WS to RS.
Then, your hook will insert into the Back Loop of the square on top from RS to WS.
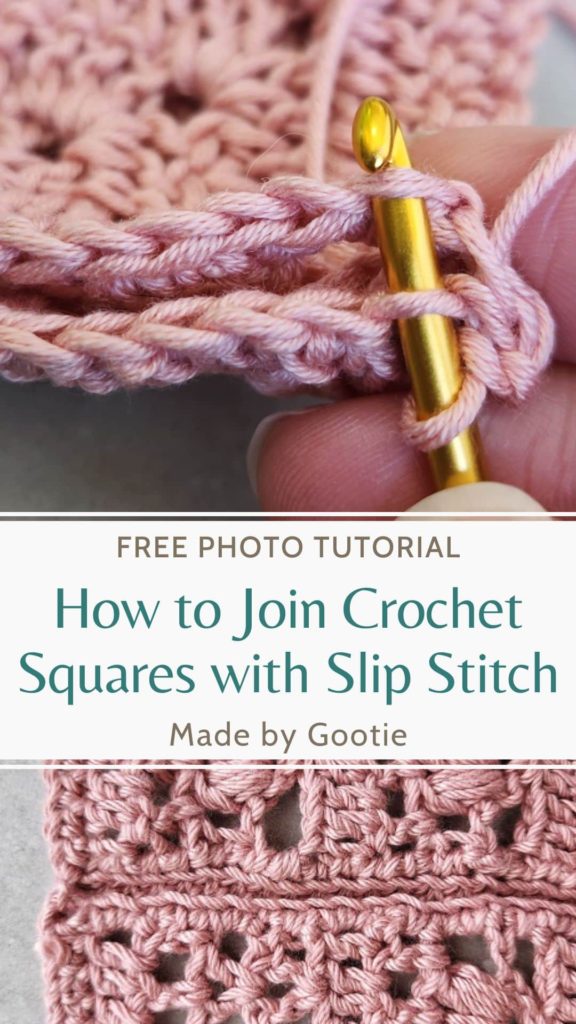
- Step 4 – Continue slip stitching across the sides of the square, making sure to insert your hook into the Back Loops Only (Pics 5 & 6).
– When you reach the corner ch-2 spaces in the Magic Circles, slip stitch only in the first chain of the ch-2 sp.
– This part of the join will end at the ch-2 sp created in the Magic Circle during the border. Make sure to slip st the corresponding sts together. There are 97 sts on this side plus one chain of each of the ch-2 sp. This means you will have a total of 99 sts.
- Step 5 – Rotate the 2 joined pieces so that the rectangle is horizontal.
Align the 3rd square to the unjoined side of the center square with the RS facing up. Then place the unjoined square on top of the other when the RS are facing together, and the WS are facing out.
– The two sides that will be joined will be vertical to you.
– The corner ch-2 spaces created in the Magic Circle while creating the borders should be together and the corner ch-2 spaces created on the edge of Row 48 should be together. Begin in the corner ch-2 space on the edge of the corner ch-2 sp.
- Step 6 – To join Square B, work a slip stitch into the corner ch-2 sp of both squares (not back loops), so it will be secured.
- Step 7 – Continue joining the squares with the same method, starting at the second chain of the corner ch-2 sp. At the end, make sure you seam the corner ch-2 spaces together.
- Step 8 – Tie off, cut yarn and weave ends.
Did you try this out? Share your project!
– Let me know how it went and leave a comment below.
– Tag me on Instagram @madebygootie
– Join and share in our FB Community
Want to save this post for later? Go ahead and PIN it!