Flower Buds Mitered Square Crochet Pattern
Last Updated on March 10, 2025
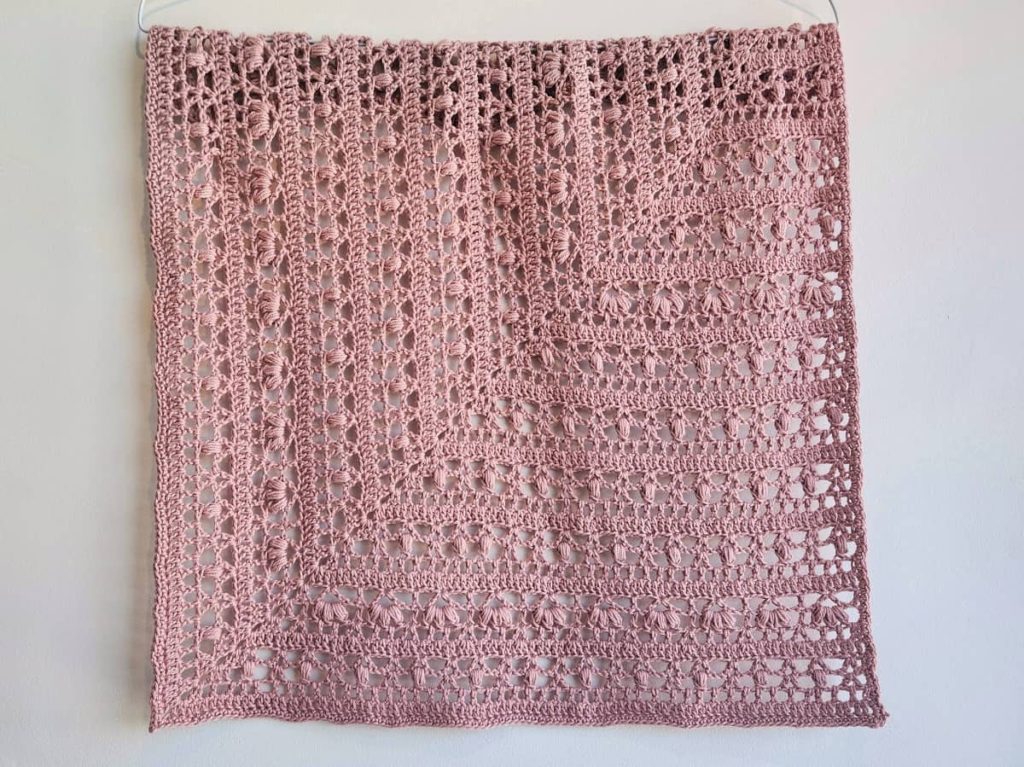
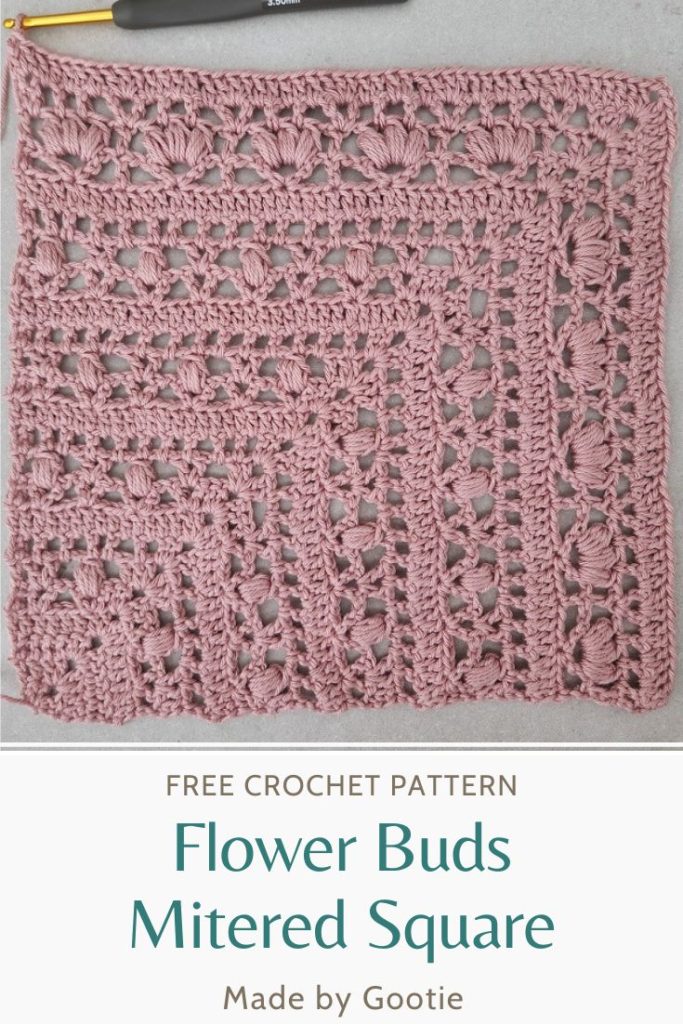
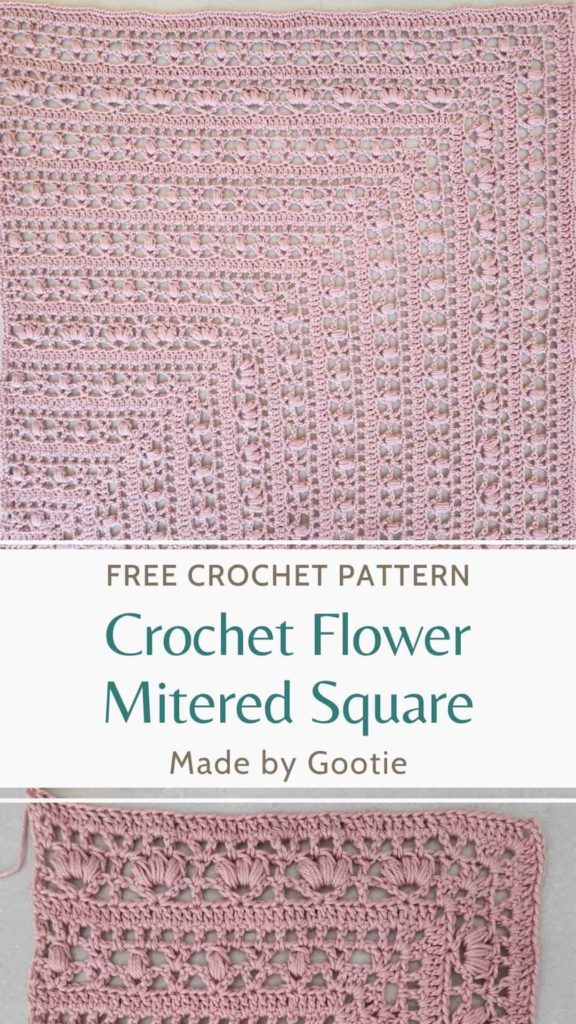
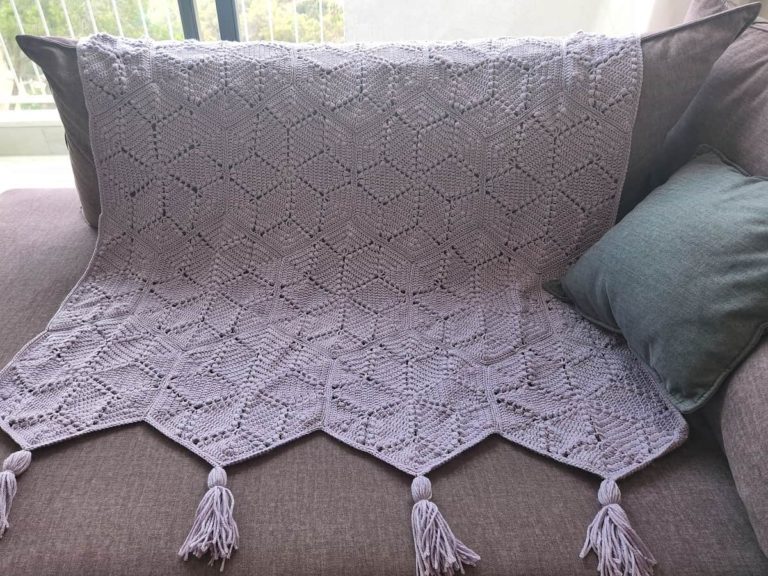
This free crochet flower square pattern is part of the In Bloom Ruana Crochet Along, which is hosted by Shannon from The Loophole Fox and myself.
The ruana is made out of 3 squares joined together, where each square is made using the Mitered Square method. The Flower Buds Mitered Square is the first square made in this crochet-along.
** Some of the links in this post may include affiliate links. Making a purchase through one of these links pays me a small referral fee at no added cost to you. View our disclosure and privacy policy for more information.
What Is a CAL (Crochet Along)?
A CAL is an event where different crocheters around the world are working together on the same pattern at the same time, that’s why it’s called a crochet along.
The In Bloom Ruana – Shawl Free Crochet Along is collaborative CAL, the pattern was designed both by Shannon and by me.
Each week from June 29th – July 20th (2023) a different part will be released of the pattern will be released. This free crochet flower square pattern is the first part of this CAL.
Want to save this post for later? Go ahead and PIN it!
About the In Bloom Ruana Pattern
The In Bloom Ruana is constructed from 3 squares seamed together, while each of the squares is made using the mitered square.
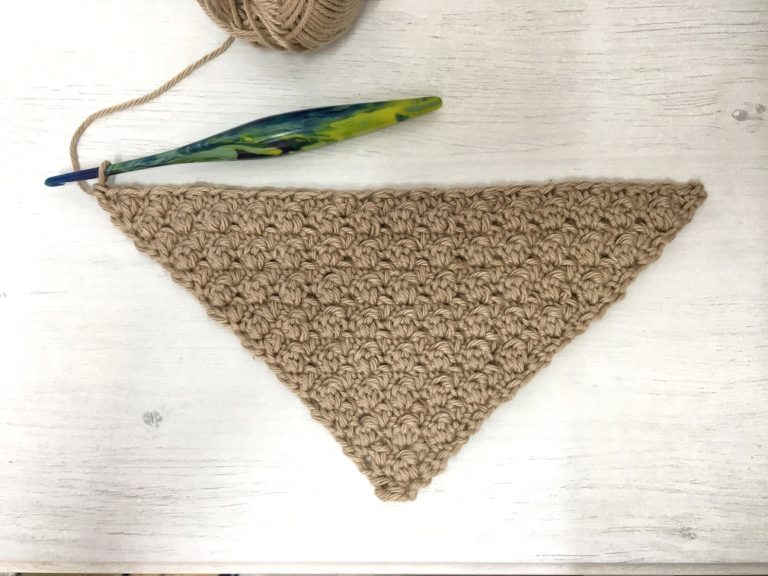
A crochet mitered square is a crochet square worked diagonally from one corner of the square to the other (while increasing in the center corner), but without having to decrease like in corner to corner method.
There are 2 ways to start a mitered square, one is to form a “corner” and crochet back and forth on its two sides to increase the corner into a square (as we will do with the Flower Buds Square).
The second way is to start with a beginning square and crochet back and forth on 2 sides of the square. I like to use the second method for blankets, like in my Mitered Butterflies Blanket and Mitered Tulips Blanket.
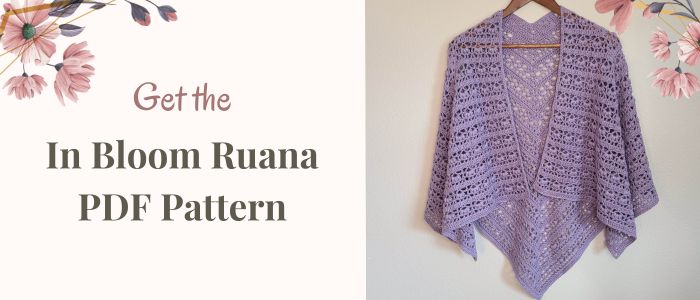
In Bloom Ruana PDF Crochet Pattern
We know not everyone likes to jump from one website to the other, or prefers to have their patterns without the ads.
We have put together a premium PDF version for the In BLoom Ruana which has the full instructions, different squares instructions, and 2 seaming options, with a full photo tutorial for each section.
You will get both the full photo tutorials PDF version and a print-friendly PDF version without the photos.
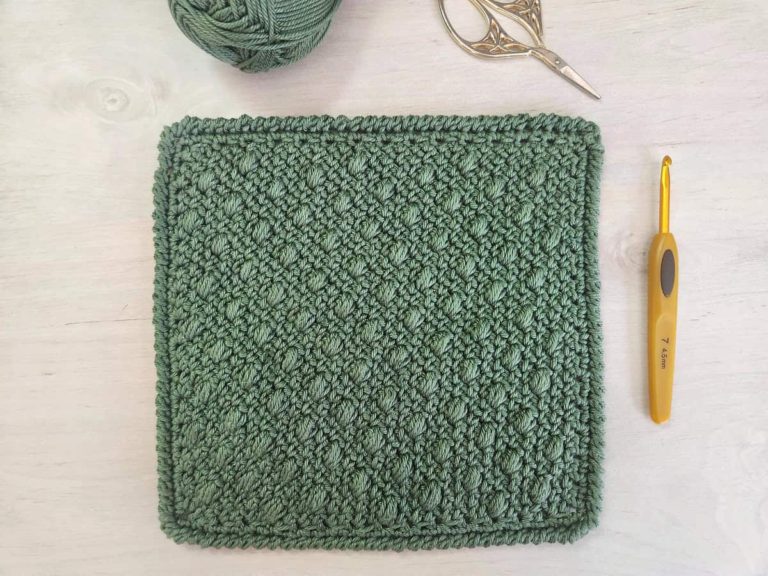
Flower Buds Mitered Square Crochet Pattern
* Want to save this post for later? Go ahead and PIN it!
* Add this pattern to your Ravelry queue HERE!
Skill Level – Intermediate
Materials
– 3.5 mm / E crochet hook (I like this hook)
– DK (3) Weight cotton or cotton blend yarn of your choice. I used Stylecraft Naturals Bamboo & Cotton DK in colorway Cameo.
For this crochet square, you will need approximately: 160 g/400 m / 437 yards
– stitch marker (if preferred)
NOTE: Because this is a cotton and bamboo blend, this DK yarn is on the thinner side and may have a significant gauge difference to an acrylic or wool DK. If you wish to use acrylic or wool yarn, you may
want to look into a Sport (2) weight instead.
Abbreviations (US)
ch – chain
dc – double crochet
flower – used only in stitch count and references (Puff-4, ch 1, Puff-4, ch 1, Puff-4) worked in same ch space
puff-4 – 4 YO Puff St: [yo, insert hook into indicated st/sp, yo and pull up a loop] x 4 times working into same st/sp, yo and pull through 8 loops, yo again and pull through 2 remaining loops
puff-5 – 5 YO Puff St: [yo, insert hook into indicated st/sp, yo and pull up a loop] x 5 times working into same st/sp, yo and pull through 10 loops, yo again and pull through 2 remaining loops
RS – right side
sk – skip
sp – space
STsc – stacked single crochet: work 1 single crochet in the first st, then work another single crochet into the left leg of the single crochet you just worked.
st – stitch
V-dc – dc V stitch: (1 dc, ch 1, 1 dc) in the same st/sp
yo – yarn over
Wide-V – (1 dc, ch 3, 1 dc) in the same st/sp
WS – wrong side
* – Repeats are shown via asterisks. Repeat begins at * and ends at ;
[…] – crochet the instructions within brackets into the same indicated st.
(…) – crochet the instructions within brackets as many times as directed.
Finished size – 19.5 x19.5 inch (49.5×49.5 cm) square. Size is listed after blocking.
Gauge (in pattern) – Check gauge after completing 10 rows. Your square should measure
approximately 4 inches (10.16 cm) along the side.
Notes
- An alternative to the Magic Circle: Ch 3, skip the ch 2 at row 1 and work the pattern into the 3 rd ch from the hook.
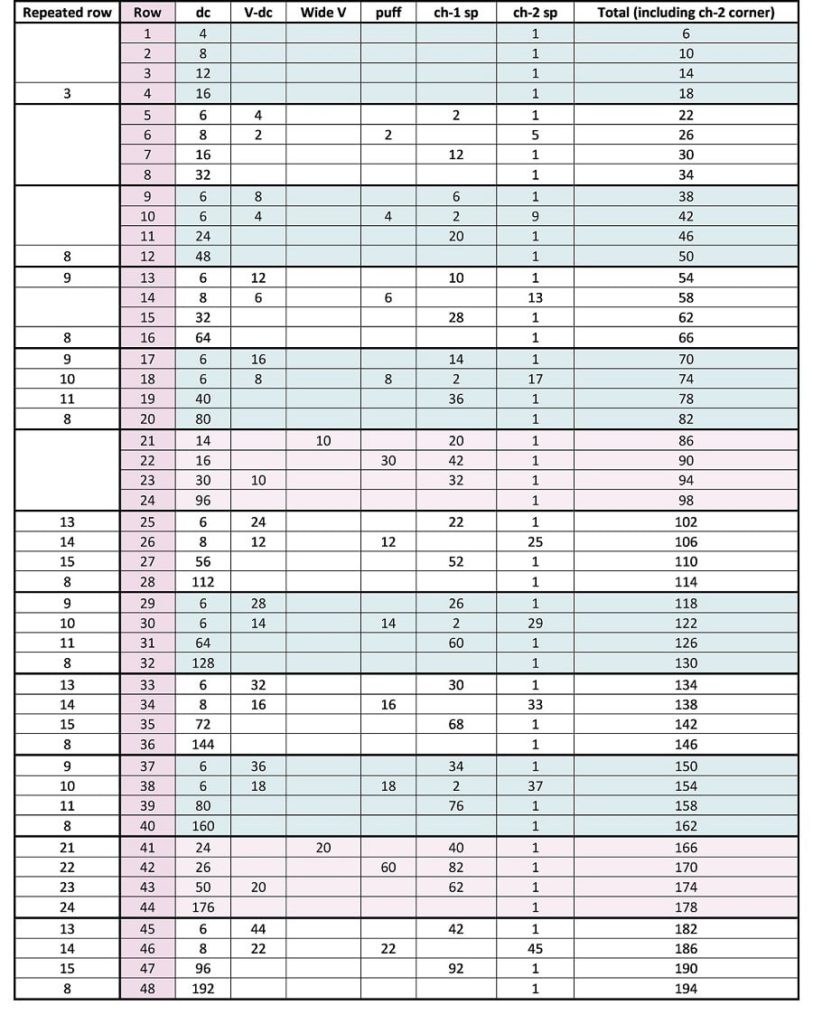
- There is a stitch count table after the written instructions, which will help you follow the row repetitions.
- To help with stitch count: every row adds 4 stitches (2 on each side).
- STsc is an alternative to the 1st double crochet, its intention in this pattern is to get a straighter edge. If you prefer, you can replace it with ch3, or ch2 + dc at the beginning of each row.
- You can place a stitch marker in the corner ch-2 space if you prefer.
How to Crochet the Puff-4 – 4 YO Puff Stitch
[yo, insert hook into indicated st/sp, yo and pull up a loop] x 4 times working into same st/sp, yo and pull through 8 loops, yo again and pull through 2 remaining loops

How to Crochet the Puff-5 – 5 YO Puff Stitch
[yo, insert hook into indicated st/sp, yo and pull up a loop] x 5 times working into same st/sp, yo and pull through 10 loops, yo again and pull through 2 remaining loops

How to Crochet the Stacked Single Crochet Stitch (STsc)
work 1 single crochet in the first st, then work another single crochet into the left leg of the single crochet you just worked.

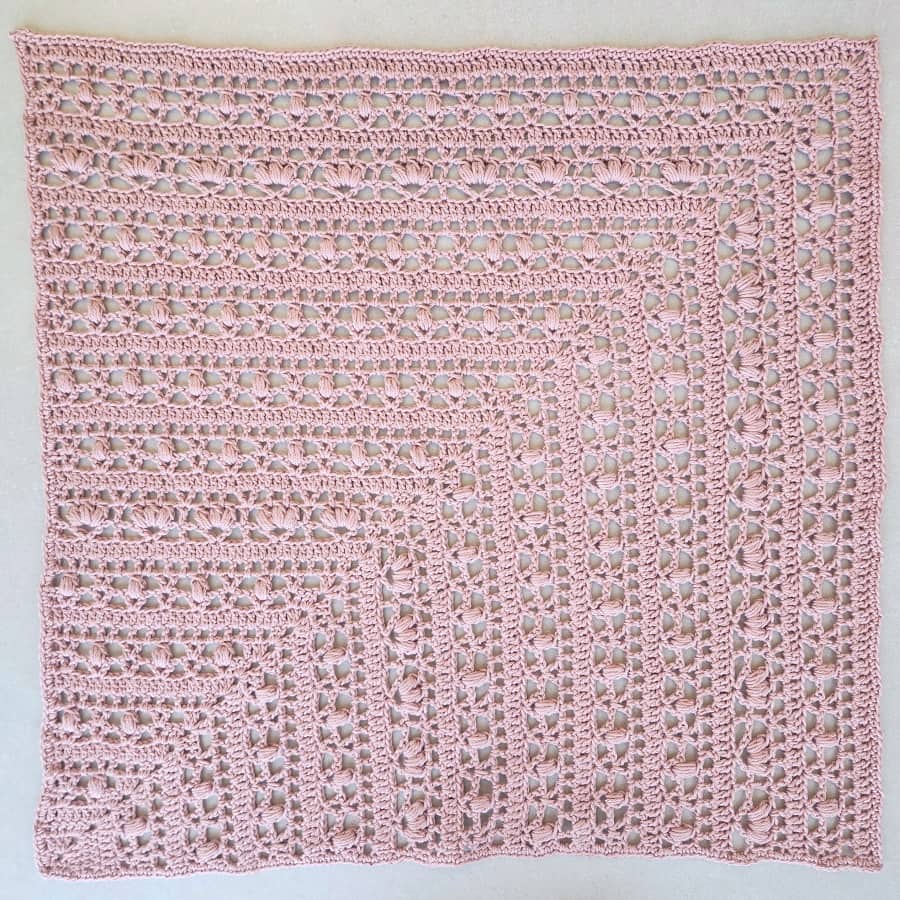
Free Crochet Flower Square Pattern
Make a Magic Circle (Click for the tutorial, if needed).
Row 1 (WS) – ch 2 (doesn’t count as a st), working into the Magic Circle: 2 dc, ch 2, 2 dc. Pull the ring tight, turn. (4 dc, 1 ch-2 sp)
Row 2 (RS) – STsc (counts as 1 dc here and throughout) in 1st dc, 1 dc in next dc, (2 dc, ch 2, 2 dc) in next ch-2 sp, 1 dc in each of last 2 dc, turn. (8 dc, 1 ch-2 sp)
Row 3 (WS) – STsc in 1st dc, 1 dc in each dc until corner ch-2 sp, (2 dc, ch 2, 2 dc) in corner ch-2 sp, 1 dc in each dc to the end of the row, turn. (12 dc, 1 ch-2 sp)
Row 4 (RS) – Repeat row 3. (16 dc, 1 ch-2 sp)
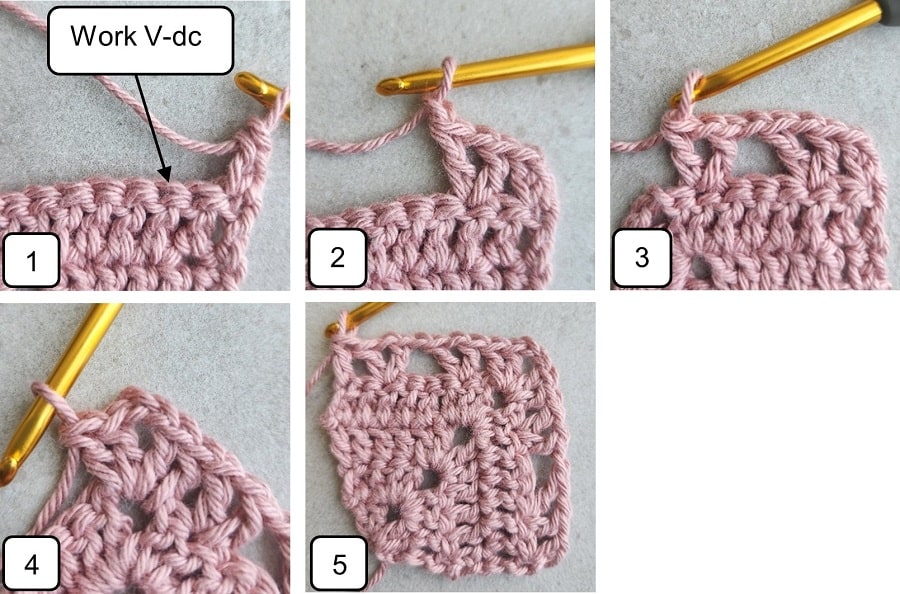
Row 5 (WS) – STsc in 1st dc, sk next dc (pic 1), 1 V-dc in next dc, ch 1 (pic 2), sk next 3 dc, 1 V-dc in next dc (pic 3), sk next dc, (2 dc, ch 2, 2 dc) in corner ch-2 sp (pic 4), sk next dc, 1 V-dc in next dc, ch 1, sk next 3 dc, 1 V-dc in next dc, sk next dc, 1 dc in last dc, turn. (6 dc, 4 V-dc, 2 ch-1 sp, 1 ch-2 sp)
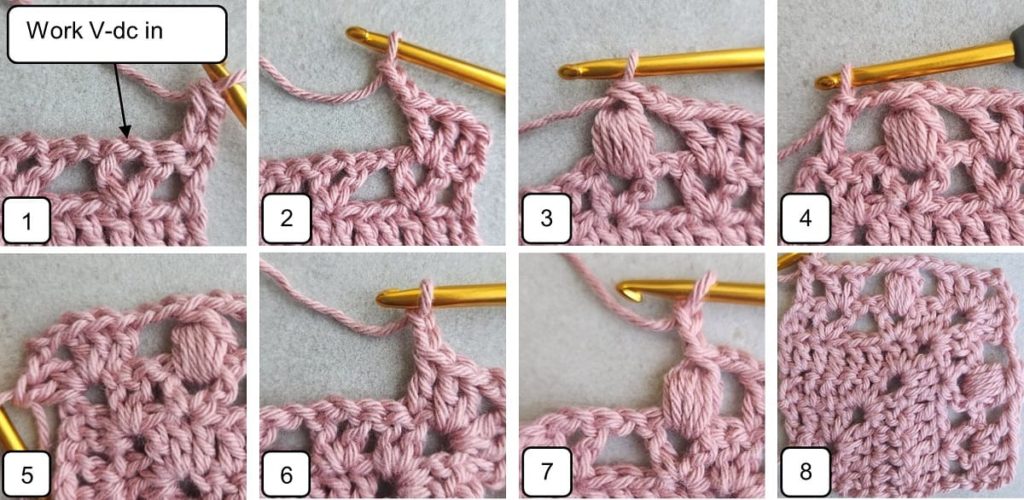
Row 6 (RS) – STsc in 1st dc, sk next dc, 1 V-dc in next ch-1 sp (pic 1), ch 2, sk next 3 sts, 1 puff-5 in next ch-1 sp (pic 3), ch 2, sk next 2 dc, 1 dc in next dc (pic 4), (2 dc, ch 2, 2 dc) in corner ch-2 sp, 1 dc in next dc, ch 2, sk next 2 dc (pic 6), 1 puff-5 in next ch-1 sp, ch 2 (pic 7), sk next 3 sts, 1 V-dc in next ch-1 sp, sk next dc, 1 dc in last dc, turn. (8 dc, 2 V-dc, 2 puff-5, 5 ch-2 sp)
Row 7 (WS) – STsc in 1st dc, ch 1, sk next dc, 1 dc in next ch-1 sp, ch 1, sk next dc, 1 dc in next ch-2 sp (pic 2), ch 1, 1 dc in next puff-5 (pic 1), ch 1, 1 dc in next ch-2 sp, ch 1, sk next dc, 1 dc in next dc (pic 2), ch 1, sk next dc, (2 dc, ch 2, 2 dc) in corner ch-2 sp.
Ch 1, sk next dc, 1 dc in next dc, ch 1, sk next dc, 1 dc in next ch-2 sp, ch 1, 1 dc in next puff-5, ch 1, 1 dc in next ch-2 sp, ch 1, sk next dc, 1 dc in next ch-1 sp, ch 1, sk next dc, 1 dc in last dc, turn. (16 dc, 12 ch-1 sp, 1 ch-2 sp)

Row 8 (RS) – STsc in 1st dc, 1 dc in each st (each dc & ch-1 sp) until corner ch-2 sp, (2 dc, ch 2, 2 dc) in corner ch-2 sp, 1 dc in each st (each dc & ch-1 sp) until the end of the row, turn. (32 dc, 1 ch-2 sp)
Row 9 (WS) – STsc in 1st dc, sk next dc, 1 V-dc in next dc.
* Ch 1, sk next 3 dc, 1 V-dc in next dc; Repeat from * to last dc before corner ch-2 sp, sk next dc, (2 dc, ch 2, 2 dc) in corner ch-2 sp. Sk next dc, 1 V-dc in next dc.
* Ch 1, sk next 3 dc, 1 V-dc in next dc; Repeat from * to last 2 dc, sk next dc, 1 dc in last dc, turn. (6 dc, 8 V-dc, 6 ch-1 sp, 1 ch-2 sp)
Row 10 (RS) – STsc in 1st dc, ch 1, sk next dc.
* 1 puff-5 in next ch-1 sp, ch 2, sk next 3 sts, 1 V-dc in next ch-1 sp, ch 2, sk next 3 sts; Repeat from * until corner ch-2 sp, (2 dc, ch 2, 2 dc) in corner ch-2 sp.
* Ch 2, sk next 3 sts, 1 V-dc in next ch-1 sp, ch 2, sk next 3 sts, 1 puff-5 in next ch-1 sp; Repeat from * to last 2 dc, ch 1, sk next dc, 1 dc in last dc, turn. (6 dc, 4 V-dc, 4 puff-5, 2 ch-1 sp, 9 ch-2 sp)

Row 11 (WS) – STsc in 1st dc, ch 1, sk next ch-1 sp.
* 1 dc in next puff-5 (pics 1 &2), ch 1, 1 dc in next ch-2 sp, ch 1, sk next dc, 1 dc in next ch-1 sp, ch 1, sk next dc, 1 dc in next ch-2 sp, ch 1; Repeat from * to last 2 dc before corner ch-2 sp, 1 dc in next dc, ch 1, sk next dc, (2 dc, ch 2, 2 dc) in corner ch-2 sp. Ch 1, sk next dc, 1 dc in next dc.
* Ch 1, 1 dc in next ch-2 sp, ch 1, sk next dc, 1 dc in next ch-1 sp, ch 1, sk next dc, 1 dc in next ch-2 sp, ch 1, 1 dc in next puff-5; Repeat from * to last 2 sts, ch 1, sk next ch-1 sp, 1 dc in last dc, turn. (24 dc, 20 ch-1 sp, 1 ch-2 sp)
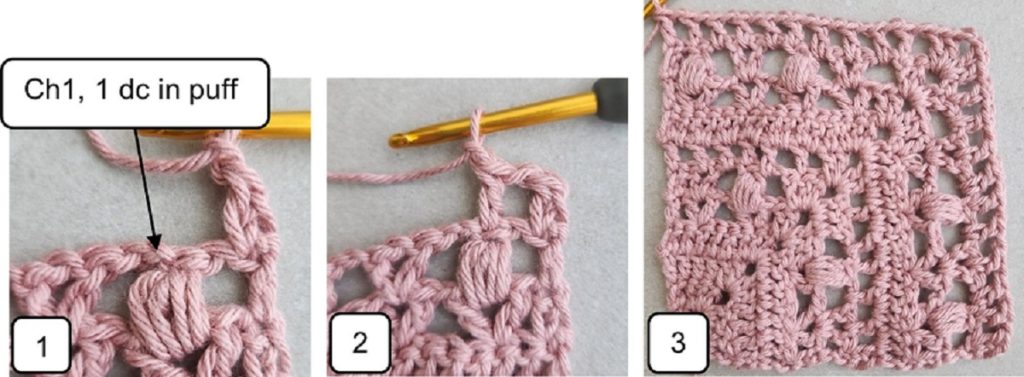
Row 12 (RS) – Repeat row 8. (48 dc, 1 ch-2 sp)
Row 13 (WS) – STsc in 1st dc, sk next dc, 1 V-dc in next dc.
* Ch 1, sk next 3 dc, 1 V-dc in next dc; Repeat from * to last dc before corner ch-2 sp, sk next dc, (2 dc, ch 2, 2 dc) in corner ch-2 sp. Sk next dc, 1 V-dc in next dc.
* Ch 1, sk next 3 dc, 1 V-dc in next dc; Repeat from * to last 2 dc, sk next dc, 1 dc in last dc, turn. (6 dc, 12 V-dc, 10 ch-1 sp, 1 ch-2 sp)
Row 14 (RS) – STsc in 1st dc, sk next dc, 1 V-dc in next ch-1 sp, ch 2, sk next 3 sts, 1 puff-5 in next ch-1 sp.
* Ch 2, sk next 3 sts, 1 V-dc in next ch-1 sp, ch 2, sk next 3 sts, 1 puff-5 in next ch-1 sp; Repeat from * to last 3 dc before corner ch-2 sp, ch 2, sk next 2 dc, 1 dc in next dc, (2 dc, ch 2, 2 dc) in corner ch-2 sp. 1 dc in next dc, ch 2, sk next 2 sts, 1 puff-5 in next ch-1 sp, ch 2, sk next 3 sts, 1 V-dc in next ch-1 sp.
* Ch 2, sk next 3 sts, 1 puff-5 in next ch-1 sp, ch 2, sk next 3 sts, 1 V-dc in next ch-1 sp; Repeat from * to last 2 sts, sk next dc, 1 dc in last dc, turn. (8 dc, 6 V-dc, 6 pu-5, 13 ch-2 sp)
Row 15 (WS) – STsc in 1st dc.
* Ch 1, sk next dc, 1 dc in next ch-1 sp, ch 1, sk next dc, 1 dc in next ch-2 sp, ch 1, 1 dc in next puff-5, ch 1, 1 dc in next ch-2 sp; Repeat from * to last 3 dc before corner ch-2 sp, ch 1, sk next dc, 1 dc in next dc, ch 1, sk next dc, (2 dc, ch 2, 2 dc) in corner ch-2 sp. Ch 1, sk next dc, 1 dc in next dc, ch 1, sk next dc.
* 1 dc in next ch-2 sp, ch 1, 1 dc in next puff-5, ch 1, 1 dc in next ch-2 sp, ch 1, sk next dc, 1 dc in next ch-1 sp, ch 1, sk next dc; Repeat from * to last dc, 1 dc in last dc, turn. (32 dc, 28 ch-1 sp, 1 ch-2 sp)
Rows 16-19 – Repeat rows 8-11. (Finishing row 19 with 40 dc, 36 ch-1 sp, 1 ch-2 sp)
Row 20 (RS) – Repeat row 8. (80 dc, 1 ch-2 sp)
Row 21 (WS) – STsc in 1st dc.
* Ch 1, sk next 3 dc (pic 1), Wide-V in next dc (pic 2), ch 1, sk next 3 dc, 1 dc in next dc (pic 3); repeat from * to last 7 dc before corner ch-2 sp. Ch 1, sk next 3 dc, Wide-V in next dc, ch 1, skip next 3 dc, (2 dc, ch 2, 2 dc) in corner ch-2 sp.
* Ch 1, sk next 3 dc, Wide-V in next dc, ch 1, sk next 3 dc, 1 dc next dc; Repeat from * to end of the row, turn. (14 dc, 10 Wide V, 20 ch-1 sp, 1 ch-2 sp)

Row 22 (RS) – STsc in 1st dc.
* Ch 1, sk next ch-1 sp & dc, ([puff-4, ch 1] x 3 times) in ch-3 sp of Wide-V (pic 4), sk next dc & ch-1 sp, 1 dc in next dc (pic 2); Repeat from * to last dc before corner ch-2 sp, ch 1, sk next dc, (2 dc, ch 2, 2 dc) in corner ch-2 sp (pic 3). Ch 1, sk next dc, 1 dc next dc.
* Ch 1, sk next ch-1 sp & dc, ([puff-4, ch 1] x 3 times) in ch-3 sp of Wide-V, sk next dc & ch-1 sp, 1 dc next dc; Repeat from * to the end of the row, turn. (16 dc, 10 flowers, 22 ch-1 sp, 1 ch-2 sp)

Row 23 (WS) – STsc in 1st dc, 1 dc in next ch-1 sp (pic 1), ch 1.
* [Sk next puff-4, 1 dc in next ch-1 sp, ch 1] x 2 times (pics 2&3), sk next puff-4 & ch-1 sp, V-dc in next dc, ch 1, sk next ch 1-sp (pic 4); Repeat from * to last 2 dc before corner ch-2 sp, sk next dc, 1 dc in next dc, (2 dc, ch 2, 2 dc) in corner ch-2 sp (pic 5). 1 dc in next dc, ch 1, sk next dc.
* Sk next ch-1 sp, V-dc in next dc, ch 1, sk next ch-1 sp & puff-4, [1 dc in next ch-1 sp, ch 1, sk next puff-4] x 2 times; Repeat from * to last ch-1 sp & dc, 1 dc in next ch-1 sp, 1 dc in last dc, turn. (30 dc, 10 V-dc, 32 ch-1 sp, 1 ch-2 sp)
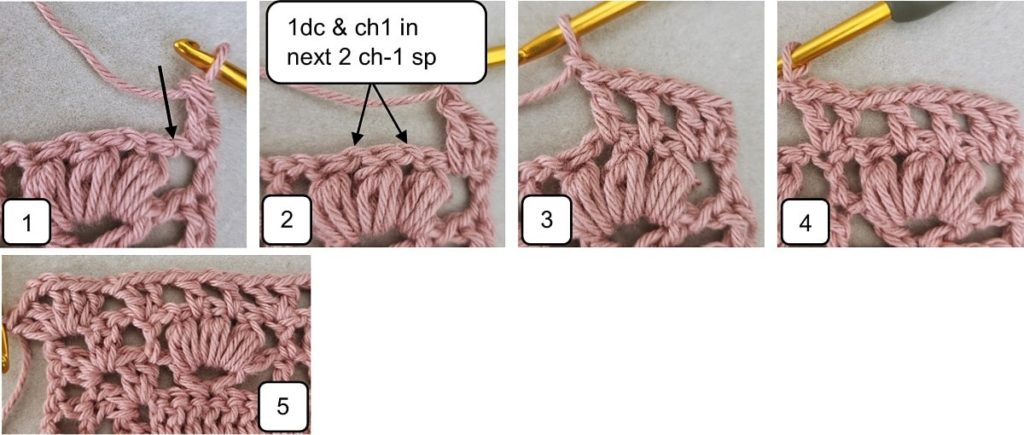
Row 24 (RS) – STsc in 1st dc, 1 dc in next dc.
* 1 dc in next 5 sts (each ch-1 sp & dc – pic 1&2 ), sk next dc, 3dc in ch-1 sp of V-dc (pic 3), sk next dc; Repeat from * to last 4 sts (ch-1 sp & 3 dc) before corner ch-2 sp, 1 dc in next 4 sts, (2 dc, ch 2, 2 dc) in corner ch-2 sp. 1 dc in next 4 sts.
* sk next dc, 3dc in ch-1 sp of V-dc, sk next dc, 1 dc in next 5 sts (each ch-1 sp & dc); Repeat from * to last 2 dc, 1 dc in last 2 dc, turn. (96 dc, 1 ch-2 sp)
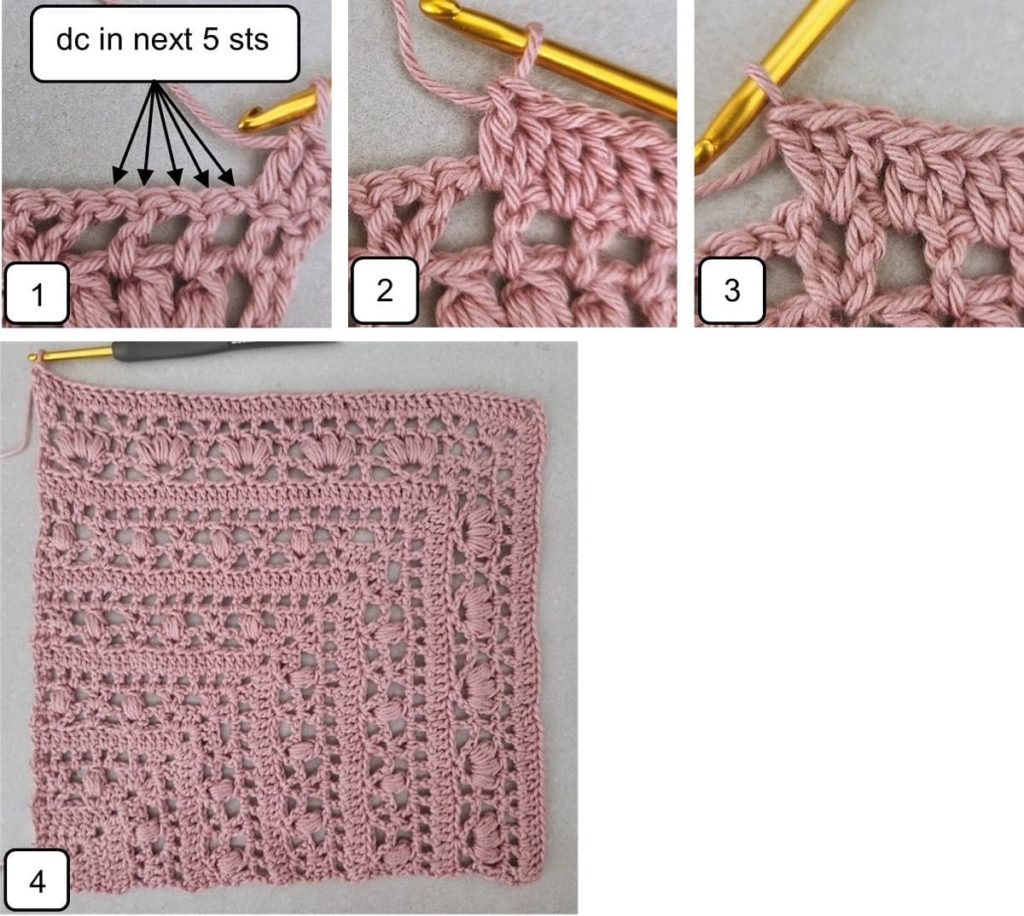
** Use the stitch count table at the end of the instructions to help keep
track of the row repetitions.
Rows 25-27 – Repeat rows 13-15.
Rows 28-31 – Repeat rows 8-11.
Row 32 (RS) – Repeat row 8.
Rows 33-40 – Repeat rows 25-32.
Rows 41-44 – Repeat rows 21-24.
Rows 45-47 – Repeat rows 13-15.
Row 48 (RS) – Repeat row 8. Don’t fasten off, continue working the border
(use the stitch count table at the end of the instructions).
How to Crochet a Border On a Square
At the end of each square made for the shawl, do not cut yarn.
Crochet a border of single crochet for easier seaming. The instructions follow the diagram
to the right.
Border Round 1 – Ch 1. Do not turn but rotate to work along the side of the
rows. In the side of each dc, place 2 sc. (96)

At the end of this side, you will be at the starting Magic Circle. In this circle, place (1 sc, ch 2, 1 sc) (2).

Rotate to work along the next side of the rows. In the side of each dc, place 2 sc. (96)
At the end, ch 2 and rotate to work along Row 48.
Place 1 sc in each st across to corner ch 2 spc (96).
In the chain 2 space, place (1 sc, ch 2, 1 sc) (2).
Continue placing 1 sc in each st across to end (96).
Ch 2, sl st to first sc to close. (388 sts, 97 on each side, 4 ch 2 spcs)
Did you try this out? Share your project!
– Let me know how it went and leave a comment below.
– Tag me on Instagram @madebygootie
– Join and share in our FB Community
Want to save this post for later? Go ahead and PIN it!



Questions about CAL: How many stitches in the magic ring? What does the bold mean? A video for the beginning would be a great help. Also, went to buy the PDF and it won’t take my debt card —any of them!
Hi Karen 🙂
1) In the magic ring you end up with 4 double crochet and ch2 in the middle (2 dc of each side of the ch-2 sp).
2) The bold at the end of row are the stitch count mentioned inside the parenthesis.
3) Aslo the corner stitches are bold to make it easier to read the pattern.
4) I’m not sure it won’t take your debt card, but at the moment the only payment processor we have is PayPal.
Could you provide a stitch count for each row? That way I can check my stitches and prevent errors on the following rows as well. Thank you so much. I really love this pattern.
Hi Carolyn,
There’s a stitch count table after the written instructions.
Can you please let me know if it’s not showing for you?
I just found it. I’m embarrassed I missed It before. Thank you so much for your prompt reply. And thanks again for sharing this beautiful pattern!!
Carolyn
Glad you found it! and pleased don’t be embarrassed about it, the table has been added to the post as an image, and sometimes they take time to load.
so I can only assume it’s the case 🙂
Is there any way to make it longer.
Hi Gail, yes, you can make it longer after you reached the desired width,
by repeating the row repetitions (from row 25) only on one side of the square.
Just work until the ch2 corner and work half of the corner (until the ch2).
Then on the next row, start working the pattern after the ch2 corner (from the other half of rhe corner).
I hope it makes sense!
I think you’re saying to work the pattern till you get to the ch 2 sp work the 2 DC and then ch 2 and turn around and continue with the pattern.
yes, exactly.
amei lindo adorei mas eu gostaria de vídeo aula ia me ajudar muito obrigada
I’m glad you like it, Janete!
Unfortunately, I don’t have a video tutorial for this pattern.
What does “bright side” mean in the Abbreviations section? Excerpt here:
puff-5 – 5 YO Puff St: [yo, insert hook into indicated st/sp, yo and pull up a loop] x 5 times working into same st/sp, yo and pull through 10 loops, yo again and pull through 2 remaining loops
bright side
sk – skip
Hi Susan,
Sorry about it and thank you for brining it to my attention.
It should say: RS – right side