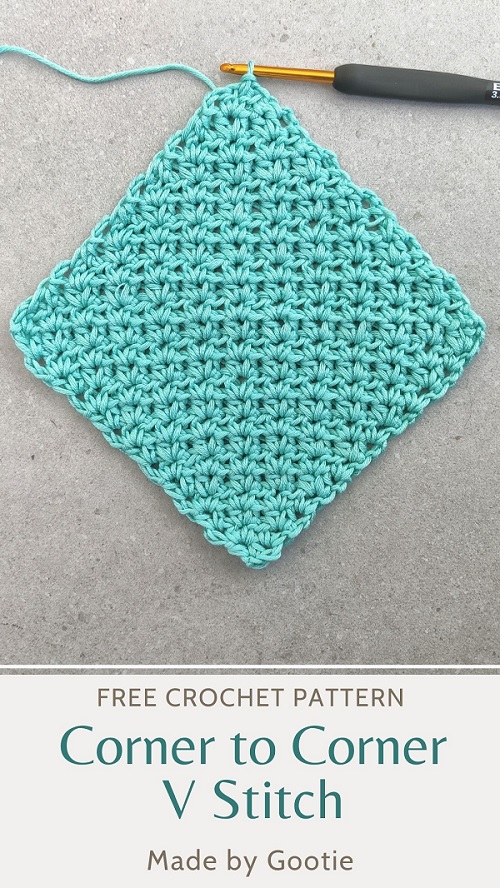
C2C V Stitch: Free Corner to Corner Crochet Pattern
Last Updated on June 4, 2024
You know how much I love working with different corner to corner crochet stitches.
In my journey of exploring different C2C stitches, I came across the V half double crochet stitch.
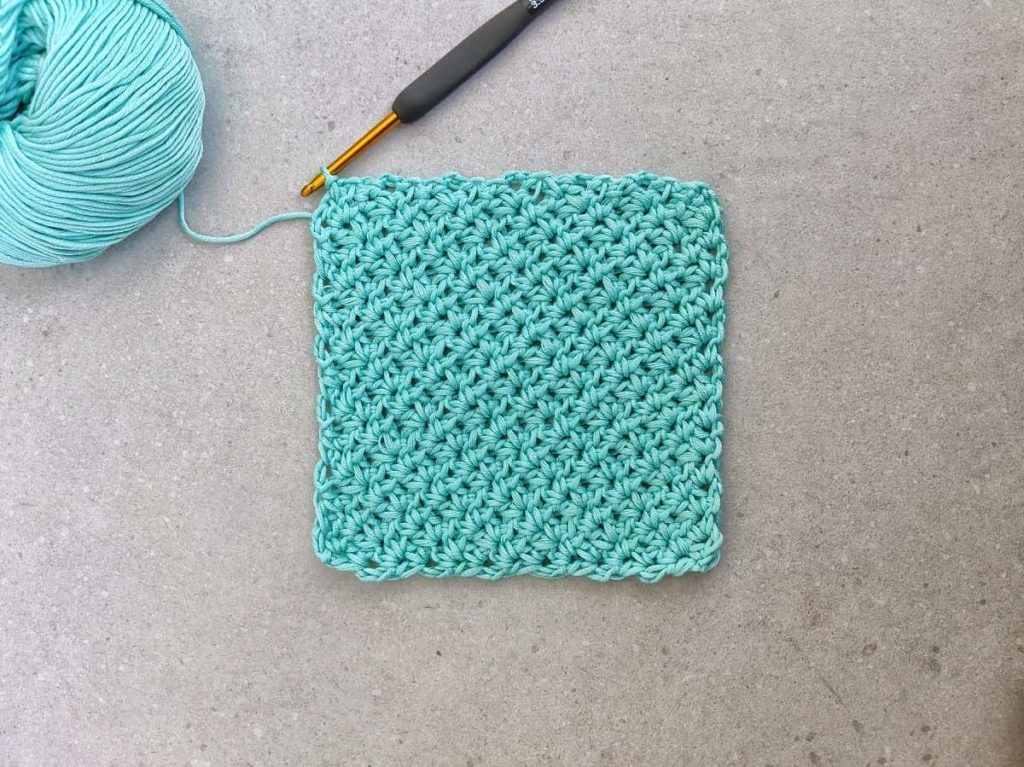
Unlike the C2C Wattle stitch or the C2C Cluster stitch, the C2C V stitch creates more airy fabric without having too many holes.
In this tutorial, you will find both a video tutorial and written instructions.
** Some of the links in this post may include affiliate links. Making a purchase through one of these links pays me a small referral fee at no added cost to you. These small fees add up and help me keep the blog running. View our disclosure and privacy policy for more information.
How to Crochet the Half Double Crochet V Stitch
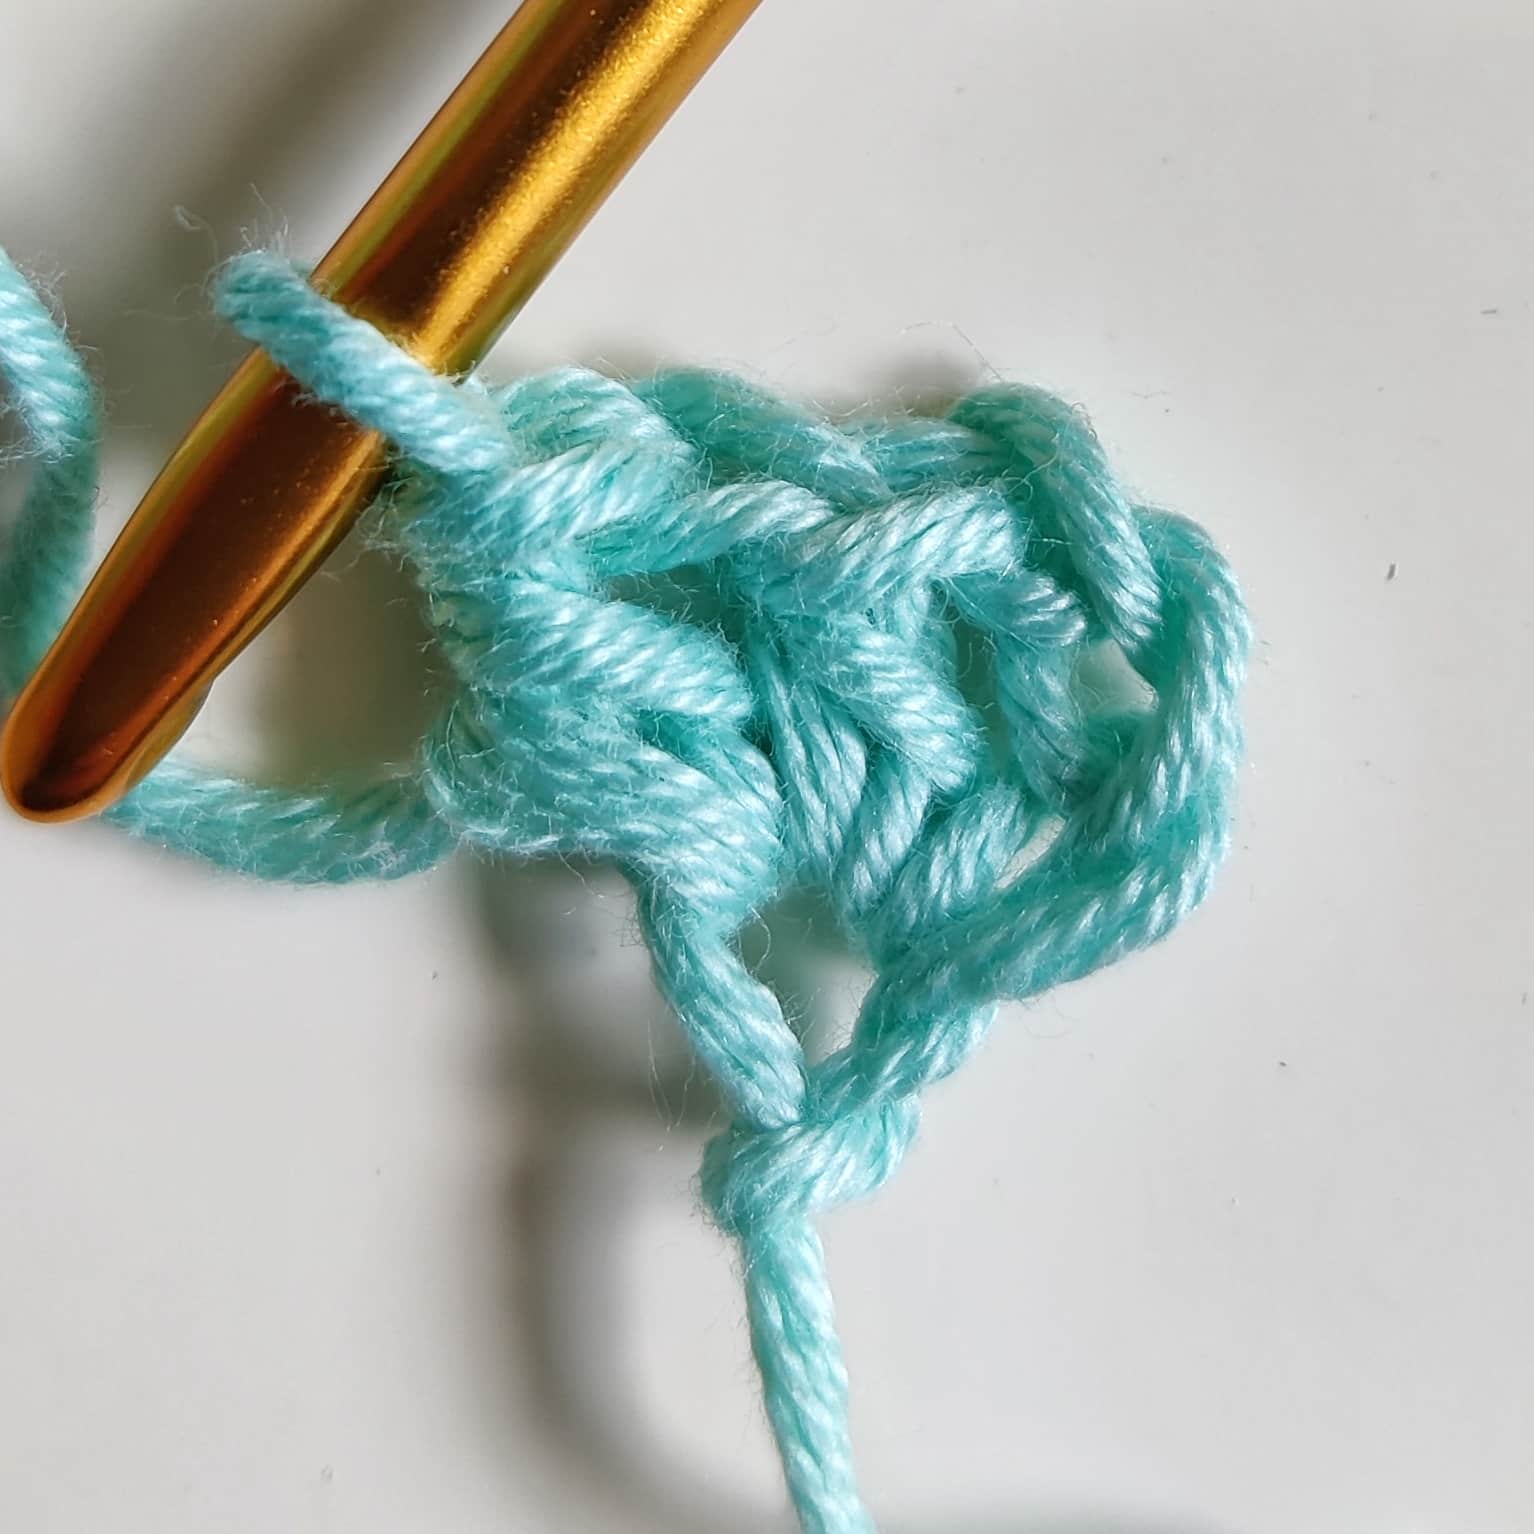
For this corner to corner V stitch pattern, I used the half-double crochet V stitch which is [1hdc, ch1, 1hdc] worked in the same ch-1 space of the V stitch from the previous row.
The crochet V Stitch can be made using either double crochet or a half double crochet. I decided to use the hdc stitch for this C2C V stitch pattern because I like the V-hdc better.
The V-hdc stitch is less dense than the V-dc, and creates a soft and airy fabric, without being too holey. I have also used it in my Sashay Shawl and the Any-Yarn Rectangle Shawl.
Want to save this post for later? Go ahead and PIN it!
Crocheting the C2C V Stitch
Working in a corner to corner method is very simple, and beginner-friendly, and there are many c2c stitch variations.
Starting from one corner, you add 3 chains at the beginning of every row and work a v stitch in this chain space that creates the next row to increase. So we are increasing by adding 1 V stitch at the end of each row.
And the same logic is used for the c2c decreasing method, we are decreasing 1 V stitch at the end of every row.
Working back and forth like that creates a reversible fabric!
Want to learn more about the Corner to Corner method? Check out the Guide to How to Crochet Corner to Corner!
C2C V Stitch Video Tutorial
Click the image below to watch the stitch tutorial on YouTube

How to Crochet the C2C V Stitch
Skill level – easy
Materials
– Crochet hook 3.5 mm (I love the Etimo and Clover Hooks).
– DK (#3) weight yarn – 100% cotton.
Amount of yarn needed: 20gr/45m/50yds
– If you would like to turn this design into a blanket, these are great yarn options for this:
Mary Maxim – Artist Pallete
Mary Maxim – Sugar Baby Stripes
Lion Brand – Mandala
– 2 Stitch markers (optional)
Finished Size – 6.5×6.5” (16.5×16.5 cm)
Do you prefer photo tutorials? Get the premium, ad-free, full photo-tutorial, printable PDF version onRavelry or Etsy!
Abbreviations (US)
ch – chain
ss – slip stitch
st – stitch
hdc – half double crochet
V-hdc – [1hdc, ch1, 1hdc] in same stitch
hdc2tog – half double crochet 2 together
PM – place marker
Notes
- To make it easier to find the ch3 / ch2 spaces at the end of the row, place a stitch marker when you ch3/ch2 at the beginning of each row.
- The pattern can be worked as a square or as a rectangle (see instructions in pattern).
- This pattern can be made in any size that you want, it’s a great stitch for blankets and washcloths!
- I would love to see your project! You can upload your project to Ravelry HERE.
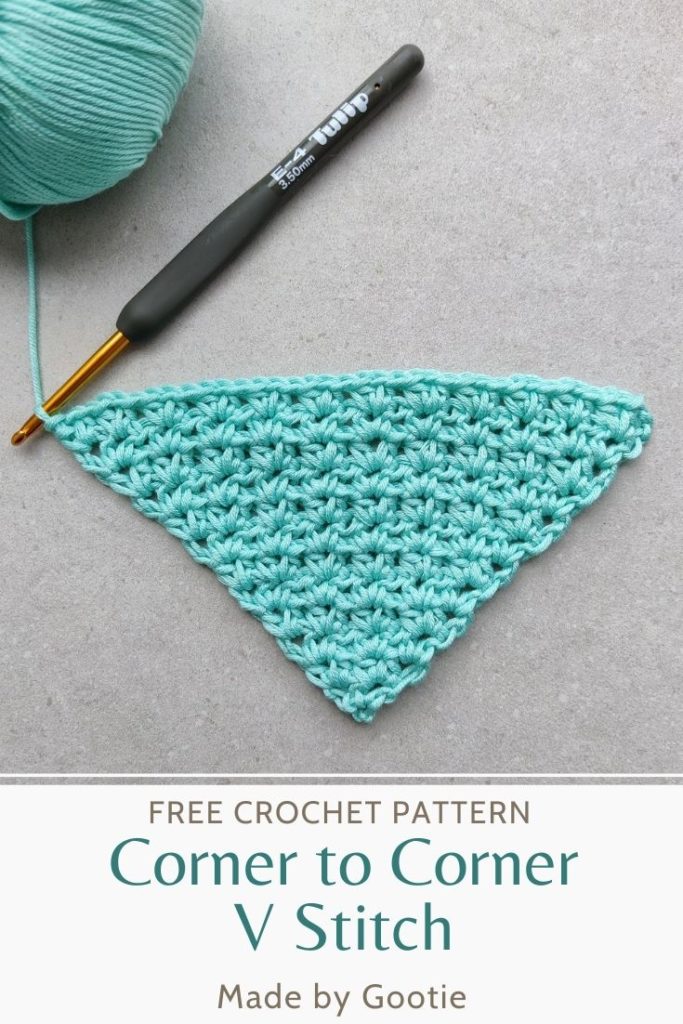
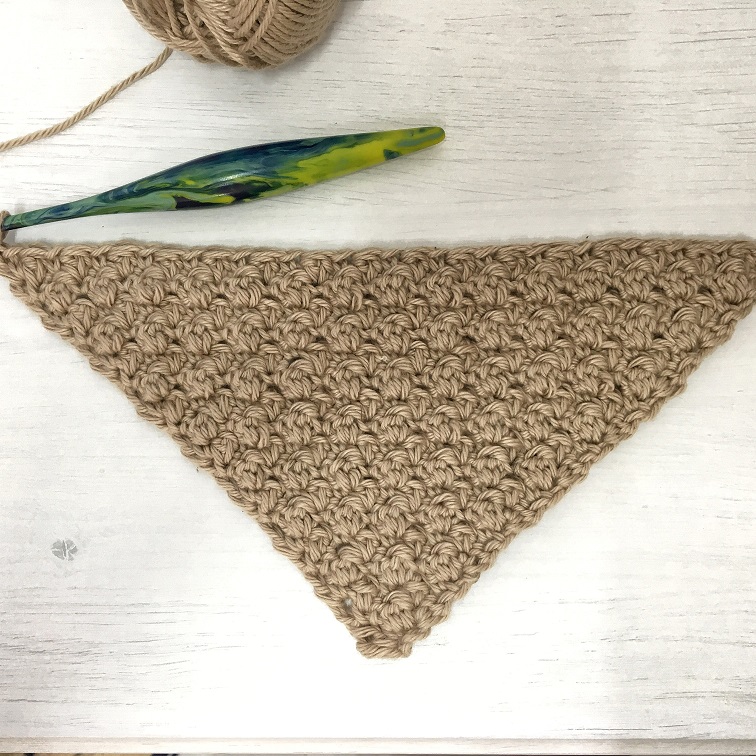
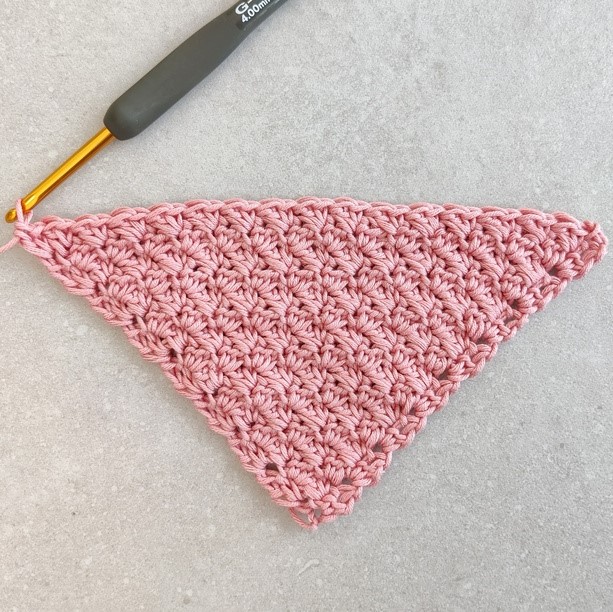
Gauge (in V stitch):
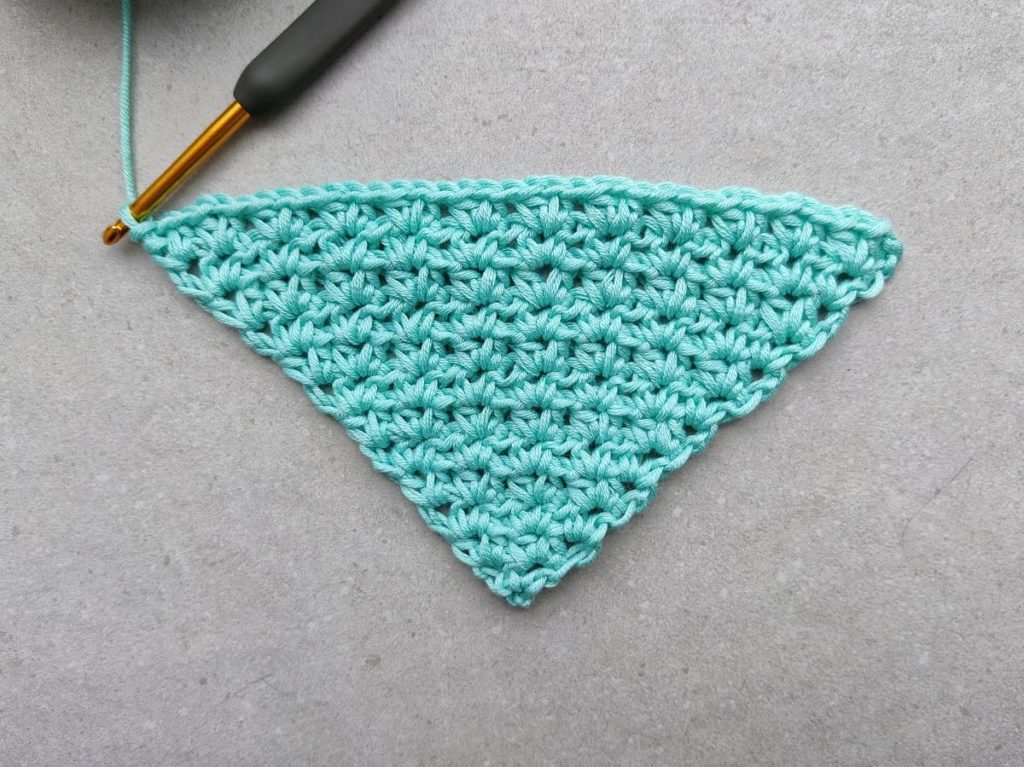
Working Rows 1-4 will result in a triangle with 1.5’’ (3.8cm) sides.
** Gauge is not crucial for this pattern.
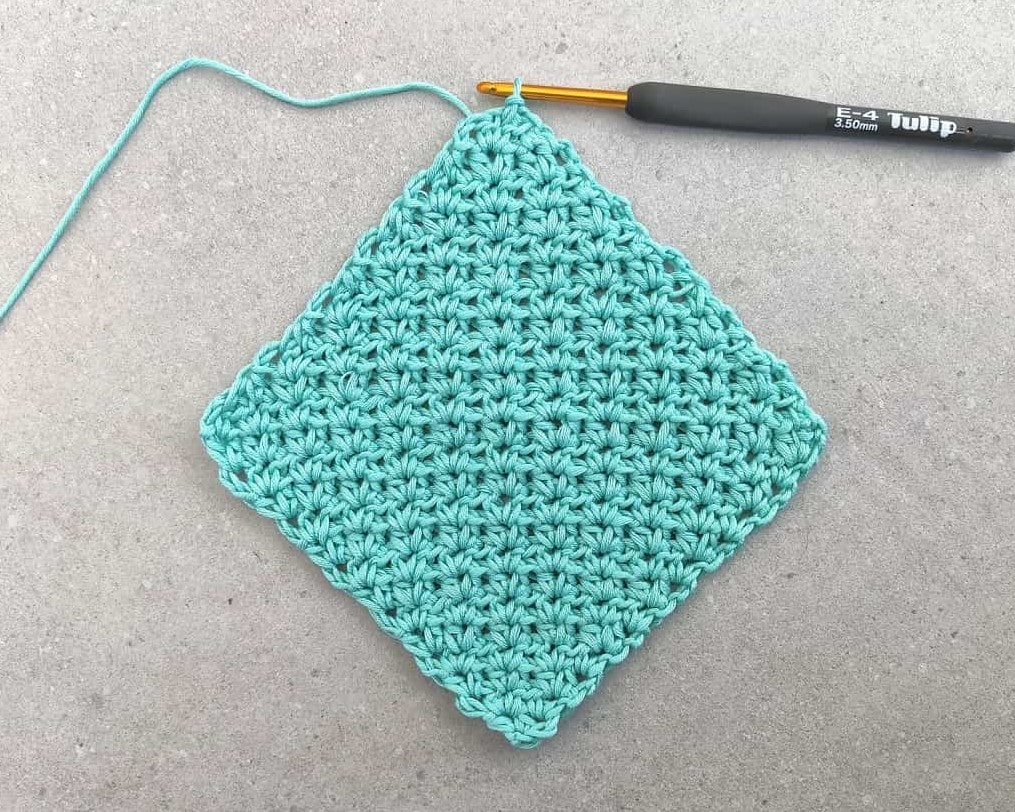
Corner to Corner V stitch Crochet Pattern
C2C Increase
Ch4
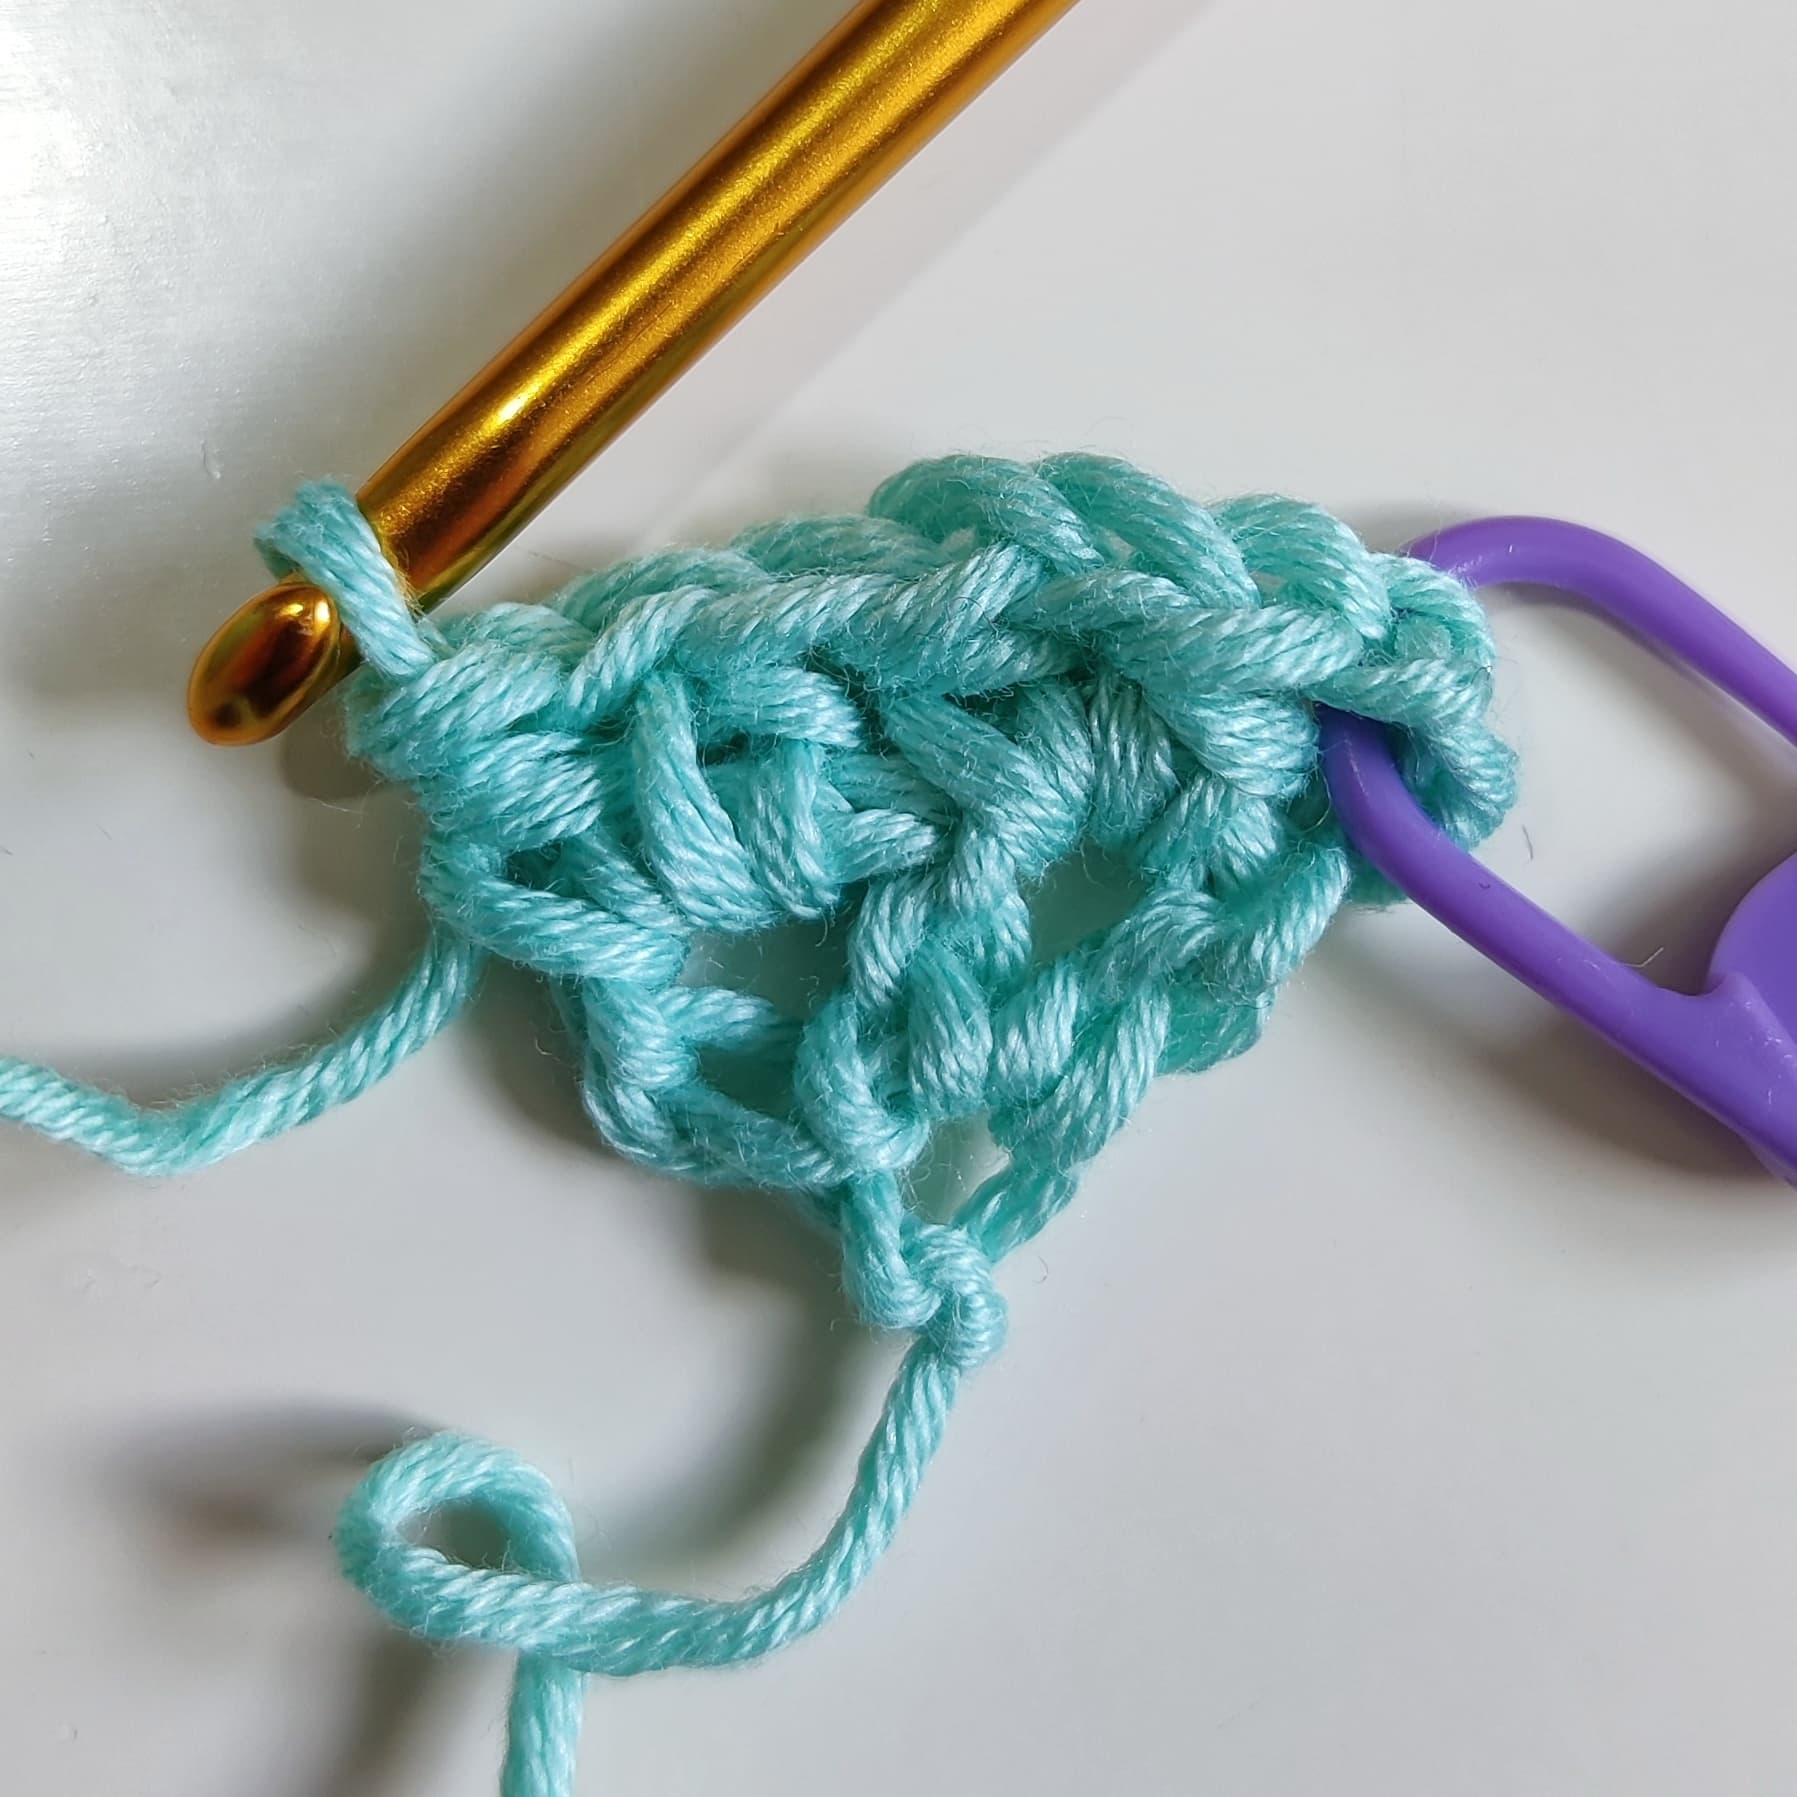
Row 1: V-hdc in 4th ch from hook, turn.
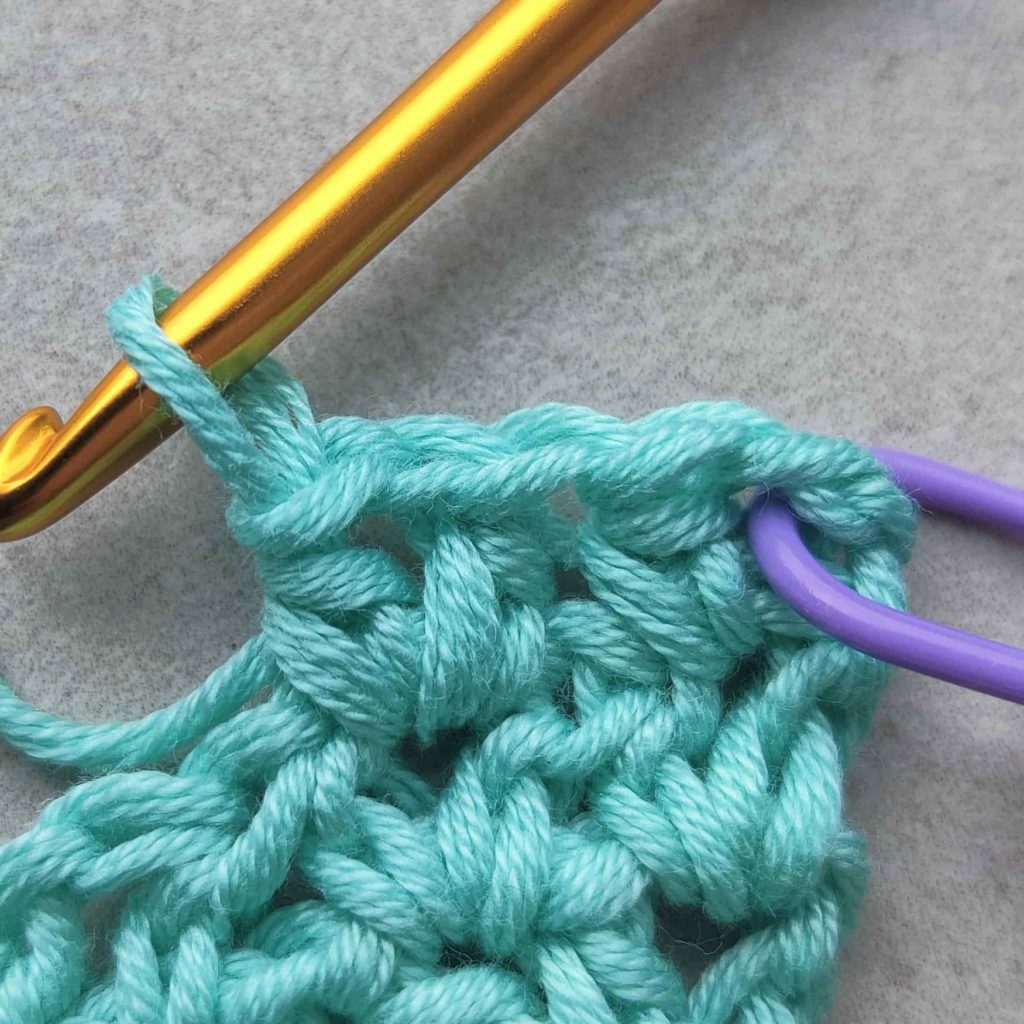
Row 2: ch3-PM, skip 1st hdc, V-hdc in next ch-1, skip next hdc, V-hdc in ch-3, turn.
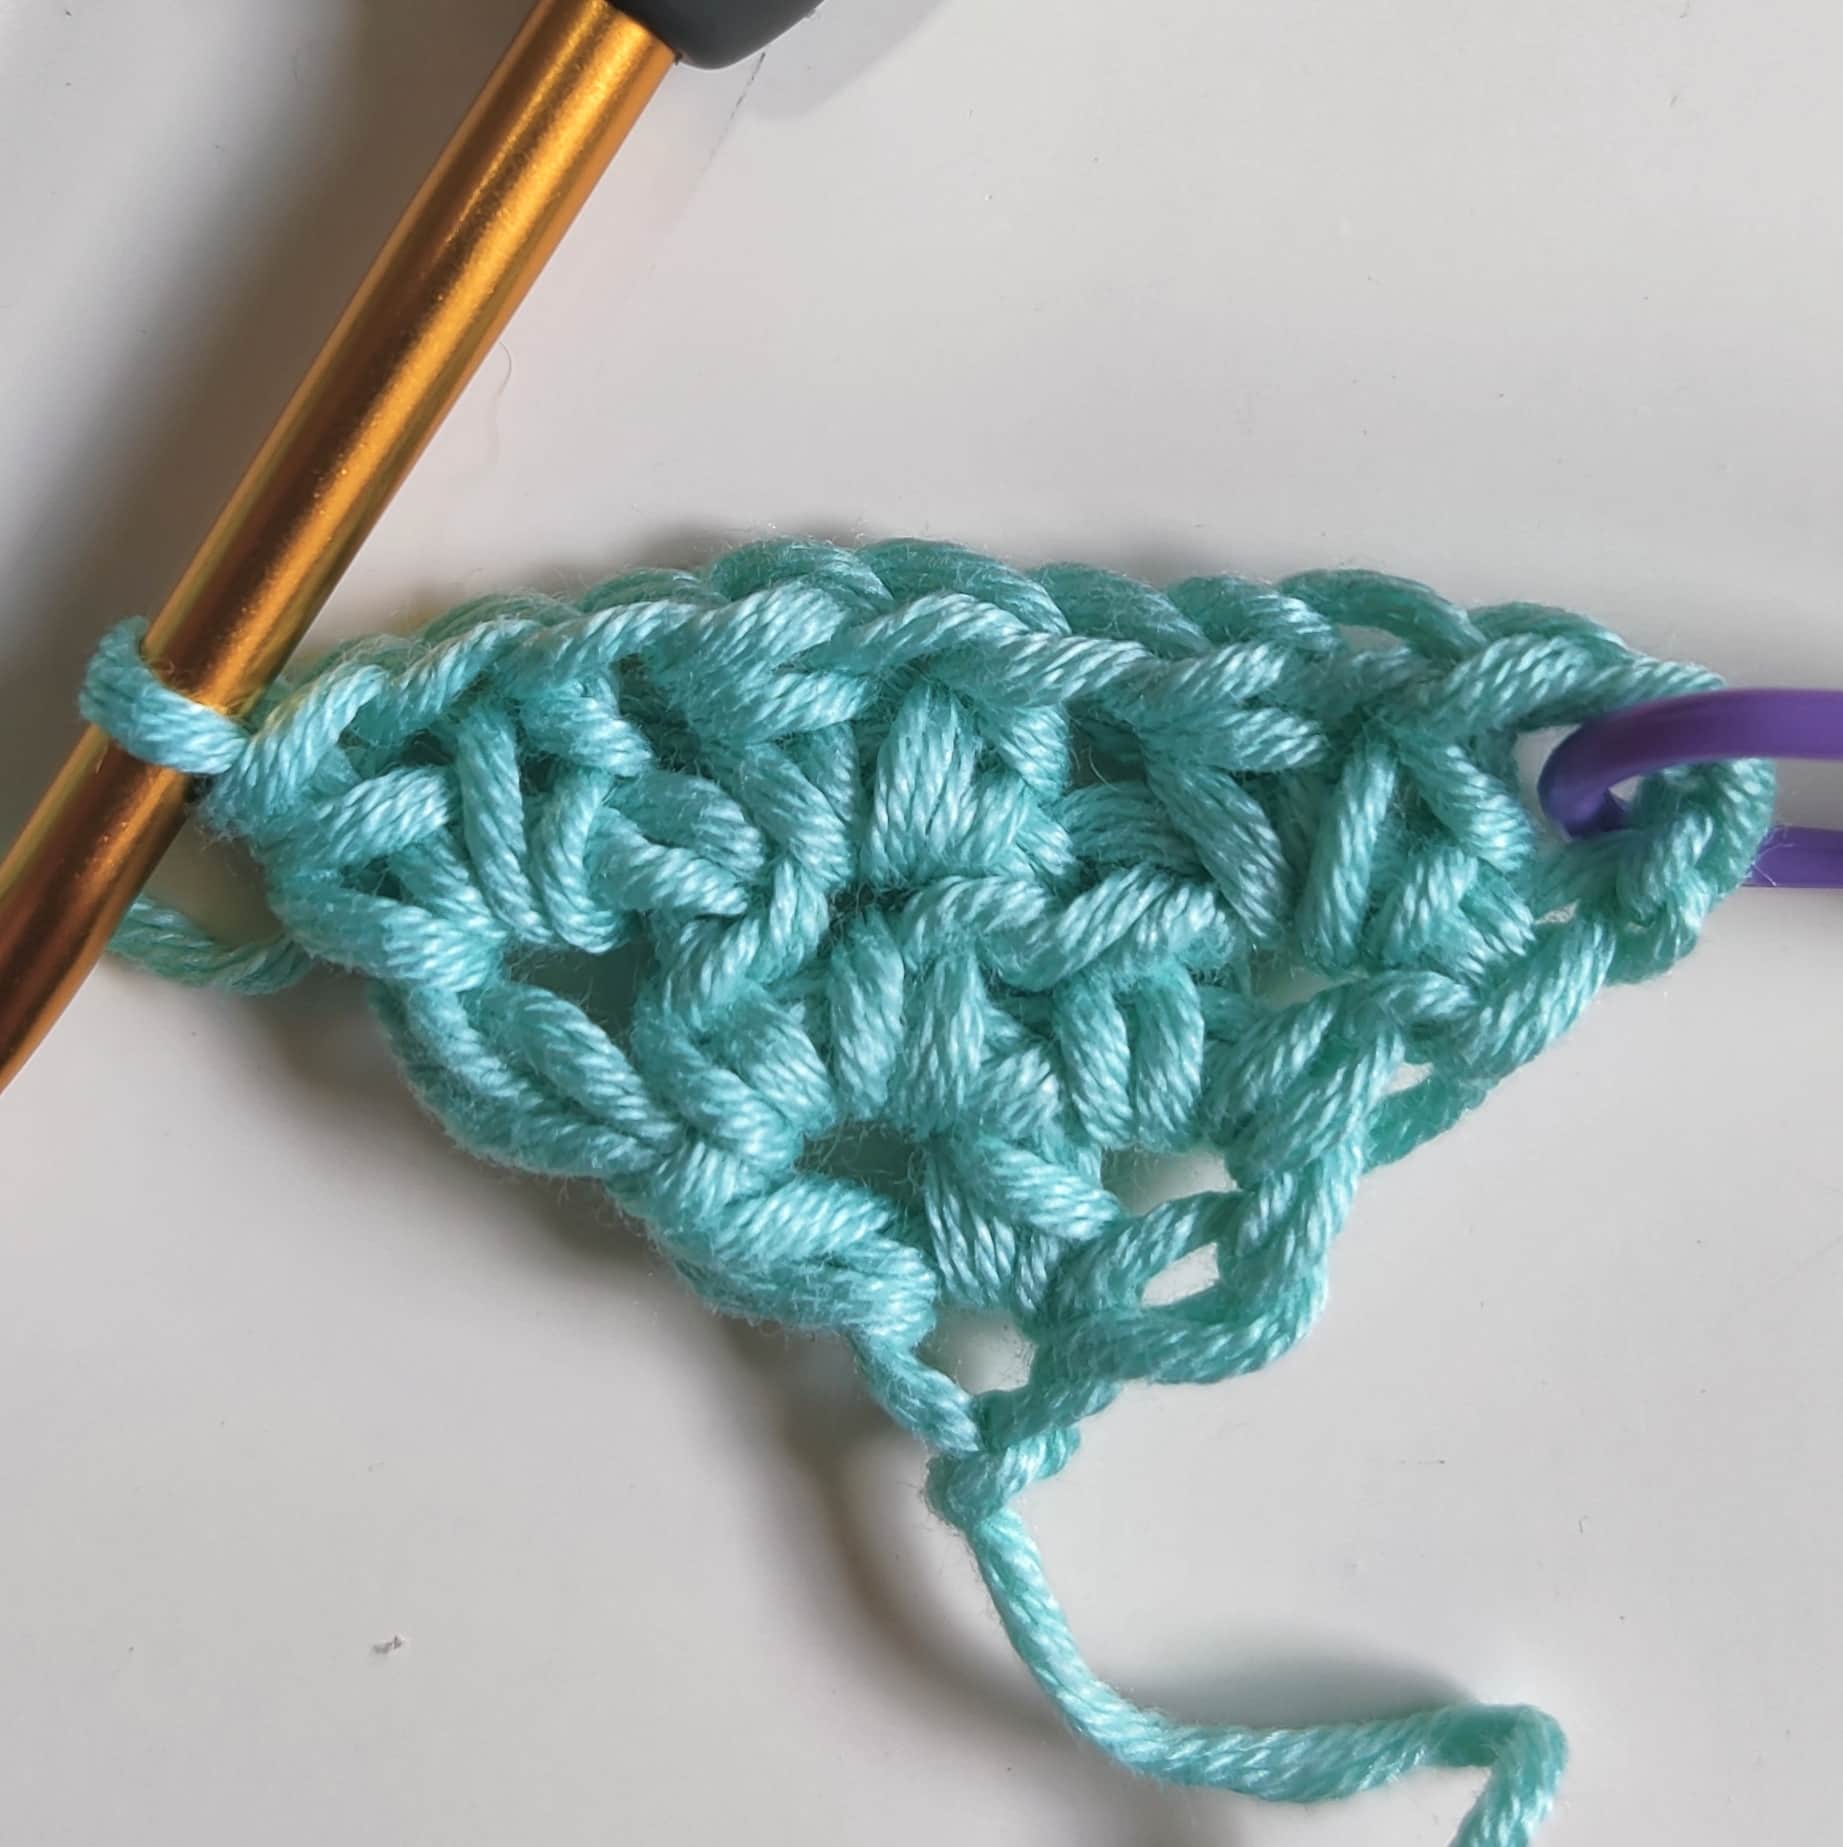
Row 3: ch3-PM, skip 1st hdc, V-hdc in next ch-1.
Skip next 2 hdc, V-hdc in next ch-1, skip next hdc, V-hdc in ch-3, turn.
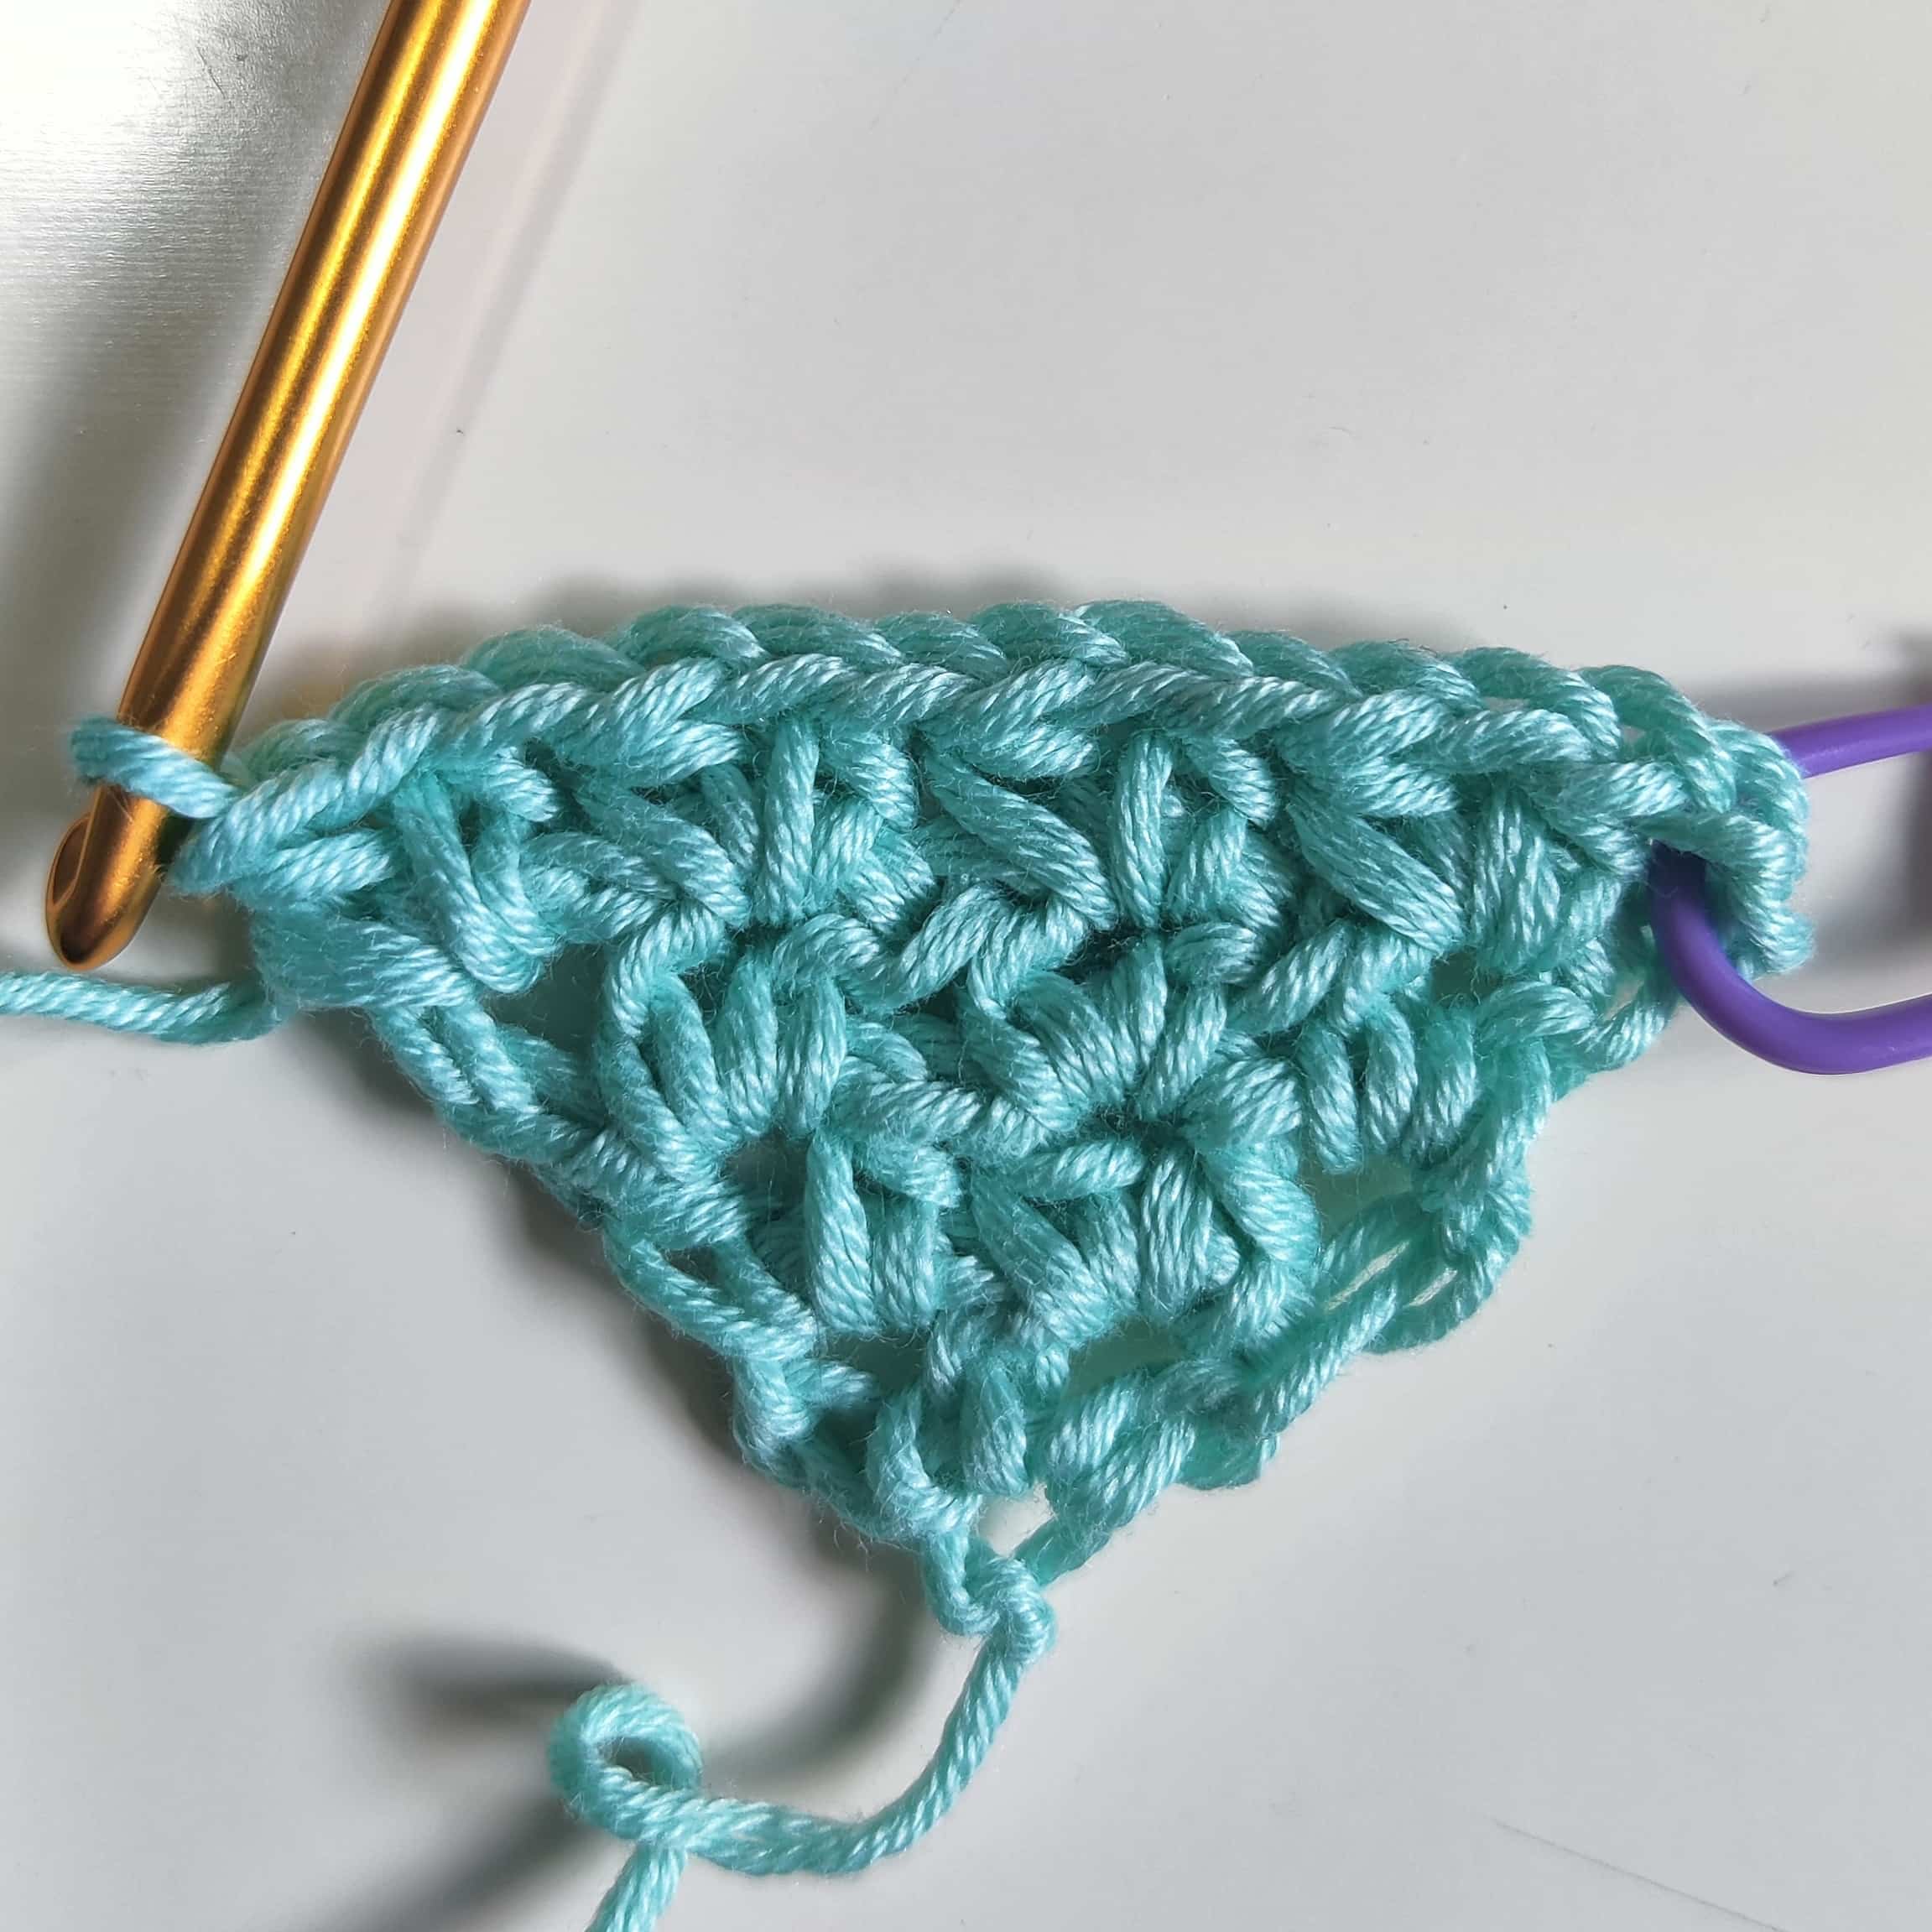
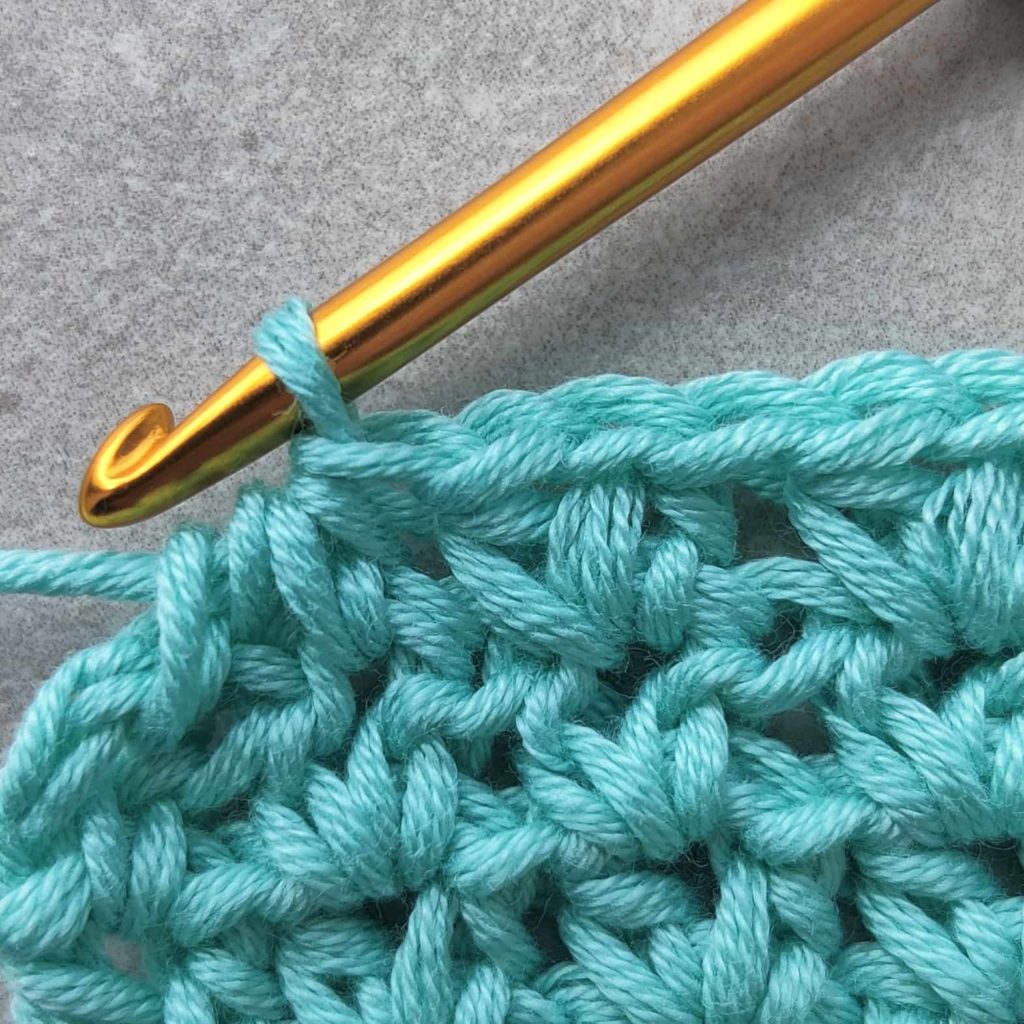
Row 4: ch3-PM, skip 1st hdc, V-hdc in next ch-1.
* Skip next 2 hdc, V-hdc in next ch-1; repeat from * to ch-3 sp, V-hdc in ch-3, turn.
Repeat row 4 until the side of the triangle measures 6.5in (16.5cm), or until your desired length.
Repeat row 4 until the side of the triangle measures 6.5in (16.5cm), or until your desired length.
Want to learn how to crochet the Corner to Corner V stitch as a rectangle? Get the premium, ad free, printable PDF version onRavelry or Etsy!
C2C Decrease
When you reach the desired length, start decreasing:
** Place the stitch marker at the beginning of each ch2 so you can easily find it for the decrease stitch.
Row 5: ch2-PM, skip 1st hdc, 1hdc in next ch-1.
* Skip next 2 hdc, V-hdc in next ch-1; repeat from * to last V-hdc, hdc2tog in last ch-1 & ch-3, turn.
Row 6: ch2-PM, skip next hdc2tog & hdc, V-hdc in next ch-1.
* Skip next 2 hdc, V-hdc in next ch-1; repeat from * to last V-hdc, hdc2tog in last ch-1 & ch-2, turn.
Continue working row 6 until you have only one V-hdc stitch in your row (total of 4 sts + ch2).
Row 7: ch1, skip next hdc2tog & hdc, ss in next ch-1.
Fasten off, soak and block if needed.
DESIGNERS – IF USING THIS C2C STITCH IN A CROCHET DESIGN, I WOULD LOVE IT IF YOU GIVE REFERENCE TO THIS ORIGINAL POST SOMEWHERE IN YOUR DESIGN.
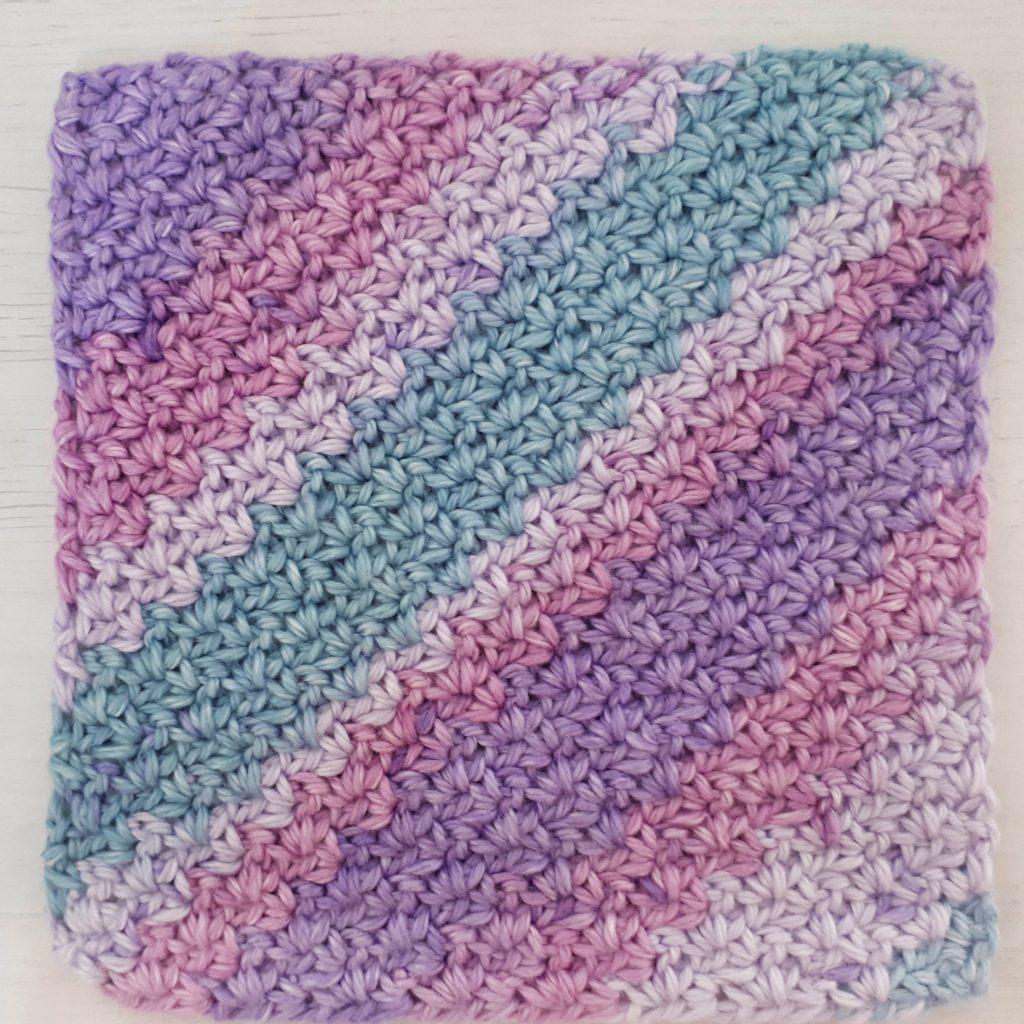
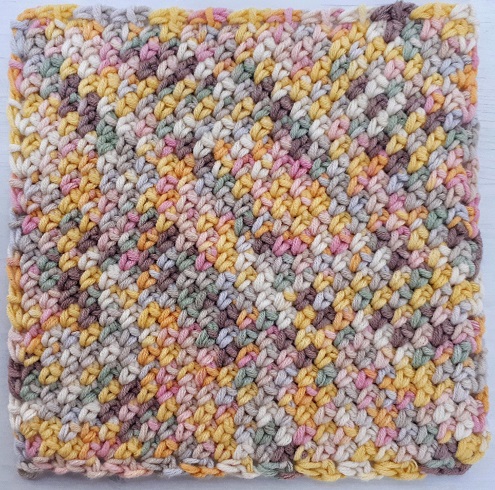
C2C V Stitch Blanket
The C2C V stitch is a perfect stitch for creating a soft blanket.
For making a blanket I would suggest using at least a DK (#3) weight yarn, or thicker.
The beautiful thing about the C2C crochet method (and why I love it so much), is that you can decide the size and dimensions of your project as you go! You can make it either a square like in the tutorial below or as a rectangle (available in the PDF version).
Looking for More Crochet C2C Stitch Variations?
Did you try this out? Share your project!
– Let me know how it went and leave a comment below.
– Tag me on Instagram @madebygootie
– Join and share in our FB Community
Want to save this post for later? Go ahead and PIN it!
why couldn’t I print the pattern?
Hi Frances,
I don’t know why, but you can get the printable PDF version.
New dish cloth making today. Thank you for this pattern tutorial. 🙂
You’re welcome! I would love to see it when it’s done!
I can’t get the decrease, I’ve pulled it apart 3x and #4 is looking wrong could you please give me some help.
Hi Donna,
I’m really sorry you’re having a hard time with decreasing the C2C V stitch.
I can’t really help without seeing a photo (you are welcome to email me a close up of your decrease part and I’ll do my best to find the problem).
Are you using stitch markers to help find the ch-2 space?
Also, another way to make sure you are decreasing correctly is to count your V stitches [1hdc, ch1, 1hdc]. Every decrease row has 2 less V stitches to it.
I hope it helps!
Hi, just an update that a video tutorial has been added to the post.
Hope it will be helpful for the decreasing!
I’ve pulled my drcrease side 3 times now. Finally found the video and watched it. I believe the pattern is written wrong. In the video, she says to Hdc2tg, ch2, then continue with v hdc until the next hdc2tg. The pattern says to start with one hdc then continues to v hdc again and adds an extra 2 ch at the end again before ch2 and turn
Hi Jennifer, I’m sorry you are having trouble with the decrease part.
I’m glad you found my video, and hope it will be helpful for you!
Although, the written pattern is not wrong, it was fully tested and I am working my square in the video according to my written pattern.
In the first row of the decrease part (row 5), you work 1 hdc in the first ch-1 instead of a V-hdc, to create the corner, then continue working regularly and work hdc2tog in the last ch-1&ch-2.
And in the second row of the decrease (row 6, which you will be repeating), you skip the first hdc2tog and 1hdc, then continue working regularly until the last V-hdc and then work hdc2tog into the ch-1&ch-2.
I recommend using stitch markers, especially in the decrease part, it helps identify better the ch-2 sp.
I hope this explanation and the video will help you with the decreasing!
x Agat
Hi Agat, I’m having trouble with this pattern. I don’t know what I’m doing wrong but It never comes
out square. The shape is always wonky. I’ve made and ripped out the piece 3 times. I got frustrated and just made regular square blanket. I love c2c patterns but this one has me stumped.
Hi Marty, I’m sorry you’re having trouble with this pattern, have you tried watching the video tutorial?
And can you be more specific on where is problem starts?
And in general, try to make sure of the following:
– When increasing on both sides, you will have an additional 1 V-hdc in each row.
– When decreasing on both sides, you will have one less 1 V-hdc in each row.
I hope it helps!