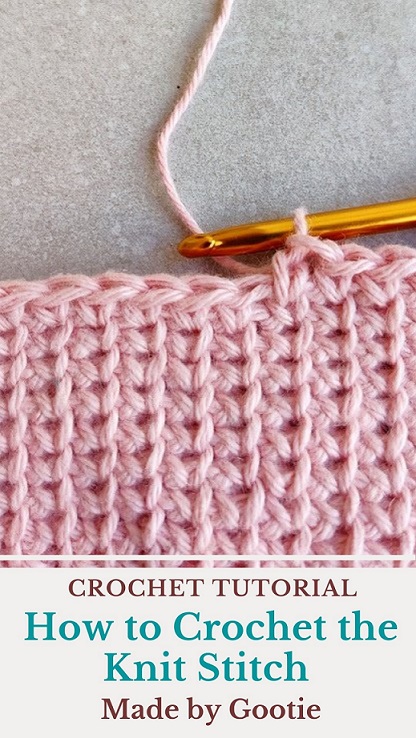
How to Crochet the Knit Stitch (Waistcoat Stitch)
Last Updated on May 21, 2025
I have been knitting for the most of my life and only learned how to crochet when I got older. Even though I prefer the flexibilty of crocheting, I like the knitted look better.
This is why I love the crochet knit stitch so much, it’s really easy to make, and the result is so similar to a knitted fabric!
** Some of the links in this post may include affiliate links. Making a purchase through one of these links pays me a small referral fee at no added cost to you. These small fees add up and help me keep the blog running For more details, view our disclosure and privacy policy.
About the Crochet Knit Stitch (AKA Waistcoat stitch)
There are two ways to work the Knit stitch; in the round, and flat. Both methods are using only single crochet stitch.
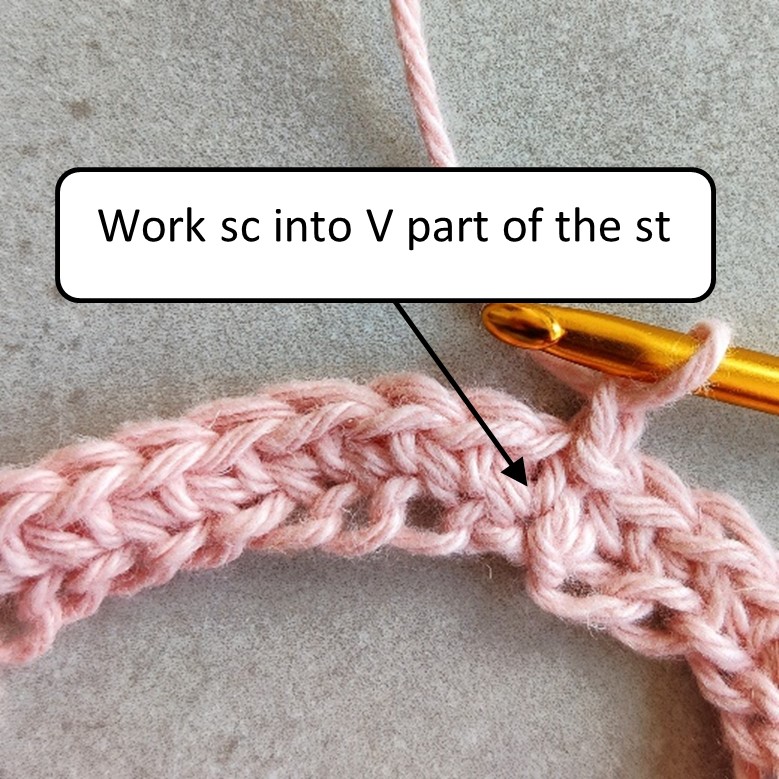
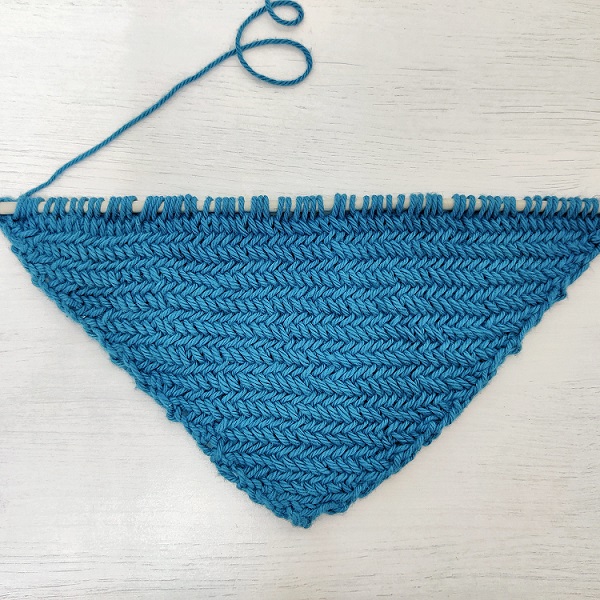
With the round method you work the sc into the V part of the single crochet (instead of working into the top of the stitch), and it also can be worked as a Diagonal Knit Look Crochet Stitch.
While in the flat method you work back and forth and crochet the single crochet stitch below the top of the stitch, between the “legs” (into the upside down “v”).
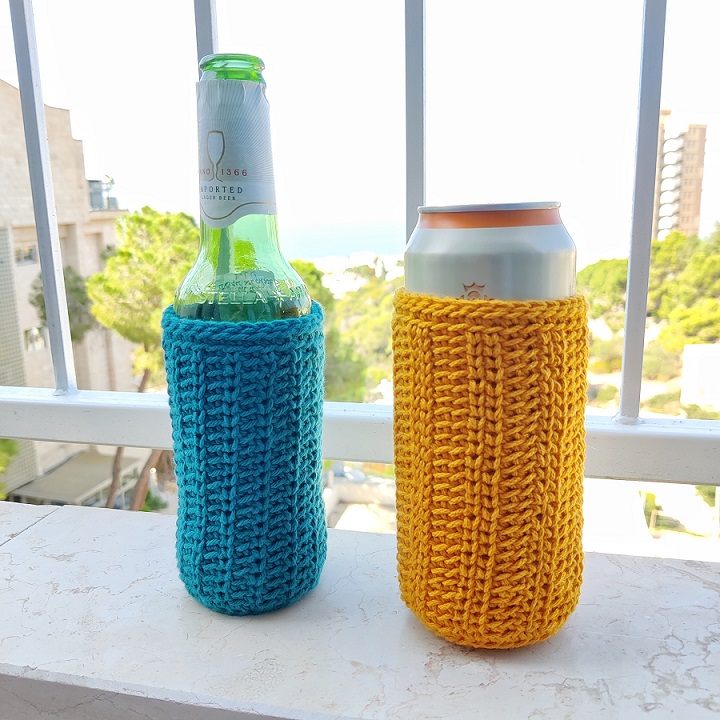
In my opinion, working the crochet knit stitch in the round is easier and results a nicer and more knit-like looking fabric. This method will be great for making cowls, beanies hot pads, and cup cozies like my Knit-Look Crochet Beer Cozies.
The flat method is a bit harder to work and forms a tigheter fabric, in this post you’ll find a tutorial for the Knit stitch (AKA Waistcoat stitch) in the round.
Want to save this post for later? Go ahead and PIN it!
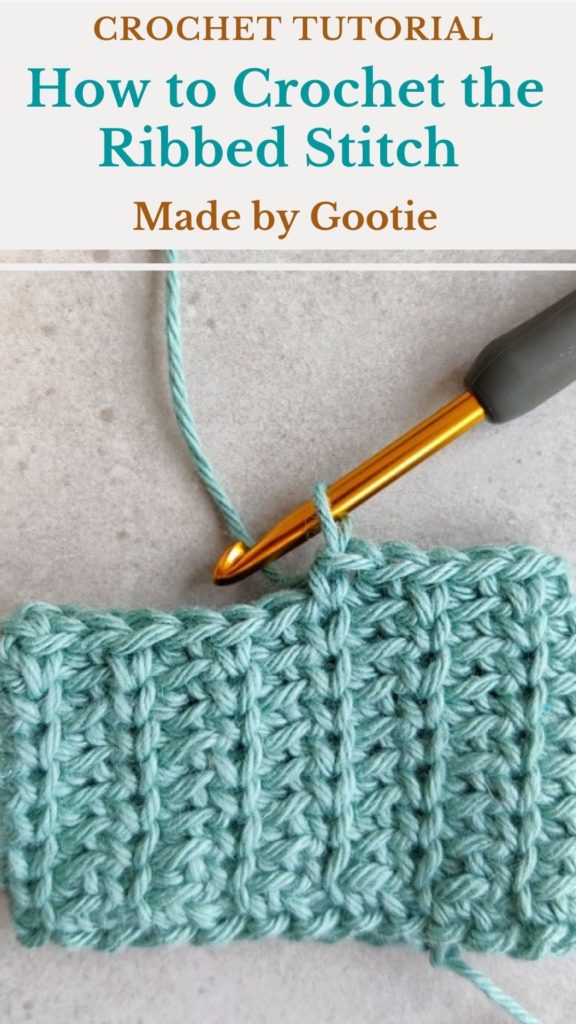
How to Crochet the Ribbed Stitch
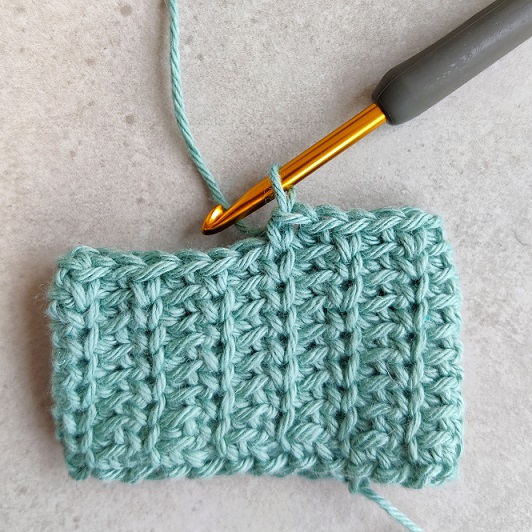
Using the knit stitch in the round method you can easily create a “Ribbed look” for your fabric.
The crochet ribbed look can be made with alternating knit-purl (ribbing 1×1) or 2 knit – 2 purl (ribbing 2×2), all you have to do is crochet the knit-like stitch with the knit stitch (see below instructions) and the purl-like stitch with a single crochet through the back loop. The ribbing crochet stitch is also worked in the round.
I used this ribbed-look crochet stitch in my Knit-Look Cozies. You can find the free pattern HERE.
Crochet Knit Stitch (Waistcoat Stitch)
Materials I used for this tutorial
– 4.5 / G mm Tulip Etimo Crochet hook.
– For this pattern I used Knit PIcks – CotLin yarn by WeCrochet – DK (#3) weight yarn. You can find this yarn HERE.
Abbreviations (US)
ch – chain
ss – slip stitch
sc – single crochet
blo – through the back loop only
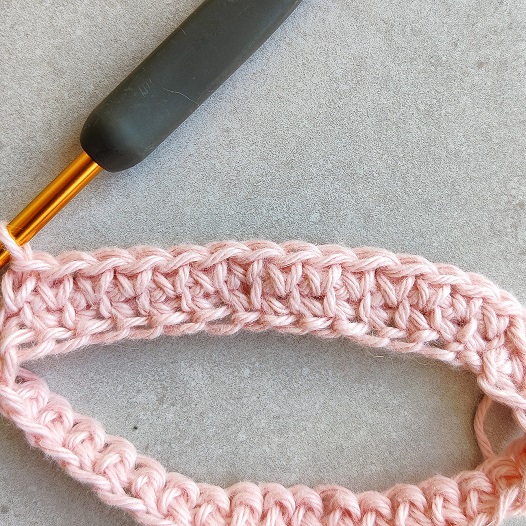
knit st: knit stitch (also known as waistcoat stitch) – work sc into the V part of the st, instead of the top of the st.
Notes
- When working the crochet knit stitch in the round, you can either finish every round with a slip stitch, or work in a continuous rounds with out slip stitching the last stitch.
- To make it easier, make sure to work the single crochet a bit loose and it is also suggested to use a larger hook.
- The Knit stitch can be made with any number of stitches.
- For the ‘knit-purl’ pattern- keep a multiple of 2 sts, for the ‘ribbed’ pattern- keep a multiple of 4 sts.
How to Crochet the Knit Stitch
Chain any number of stitches, ss to join the end ch to the beginning ch, and place the marker, being careful to keep the chain straight. Do not allow it to twist.
Round 1: ch1 (doesn’t count as a st), 1sc in each ch around, ss to 1st sc to join.
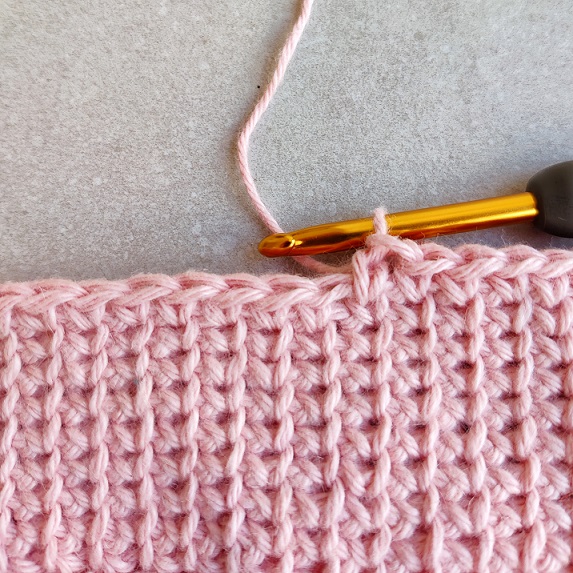
Round 2: ch1 (doesn’t count as a st), 1knit st in each sc around, ss to 1st st to join.
Knit stitch: make a single crochet into the “V” part of the st instead of crocheting into the top of the stitch.
Round 3: ch1 (doesn’t count as a st), 1knit st in each sc around, ss to 1st st to join.
Continue working round 3.

How to Crochet the Knit-Purl Stitch (Ribbing 1×1)
Chain an even number of stitches, ss to join the end ch to the beginning ch and place the marker, being careful to keep the chain straight. Do not allow it to twist.
Round 1: ch1 (doesn’t count as a st), 1sc in each ch around, ss to 1st sc to join.
Round 2: ch1 (doesn’t count as a st), * 1sc blo in next sc, 1 knit st in next sc; repeat from * around, ss to 1st sc to join.
** See above Knit stitch tutorial photos.
Continue working round 2.
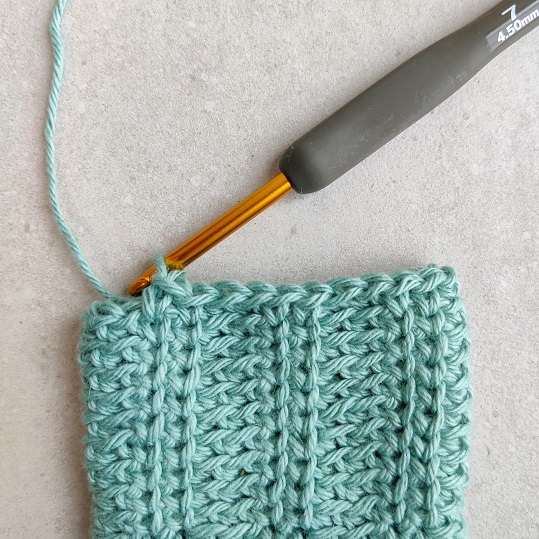
How to Crochet the Ribbed Crochet Stitch (Ribbing 2×2)
Chain an a multiple of 4, ss to join the end ch to the beginning ch and place the marker, being careful to keep the chain straight. Do not allow it to twist.
Round 1: ch1 (doesn’t count as a st), 1sc in each ch around, ss to 1st sc to join.
Round 2: ch1 (doesn’t count as a st), * 1sc blo in next 2 sc, 1knit st in next 2 sc; repeat from * around, ss to 1st sc to join.
** See above Knit stitch tutorial photos.
Continue working round 2.
Looking for More Crochet Stitches? Check out these other stitch tutorials on the blog:
Did you try this out? Let me know how it went and leave a comment below or tag me @madebygootie !
* Want to save this post for later? Go ahead and PIN it!
Would be easier to understand via a video as advanced beginners probably dont understand… look at it through the eyes of a advanced beginner or intermediate.
Hi Margaret,
Thank you for your suggestion, I will take it into consideration.
I do try to make my photo tutorials as clear as can be.
I gradually adding video tutorials to my posts now, although making video tutorials are much more time and resource consuming, which I don’t always have 🙂
If you’re still having trouble with this stitch, I recommend searching YouTube, there are a lot of good tutorials for this one!
Hi!
I truly appreciate all the work you put into the free patterns and tutorials. Thank you so much!
I’d love to use this knit look diagonal stitch to make dish and wash clothes.
But, my brain is not translating the process correctly to eliminate the need to do it in the round.
Would/could you give me some pointers please?
Again, great tutorials and generous sharing appreciated!
Thank you, Margaret, thats so kind of you!
I don’t think it’s possible to not work this stitch in the round, because you need all the stitches to be in the same direction for the diagonal lines and knit look.
You can start with a chain and work around the chain, so it will be a double layered washcloth and seam the top to make it flat.
I hope it helps!