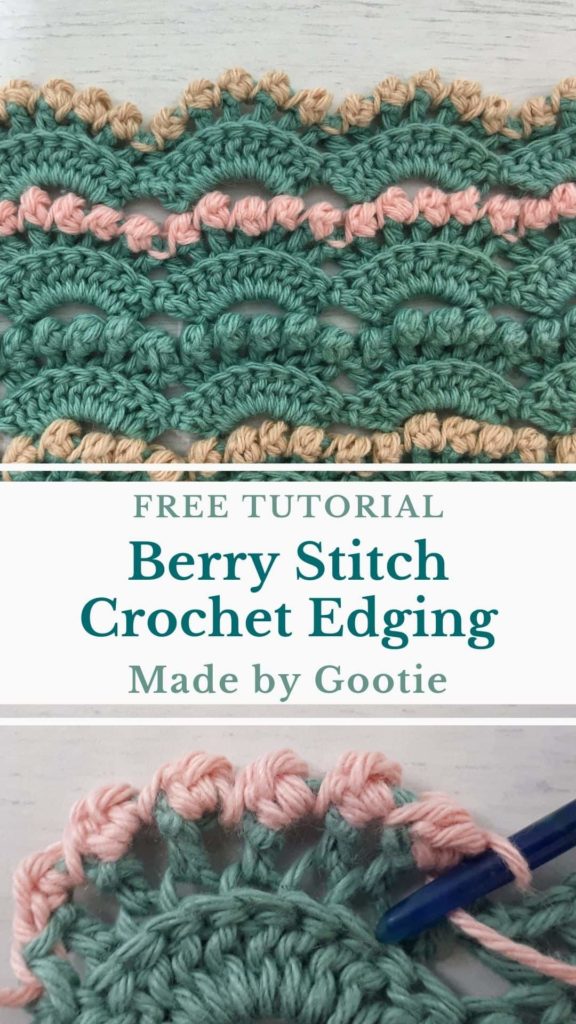
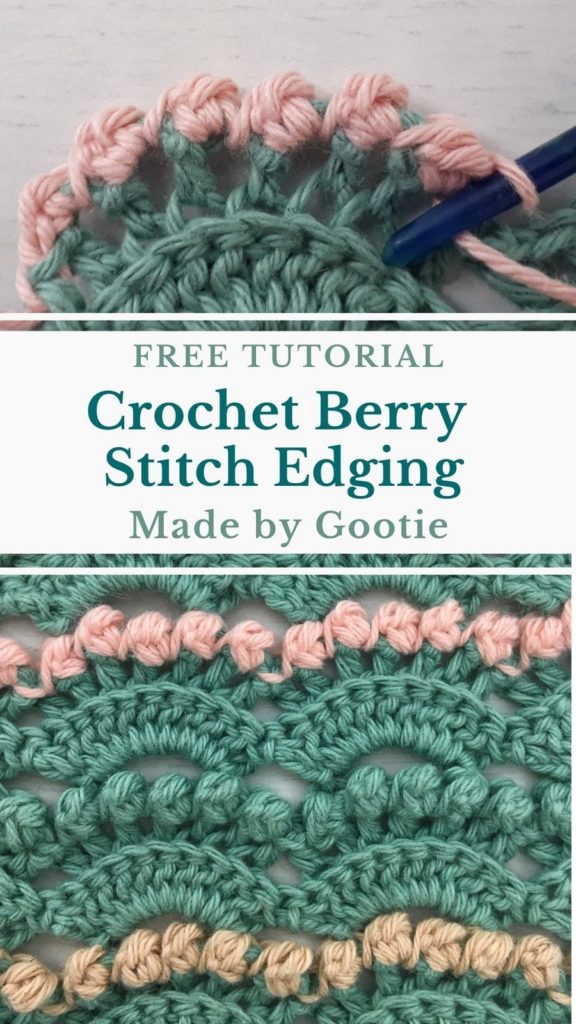
A Different Crochet Bobble Border: Berry Stitch Crochet Edging Free Tutorial
Last Updated on July 11, 2024
Do you like bobble stitches? If you do, you are going to love the berry stitch!
This stitch is a better looking version (in my opinion at least) of the bobble stitch, it creates a rounder and more tight little bobble stitch.
This tutorial is for the Berry stitch crochet edging, which is a little simialr to the crochet bobble border. The pattern forms a mini bobble border stitch, or puff border. It’s a beautiful and unique border to add to blankets, potholders, or garments.
** Some of the links in this post may include affiliate links. Making a purchase through one of these links pays me a small referral fee at no added cost to you. These small fees add up and help me keep the blog running. View our disclosure and privacy policy for more information.
Is the Crochet Berry Border the Same as the Crochet Bobble Border?
The bobble border is a bit different than the berry border. The Bobble Stitch is a group or cluster of stitches, usually double crochet, while the berry stitch is more similar to the puff stitch, it doesn’t group specific stitches like the bobble.
With that in mind, both the berry and bobble border create a round puff stitch, that differs in its size, the berry creates a smaller puff compared to the bobble.
Want to save this post for later? Go ahead and PIN it!
Have You Ever Thought of Using the Crochet Berry Stitch as Edging?
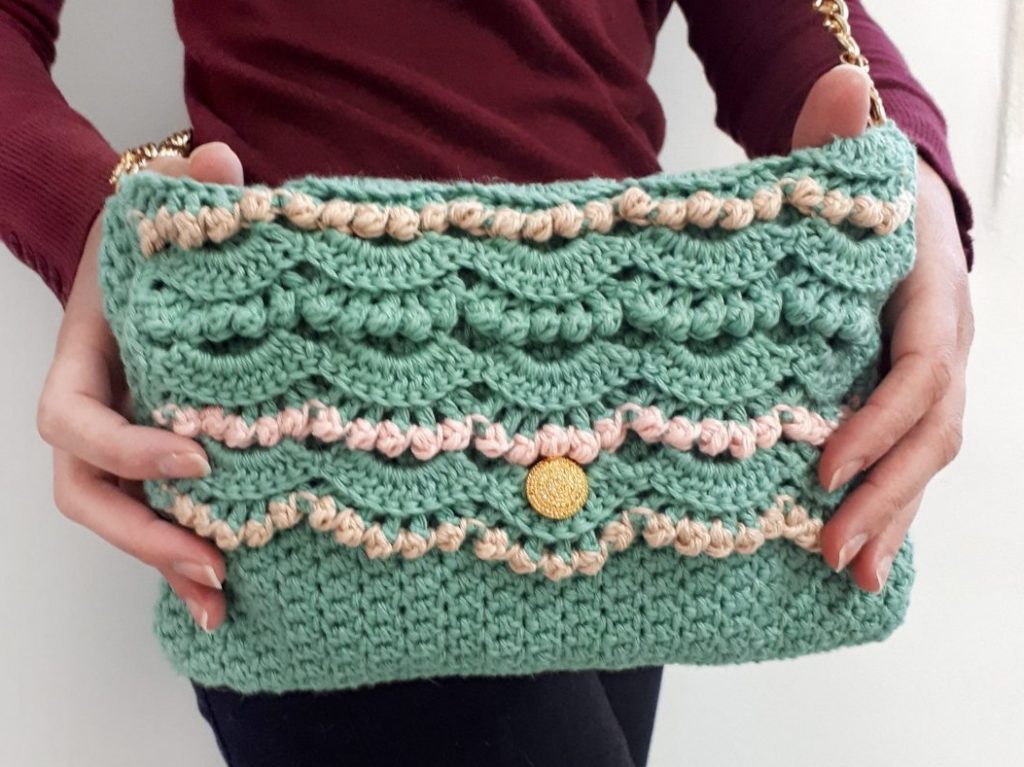
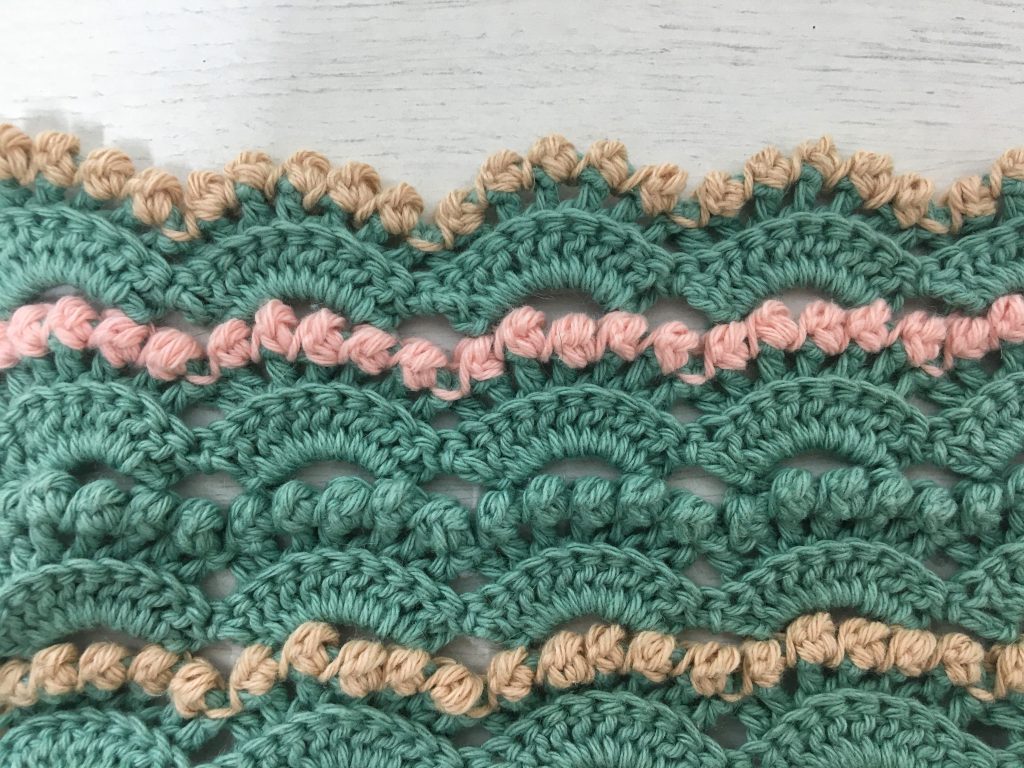
I came across the Berry stitch when I was working on my Pearls of the Sea Clutch pattern.
I used round shells for the bag’s cover and was looking to add some kind of bobbles at the edge of the shells. Trying to get the effect I was looking for, I started with small puff stitches but wasn’t satisfied with the result, it looked too “loose” and not round enough.
When I tried the Berry stitch, I was so pleased with the result! It created little round bobbles that look like pearls, and this is where this pattern got its name 🙂
** The body of this clutch is made with the Alternating Spike Stitch, you can find the detailed tutorial for this stitch HERE.
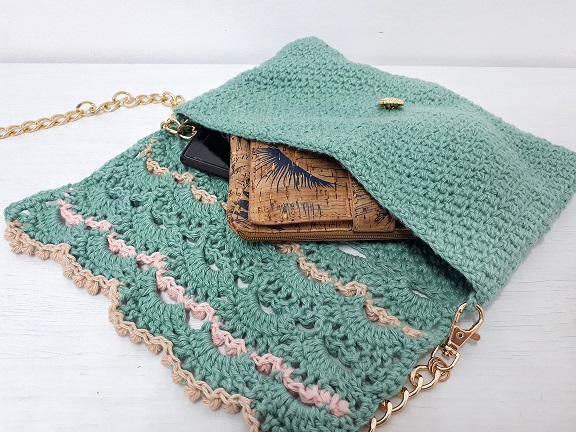
You can get the Pearls of the Sea Clutch (ad-free, photo tutorial, and printable version) PDF crochet pattern on one of my stores:


How Do You Crochet a Border on a Finished Blanket?
You can crochet all kinds of stitches as a border for a blanket. The easiest and ‘neat-looking’ border is working single crochet around the blanket, as I did in the Mitered Tulips Blanket.
When you are working any other kind of border that is not only a single crochet stitch, it’s recommended to also start with a first round of single crochet and then work the stitch you want, it will make it easier to work your border and result a neater transition.
Berry Stitch Edging (Bobble Border)
Materials I used in this tutorial
– 4 mm / G-6 Crochet hook (I love the Furls and Clover Hooks).
– For this tutorial, I used a DK (#3) weight CotLin yarn by KnitPicks, you can find it HERE
Abbreviations (US)
ch – chain
st – stitch
ss – slip stitch
yo – yarn over
Important Notes
– When you are working this stitch, you are working on its wrong side.
– So in case you are working flat (back and forth) – make sure to finish with the right side before working this edging.
– And in case of working in the round – turn your work and work in the other direction.
– If your berries are too close to each other, work 3 ss stitches between every berry, instead of 1 ss.
– you can find a video tutorial for this stitch HERE
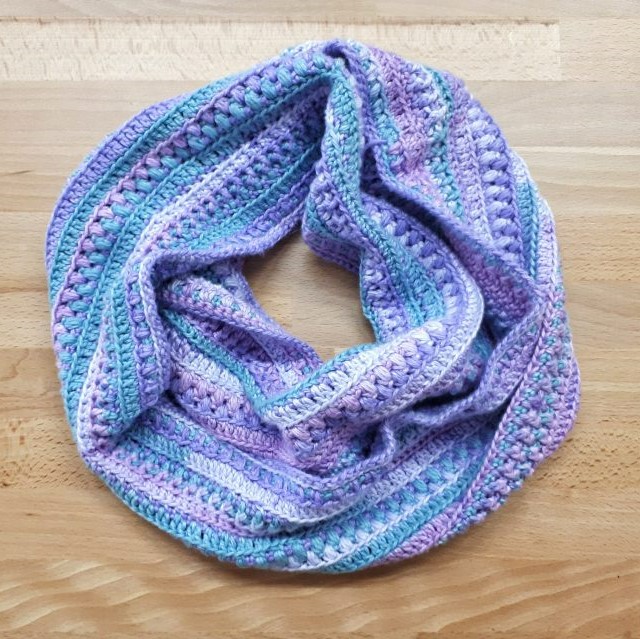
Looking for More Crochet Inspiration? Check out these other free patterns on the blog:
Crochet Berry Stitch Edging Video Tutorial
How to Crochet the Berry Stitch Edging
This edging is worked over an uneven number of stitches.
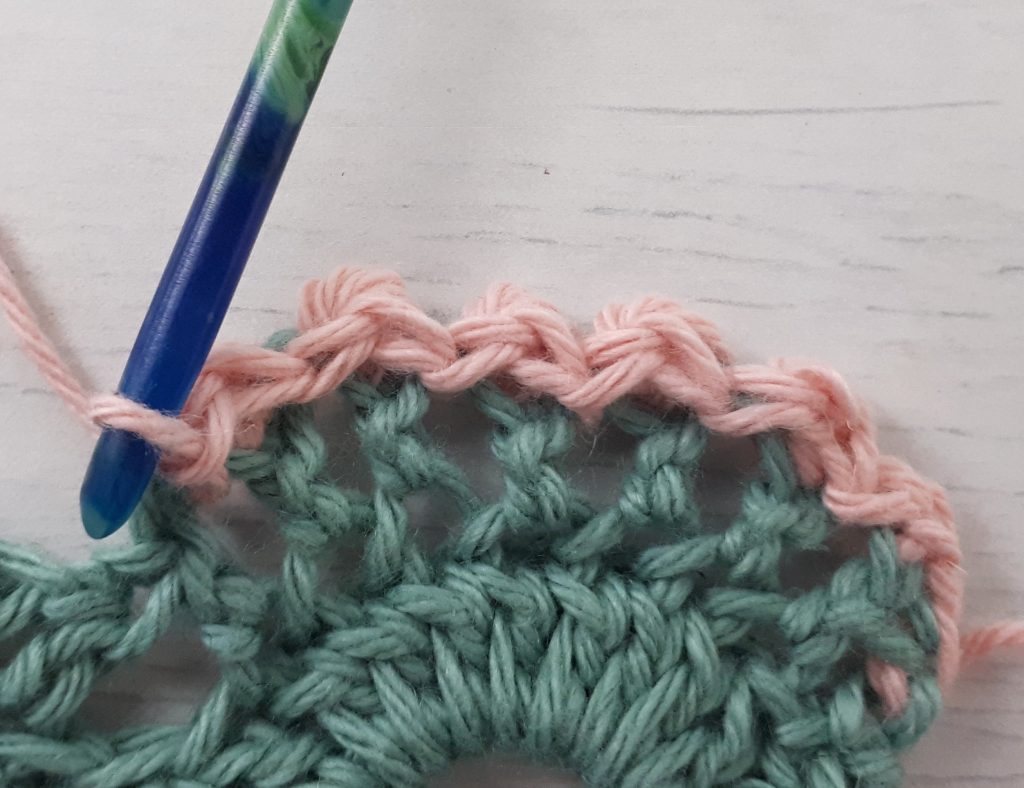
1) 1ss in 1st st.
2) yo, insert hook in next st, yo and pull yarn through (3 loops on hook).
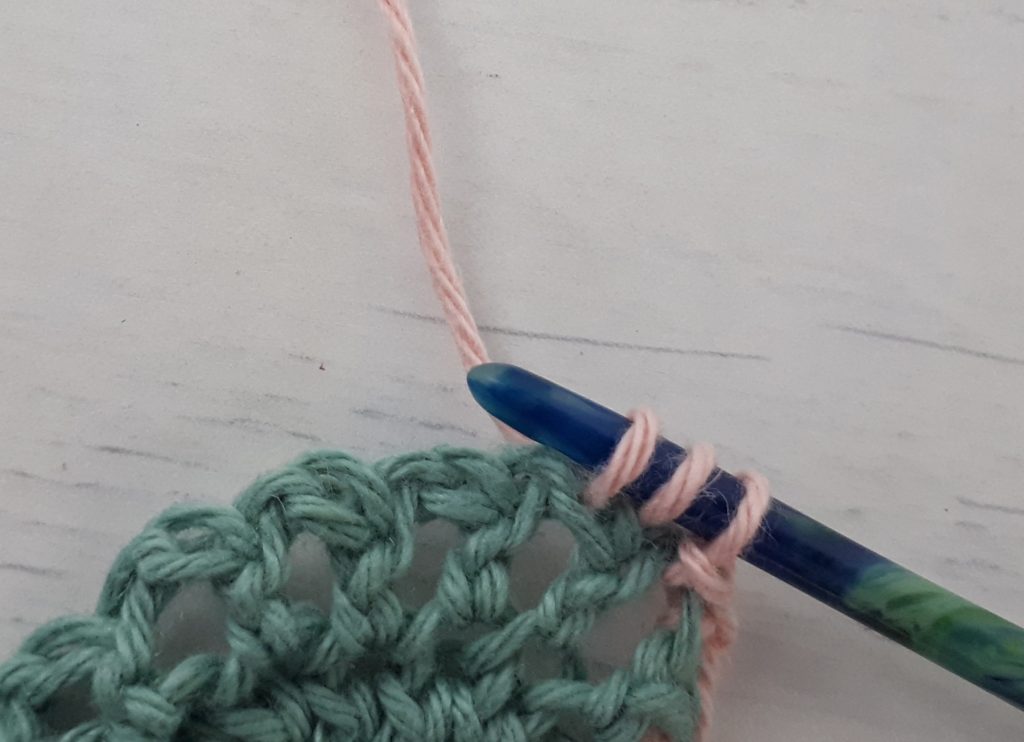
3) yo and pull through 1 loop (3 loops on hook).
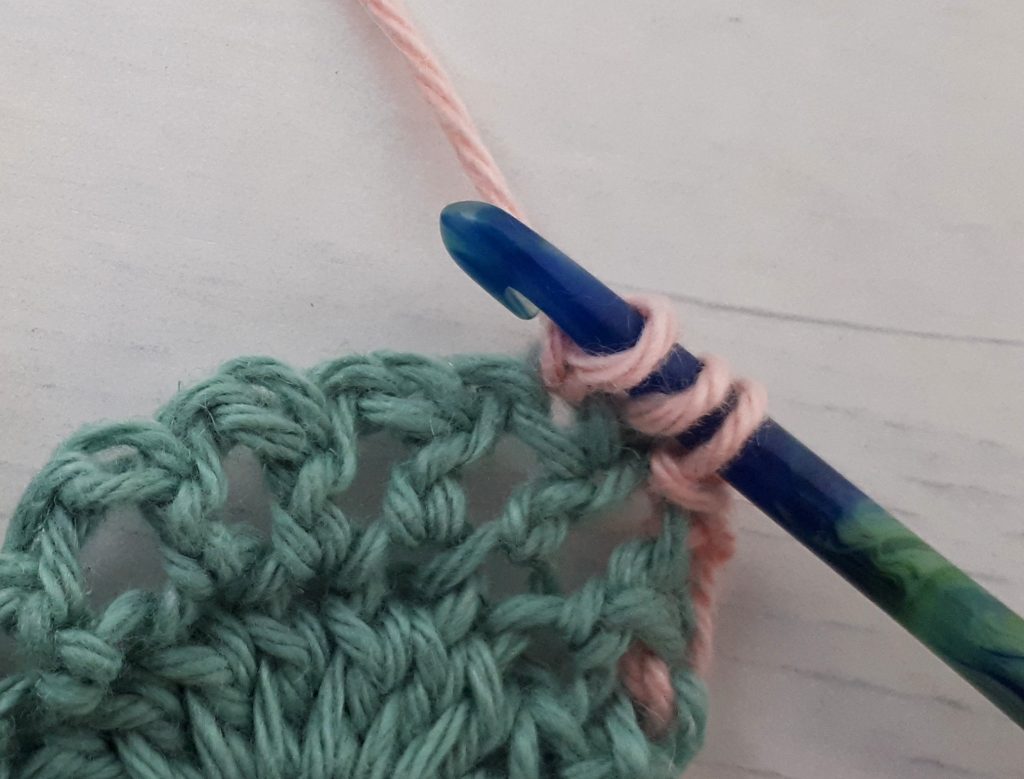
4) yo, insert hook into same st, yo and pull through (5 loops on hook).
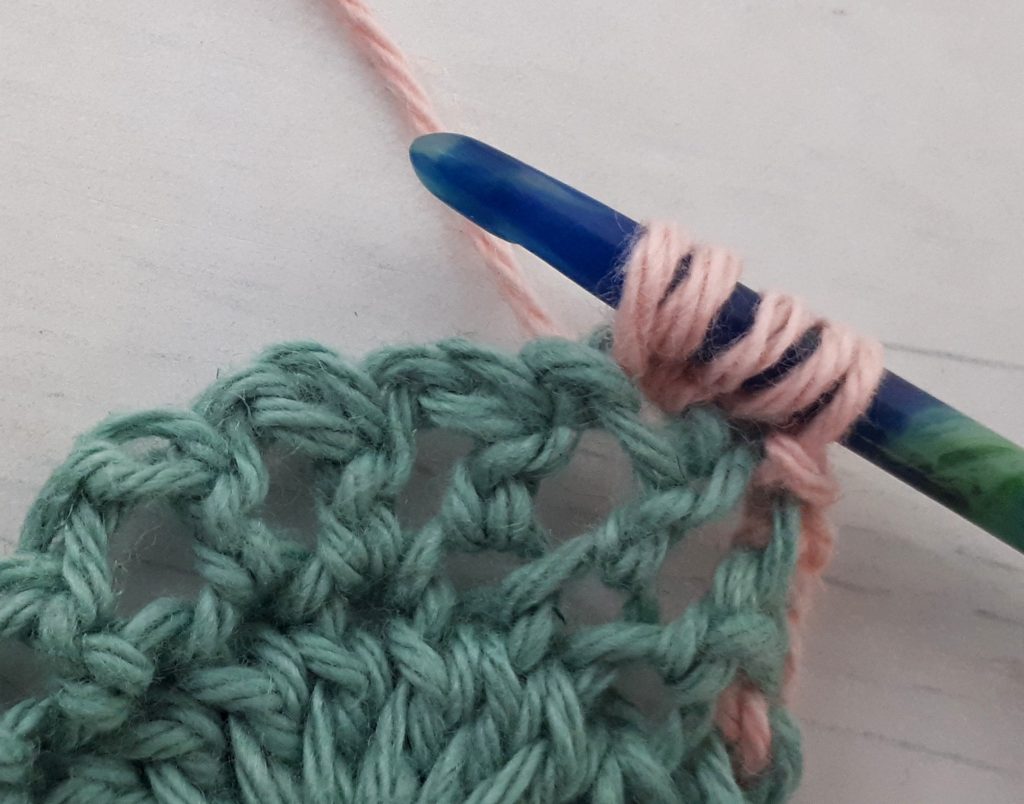
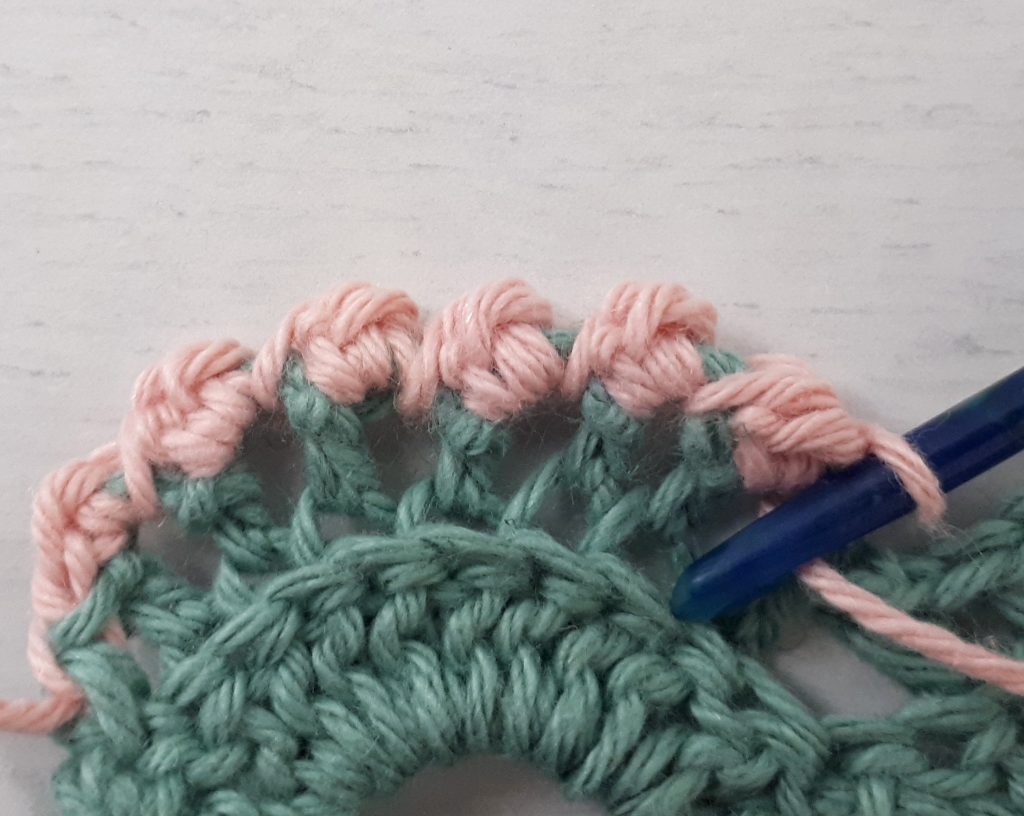
5) yo and pull yarn through all 5 loops.
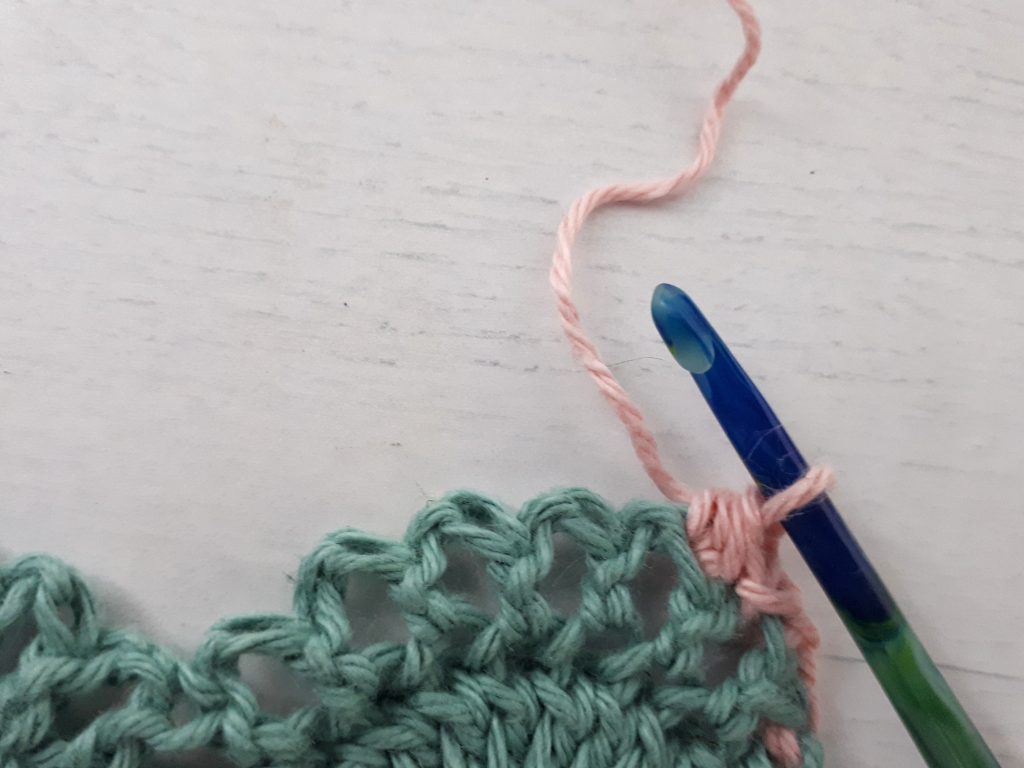
6) 1ss in next st.
** If your berries are too close to each other, work 3 ss stitches between every berry, instead of 1 ss.
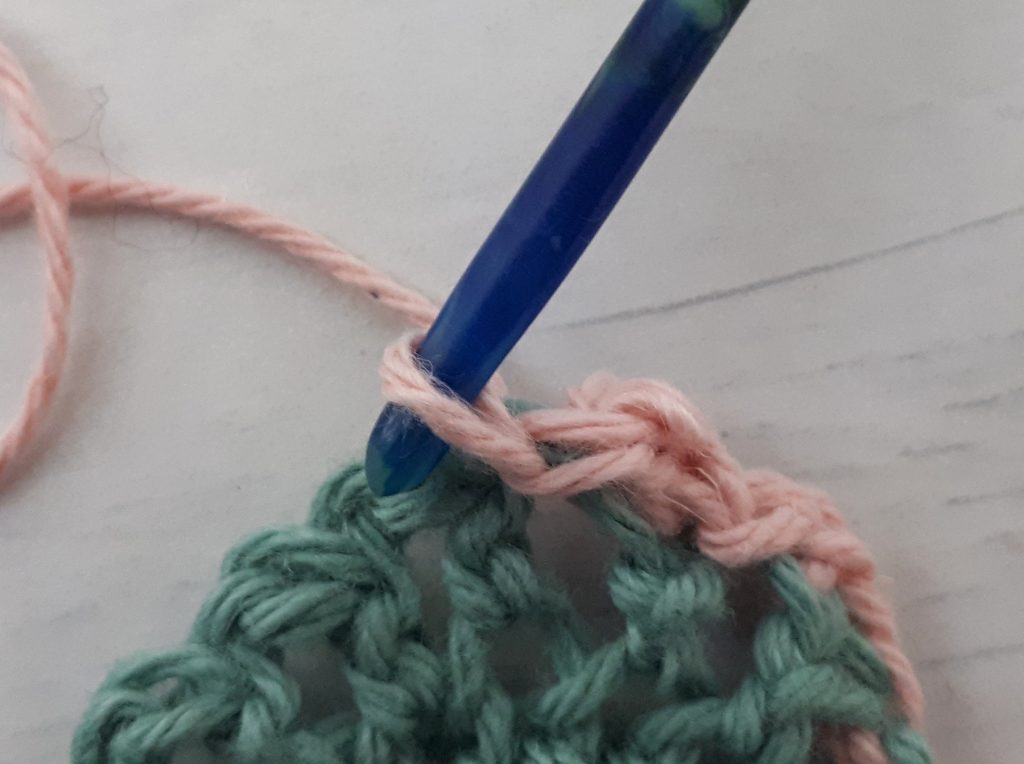
Continue working steps 2-6.
Did you try this out? Share your project!
– Let me know how it went and leave a comment below
– Tag me @madebygootie
– Join and share in our FB Community
Want to save this post for later? Go ahead and PIN it!
There’s no video. When you click the link at the beginning it pushes you down to the end of the written instructions where it says, “Video Tutorial,” but that’s just text only, there’s no actual link attached to it 🤷🏻♀️
Hi Alexandra,
Sometimes the video is not showing when you are using an AdBlock with your browser.
I added a link to the video when it’s not showing, let me know if you’re still having problems.
I love the shell/arches used with the berry stitch! I want to use it for a border on my daughter’s blanket. Is there a tutorial for the whole section somewhere? or do I have to purchase the clutch pattern?
Hi Kristen,
This is such a beautiful idea!
And yes, the combination of the berries with the shells is only available in the paid PDF at the moment.
I would love to see your blanket when it’s done!