Last Updated on July 11, 2024
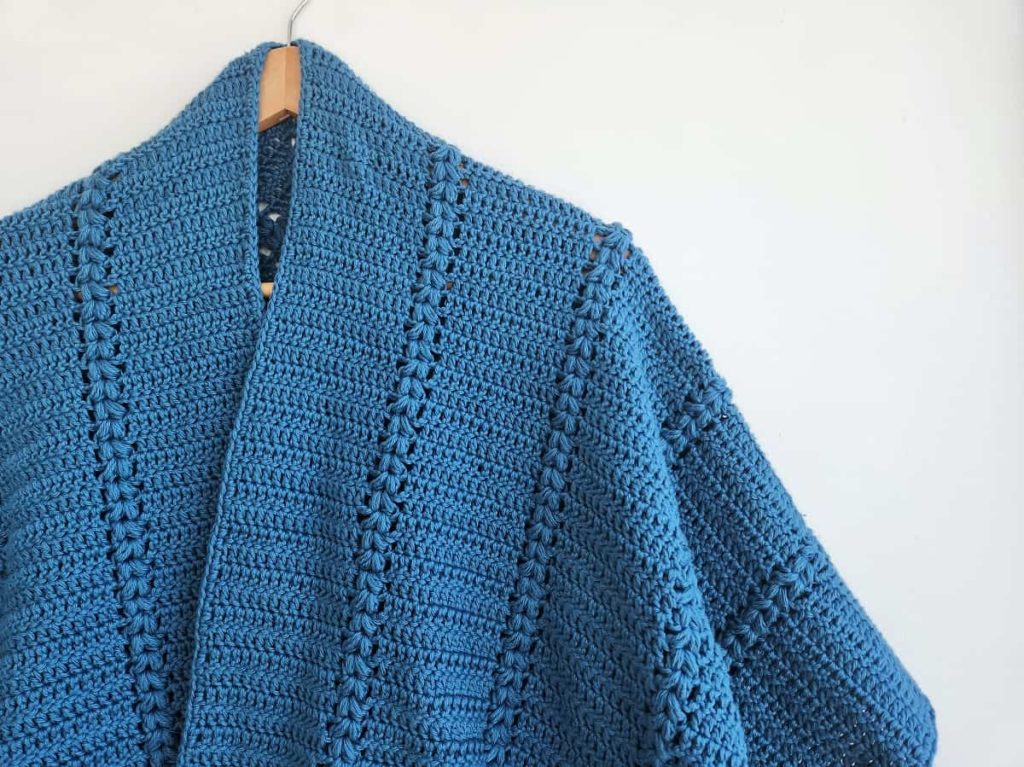
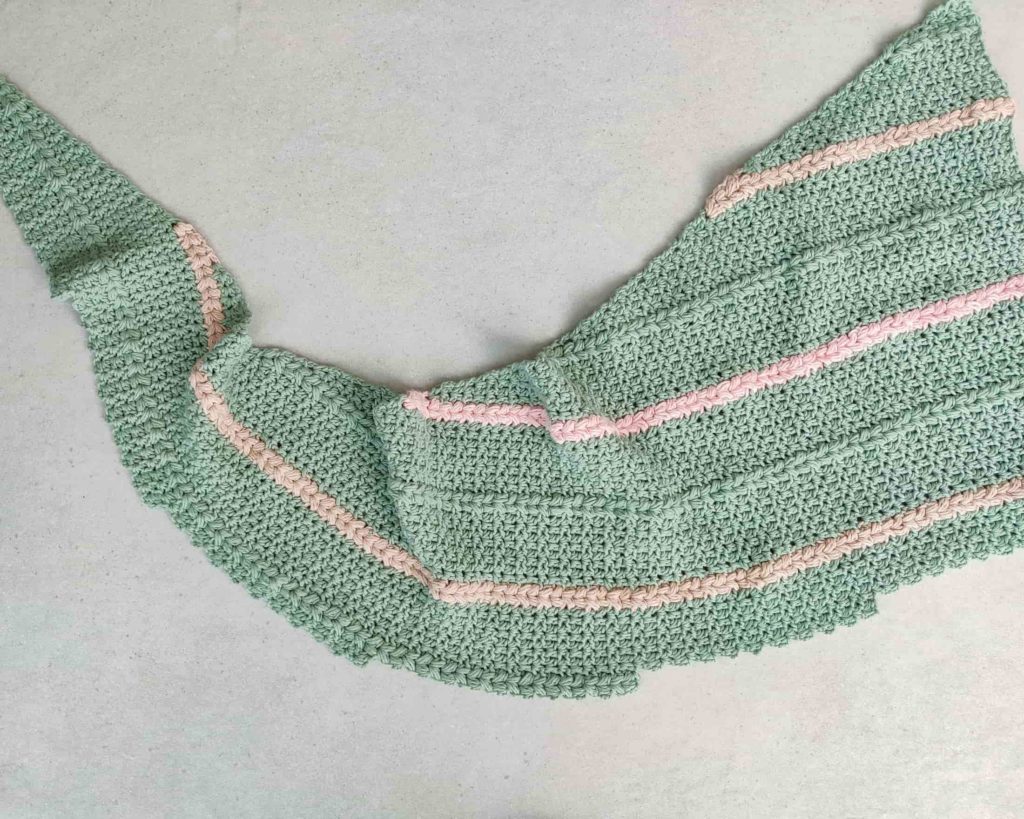
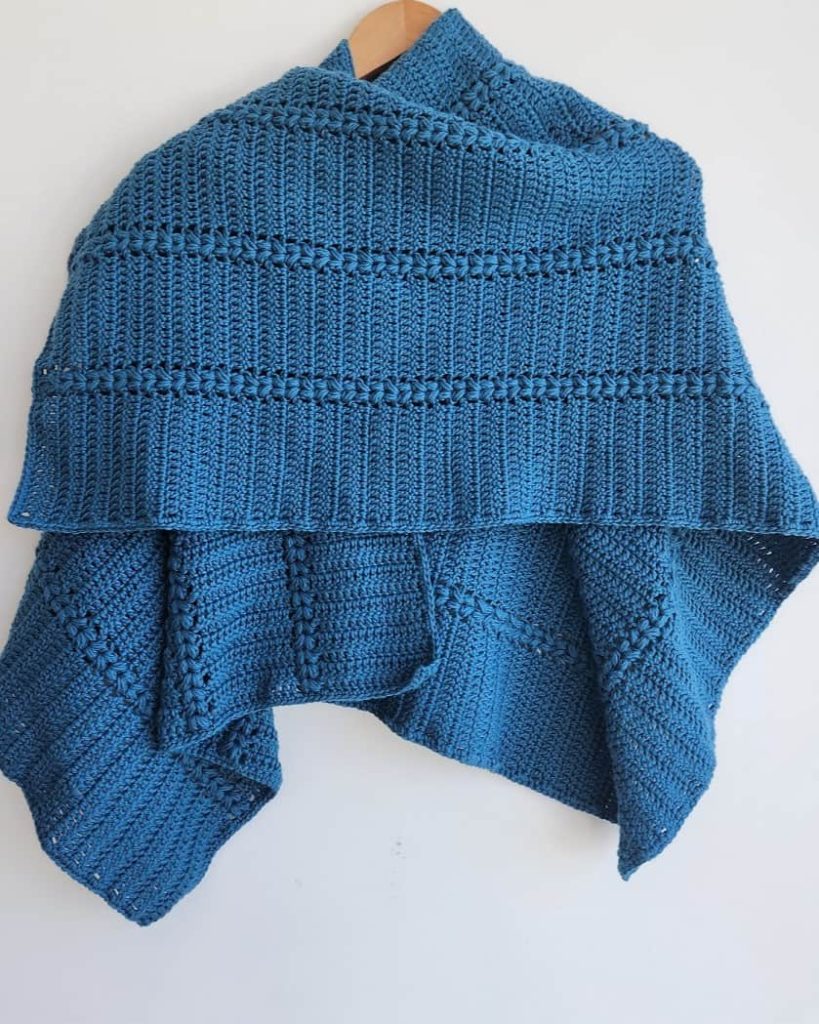
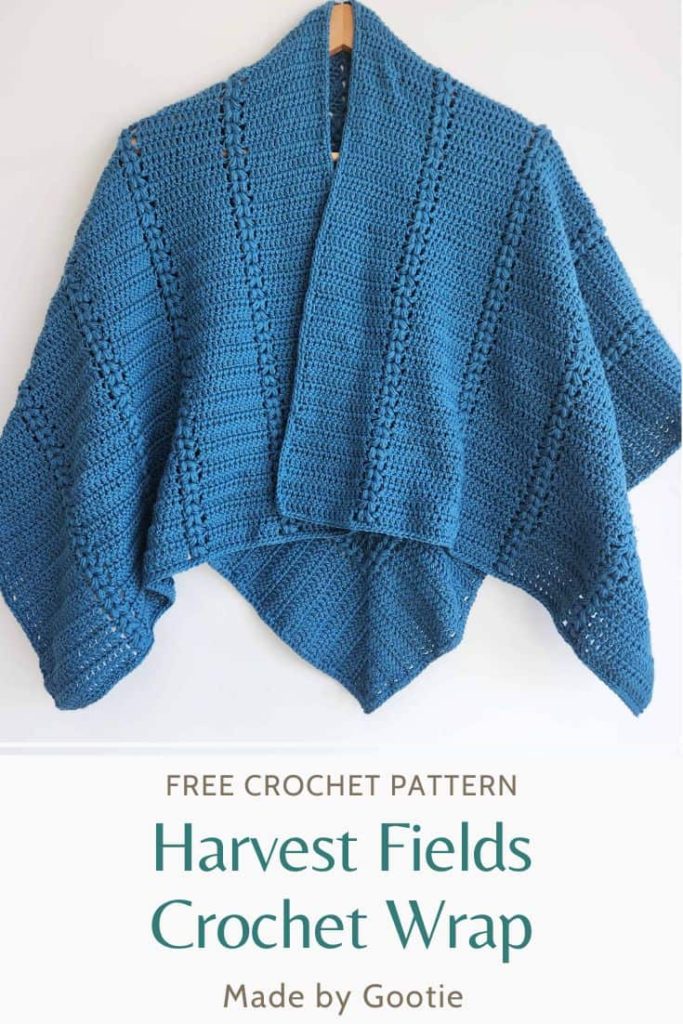
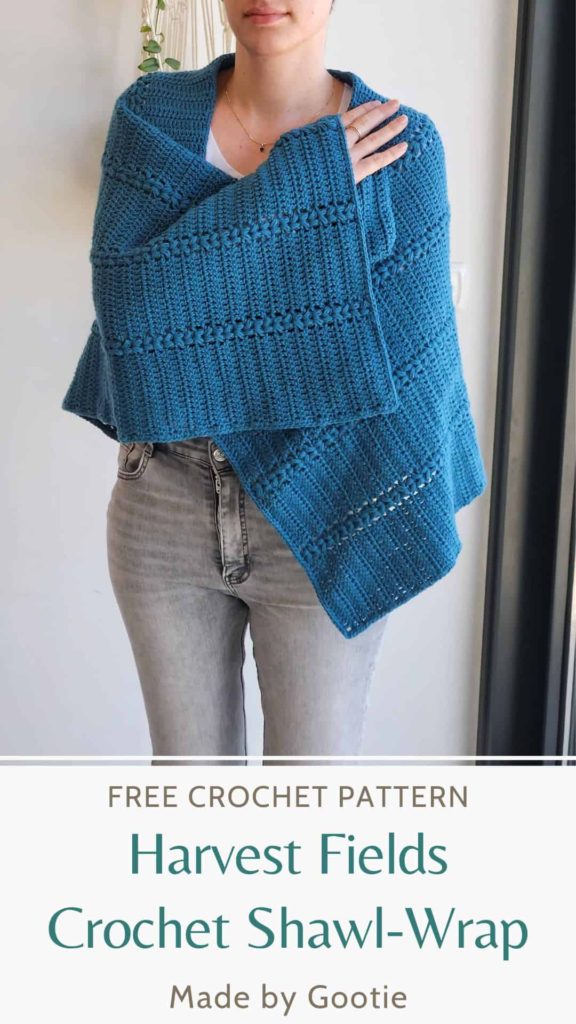
The Harvest Fields Wrap Crochet Pattern is a romantic and cozy crochet shawl-wrap.
I made this wrap as a gift to my mother-in-law, she wanted something stylish that will keep her shoulders warm.
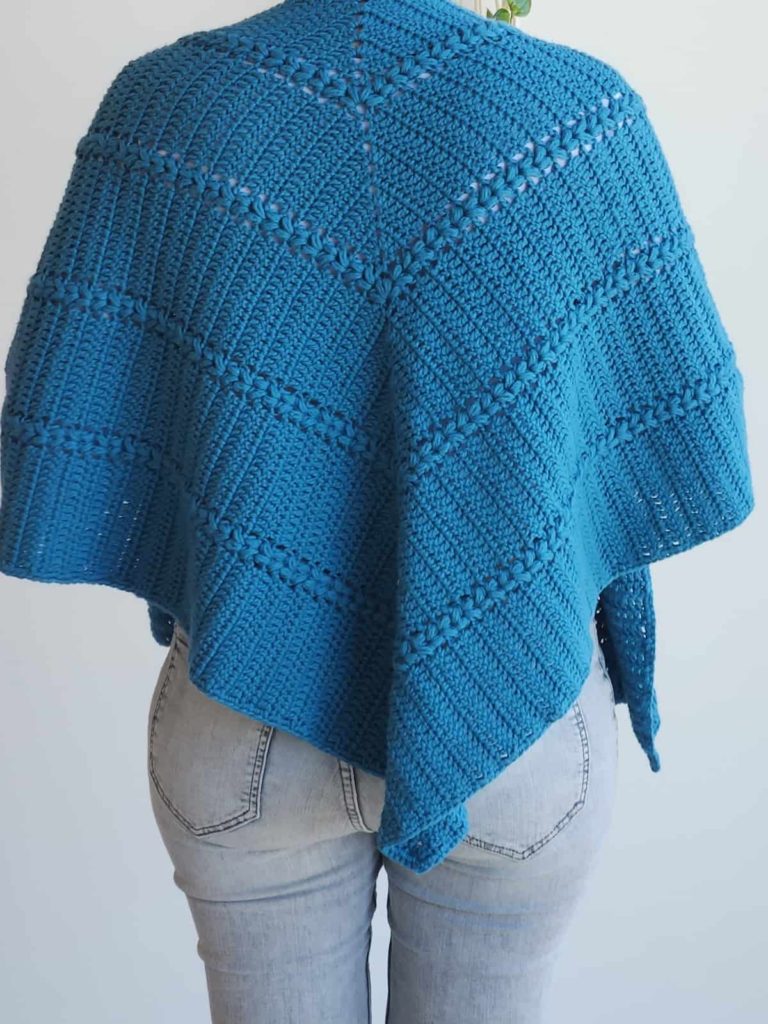
This wrap crochet pattern is worked in the Mitered Square method, which results in a unique shape – a triangle at the back, and long panels on the front.
** Some of the links in this post may include affiliate links. Making a purchase through one of these links pays me a small referral fee at no added cost to you. These small fees add up and help me keep the blog running. View our disclosure and privacy policy for more information.
Want to save this post for later? Go ahead and PIN it!
The unique construction of the Harvest Fields Wrap makes it the perfect accessory to keep you warm and look elegant.
This wrap crochet pattern’s construction is similar to the In Bloom Ruana, the pattern is worked from the back corner as a mitered square. But the difference in this pattern is that there is no seaming and joining, the panels are worked continuously from each side, and it gives you the freedom to make the front panels as long as you want!
Although the skill level of the pattern is stated to be intermediate, I think an advanced beginner would conquer it just fine! I rated it as “intermediate” because of the mitered square construction.
Is It a Shawl or a Wrap?
I admit I had a hard time deciding whether to call it a ‘wrap’ or a ‘shawl’.
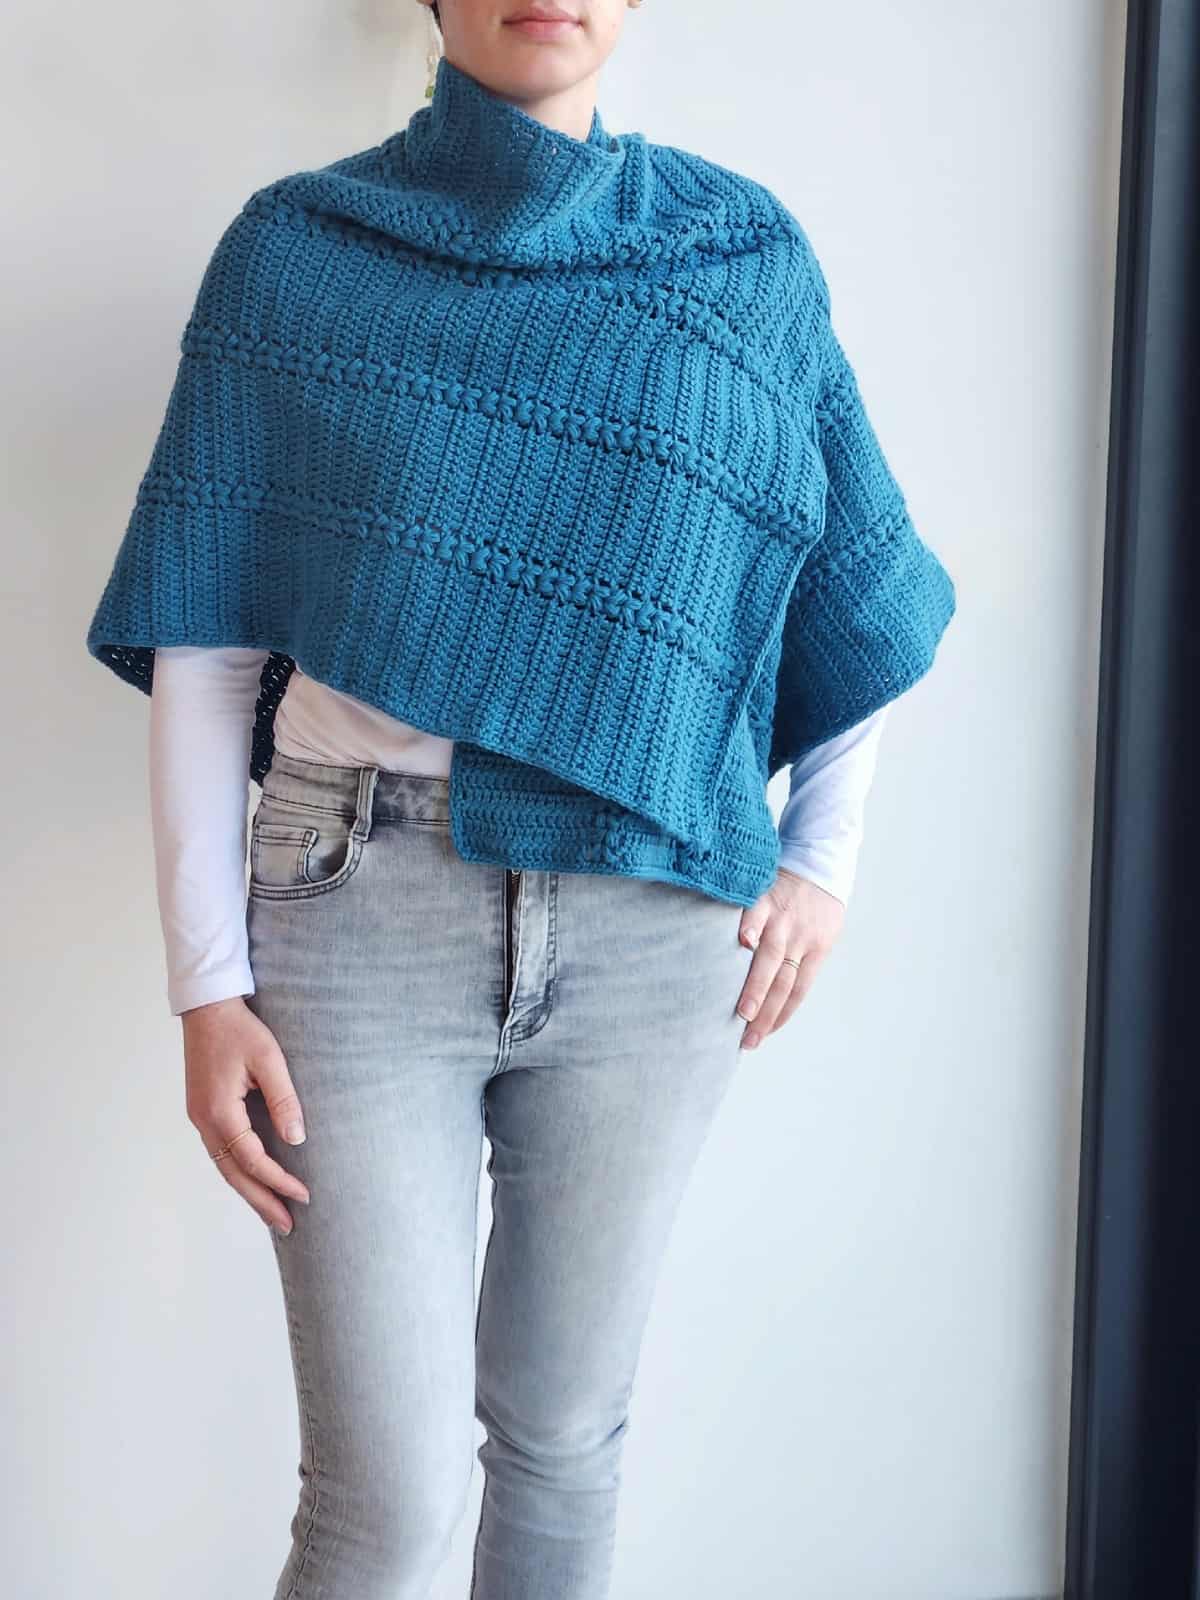
From the back, it looks like a triangle shawl, while on the front it looks like a rectangle wrap or even a ruana.
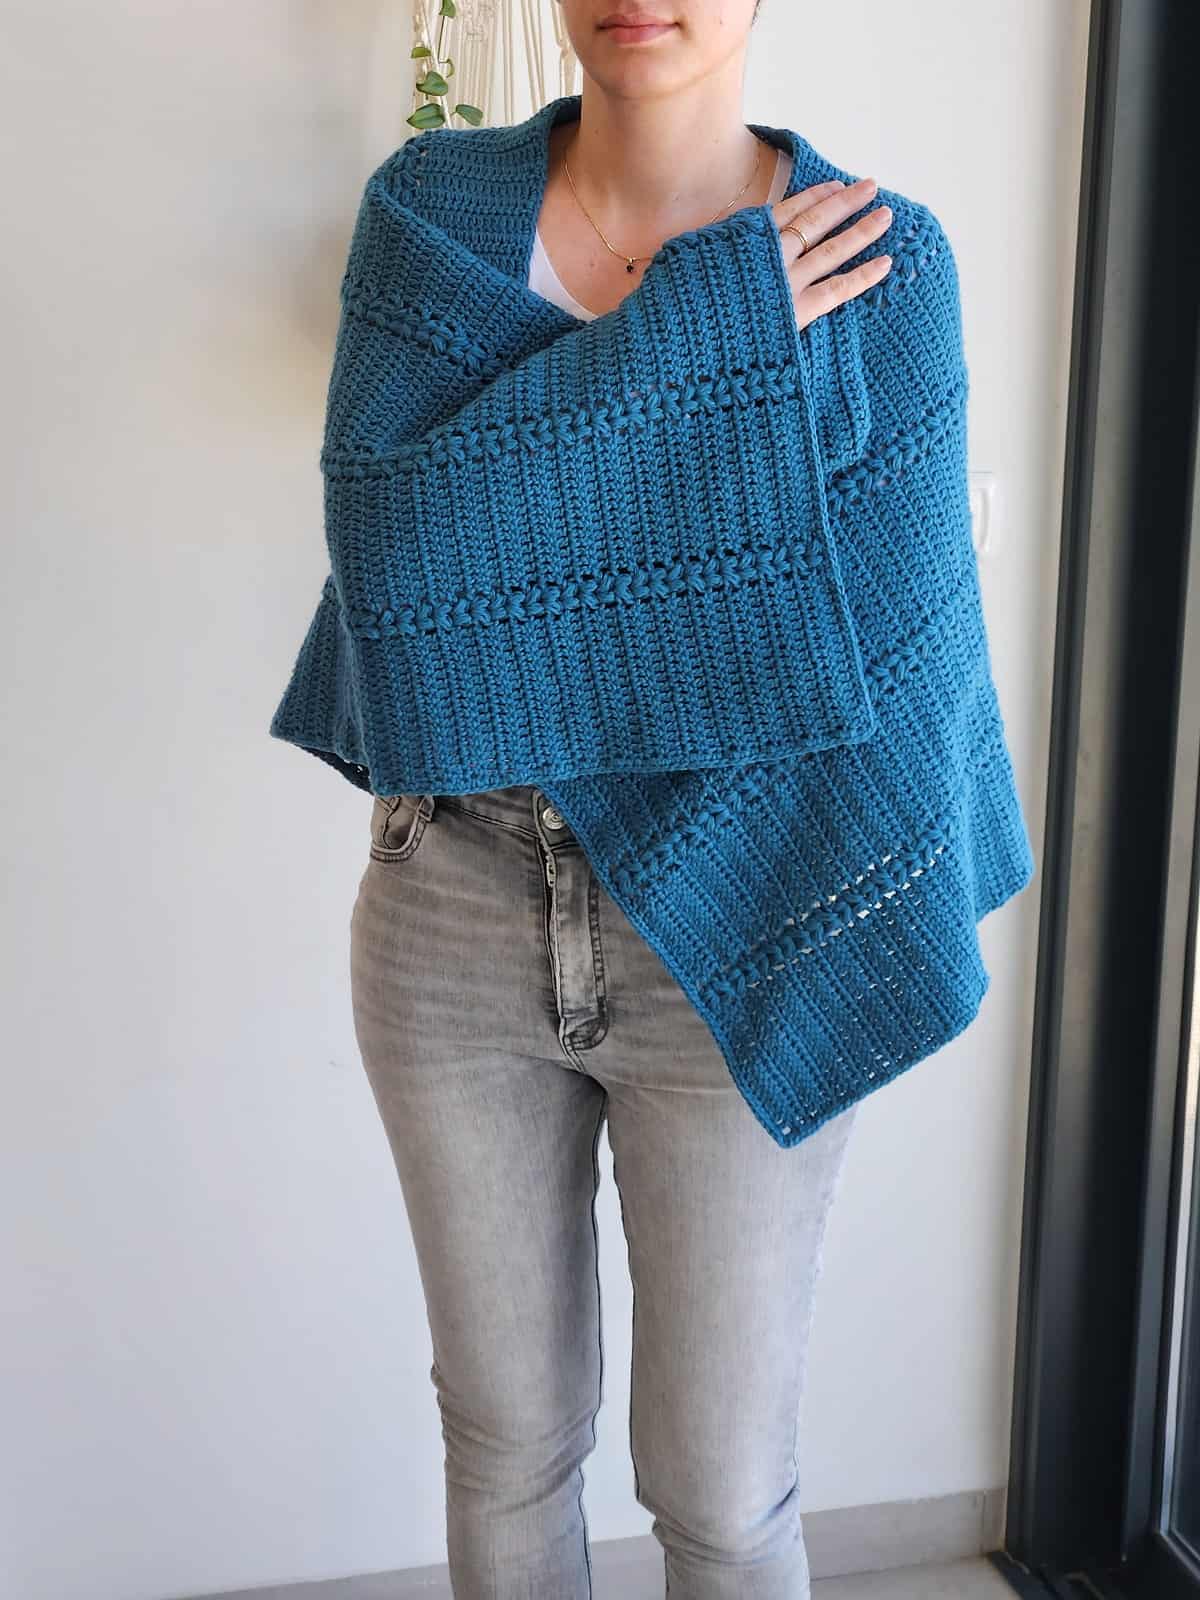
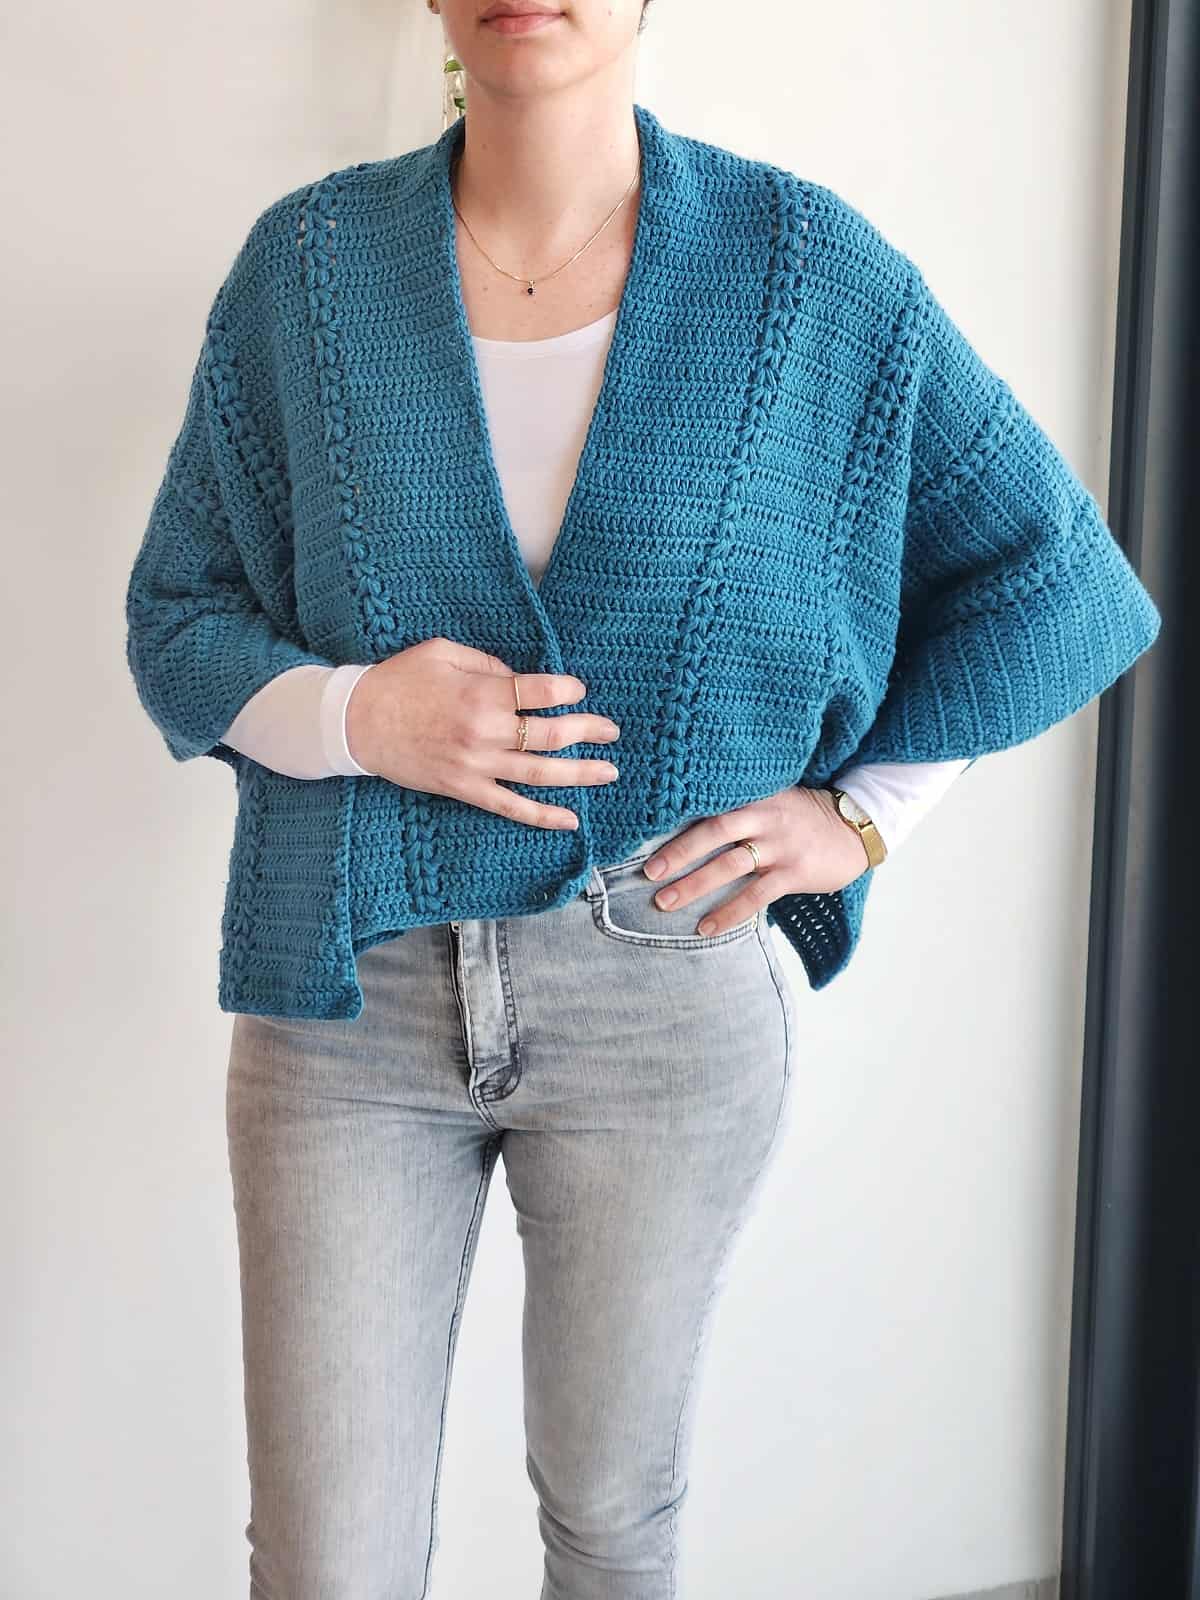
You can wear it as a shawl with the triangle at the back and panels at the front. You can wear it as a wrap, wrapping the panels around the shoulders. Or make it into a ruana, by making the front panels longer.
I ended up asking for help to name this pattern on my Facebook group, and the majority called it a wrap, but you can call it whatever you want!
What Yarn Should You Use For This Crochet Wrap?
The wrap is crocheted with a DK (#3) weight yarn, which makes it perfect for the autumn or spring, and not too warm.
I used Knit Picks – CotLin which is 70% Tangius Cotton and 30% Linen. This yarn is soft, with beautiful stitch definition, and not too heavy and feels nice on your skin, and I love the big variety of colors it has.
You can use any fiber type you’d like, this pattern will also shows the texture very well with acrylic yarn.
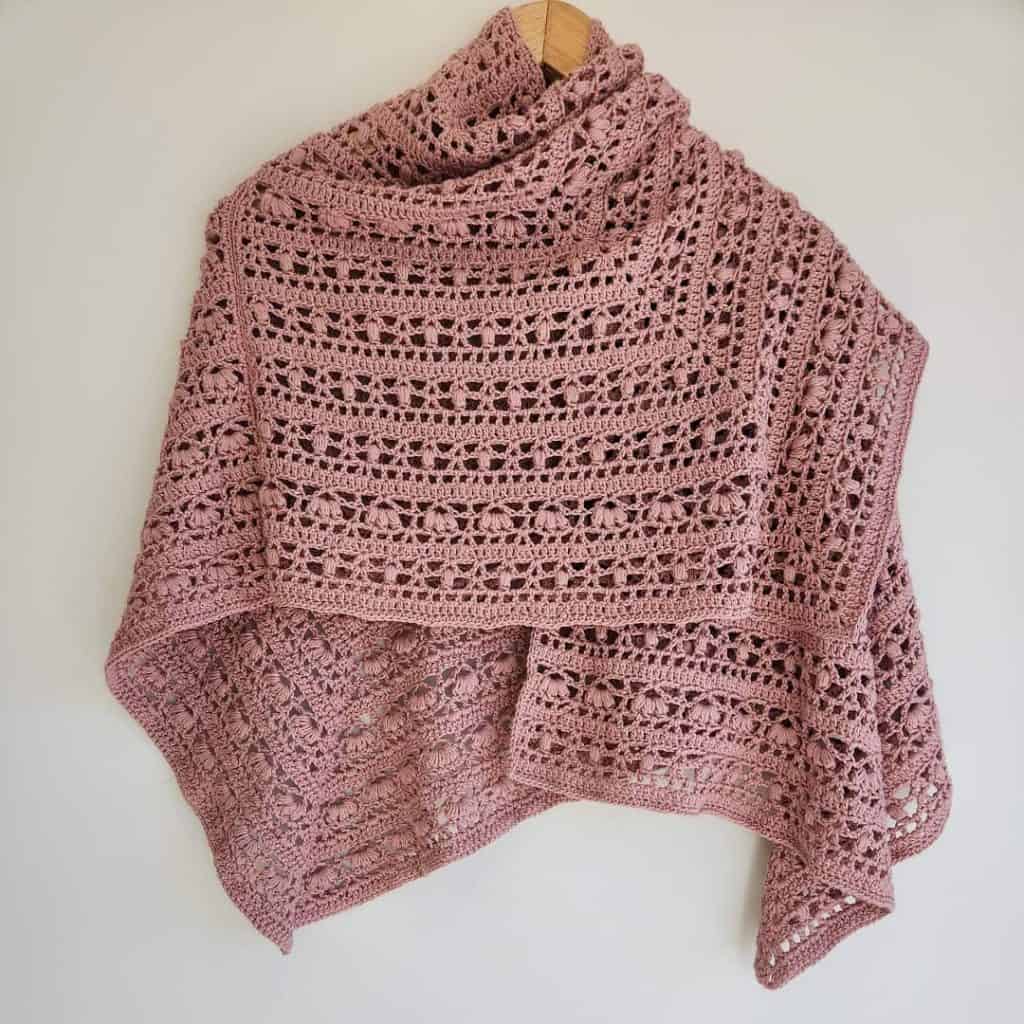
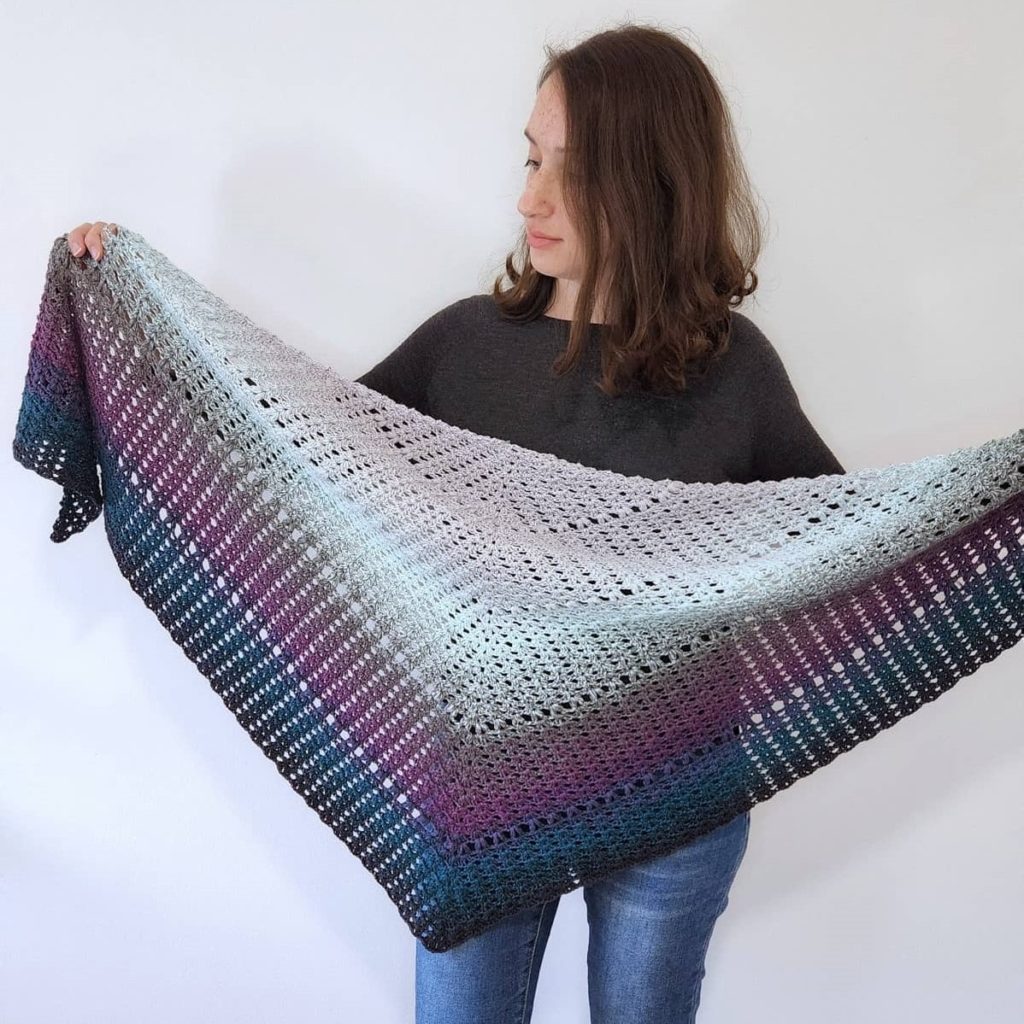
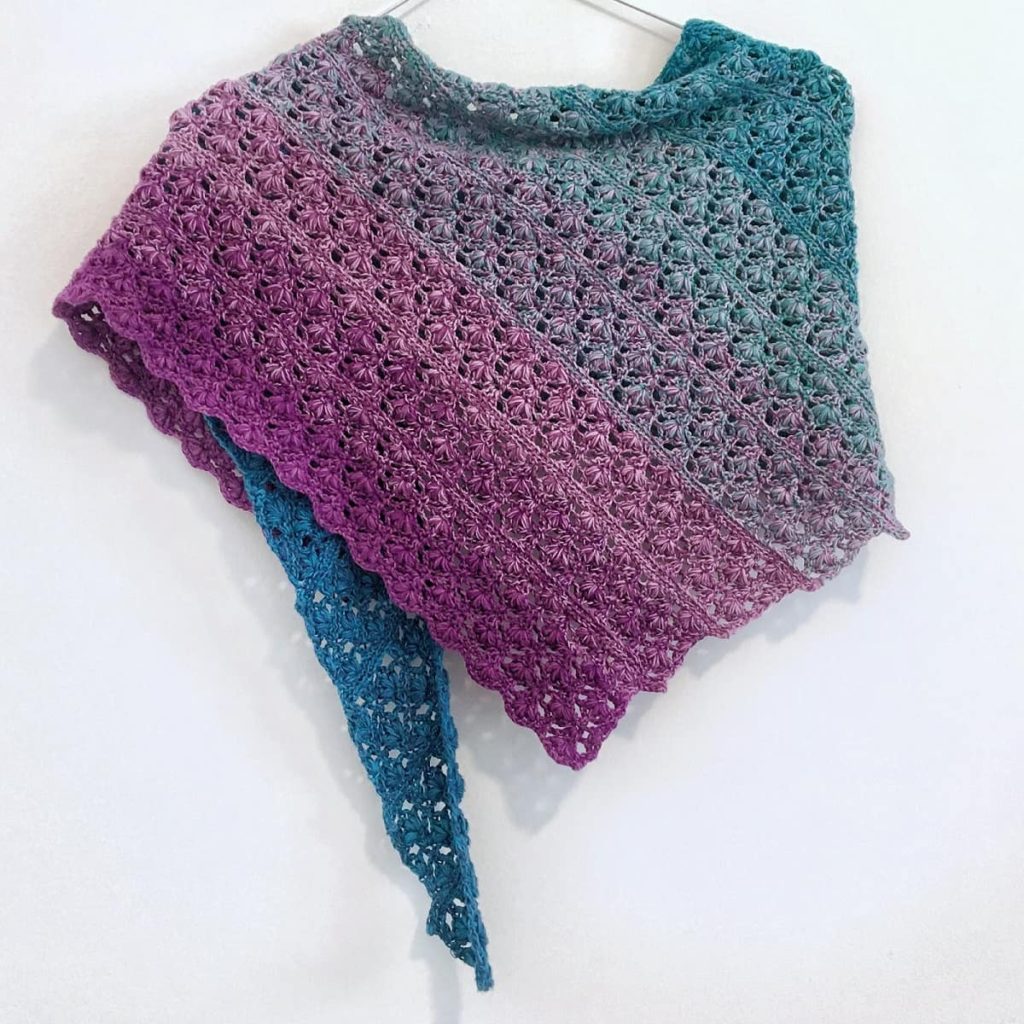
Looking for More Crochet Shawl Patterns? Check out the other free stitch tutorials on the blog:
Materials
– Crochet hook 4.0 mm / G (I love the Etimo Hooks).
– DK (#3) weight yarn – I used Knit Picks – CotLin).
Amount of yarn needed: 550gr/1,200m/1,300yds
Finished Size
Length – 40 inch / 102 cm (can be made longer)
Width of single panel – 20 inch / 51 cm

Gauge (in pattern):
Working Rows 1-8 with a 4.0mm / G hook will result in a 4’’ (10 cm) square.
Do you prefer photo tutorials? Get the premium, ad-free, full photo-tutorial, printable PDF version on Ravelry or Etsy!
Abbreviations (US)
ch – chain
dc – double crochet
Puff – (Yo and insert hook into same st, yo and pull up a loop) x 3 times. Yo and pull yarn through all 7 loops on hook.
sc – single crochet
sk – skip
sp – space
st – stitch
STsc – stacked single crochet
V-Puff – [1 Puff, ch 1, 1 Puff] in same sp/st
yo – yarn over
How to Crochet the Stacked Single Crochet Stitch (STsc)
work 1 single crochet in the first st, then work another single crochet into the left leg of the single crochet you just worked.

How to Crochet the Puff stitch:
(yo, insert hook into next st, yo and pull up a loop) x 3 times working into same st, yo and pull through all 7 loops on hook.

Notes
- An alternative to the Magic Circle: Ch 3, sk ch 2 at row 1 and work the pattern into the 3rd ch from the hook.
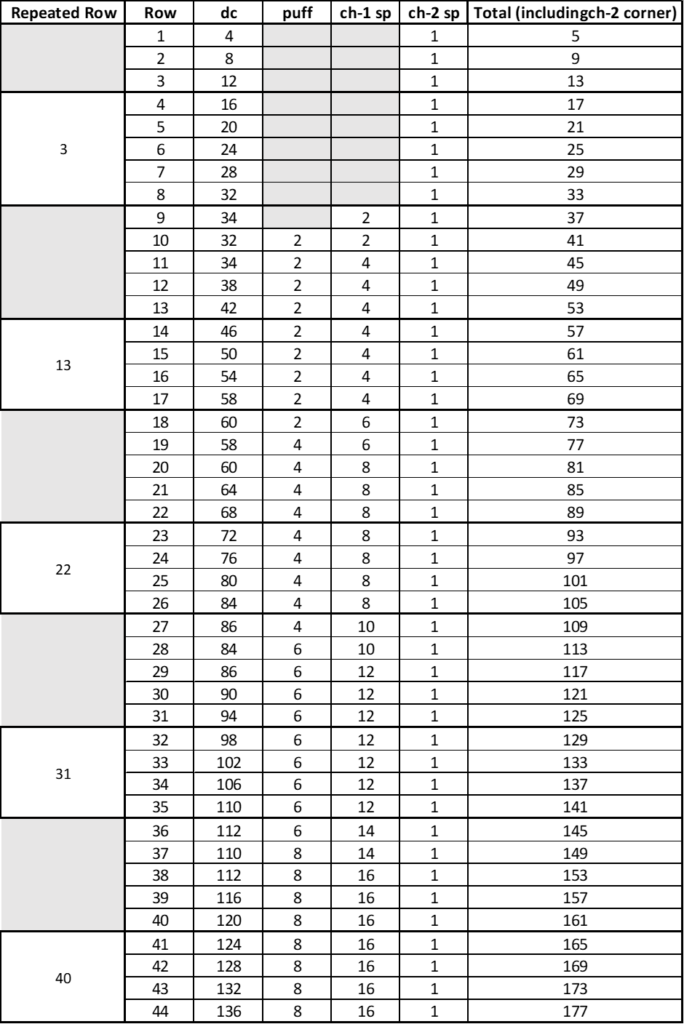
- There is a stitch count table after the written instructions, which will help you follow the row repetitions.
- To help with stitch count of the back panel: every row adds 4 stitches (2 on each side).
- STsc is an alternative to the 1st double crochet, its intention in this pattern is to get a straighter edge. If you prefer, you can replace it with ch3, or ch2 + dc at the beginning of each row.
- The back panel is worked in a Mitered Square method, you start by working from one corner, and increasing back and forth on two sides of the square.
- You can place a stitch marker in the corner ch-2 space if you prefer.
Harvest Field Crochet Wrap Free Pattern
Back Panel
Make a magic ring.
Row 1 (WS): ch 2 (doesn’t count as a st), working into the magic ring: 2 dc, ch 2, 2 dc. Pull the ring tight, turn. (4 dc, 1 ch-2 sp)
Row 2 (RS): STsc (counts as 1 dc here and throughout) in 1st dc, 1 dc in next dc, [2 dc, ch 2, 2 dc] in next corner ch-2 sp, 1 dc in each of last 2 dc, turn. (8 dc, 1 ch-2 sp).
Row 3 (WS): STsc in 1st dc, 1 dc in each dc until corner ch-2 sp, [2 dc, ch 2, 2 dc] in corner
ch-2 sp, 1 dc in each dc to the end of the row, turn. (12 dc, 1 ch-2 sp)
Row 4-8: Repeat row 3. (finishing row 8 with 32 dc, 1 ch-2 sp)
Row 9 (WS): STsc in 1st dc, 1 dc in each dc until corner ch-2 sp, [ch 1, 1 dc, ch 2, 1 dc ,ch 1] in corner ch-2 sp, 1 dc in each dc to the end of the row, turn. (34 dc, 2 ch-1 sp, 1 ch-2 sp)
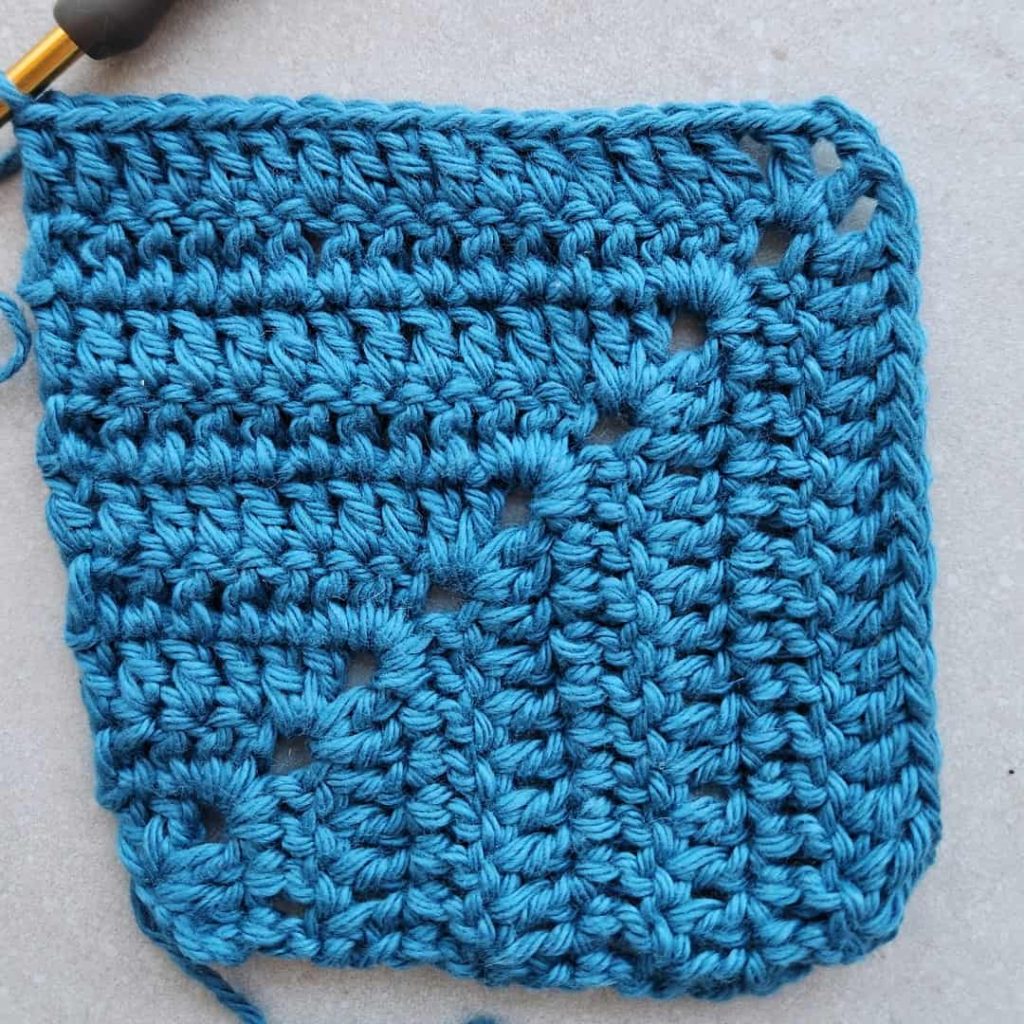
Row 10 (RS): STsc in 1st dc, 1 dc in next 15 dc, ch 1, sk next ch-1 sp & dc, [V-Puff, ch 2, V-Puff] in corner ch-2 sp.
Ch 1, sk next dc & ch-1 sp, 1 dc in next 16 dc to the end of the row, turn. (32 dc, 2 V-Puff, 2 ch-1 sp, 1 ch-2 sp)
Row 11 (WS): STsc in 1st dc, 1 dc in next 15 dc, ch 1, sk next ch-1 sp & puff, V-Puff in next ch-1 sp, ch 1, sk next puff, [1 dc, ch 2, 1 dc] in corner ch-2 sp.
Ch 1, sk next puff, V-Puff in next ch-1 sp, ch 1, sk next puff & ch-1 sp, 1 dc in next 16 dc to the end of the row, turn. (34 dc, 2 V-Puff, 4 ch-1 sp, 1 ch-2 sp)
Row 12 (RS): STsc in 1st dc, 1 dc in next 15 dc, ch 1, sk next ch-1 sp & puff, V-Puff in next ch-1 sp, ch 1, sk next puff & ch-1 sp, 1 dc in next dc, [2 dc, ch 2, 2 dc] in corner ch-2 sp.
1 dc in next dc, ch 1, sk next ch-1 sp & puff, V-Puff in next ch-1 sp, ch 1, sk next puff & ch-1 sp, 1 dc in next 16 dc to the end of the row, turn. (38 dc, 2 V-Puff, 4 ch-1 sp, 1 ch-2 sp)
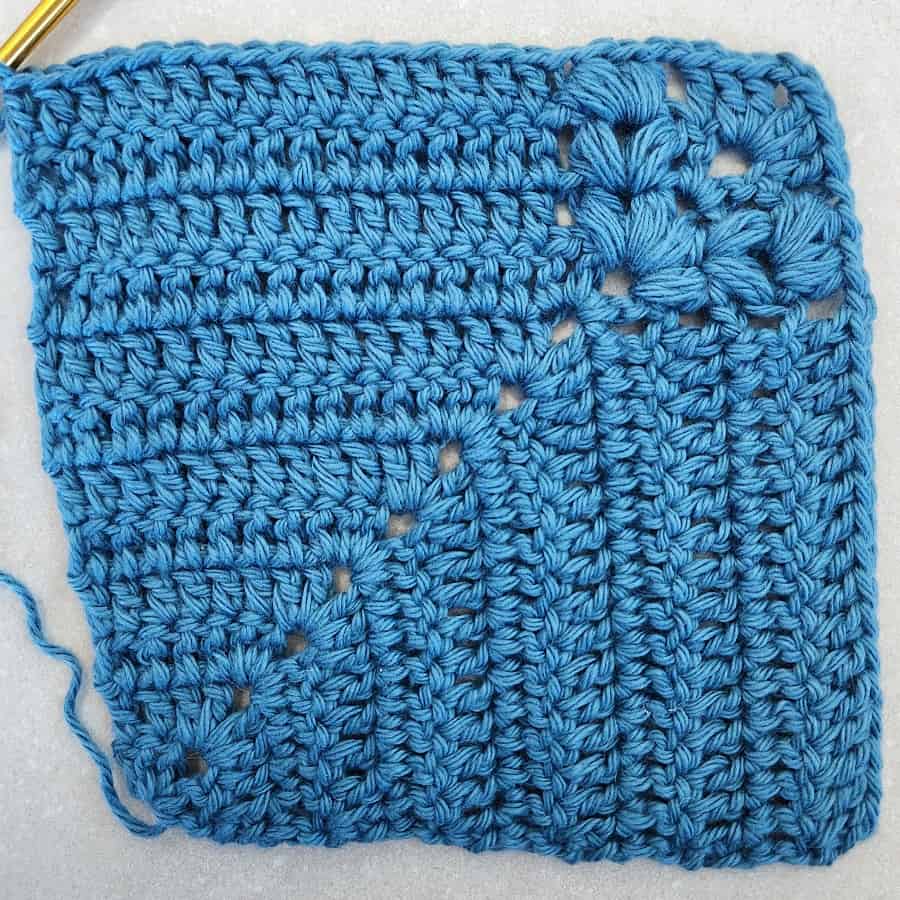
Row 13 (WS): STsc in 1st dc, 1 dc in next 15 dc, ch 1, sk next ch-1 sp & puff, V-Puff in next ch-1 sp, ch 1, sk next puff & ch-1 sp.
1 dc in each dc until ch-2 sp, [2 dc, ch 2, 2 dc] in corner ch-2 sp.
1 dc in each dc until ch-1 sp, ch 1, sk next ch-1 sp & puff, V-Puff in next ch-1 sp, ch 1, sk next puff & ch-1 sp. 1 dc in next 16 dc to the end of the row, turn. (42 dc, 2 V-Puff, 4 ch-1 sp, 1 ch-2 sp)
Rows 14-17: Repeat row 13 – total of 4 times. (finishing row 17 with 58 dc, 2 V-Puff, 4 ch-1 sp, 1 ch-2 sp)
Row 18 (RS): STsc in 1st dc, 1 dc in next 15 dc, ch 1, sk next ch-1 sp & puff, V-Puff in next ch-1 sp, ch 1, sk next puff & ch-1 sp.
1 dc in next 13 dc, [ch 1, 1 dc, ch 2, 1 dc, ch 1] in corner ch-2 sp.
1 dc in next 13 dc, ch 1, sk next ch-1 sp & puff, V-Puff in next ch-1 sp, ch 1, sk next puff & ch-1 sp. 1 dc in next 16 dc to the end of the row, turn. (60 dc, 2 V-Puff, 6 ch-1 sp, 1 ch-2 sp)
Row 19 (WS): STsc in 1st dc, 1 dc in next 15 dc, ch 1, sk next ch-1 sp & puff, V-Puff in next ch-1 sp, ch 1, sk next puff & ch-1 sp.
1 dc in next 13 dc, ch 1, sk next ch-1 sp & dc, [V-Puff, ch 2, V-Puff] in corner ch-2 sp.
Ch 1, sk next dc & ch-1 sp, 1 dc in next 13 dc, ch 1, sk next ch-1 sp & puff, V-Puff in next ch-1 sp, ch 1, sk next puff & ch-1 sp.
1 dc in next 16 dc to the end of the row, turn. (58 dc, 4 V-Puff, 6 ch-1 sp, 1 ch-2 sp)
Row 20 (RS): STsc in 1st dc, 1 dc in next 15 dc, ch 1, sk next ch-1 sp & puff, V-Puff in next ch-1 sp, ch 1, sk next puff & ch-1 sp.
1 dc in next 13 dc, sk next ch-1 sp & puff, V-Puff in next ch-1 sp, ch 1, sk next puff,
[1 dc, ch 2, 1 dc] in corner ch-2 sp.
Ch 1, sk next puff, V-Puff in next ch-1 sp, ch 1, sk next puff & ch-1 sp, 1 dc in next 13 dc.
Ch 1, sk next puff, V-Puff in next ch-1 sp, ch 1, sk next puff & ch-1 sp, 1 dc in next 16 dc to the end of the row, turn. (60 dc, 4 V-Puff, 8 ch-1 sp, 1 ch-2 sp)
Row 21 (WS): STsc in 1st dc, 1 dc in next 15 dc, ch 1, sk next ch-1 sp & puff, V-Puff in next ch-1 sp, ch 1, sk next puff & ch-1 sp.
1 dc in next 13 dc, ch 1, sk next ch-1 sp & puff, V-Puff in next ch-1 sp, ch 1, sk next puff.
1 dc in next dc, [2 dc, ch 2, 2 dc] in corner ch-2 sp.
1 dc in next dc, ch 1, sk next ch-1 sp & puff, V-Puff in next ch-1 sp, ch 1, sk next puff & ch-1 sp, 1 dc in next 13 dc.
Ch 1, sk next puff, V-Puff in next ch-1 sp, ch 1, sk next puff & ch-1 sp, 1 dc in next 16 dc to the end of the row, turn. (64 dc, 4 V-Puff, 8 ch-1 sp, 1 ch-2 sp)
Row 22 (RS): STsc in 1st dc.
* 1 dc in each dc until ch-1 sp, ch 1, sk next ch-1 sp & puff, V-Puff in next ch-1 sp, ch 1, sk next puff & ch-1 sp; Repeat from * 1 more time.
1 dc in each dc until ch-2 sp corner, [2 dc, ch 2, 2 dc] in corner ch-2 sp.
* 1 dc in each dc until ch-1 sp, ch 1, sk next ch-1 sp & puff, V-Puff in next ch-1 sp, ch 1, sk next puff & ch-1 sp; Repeat from * 1 more time.
1 dc in next 16 dc to the end of the row, turn. (68 dc, 4 V-Puff, 8 ch-1 sp, 1 ch-2 sp)
Rows 23-26: Repeat row 22 – total of 4 times.
(finishing row 26 with 84 dc, 4 V-Puff, 8 ch-1 sp, 1 ch-2 sp)
Row 27 (WS): STsc in 1st dc.
* 1 dc in each dc until ch-1 sp, ch 1, sk next ch-1 sp & puff, V-Puff in next ch-1 sp, ch 1, sk next puff & ch-1 sp; Repeat from * 1 more time.
1 dc in next 13 dc, [ch 1, 1 dc, ch 2, 1 dc, ch 1] in corner ch-2 sp.
* 1 dc in each dc until ch-1 sp, ch 1, sk next ch-1 sp & puff, V-Puff in next ch-1 sp, ch 1, sk next puff & ch-1 sp; Repeat from * 1 more time.
1 dc in next 16 dc to the end of the row, turn. (86 dc, 4 V-Puff, 10 ch-1 sp, 1 ch-2 sp)
Row 28 (RS): STsc in 1st dc.
* 1 dc in each dc until ch-1 sp, ch 1, sk next ch-1 sp & puff, V-Puff in next ch-1 sp, ch 1, sk next puff & ch-1 sp; Repeat from * 1 more time.
1 dc in next 13 dc, ch 1, sk next ch-1 sp & dc, [V-Puff, ch 2, V-Puff] in corner ch-2 sp, ch 1, sk next dc & ch-1 sp.
* 1 dc in each dc until ch-1 sp, ch 1, sk next ch-1 sp & puff, V-Puff in next ch-1 sp, ch 1, sk next puff & ch-1 sp; Repeat from * 1 more time.
1 dc in next 16 dc to the end of the row, turn. (84 dc, 6 V-Puff, 10 ch-1 sp, 1 ch-2 sp)
Row 29 (WS): STsc in 1st dc.
* 1 dc in each dc until ch-1 sp, ch 1, sk next ch-1 sp & puff, V-Puff in next ch-1 sp, ch 1, sk next puff & ch-1 sp; Repeat from * 1 more time.
1 dc in next 13 dc, ch 1, sk next ch-1 sp & puff, V-Puff in next ch-1 sp, ch 1, sk next puff,
[1 dc, ch 2, 1 dc] in corner ch-2 sp.
Ch 1, sk next puff, V-Puff in next ch-1 sp, ch 1, sk next puff & ch-1 sp.
* 1 dc in each dc until ch-1 sp, ch 1, sk next ch-1 sp & puff, V-Puff in next ch-1 sp, ch 1, sk next puff & ch-1 sp; Repeat from * 1 more time.
1 dc in next 16 dc to the end of the row, turn. (86 dc, 6 V-Puff, 12 ch-1 sp, 1 ch-2 sp)
Row 30 (RS): STsc in 1st dc.
* 1 dc in each dc until ch-1 sp, ch 1, sk next ch-1 sp & puff, V-Puff in next ch-1 sp, ch 1, sk next puff & ch-1 sp; Repeat from * 2 more times.
1 dc in next dc, [2 dc, ch 2, 2 dc] in corner ch-2 sp.
1 dc in next dc, ch 1, sk next ch-1 sp & puff, V-Puff in next ch-1 sp, ch 1, sk next puff & ch-1 sp.
* 1 dc in each dc until ch-1 sp, ch 1, sk next ch-1 sp & puff, V-Puff in next ch-1 sp, ch 1, sk next puff & ch-1 sp; Repeat from * 1 more time.
1 dc in next 16 dc to the end of the row, turn. (90 dc, 6 V-Puff, 12 ch-1 sp, 1 ch-2 sp)
Row 31 (WS): STsc in 1st dc.
* 1 dc in each dc until ch-1 sp, ch 1, sk next ch-1 sp & puff, V-Puff in next ch-1 sp, ch 1, sk next puff & ch-1 sp; Repeat from * 2 more times.
1 dc in each dc until ch-2 sp corner, [2 dc, ch 2, 2 dc] in corner ch-2 sp.
* 1 dc in each dc until ch-1 sp, ch 1, sk next ch-1 sp & puff, V-Puff in next ch-1 sp, ch 1, sk next puff & ch-1 sp; Repeat from * 2 more times.
1 dc in next 16 dc to the end of the row, turn. (94 dc, 6 V-Puff, 12 ch-1 sp, 1 ch-2 sp)
Rows 32-35: Repeat row 31 – total of 4 times. (finishing row 35 with 110 dc, 6 V-Puff, 12 ch-1 sp, 1 ch-2 sp)
Row 36 (RS): STsc in 1st dc.
* 1 dc in each dc until ch-1 sp, ch 1, sk next ch-1 sp & puff, V-Puff in next ch-1 sp, ch 1, sk next puff & ch-1 sp; Repeat from * 2 more times.
1 dc in next 13 dc, [ch 1, 1 dc, ch 2, 1 dc, ch 1] in corner ch-2 sp.
* 1 dc in each dc until ch-1 sp, ch 1, sk next ch-1 sp & puff, V-Puff in next ch-1 sp, ch 1, sk next puff & ch-1 sp; Repeat from * 2 more times.
1 dc in next 16 dc to the end of the row, turn. (112 dc, 6 V-Puff, 14 ch-1 sp, 1 ch-2 sp)
Row 37 (WS): STsc in 1st dc.
* 1 dc in each dc until ch-1 sp, ch 1, sk next ch-1 sp & puff, V-Puff in next ch-1 sp, ch 1, sk next puff & ch-1 sp; Repeat from * 2 more times.
1 dc in next 13 dc, ch 1, sk next ch-1 sp & dc, [V-Puff, ch 2, V-Puff] in corner ch-2 sp, ch 1, sk next dc & ch-1 sp.
* 1 dc in each dc until ch-1 sp, ch 1, sk next ch-1 sp & puff, V-Puff in next ch-1 sp, ch 1, sk next puff & ch-1 sp; Repeat from * 2 more times.
1 dc in next 16 dc to the end of the row, turn. (110 dc, 8 V-Puff, 14 ch-1 sp, 1 ch-2 sp)
Row 38 (RS): STsc in 1st dc.
* 1 dc in each dc until ch-1 sp, ch 1, sk next ch-1 sp & puff, V-Puff in next ch-1 sp, ch 1, sk next puff & ch-1 sp; Repeat from * 2 more times.
1 dc in next 13 dc, ch 1, sk next ch-1 sp & puff, V-Puff in next ch-1 sp, ch 1, sk next puff,
[1 dc, ch 2, 1 dc] in corner ch-2 sp.
Ch 1, sk next puff, V-Puff in next ch-1 sp, ch 1, sk next puff & ch-1 sp.
* 1 dc in each dc until ch-1 sp, ch 1, sk next ch-1 sp & puff, V-Puff in next ch-1 sp, ch 1, sk next puff & ch-1 sp; Repeat from * 2 more times.
1 dc in next 16 dc to the end of the row, turn. (112 dc, 8 V-Puff, 16 ch-1 sp, 1 ch-2 sp)
Row 39 (WS): STsc in 1st dc.
* 1 dc in each dc until ch-1 sp, ch 1, sk next ch-1 sp & puff, V-Puff in next ch-1 sp, ch 1, sk next puff & ch-1 sp; Repeat from * 3 more times.
1 dc in next dc, [2 dc, ch 2, 2 dc] in corner ch-2 sp.
1 dc in next dc, ch 1, sk next ch-1 sp & puff, V-Puff in next ch-1 sp, ch 1, sk next puff & ch-1 sp.
* 1 dc in each dc until ch-1 sp, ch 1, sk next ch-1 sp & puff, V-Puff in next ch-1 sp, ch 1, sk next puff & ch-1 sp; Repeat from * 2 more times.
1 dc in next 16 dc to the end of the row, turn. (116 dc, 8 V-Puff, 16 ch-1 sp, 1 ch-2 sp)
Row 40 (RS): STsc in 1st dc.
* 1 dc in each dc until ch-1 sp, ch 1, sk next ch-1 sp & puff, V-Puff in next ch-1 sp, ch 1, sk next puff & ch-1 sp; Repeat from * 3 more times.
1 dc in each dc until ch-2 sp corner, [2 dc, ch 2, 2 dc] in corner ch-2 sp.
* 1 dc in each dc until ch-1 sp, ch 1, sk next ch-1 sp & puff, V-Puff in next ch-1 sp, ch 1, sk next puff & ch-1 sp; Repeat from * 3 more times.
1 dc in next 16 dc to the end of the row, turn. (120 dc, 8 V-Puff, 16 ch-1 sp, 1 ch-2 sp)
Rows 41-44: Repeat row 40 – total of 4 times. Don’t fasten off. (finishing row 44 with 136 dc, 8 V-Puff, 16 ch-1 sp, 1 ch-2 sp)
Left Panel
Row 1 (WS): STsc in 1st dc, 1 dc in each dc until ch-1 sp, ch 1, sk next ch-1 sp & puff, V-Puff in next ch-1 sp, ch 1, sk next puff & ch-1 sp; Repeat from * 3 more times.
1 dc in next 13 dc to the end of the row, 2 dc in ch-2 sp, turn. (70 dc, 4 V-Puff, 8 ch-1 sp)
Row 2 (RS): STsc in 1st dc, 1 dc in each dc until ch-1 sp, ch 1, sk next ch-1 sp & puff, V-Puff in next ch-1 sp, ch 1, sk next puff & ch-1 sp; Repeat from * 3 more times.
1 dc in next 16 dc to the end of the row, turn. (70 dc, 4 V-Puff, 8 ch-1 sp)
Row 3 (WS): STsc in 1st dc, 1 dc in each dc until ch-1 sp, ch 1, sk next ch-1 sp & puff, V-Puff in next ch-1 sp, ch 1, sk next puff & ch-1 sp; Repeat from * 3 more times.
1 dc in next 15 dc to the end of the row, turn. (70 dc, 4 V-Puff, 8 ch-1 sp)
Rows 4-46: Repeat rows 2-3 – total of 43 times (finishing with row 2). (if you want the front panels to be longer, you can continue repeating these rows as long as you’d like, finishing with row 2).
Fasten off and continue working the right panel.
Right Panel
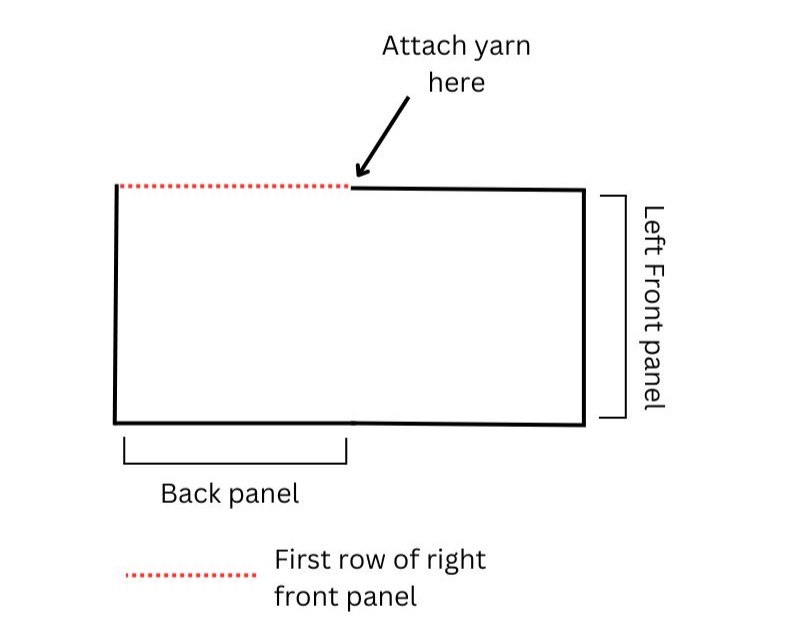
Row 1 (WS): With the wrong side facing you, attach the yarn to the back panel in the ch-2 sp corner as follows:
Make a slip knot, yarn over and insert hook into the ch-2 sp, yo and pull up a loop.
Now continue working a Double Crochet: yo and pull through 2 loops, yo and pull through both 2 loops.
Work another 1 dc in the ch-2 sp corner.
Continue working the row: 1 dc in each dc until ch-1 sp, ch 1, sk next ch-1 sp & puff, V-Puff in next ch-1 sp, ch 1, sk next puff & ch-1 sp; Repeat from * 3 more times.
1 dc in next 16 dc to the end of the row, turn. (70 dc, 4 V-Puff, 8 ch-1 sp)
Row 2 (RS): STsc in 1st dc, 1 dc in each dc until ch-1 sp, ch 1, sk next ch-1 sp & puff, V-Puff in next ch-1 sp, ch 1, sk next puff & ch-1 sp; Repeat from * 3 more times.
1 dc in next 15 dc to the end of the row, turn. (70 dc, 4 V-Puff, 8 ch-1 sp)
Row 3 (WS): STsc in 1st dc, 1 dc in each dc until ch-1 sp, ch 1, sk next ch-1 sp & puff, V-Puff in next ch-1 sp, ch 1, sk next puff & ch-1 sp; Repeat from * 3 more times.
1 dc in next 16 dc to the end of the row, turn. (70 dc, 4 V-Puff, 8 ch-1 sp)
Rows 4 (RS): Repeat row 2.
Rows 5-46: Repeat rows 3-4 – total of 42 times (finishing with row 4). (if you want the front panels to be longer, you can continue repeating these rows as long as you’d like, finishing with row 4).
Don’t turn after the last row, and continue working the border.
Border
With the right side facing you: Ch 1 and rotate your work 90 degrees, so you will work on side 1.
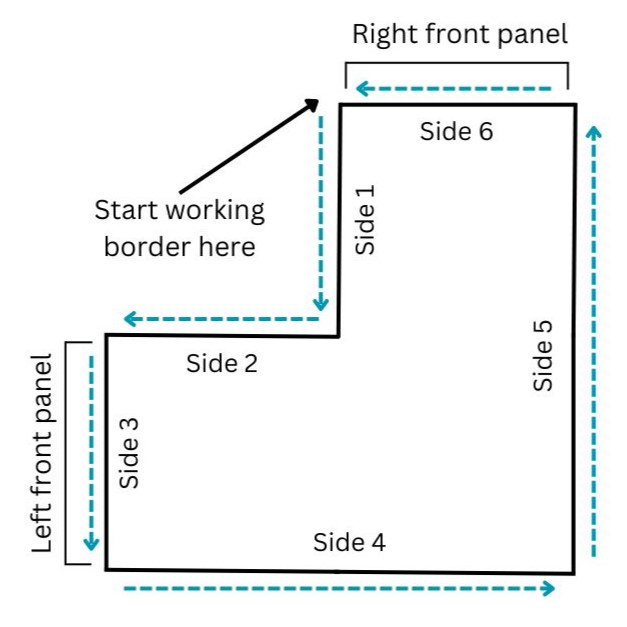
Side 1: Place 2 sc in the side of each dc to the end of this side. (92 sc)
Side 2: Sk the corner ch-2 sp and continue working this side.
Place 2 sc in the side of each dc to the end of this side. (92 sc)
To create the corner: ch 2.
Side 3: Work 1 sc in each st (including ch-1 sp) to the end of this side. (90 sc)
To create the corner: ch 2.
Side 4: Place 2 sc in the side of each dc to the end of this side. (180 sc)
Work corner in the starting magic ring (pics 8&9): [1 sc, ch 2, 1 sc].
Side 5: Place 2 sc in the side of each dc to the end of this side. (180 sc)
To create the corner: ch 2.
Side 6: Work 1 sc in each st (including ch-1 sp) to the end of this side. (90 sc)
Ch 1 and slip stitch to the first sc.
Fasten off and weave in the ends, soak and block if needed.
Stitch Count Table
Crochet Wrap PDF Pattern
You can find the ad-free PDF pattern with the full photo-tutorial at one of my shops below:
Did you try this out? Share your project!
– Let me know how it went and leave a comment below.
– Tag me on Instagram @madebygootie
– Join and share in our FB Community
Want to save this post for later? Go ahead and PIN it!




I have been following your designs (and your life, a bit) and was blown away by your wrap/shawl! I saw something just like that in a museum store (was woven), but i wanted to crochet it. As my husband always says “why reinvent the wheel” You, did it for me! Thanks for everything you do and stay safe!
Wow, Julie, thank you so much!
What are the odds you saw something so similar in a museum?? I hope you’ll enjoy crocheting it, please share when you get to make it 🙂
Hi. I noticed what seems to be an error in the pattern.
Rows 32- 35. Repeat row 35 four times.
Should it not be Repeat row 31 for times?
Hi Pete,
Thank you so much for bringing this to my attention!
Yes, it’s should be row 31, I’m sorry about it, this pattern has been tested by several testers and I’m not sure how we missed it.
It’s fixed now, thank you 🙂