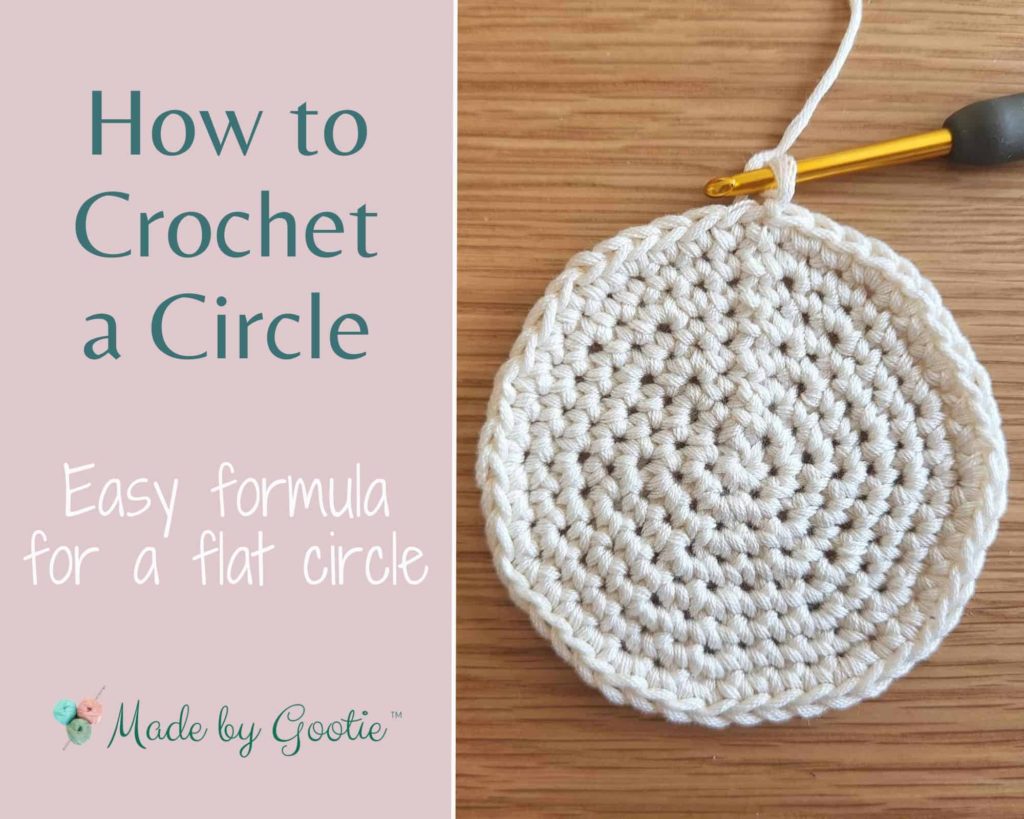
How to Crochet a Circle (with detaild photo tutorial)
Last Updated on May 30, 2024
In this tutorial, I will show you how to crochet a circle step by step, with a detailed photo tutorial and an easy magic formula that will make the circle lay flat and keep it round.
This tutorial is using single crochet stitch to make a circle, but the method can be used with half double crochet and double crochet stitch, with adjustment to the beginning number of stitches.
A crochet circle is a basic method for so many different items.
** Some of the links in this post may include affiliate links. Making a purchase through one of these links pays me a small referral fee at no added cost to you. These small fees add up and help me keep the blog running. View our disclosure and privacy policy for more information.
How to Crochet a Flat Circle
To keep our crochet circle flat and not wavy, I recommend starting with a magic ring or creating a loop and working your stitches into this loop (I prefer the magic ring method).
When crocheting a circle using the single crochet stitch, you start with working 6 stitches into the ring or loop, then each round is increased with 6 stitches.
The important thing to remember to crochet a flat circle, even if you use a different stitch or start with a different number of stitches in the first round, is to increase each round the same number of stitches you started with. If you increase more stitches than you started with, your circle will become wavey, and if you increase fewer stitches your circle will curl inside.
Easy Formula for a Flat and Perfectly Round Crochet Circle
The rule of thumb is to add 1 more stitch between the increased stitches in each round.
The simple formula for a perfect ROUND crochet circle (instead of a hexagon) is that you have 2 types of rounds:
- When you have an odd number of stitches between the increased stitches: you first work the odd number of stitches and then the increased stitch.
- When you have an even number of stitches between the increased stitches: you start the round with half the stitches, work the increased stitch, then continue working the full number of stitches until the increased stitch, and repeat working the full amount of stitches followed by an increase stitch 5 times, then work the other half of the stitches to complete the round.
For example, if we reach a round where we have 3 stitches between the increased stitches, the round repetitions will look like this: (1sc in next 3 sts, inc in next st) x 6 times.
And then for the next round we have 4 stitches between the increased stitches, so we need to start with 2 stitches, and the round repetitions will look like this: 1sc in next 2 sts, inc in next st, (1sc in next 4 sts, inc in next st) x 5 times, 1sc in next 2 sts.
So you are working 4 stitches between each increased stitch, but the round is shifted and “cut in half”.
Want to save this post for later? Go ahead and PIN it!
How Many Stitches Should You Start With For a Flat Crochet Circle?
The number of beginning stitches varies depending on the stitch you use. And the increase you do in each round is the same as the beginning number of stitches.
- Single Crochet – 6 single crochet stitches in the first round.
- Half Double Crochet – 8 half double crochet stitches in the first round.
- Double Crochet – 12 double crochet stitches in the first round.
Although, everyone’s tension is different, and if your tension is very tight, you can also start with 1 more stitch.
How to Crochet a Circle in Single Crochet
Skill level – easy
Materials I Used in This Tutorial
– Crochet hook 3.5 mm (I love the Tulip Etimo Hooks).
– DK (#3) weight yarn
Abbreviations (US)
ch – chain
inc – increase: 2 single crochet in same stitch
sc – single crochet
st – stitch
ss – slip stitch
(…) – crochet the instructions within brackets as many times as directed.
Notes
- Ch1 at the beginning of the round does now count as a stitch.
- The first stitch is always worked into the stitch which you slip stitched in the last round.
- You can use the same formula below to make a continuous circle, just omit the first ch1 and don’t slip stitch at the end of the round, and work continuously.
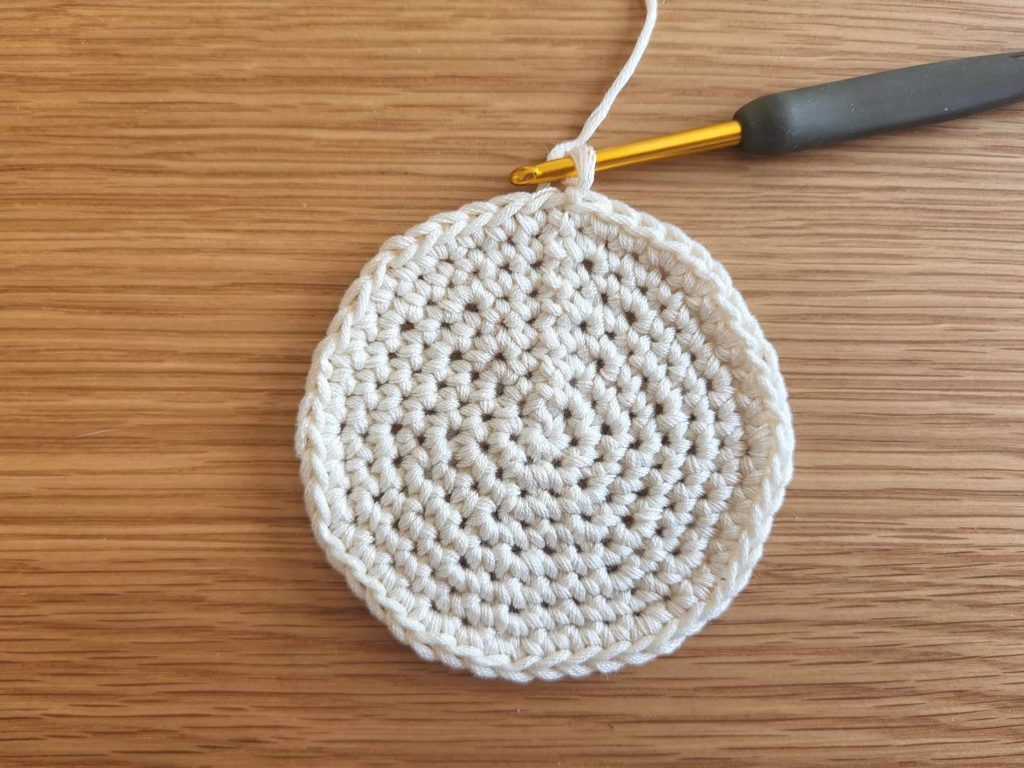
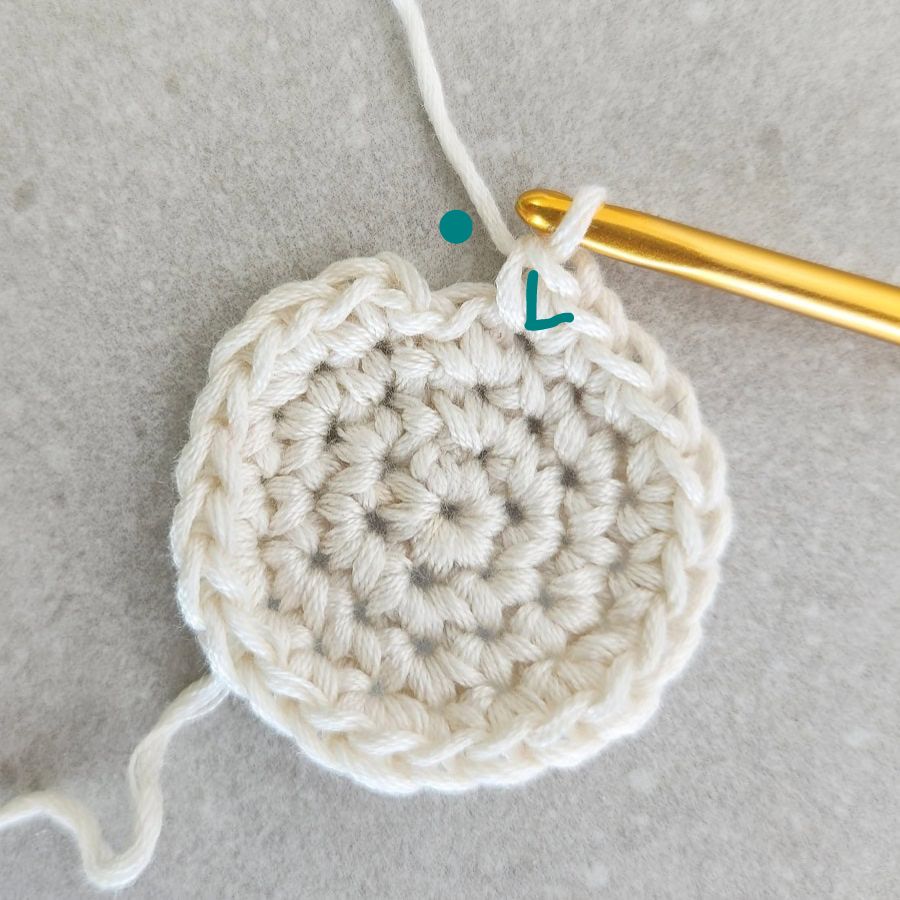
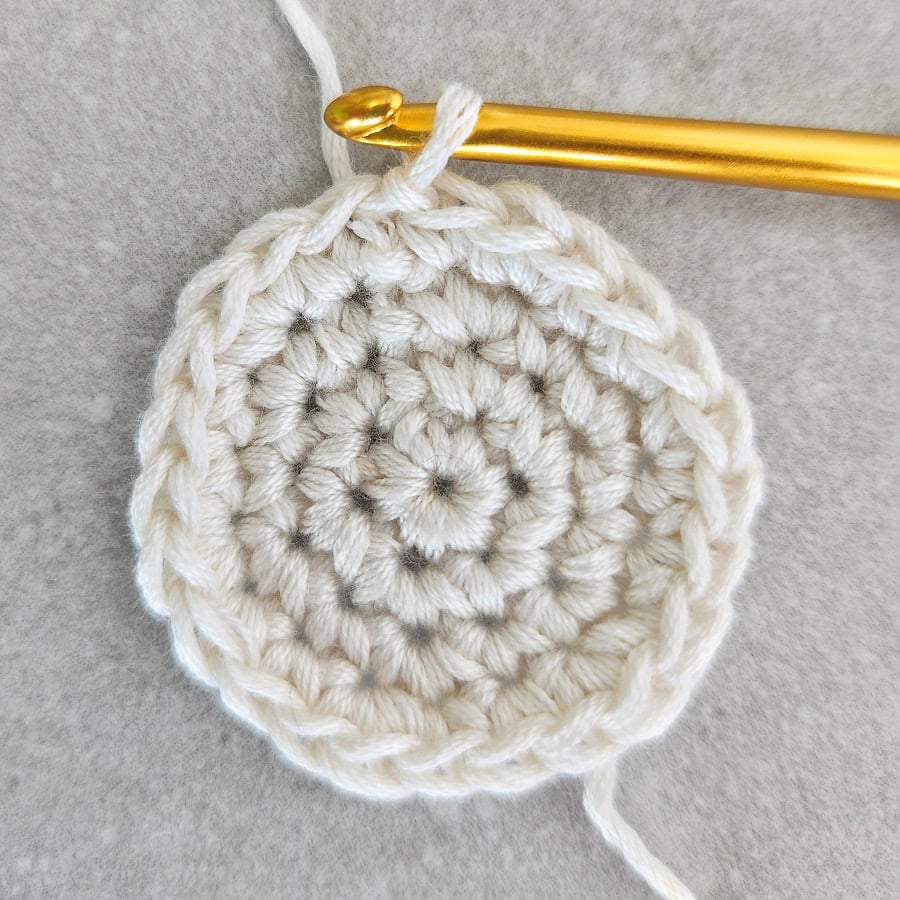
How to Crochet a Circle Step-by-Step Photo Tutorial
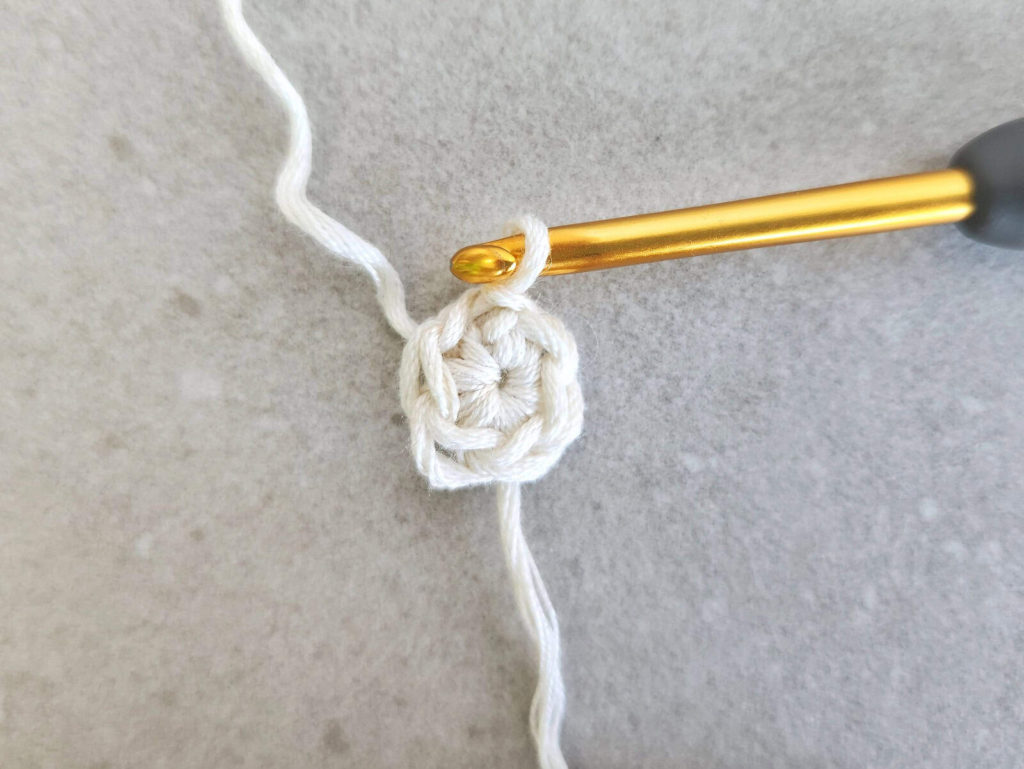
Make a magic ring
Round 1:
Ch1, 6sc into the ring, pull the ring tight, ss to 1st sc. (6 sc)
Round 2:
Ch1, inc in each sc around, ss to 1st sc. (12 sc)

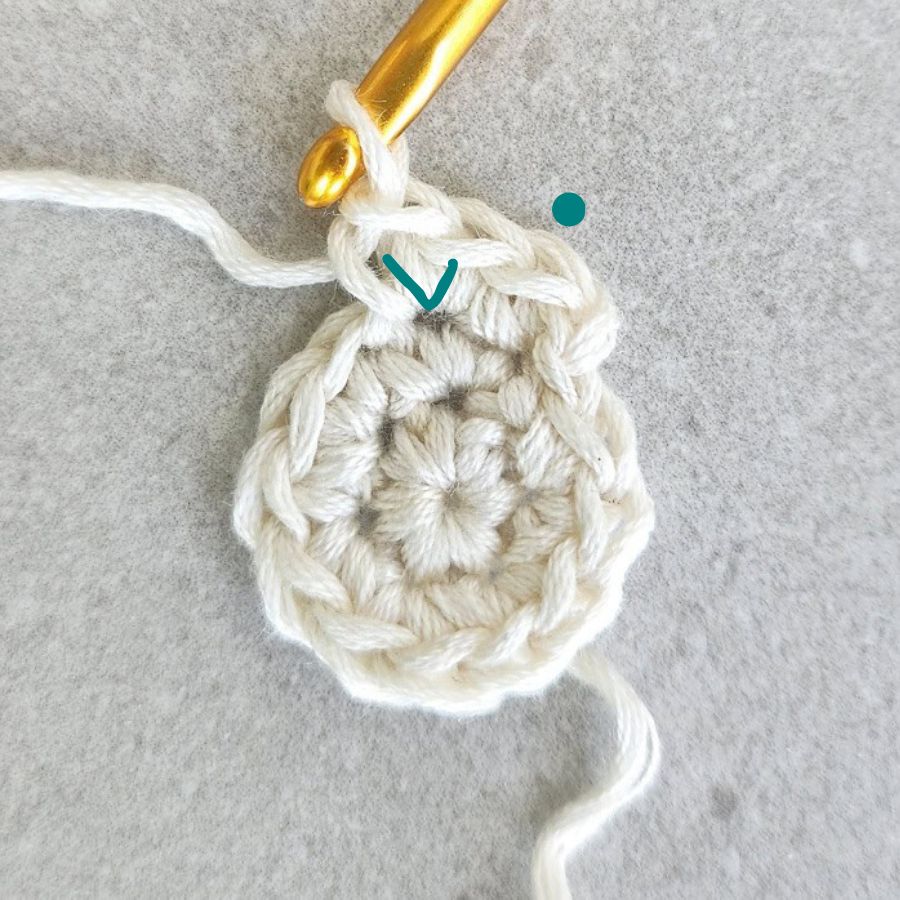
Round 3:
Ch1, (1sc in next sc, inc in next sc) x 6 times, ss to 1st sc. (18 sc)
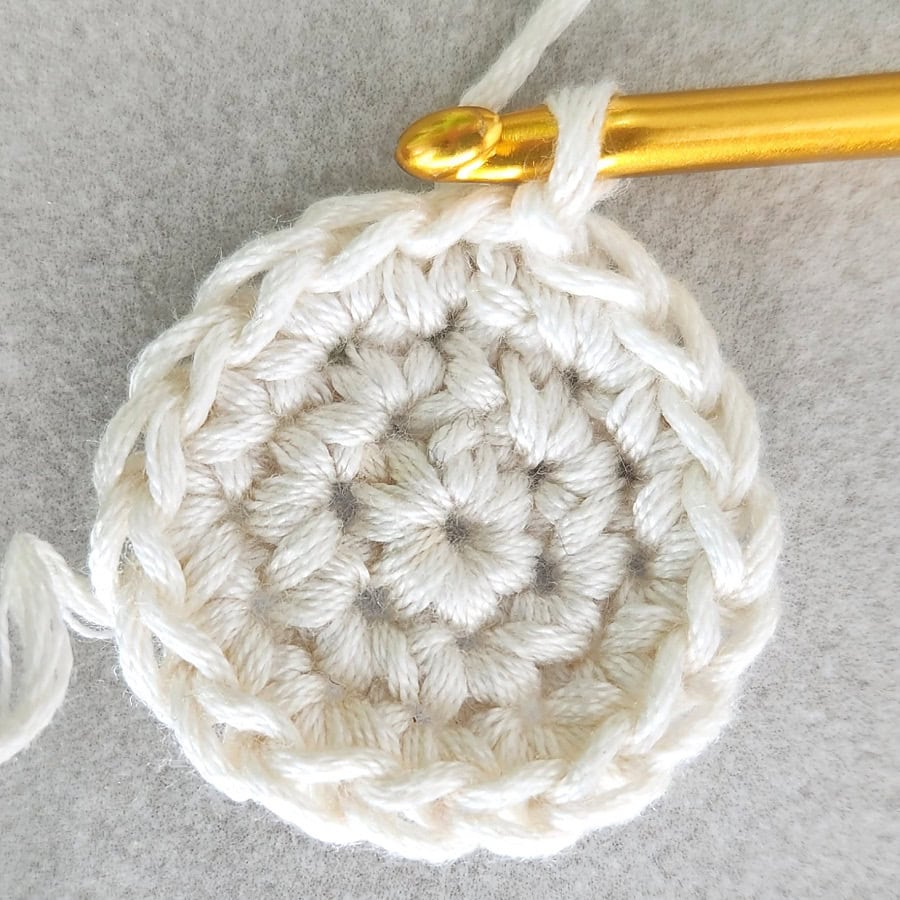
Round 4:
Ch1, 1sc in next sc, inc in next sc, (1sc in next 2 sc, inc in next sc) x 5 times, 1sc in next sc, ss to 1st sc. (24 sc)
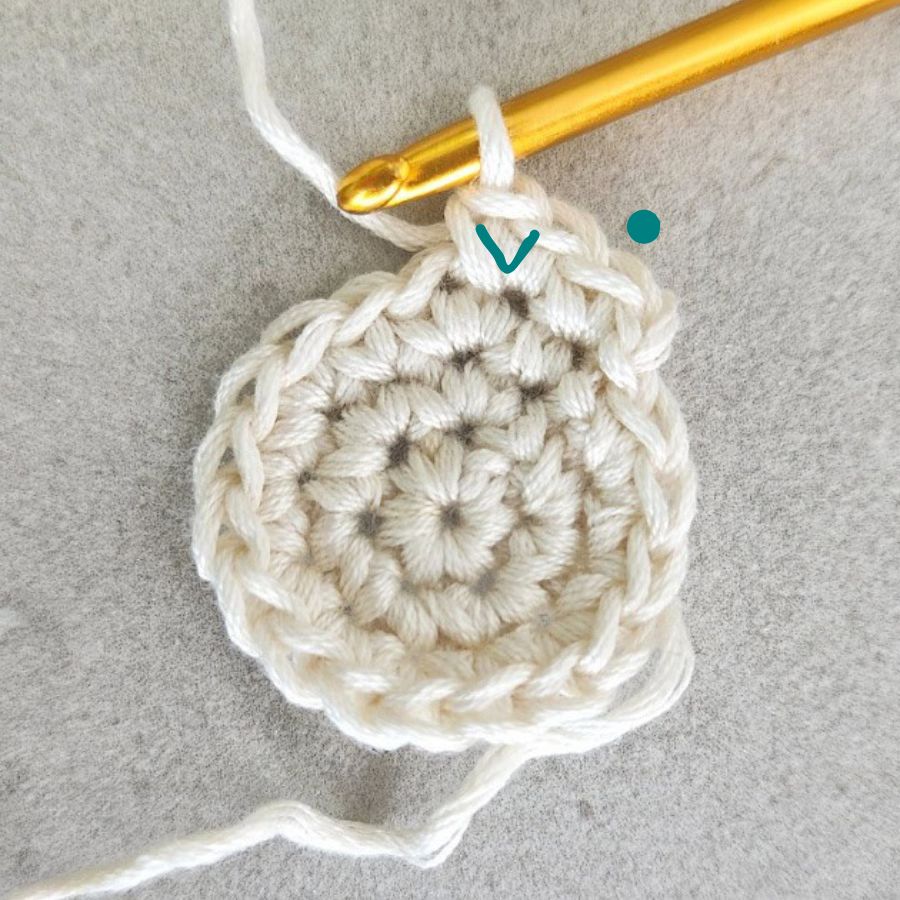
Round 5:
Ch1, (1sc in next 3 sts, inc in next sc) x 6 times, ss to 1st sc. (30 sc)
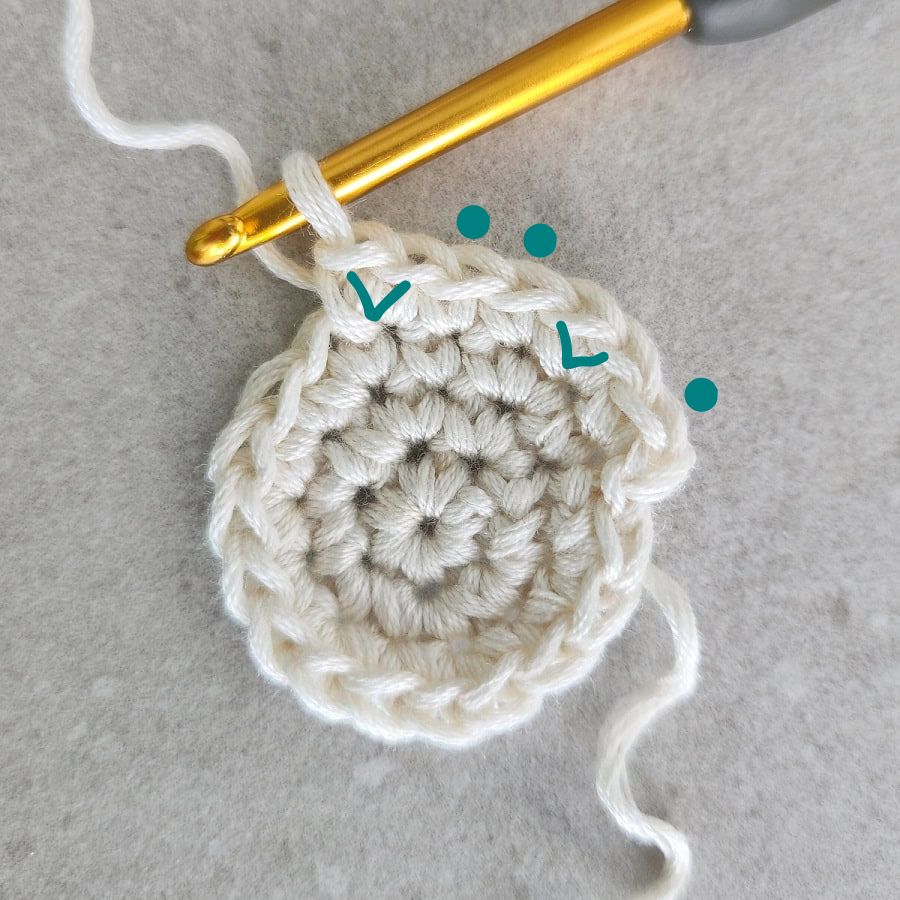
Round 6: Ch1, 1sc in next 2 sc, inc in next sc, (1sc in next 4 sc, inc in next sc) x 5 times, 1sc in next 2 sc, ss to 1st sc. (36 sc)
Round 7: Ch1, (1sc in next 5 sc, inc in next sc) x 6 times, ss to 1st sc. (42 sc)
Round 8: Ch1, 1sc in next 3 sc, inc in next sc, (1sc in next 6 sc, inc in next sc) x 5 times, 1sc in next 3 sc, ss to 1st sc. (48 sc)
Round 9: Ch1, (1sc in next 7 sc, inc in next st) x 6 times, ss to 1st sc. (54 sc)
Round 10: Ch1, 1sc in next 4 sc, inc in next sc, (1sc in next 8 sc, inc in next sc) x 5 times, 1sc in next 4 sc, ss to 1st sc. (60 sc)
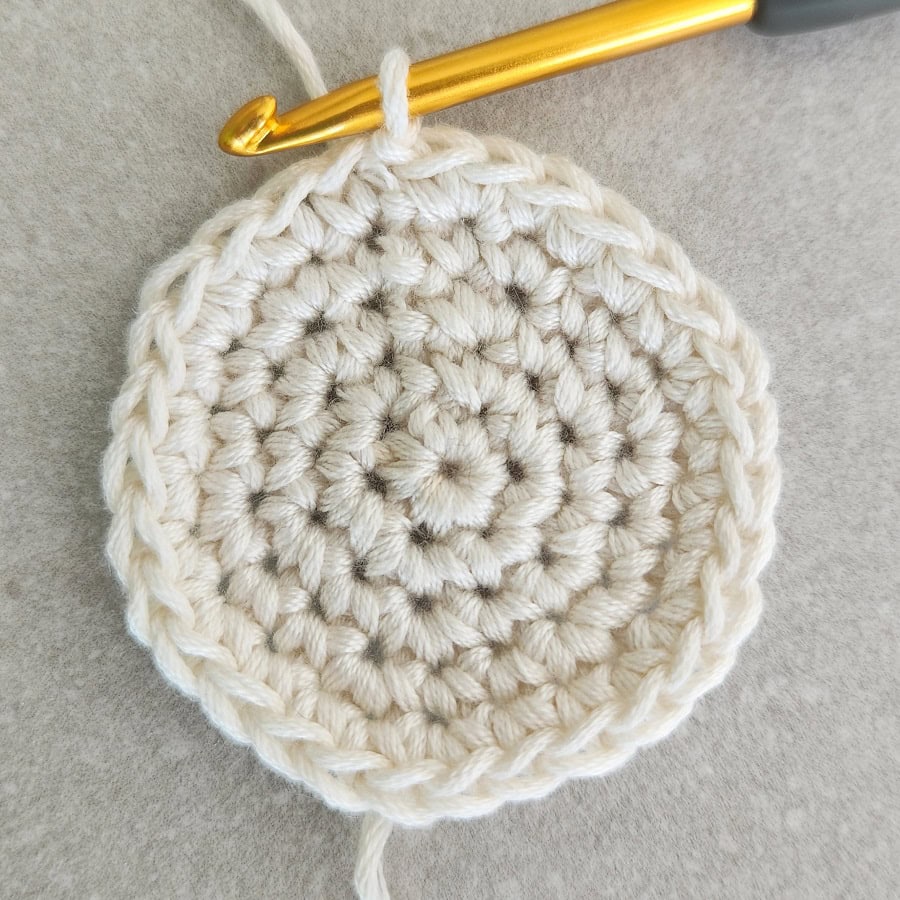
Keep going using this formula to form a circle in any size you want.
Crochet Continous Circle Vs. Joined Rounds Circle
A crochet circle can be made either with joined rounds where you slip stitch to the first stitch of the round at the end of the round, or in continuous rounds without slip stitching.
For this tutorial, we’ll learn how to crochet a circle using the joined rounds method. I prefer to use this method in projects like baskets or bags.
The continuous method is usually used when making amigurumi, I used it in my Bobbles Christmas Tree and Tiny Lights Christmas Tree. You can use the same formula below to make a continuous circle, just omit the ch1 and slip stitch, and work continuously.
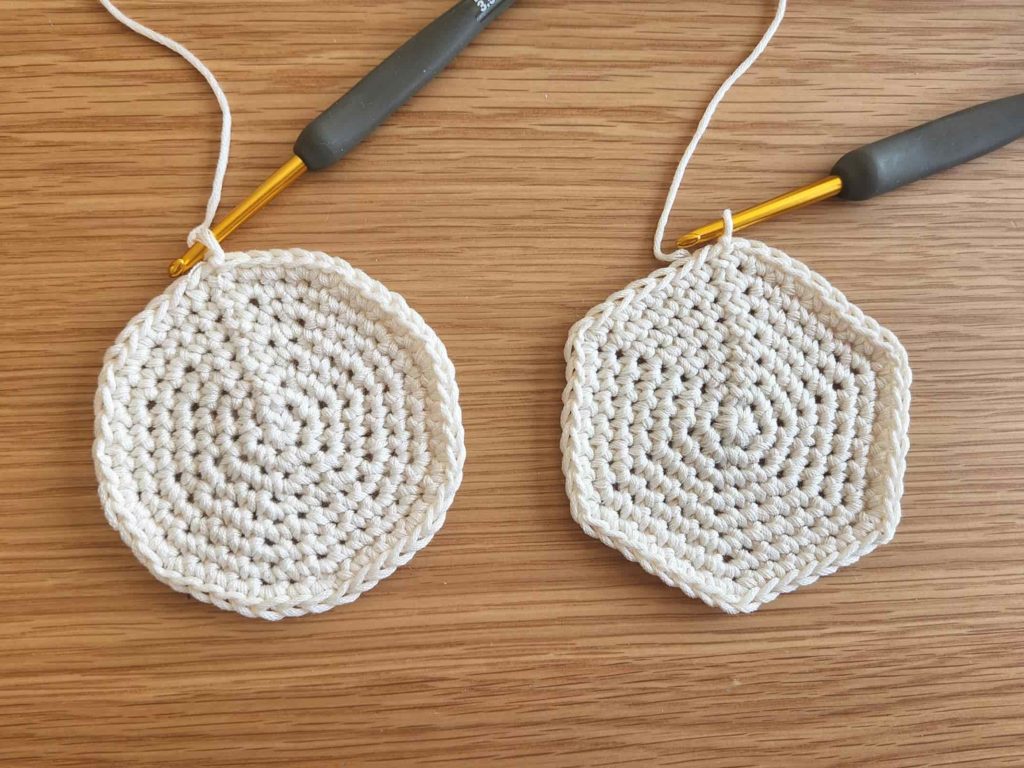
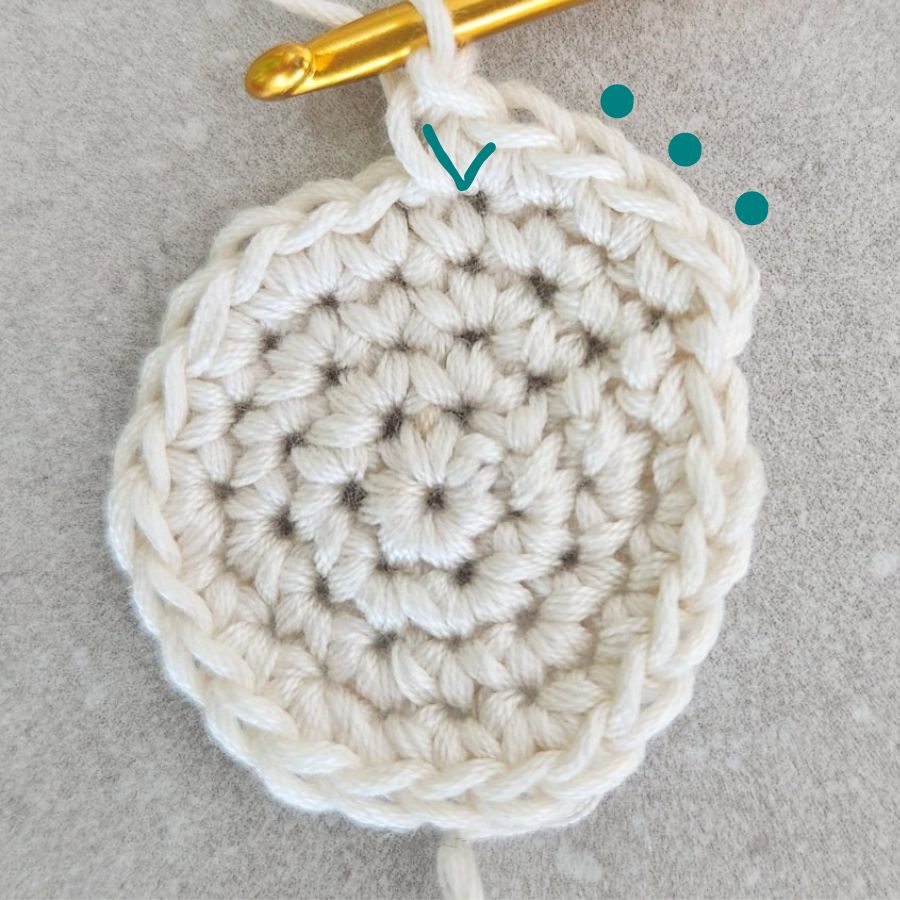
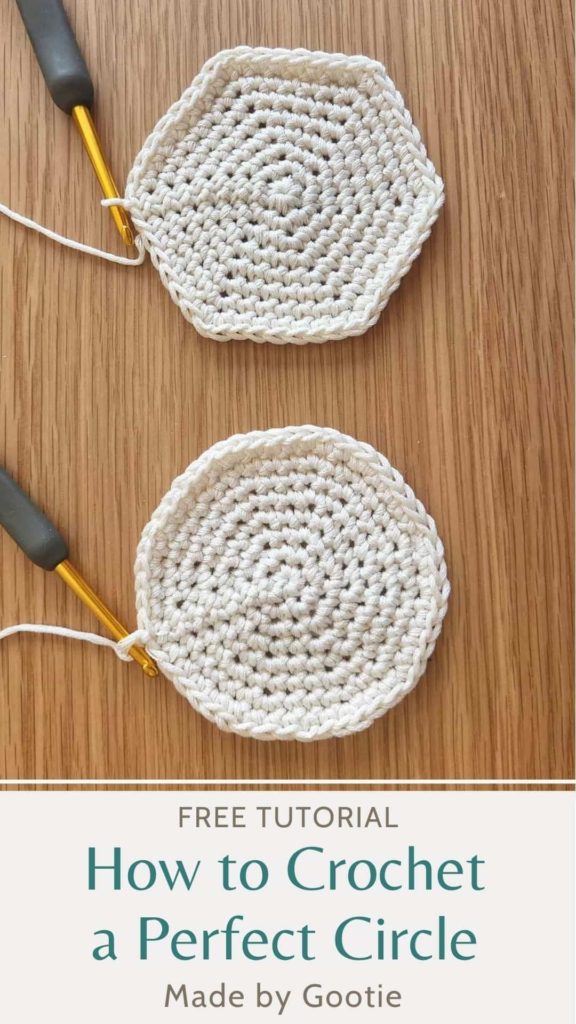
How to Crochet a Perfect Circle Instead of a Hexagon
So how do you keep a round crochet circle and prevent it from turning into a hexagon?
As you can see in the circle formula above, when increasing each round, if you start with an increase at the first stitch of each round, the result will be increased stitches stacked on top of each other, creating some kind of a hexagon-like circle.
To prevent that, the solution is to shift the place of the increased stitch every round – as you can see in the circle formula above.
What Can You Make With Crochet Circles?
After you learn how to crochet a circle, you can use it in a lot of different crochet projects.
Looking for More Crochet Tutorials? Check out the other free patterns on the blog:
Did you try this out? Share your project!
– Let me know how it went and leave a comment below.
– Tag me on Instagram @madebygootie
– Join and share in our FB Community
Want to save this post for later? Go ahead and PIN it!
Thank you for perfect crochet circle tutorial. Definitely a lot neater.
You’re welcome! I hope you’ll find it useful 🙂
I am 80 years old, learned to crochet 5 years ago…and this is the first time I’ve seen how to make a perfect circle! THANK YOU!!! God bless.
My pleasure, Sharon!
I just read through instructions. Very clear and concise. Crocheting for 50 years. Never stop learning. Thanks,
Thank you, Margaret! I’m glad you found it helpful.
Great tutorial, thanks. Is there a way to join the rows more invisibly?