Last Updated on May 15, 2024
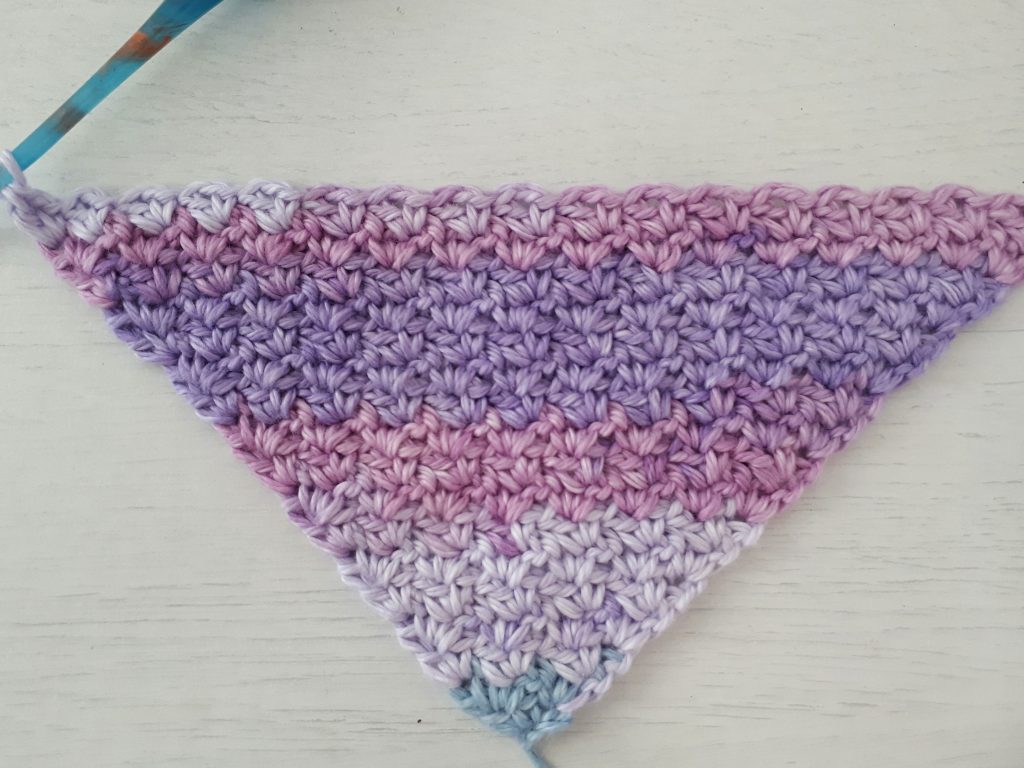
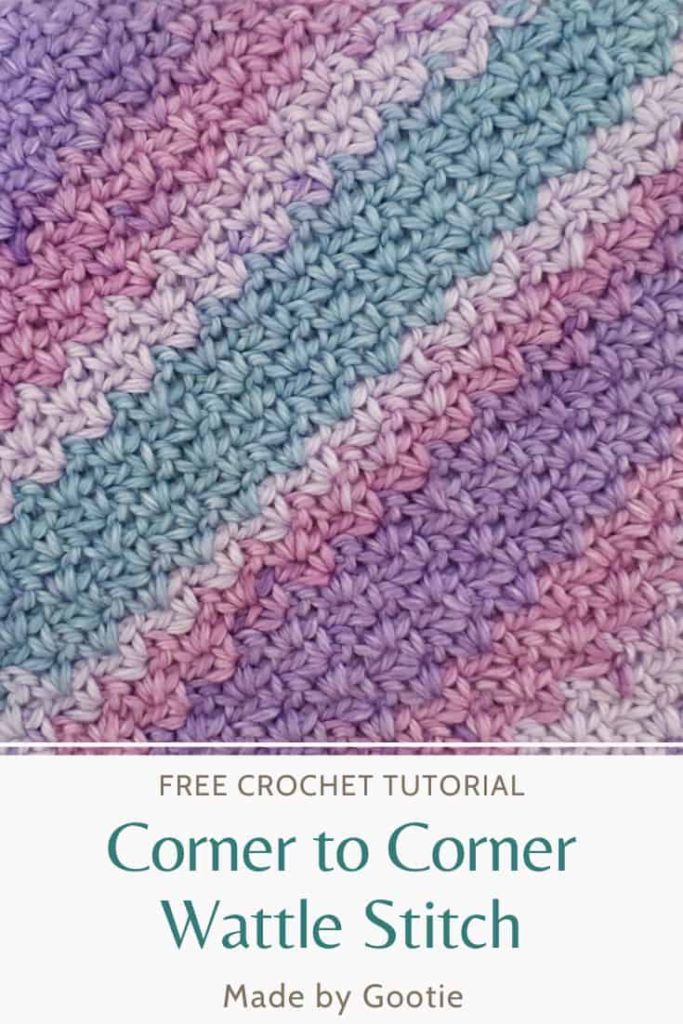
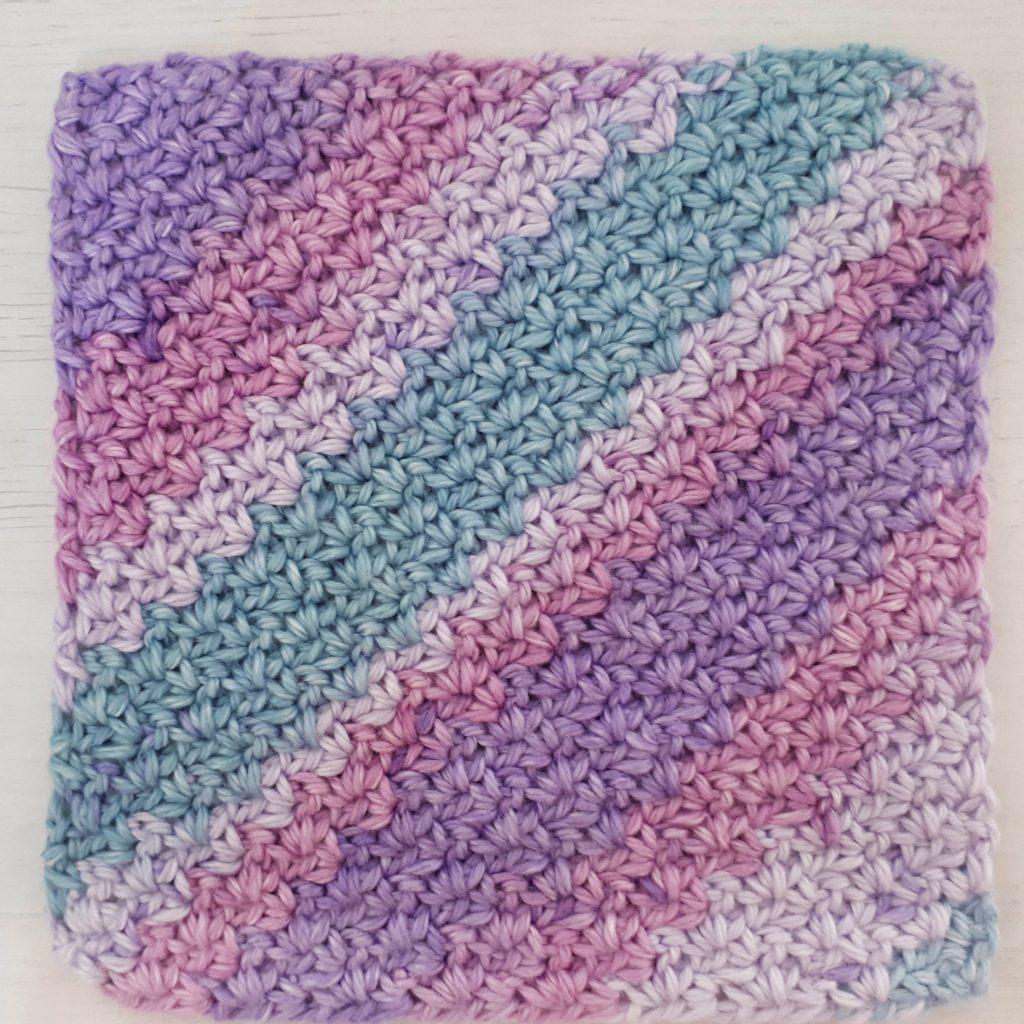
Have you tried the Corner to Corner Wattle stitch? It has such a beautiful texture, it looks like a million little flowers!
I love using the C2C Wattle stitch to make blankets and washcloths, it spares me the stress of making a long starting chain and counting stitches.
** Some of the links in this post may include affiliate links. Making a purchase through one of these links pays me a small referral fee at no added cost to you. These small fees add up and help me keep the blog running. View our disclosure and privacy policy for more information.
C2C Wattle Stitch Crochet
C2C crochet is one of my favorite crochet techniques, it’s so nice when you don’t have to count stitches and decide the size and shape of your project as you go, I find it very relaxing to start a project that way.
The corner to corner crochet Wattle stitch has a wonderful texture, you will be surprised how basic stitches can form such a beautiful fabric! When you crochet the Wattle stitch from corner to corner, you just increase from one corner and when you are ready, you start to decrease the stitches until reaching the other corner.
So if you are looking for a different corner to corner (C2C) stitch, and want to add some interest to your C2C project, you are in the right place!
Want to learn more about the Corner to Corner method? Check out the Guide to How to Crochet Corner to Corner!
Want to save this post for later? Go ahead and PIN it!
How to crochet the Wattle Stitch?
Let’s go back to the basic Wattle stitch first. The Wattle stitch is very similar to the Suzette Stitch it uses basic stitches- single crochet and double crochet, the only difference is, that there’s a chain between the sc and dc which makes the fabric a little more ‘airy’ compared to the Suzette stitch.
The basic Wattle stitch consists of [sc, ch1, dc], where these stitches are worked into the ch-1 space. So it’s a simple one row repeat stitch, very relaxing to make and perfect for a beginner.
What Projects Can You Make with the C2C Wattle Stitch?
Because of its soft texture, the Wattle stitch is a perfect stitch for blankets and washcloths. And when you are working in the C2C method you don’t need to start with a long foundation chain, or count stitches, you just work until you reach the desired length and start decreasing. It’s the perfect no-count Mindless Crochet stitch.
Here are a few more project ideas
- Placemats
- Potholders
- Pumpkins (yes! You can work it from corner to corner)
- Table runner
- Coasters
* Want to save this post for later? Go ahead and PIN it!
Corner to Corner Wattle Stitch Video Tutorial
Click the image below to watch the stitch tutorial on YouTube

How to Crochet the Corner to Corner Wattle Stitch
In this tutorial, we will make a washcloth, but you can use this pattern to make anything else you want!
* Want to save this post for later? Go ahead and PIN it!
* Add this to your Ravelry queue
Skill level – easy
Materials I used in this tutorial
– Crochet hook 4 mm / G (I love the Etimo and Clover Hooks).
– DK (#3) weight yarn – 100% cotton (100 gr – 210m / 230yds).
I used King Cole Cottonsoft Crush DK – Rhododendron (2441), this yarn is very soft and nice to work with!
– 2 Stitch markers (optional)
Finished Size – 6.5×6.5” (16.5×16.5 cm)
Although, you can make this in any size you want!
Abbreviations (US)
ch – chain
sc – single crochet
sc2tog – single crochet 2 together
dc – double crochet
sp – space
Want to learn how to crochet the Corner to Corner Wattle stitch also as a rectangle? Get the premium, ad free, printable PDF version on Ravelry or Etsy!
Corner to Corner Crochet Wattle Stitch Washcloth Crochet Pattern
C2C Increase
Ch4
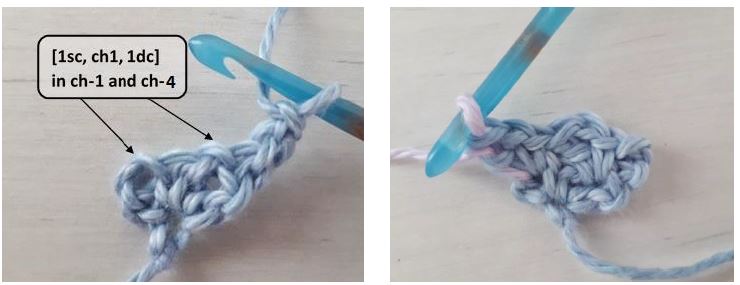
ROW 1:
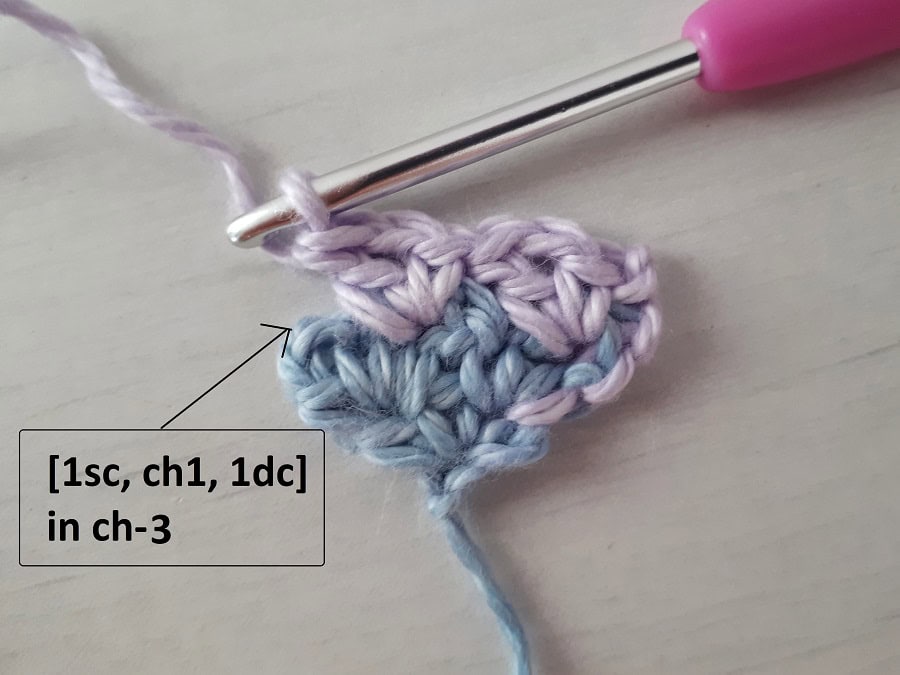
[1 sc, ch 1, 1 dc] in 4th ch from hook, turn.
ROW 2:
Ch 3, skip 1st dc, [1 sc, ch 1, 1 dc] in next ch-1 sp, skip next sc, [1 sc, ch 1, 1 dc] in ch-4 sp, turn.
ROW 3:
Ch 3, skip 1st dc, [1 sc, ch 1, 1 dc] in next ch-1 sp, skip next sc and dc, [1 sc, ch 1, 1 dc] in next ch-1 sp, [1 sc, ch 1, 1 dc] in ch-3 sp, turn.
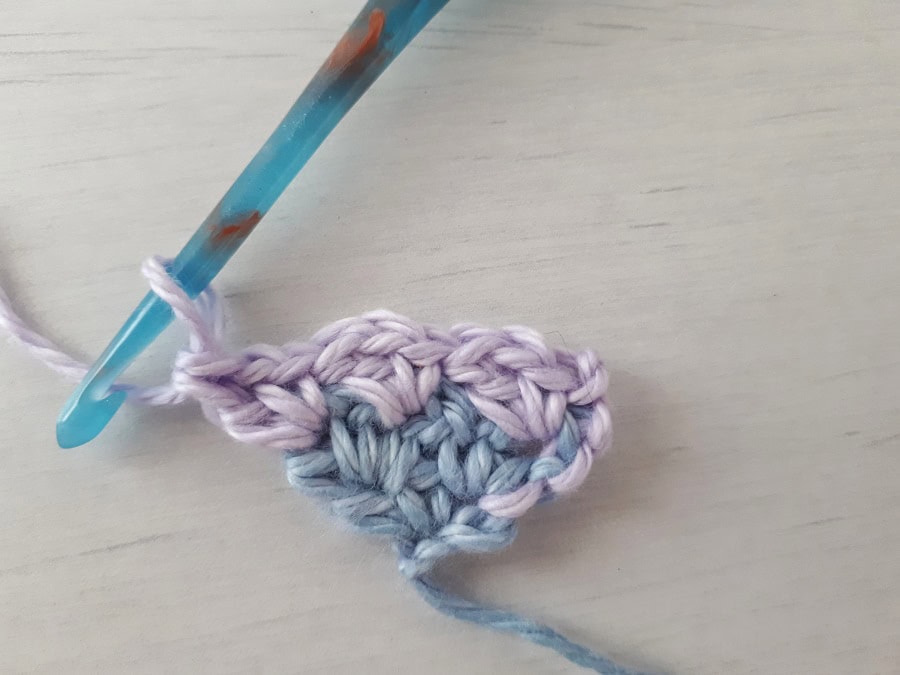
ROW 4:
Ch 3, * skip next dc, [1 sc, ch 1, 1 dc] in next ch-1 sp, skip next sc; repeat from * to ch-3 sp [1 sc, ch 1, 1 dc] in ch-3 sp, turn.
Repeat row 4 until the side of the triangle measures 6.5” (16.5 cm), or until your desired length.
Do you prefer photo tutorials? Get the premium, ad-free, full photo-tutorial, printable PDF version on Ravelry or Etsy!
C2C Decrease
When you reach the desired length, start decreasing:
** Place the stitch marker at the beginning of each ch-2 sp so you can easily find it for the decreased stitch.
ROW 5:
Ch 2 (place marker), * skip next dc, [1 sc, ch 1, 1 dc] in next ch-1 sp, skip next sc; repeat from * to ch-3 sp, 1sc in ch-3 sp, turn.
ROW 6:
Ch 2 (place marker), skip next sc and dc, [1 sc, ch 1, 1 dc] in next ch-1 sp, * skip next sc and dc, [1 sc, ch 1, 1 dc] in ch-1 sp; repeat from * until last ch-1 sp (don’t work into last ch-1 sp). Sc2tog in next ch-1 sp and ch-2 sp (ch-2 of prev. row), turn.
Continue working row 6 until you have only 2 [1sc, ch1, 1dc] in your row (total of 9 sts).
ROW 7:
Ch 2 (place marker), skip next sc and dc, [1 sc, ch 1, 1 dc] in next ch-1 sp, sc2tog in next ch-1 sp and ch-2 sp (ch-2 of prev. row), turn.
ROW 8:
Ch 1, skip next sc and dc, 1 sc in next ch-1 sp. Fasten off.
DESIGNERS – IF USING THIS C2C STITCH IN A CROCHET DESIGN, I WOULD LOVE IT IF YOU GIVE REFERENCE TO THIS ORIGINAL POST SOMEWHERE IN YOUR DESIGN.
What Yarn Should You Use For the Corner to Corner Wattle Stitch?
I get asked a lot about the yarn I used for this C2C Wattle Stitch Washcloth pattern.
For this washcloth pattern, I used King Cole Cottonsoft Crush DK – Rhododendron (2441). I love using cotton yarn, this specific cotton yarn is really soft, I also made a super easy blanket with this yarn.
The beauty of this C2C Wattle stitch is that it can be used with any type and weight of yarn, and still show its beautiful texture.
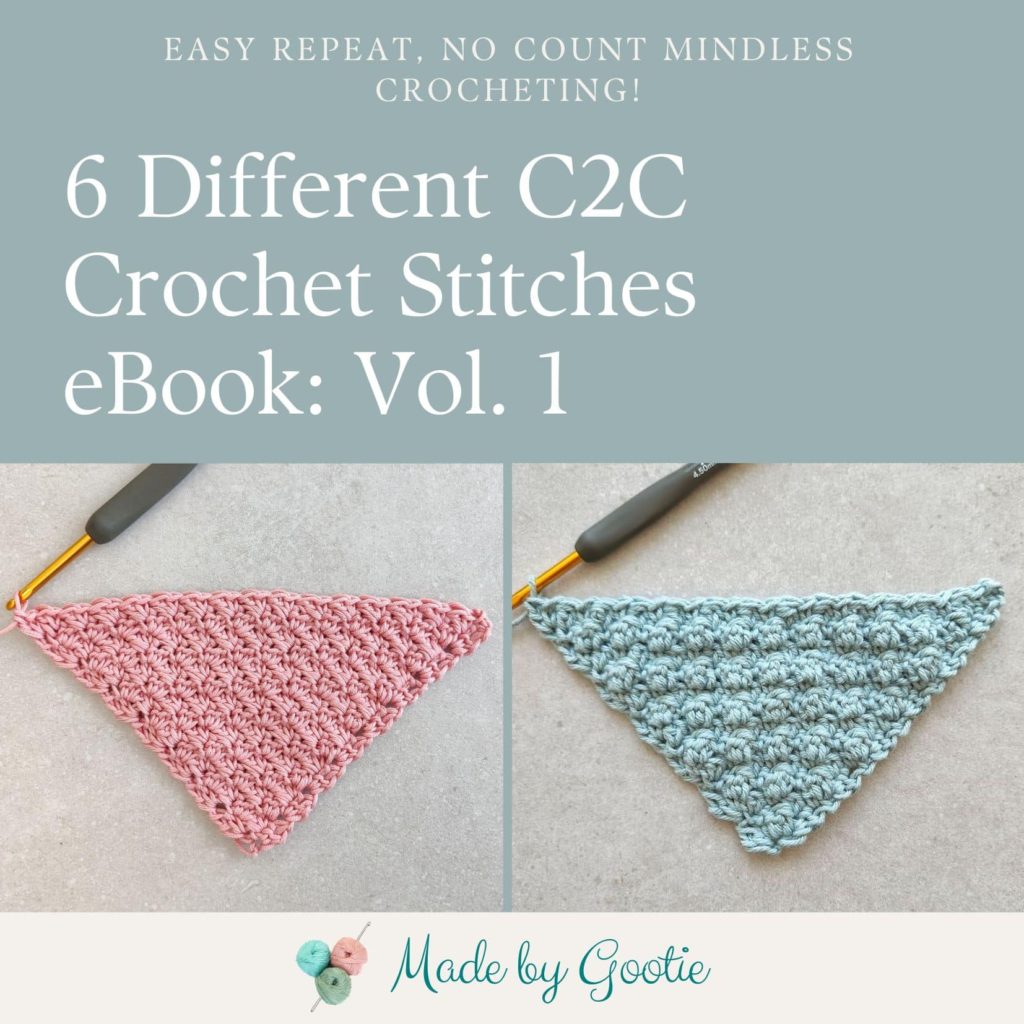
Looking for More Different C2C Crochet Stitches? Check out the other free tutorials on the blog:
1) C2C Bean stitch
2) C2C V stitch
3) C2C Suzette stitch
4) C2C Cluster st
5) C2C Cable & Bean st
6) C2C Lemon Peel
7) C2C Moss & Bean st
Did you try this out? Share your project!
– Let me know how it went and leave a comment below.
– Tag me on Instagram @madebygootie
– Join and share in our FB Community
Want to save this post for later? Go ahead and PIN it!


Enjoyed this easy pattern. Thanks for sharing!
Shirley I just left a reply for Agat/Gootie asking her if she has a video tutorial like on youtube that shows you how to do the wattle stitch. Do you know if he does? I have tried a couple times already to just look at her pics posted here and read her steps but I’m not getting mine correct. Maybe you could show me, since you found this to be easy? I can Facetime if that’s helpful for you?
Thanks in advance!
Karen
Do you have a video tutorial like on you tube or somewhere that shows you how to do this wattle stitch? I have looked at your photos and read the step by step instructions but I’m not getting it correctly. Thanks in advance! Karen
Hi Karen,
Sorry, I don’t have a video tutorial for this.
Are you having trouble with the stitch itself, or the increase/decrease of the stitch?
I put stitch markers in the ch1 spaces as I was crocheting. Then I looked carefully at what they looked like, was surrounding by, on the next round. It worked really well for me.
How do i make the corner to corner wattle stitch pattern into a rectangle for a blanket ?
Are you decreasing on each end of every row? I did that & it wasn’t right. The decrease side was too short.
Hi Christine,
You decrease at the beginning of the row when skipping both sc and dc, and also at the end of the row when doing the sc2tog.
Hope that helps 🙂
Agat
How many yards of dk do you think I would need for a blanket? Maybe 48” x 60”.
I made a baby blanket (30″x36″) and used 1380 yds (6 skeins) of DK yarn. So for a 48″x60″ blanket, you’ll need about 3680 yds (16 skeins).
I love this pattern, but row 6 instructions are obliterated by photographs. I am struggling to get the decreases correct at the ends of the rows. The photographs are not clear enough without words. Help! Trying to make a baby blanket. Wattle C2C decreases different from other C2C.
Hi Linda,
I’m not sure why you can’t see the instructions for row 6.. very strange!
Just in case, I’m copying it in here:
ROW 6:
ch2 (place marker), skip next sc and dc, [1sc, ch1, 1dc] in next ch1, * skip next sc and dc, [1sc, ch1, 1dc] in ch-1; repeat from * until last ch-1 gap (don’t work into last ch-1 gap). sc2tog in next ch-1 gap and ch-2 (ch-2 of prev. row), turn.
I think it is a perfect stitch pattern for a beginner to hone in the essentials of crocheting. I’m a beginner myself, and left handed as well. My only struggle was that my work curved, making a fan shape rather than a triangle. I’m working with a stretchy wool, so I don’t think it’s too tight, any thoughts on what I’m doing wrong?
Hi Kara,
It sounds like maybe you’re skipping some stitches?
When you increase, from row 3 and on, make sure that in each row you increase the number of wattles (sc,ch1,dc) in 2: one at the beginning of the row and one at the end.
I hope it helps.
When decreasing, do I skip the first ch1 and crochet in the second on? I was skipping the first one and then sc2tog at the end and it was decreasing too fast. I’m not sure what i did wrong.
When you decrease, you crochet into the first ch1 gap (skip only the sc2tog and dc), don’t skip it.
I you find it hard to locate, try and put a marker into the last ch-1.
Hi agat, I’m Serena. I was looking for different c2c patterns and found your c2c wattle stitch. I’ve been crocheting for over 50 years and I’ve made many, many blankets. I just wanted something different and something I didn’t have to put much focus on …. Going through a bad heat wave here that makes me feel unwell. But, I need to crochet to keep my sanity in this pandemic.
I have to tell you that I ABSOLUTELY LOVE THIS PATTERN!! It’s working up quickly, and it’s sooooo pretty. I’m using Red Heart Supersaver stripes yarn in Cool Stripes. I haven’t come to decrease yet, but you have lots of posts explaining it, so I’m sure I’ll be ok.
I just want to thank you!!!!!
HUGS!!!!
Hi Serena,
I’m so happy you’re enjoying this pattern and that it helps you through these challenging times!
Thank you for the heart warming comment, stay safe and well.
This was coming along nicely until the last 3 rows. Doing it as written, it stopped squaring up and looked more like the state of Utah, and even waiting until a row later it was better but not quite even. 🤔 Any suggestions?
Hi 🙂
I’m sorry you are having trouble with the pattern.
It’s a bit hard for me to help out without seeing your project.
Can you please send me a close-up photo of your decreasing parts? You can message me on IG at @madebygootie, or send me an email at [email protected] 🙂
Any suggestions for a border, I love the pattern, works up quickly. I’m doing a baby blanket, and was wondering in a border
Hi Kym,
I’m so happy you enjoy this pattern!
About the border, I don’t like to make “big” borders, I usually go with one or two rounds of single crochet for a minimalist border. But it really up to what you like 🙂
This is beautiful, but it doesn’t look like any waffle stitch that I have seen. All of them that I have seen include post stitches to make the waffle pattern.
Hi Donelda,
You are right, because this is not the Waffle stitch, it’s the WaTTle stitch 😉
I happened to be playing around with different C2C stitches. I was looking for something a bit between the wattle and suzette stitches. So, instead of losing the ch1 for the suzette stitch, I kept it and changed the dc into a hdc. You keep the airiness of the wattle and gain the structure of the suzette.
Have you used this combination (1sc, ch1,1hdc)?
Hi Jacqui,
Thank you for sharing your experience!
I haven’t tried this variation, but it sounds really nice.