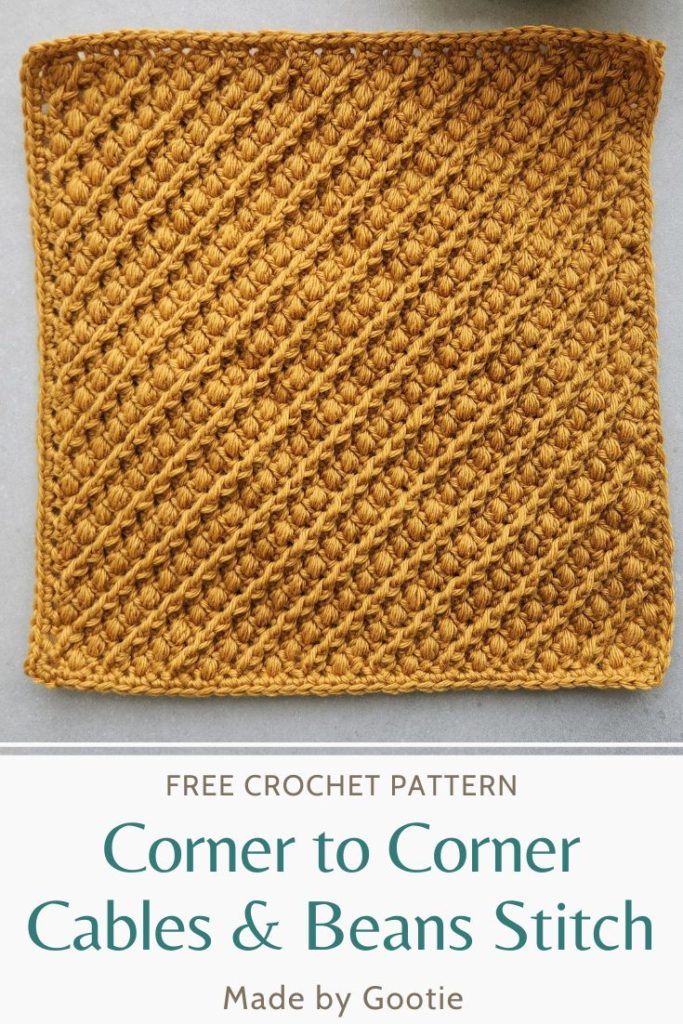
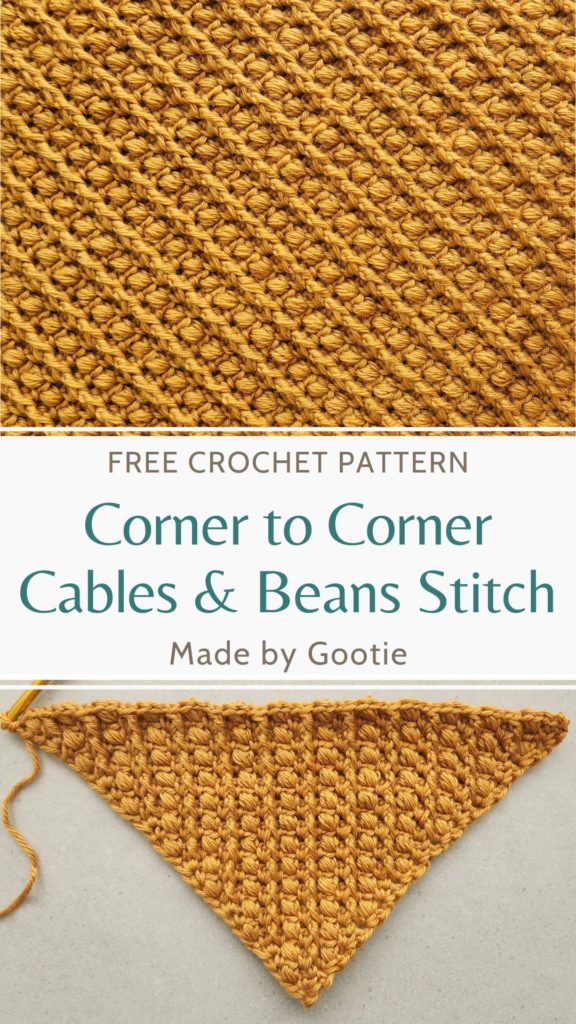
C2C Crochet Cables and Beans Stitch Free Pattern
Last Updated on July 11, 2024
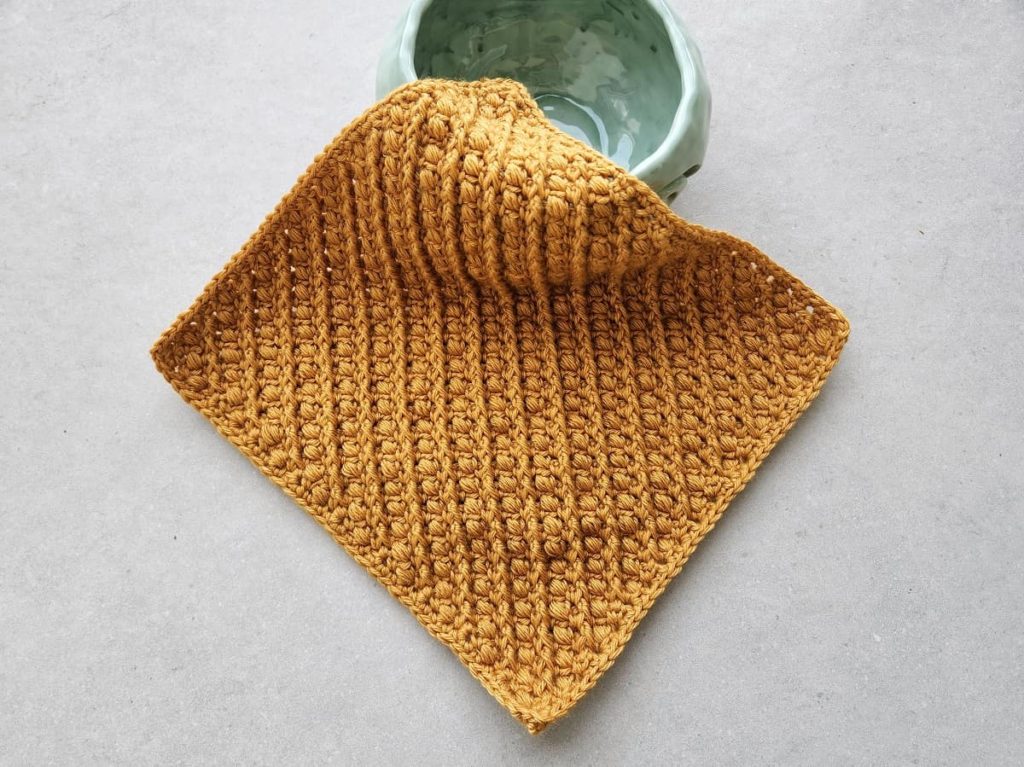
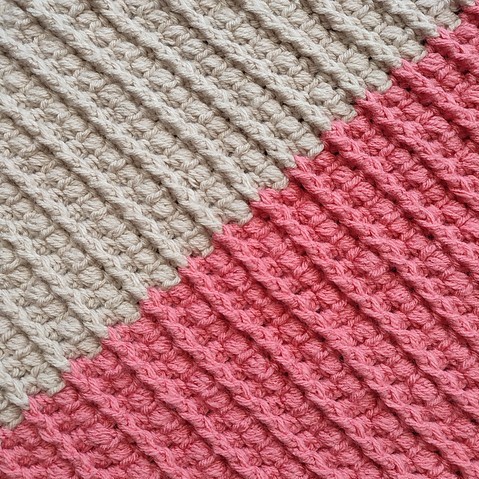
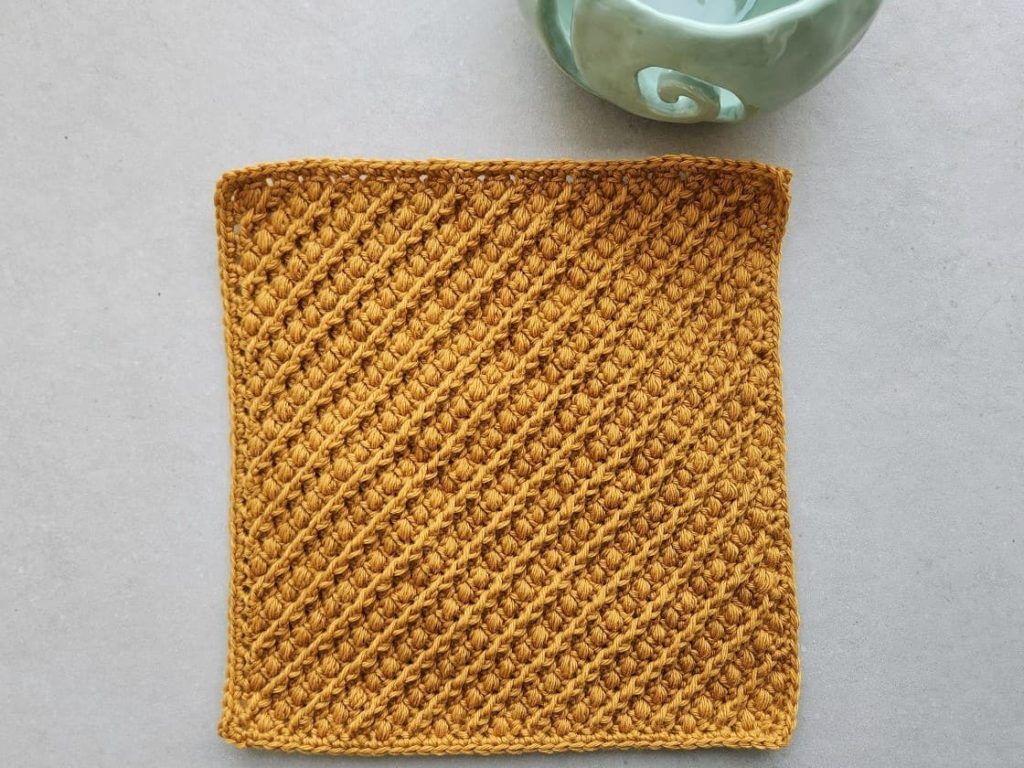
This crochet Cables and Beans stitch pattern incorporates both my love for texture and corner-to-corner patterns.
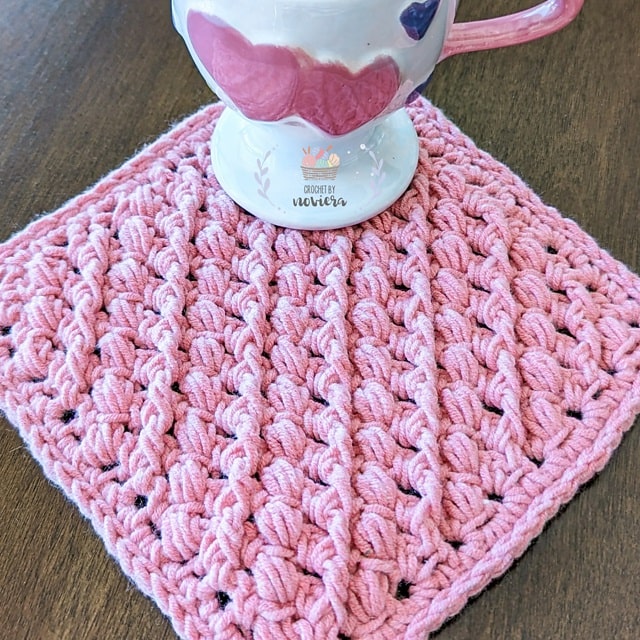
The combination of the cable stitch and the beans stitch, worked diagonally creates a beautiful textured fabric, that can be used for so many projects, such as blankets, pillows, and washcloths!
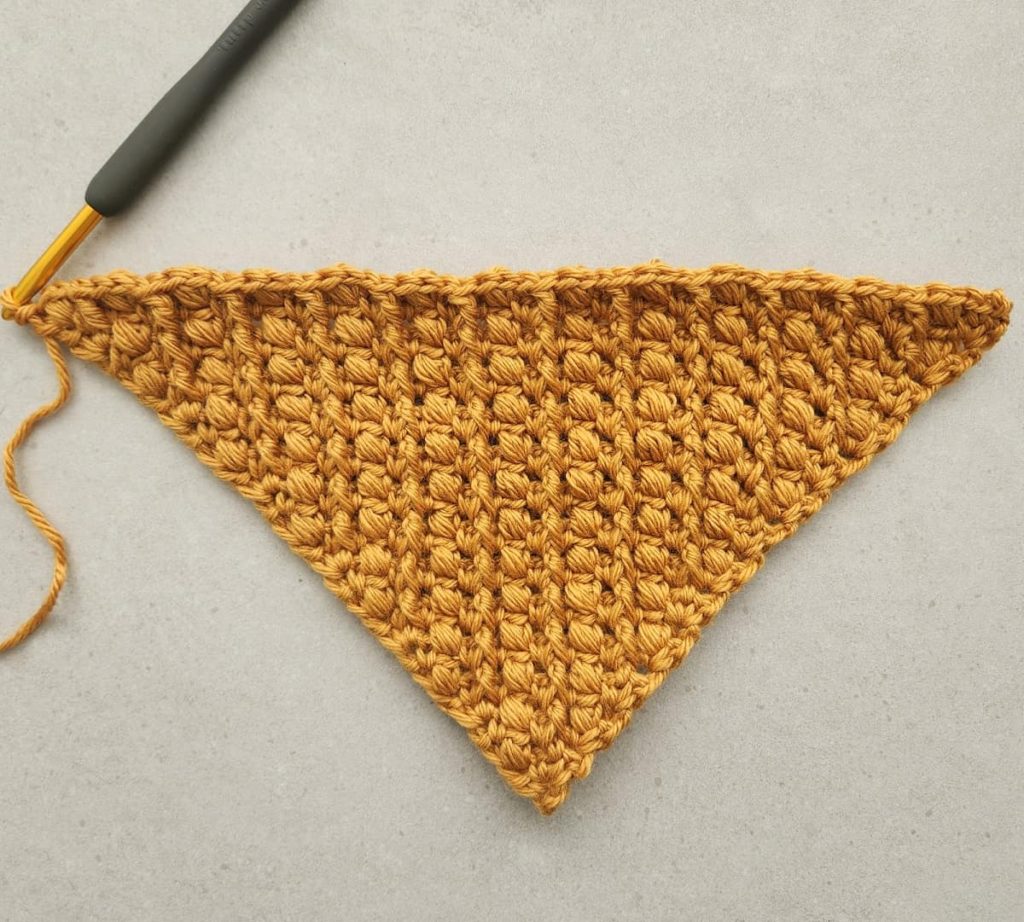
In this tutorial we will make a 12-inch crochet square using this stitch pattern, scroll down to find both a video tutorial and written instructions.
** Some of the links in this post may include affiliate links. Making a purchase through one of these links pays me a small referral fee at no added cost to you. These small fees add up and help me keep the blog running. View our disclosure and privacy policy for more information.
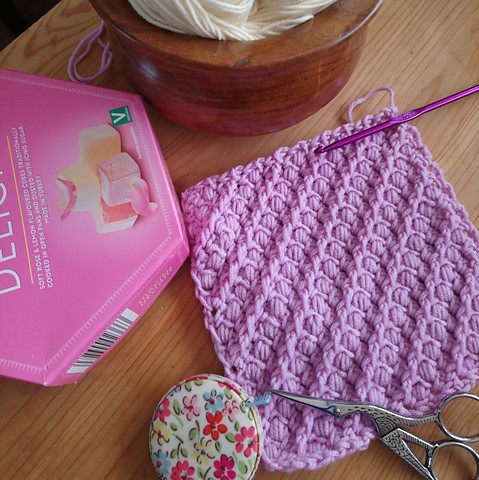
I love the beautiful texture of the cable stitch, and how it creates these delicate braids in the fabric.
While designing this crochet square, I wanted to add more depth and texture, and that’s how I came up with alternating cables and bean stitches. I did try to use the Mini Bean stitch first, but the bobbles weren’t noticeable enough.
The corner to corner crochet Cables and Beans stitch isn’t a one-row repeat like my other C2C different crochet stitches such as the C2C Suzette stitch, or C2C Mini Bean Stitch. Although it is very intuitive and easy to follow, you can definitely count it as a mindless crochet pattern!
Want to save this post for later? Go ahead and PIN it!
How to Use This Pattern as a Diagonal Crochet Blanket Pattern
Although the pattern below is for a 12-inch square, this stitch pattern will make a beautiful braided cable crochet throw pattern. Since the pattern is worked in diagonal from corner to corner, just increase until you reach the size you want, and then continue decreasing.
The diagonal crochet cable stitch creates a unique texture fabric, and the bean stitch adds some softness to the texture.
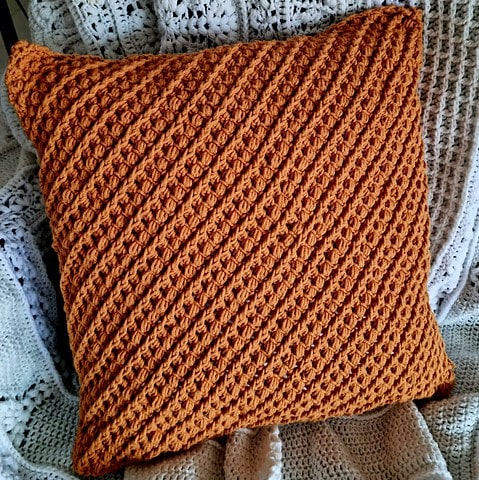
This stitch pattern will also make a gorgeous pillow case (scroll down to see the beautiful pillow one of my testers made!).
The Stash Busting Mystery Crochet-Along (CAL) by The Unraveled Mitten
The Corner to Corner Cables and Beans crochet blanket square is also part of the Stash Busting Mystery Crochet-Along which is hosted by Heather from The Unraveled Mitten.
This CAL features a blanket made out of 20 different 12-inch squares, each designed by a different designer. A new square is published every 2 weeks.
Visit the Stash Busting Mystery CAL to join the fun!
Inspiration For Your Corner to Corner Cable and Bean Stitch
Here are the beautiful C2C Crochet Cables and Beans Squares made by my wonderful testers!
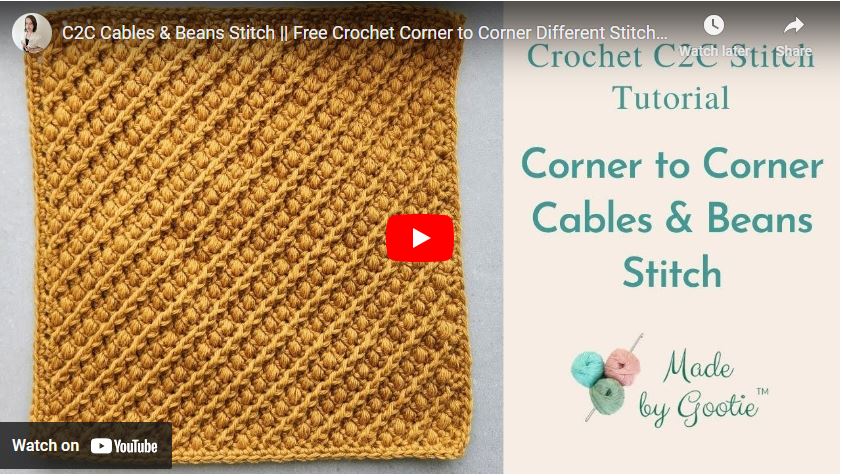
Corner to Corner Cables & Beans Stitch Video Tutorial
Click the image below to watch the stitch tutorial on YouTube
Materials
– Crochet hook 5.0 mm / H (I love the Etimo Hooks).
– Worsted (#4) weight yarn – I used Lion Brand -Vanna’s Choice).
Amount of yarn needed for a 12” (30.5 cm) square: 100gr/156m/170yds.
– 2 Stitch markers (optional)
Abbreviations (US)
Bean st – insert hook into indicated st, yo and pull up a loop.
(Yo and insert hook into same st, yo and pull up a loop) x 2 times. Yo and pull through all 6 loops on hook.
ch – chain
FPdc – front post double crochet: Yo, insert hook from the front to the back and then to the front of the indicated stitch 2 rows below, yo and pull up a loop, continue working as a regular double crochet.
PM – place marker
sc – single crochet
sc2tog – single crochet 2 together
sp – space
ss – slip stitch
WS – wrong side
RS – right side
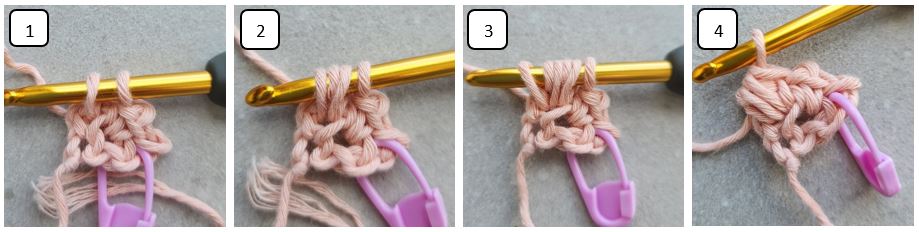
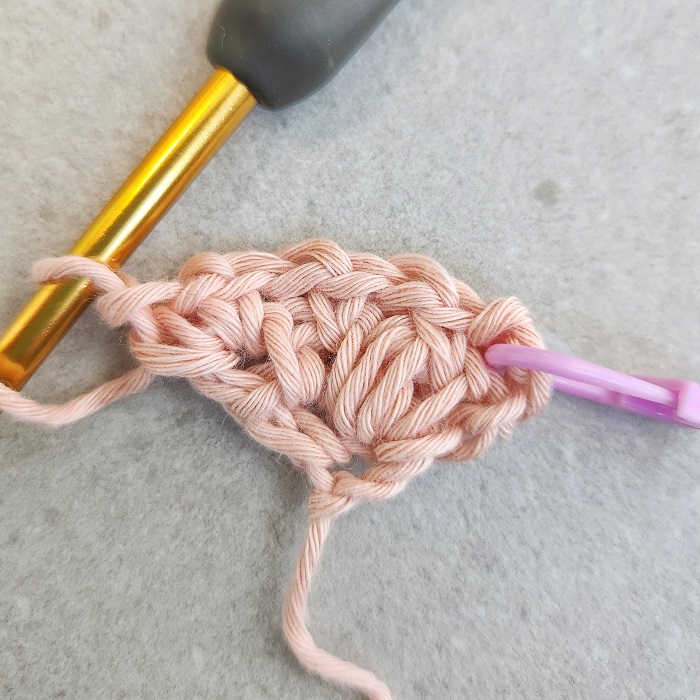
How to crochet the Bean Stitch:
Insert your hook into indicated st (or space), yo and pull up a loop (pic 1). (Yo and insert hook into same st, yo and pull up a loop) x 2 times (pics 2&3). Yo and pull yarn through all 6 loops on hook (pic 4).
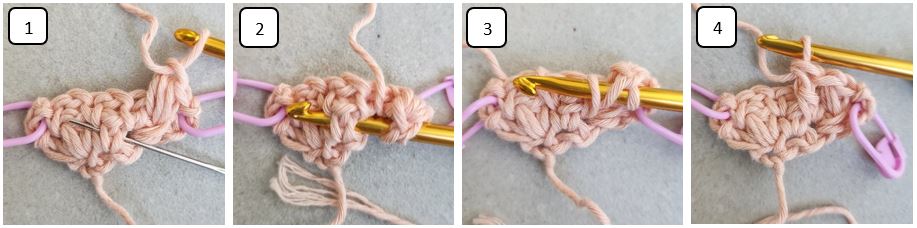
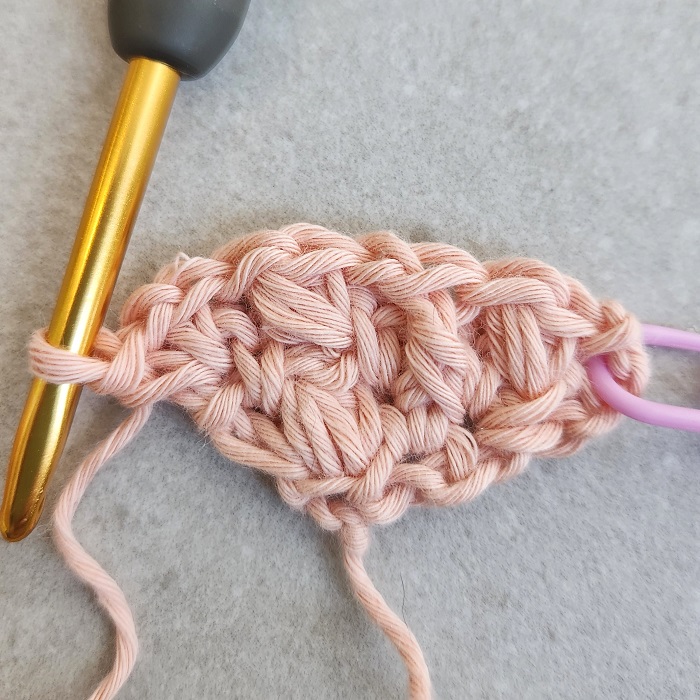
How to crochet Front Post Double Crochet (FPdc) in single crochet 2 rows below:
Yo, insert hook from the front to the back and then to the front of the indicated sc 2 rows below (pics 1&2), yo and pull up a loop (pic 3), continue working as a regular double crochet.
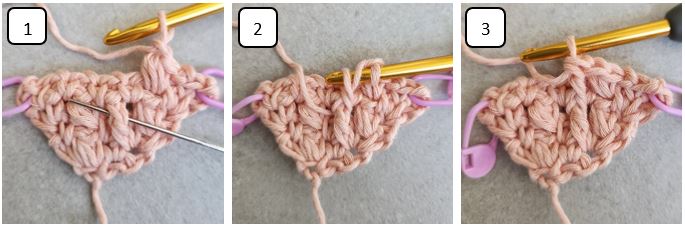
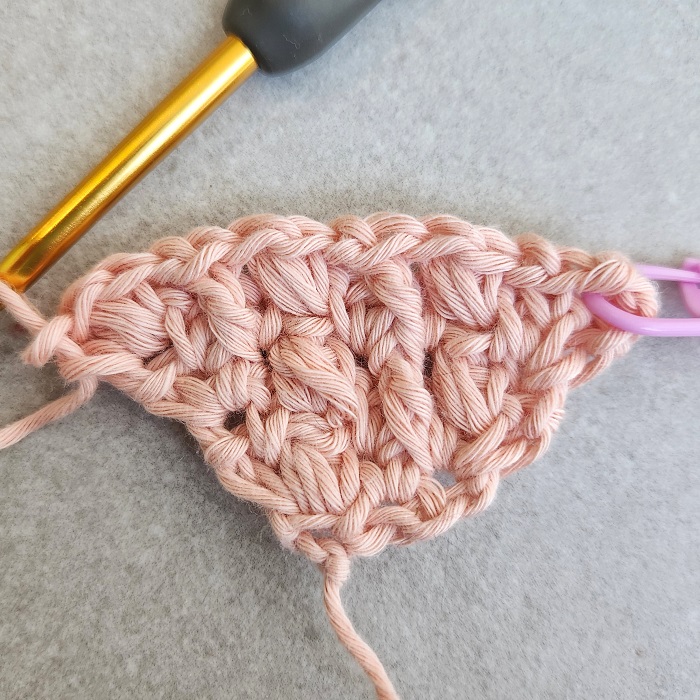
How to crochet Front Post Double Crochet (FPdc) in FPdc 2 rows below:
Yo, insert hook from the front to the back and then to the front of the post of the indicated FPdc 2 rows below (pic 1), yo and pull up a loop (pic 2), continue working as a regular double crochet.
Notes
- To make it easier to find the ch3 / ch2 spaces at the end of the row, place a stitch marker when you ch3/ch2 at the beginning of each row.
- […] – crochet the instructions within brackets into the same indicated stitch/space.
- From row 3 all the stitches are worked into the ch-1 sp’s.
- This pattern can be made as a square or a rectangle in any size you want, just keep increasing according to the instructions.
- It is recommended to block your work when done to obtain the square shape.
Corner to Corner Crochet Cables and Beans Stitch Pattern
C2C Increase
Setup Section
Ch4
Row 1 (WS): 1sc in 4th chain from hook, turn. (1 sc, 1 ch-3 sp)
Row 2 (RS): ch3-PM, 1sc in sc, ch1, [1bean, ch1, 1sc] in ch-3 sp, turn.
(2 sc, 1 bean, 1 ch-3 sp, 2 ch-1 sp)
Row 3 (WS): ch3-PM, skip 1st sc, 1sc in next ch-1 sp.
* ch1, skip next bean, 1sc in next ch-1 sp, ch1, skip next sc, [1sc, ch1, 1sc] in ch-3 sp, turn.
(4 sc, 1 ch-3 sp, 3 ch-1 sp)
Row 4 (RS): ch3-PM, skip 1st sc, 1bean in next ch-1 sp, ch1, skip next sc, 1FPdc in sc of 2 rows below, ch1, skip next sc, 1bean in next ch-1 sp, ch1, skip next sc, [1sc, ch1, 1sc] in ch-3 sp, turn. (2 sc, 2 bean, 1 FPdc, 1 ch-3 sp, 4 ch-1 sp)
Row 5 (WS): ch3-PM, skip 1st sc, 1sc in next ch-1 sp, ch1, skip next st.
* 1sc in next ch-1 sp, ch1, skip next st; repeat from * to last st before ch-3 sp, [1sc, ch1, 1sc] in ch-3 sp, turn. (6 sc, 1 ch-3 sp, 5 ch-1 sp)
Row 6 (RS): ch3-PM, skip 1st sc, 1sc in next ch-1 sp, ch1, skip next sc, 1bean in next ch-1 sp, ch1, skip next sc, 1FPdc in FPdc of 2 rows below, ch1, skip next sc, 1bean in next ch-1 sp, ch1, skip next sc, 1FPdc in sc of 2 rows below, ch1, skip next sc, [1bean, ch1, 1sc] in ch-3 sp, turn. (2 sc, 3 bean, 2 FPdc, 1 ch-3 sp, 6 ch-1 sp)
Main Section
Row 7 (WS): repeat row 5. (8 sc, 1 ch-3 sp, 7 ch-1 sp)
Row 8 (RS): ch3-PM, skip 1st sc, 1bean in next ch-1 sp, ch1, skip next sc, 1FPdc in sc of 2 rows below.
* ch1, skip next sc, 1bean in next ch-1 sp, ch1, skip next sc, 1FPdc in FPdc of 2 rows below; repeat from * until only 2 sc are left in the row, ch1, skip next sc, 1bean in next ch-1 sp, ch1, skip next sc, [1sc, ch1, 1sc] in ch-3 sp, turn. (2 sc, 4 bean, 3 FPdc, 1 ch-3 sp, 8 ch-1 sp)
Row 9 (WS): repeat row 5. (10 sc, 1 ch-3 sp, 9 ch-1 sp)
Row 10 (RS): ch3-PM, skip 1st sc, 1sc in next ch-1 sp, ch1, skip next sc, 1bean in next ch-1 sp.
* ch1, skip next sc, 1FPdc in FPdc of 2 rows below, ch1, skip next sc, 1bean in next ch-1 sp; repeat from * until only 2 sc are left in the row, ch1, skip next sc, 1FPdc in sc of 2 rows below, ch1, skip next sc, [1bean, ch1, 1sc] in ch-3 sp, turn.
(2 sc, 5 bean, 4 FPdc, 1 ch-3 sp, 10 ch-1 sp)
Repeat rows 7-10, until the side of your square measures 11.75” (29.8 cm), or until you reach your desired size, finishing with row 8.
Want to learn how to crochet the C2C Cables & Beans stitch as a rectangle? Get the premium, ad free, printable PDF version onRavelry or Etsy!
C2C Decrease
Row 11 (WS): ch2-PM, skip 1st sc, 1sc in next ch-1 sp, don’t ch1, skip next st, 1sc in next ch-1 sp. * ch1, skip next st, 1sc in next ch-1 sp; repeat from * to ch-3 sp, don’t ch1, skip next st, 1sc in ch-3 sp, turn.
Row 12 (RS): ch2-PM, skip 1st & 2nd sc, 1FPdc in FPdc of 2 rows below, ch1, skip next sc, 1bean in next ch-1 sp.
* ch1, skip next sc, 1FPdc in FPdc of 2 rows below, ch1, skip next sc, 1bean in next ch-1 sp; repeat from * until only 2 sc are left in the row, don’t ch1, skip next 2 sc, 1sc in ch-2 sp, turn.
Main Decrease Section
Row 13 (WS): ch2-PM, skip 1st & 2nd sts, 1sc in next ch-1 sp.
* ch1, skip next st, 1sc in next ch-1 sp; repeat from * to last st before ch-2 sp, don’t ch1, skip next st, 1sc in ch-2 sp, turn.
Row 14 (RS): ch2-PM, skip 1st & 2nd sc, 1bean in next ch-1 sp, ch1, skip next sc, 1FPdc in FPdc of 2 rows below.
* ch1, skip next sc, 1bean in next ch-1 sp, ch1, skip next sc, 1FPdc in FPdc of 2 rows below; repeat from * until only 1 sc is left in the row, don’t ch1, skip next sc, 1sc in ch-2 sp, turn.
Row 15 (WS): repeat row 13.
Row 16 (RS): ch2-PM, skip 1st & 2nd sc, 1FPdc in FPdc of 2 rows below, ch1, skip next sc, 1bean in next ch-1 sp.
* ch1, skip next sc, 1FPdc in FPdc of 2 rows below, ch1, skip next sc, 1bean in next ch-1 sp; repeat from * until only 1 sc is left in the row, don’t ch1, skip next 1 sc, 1sc in ch-2 sp, turn.
Repeat rows 13-16, until you have only 4 sc, finishing with row 15.
Row 17 (RS): ch2-PM, skip 1st & 2nd sc, 1FPdc in FPdc of 2 rows below, ch1, skip next sc, 1bean in next ch-1 sp, don’t ch1, skip next 1 sc, 1sc in ch-2 sp, turn.
Row 18 (WS): ch1, skip 1st & 2nd sts, work sc2tog in next ch-1 sp & ch-2 sp, turn.
Border
With the RS facing you, turn the square in 90 degrees. Ch1, work 1sc in each side of each sc & ch-2 sp, (you will be working 1sc in each row’s side), continue working until corner, work corner: [1sc, ch1, 1sc] into the corner.
Continue working each side of the square.
On the last side of the square, when you reach the corner work corner: [1sc, ch1, 1sc] into the beginning ch-1, ss to 1st sc. Fasten off and weave in the ends.
Looking for More Crochet C2C Stitch Variations? Check out the other free stitch tutorials on the blog:
Did you try this out? Share your project!
– Let me know how it went and leave a comment below.
– Tag me on Instagram @madebygootie
– Join and share in our FB Community
Want to save this post for later? Go ahead and PIN it!
Has anyone used this pattern for a rectangle instead of a square? If so, how’d it turn out?